Removing insects from your car is all about a gentle touch and a multi-step process to keep your paint safe. The secret is to pre-soak the area with a quality bug remover or even just soapy water, let it sit for a minute, and then carefully wipe the gunk away with a plush microfiber towel before giving it a final rinse. Whatever you do, never scrub. Aggressive rubbing is a surefire way to leave permanent scratches in your clear coat.
Why Bug Guts Are a Menace to Your Car’s Paint
We’ve all been there. A beautiful summer drive down a country road ends with a front bumper and windshield that look like a war zone. It’s easy to write this off as a minor inconvenience, but those splatters are far more than just an ugly mess—they’re a direct assault on your vehicle’s paint.
The very second an insect impacts your car, its body starts a nasty chemical reaction. Bug guts are a potent cocktail of fluids and enzymes that are surprisingly acidic. When you let those acidic compounds bake in the sun, they begin to dissolve your car’s clear coat, the critical top layer that protects the color underneath.
The Science of Paint Etching
Think of your car’s clear coat as its armor. The acidic nature of bug remains systematically weakens this shield. In just a day or two, this chemical attack can cause permanent damage we call etching. Etching isn’t a stain; it’s a physical pit where the acid has eaten into the clear coat, leaving a permanent crater that you can’t just wash away.
This is exactly why speed is your best friend here. What starts as a simple cleaning task can quickly spiral into a costly paint correction job if you let it slide. These types of contaminants are a big reason why learning how to properly decontaminate car paint is such a vital skill for any car owner who cares about their ride.
You might have even noticed that you’re cleaning fewer bugs off your windshield than you did years ago. This isn’t just your imagination. It’s a real phenomenon, and it points to a much bigger environmental issue. A study back in 2004 recorded one insect splat for every 8 kilometers driven. When researchers checked again in 2023, they found a stunning 78% drop in bug encounters. While the problem is less frequent, the bugs that do hit your car are just as corrosive as ever.
Key Takeaway: The combination of acidic bug guts and the sun’s heat creates a perfect storm for paint damage. Acting quickly is the single most important factor in preventing permanent clear coat etching.
The insects that remain still pose a serious threat, making a proactive protection strategy more crucial than ever. The goal isn’t just to clean what’s there but to preserve your car’s finish for years to come.
Assembling Your Bug Removal Arsenal
Jumping into a bug removal job with the wrong gear is like trying to perform surgery with a butter knife. You’ll probably do more harm than good, and you could easily find yourself facing a hefty bill for paint correction. The first, most crucial step isn’t scrubbing—it’s preparation. Getting the right tools together beforehand makes all the difference.
Your most important ally is a high-quality, dedicated bug and tar remover. These aren’t just soap and water; they’re specifically engineered to dissolve the acidic, protein-based mess that bug guts leave behind. More importantly, they do it without stripping away the wax, sealant, or ceramic coating you’ve invested in to protect your paint.
Choosing Your Tools Wisely
Beyond the cleaner itself, what you use to physically touch the paint is just as critical. Forget about kitchen sponges, old t-shirts, or those rough gas station towels. Those will absolutely scratch your clear coat.
Your go-to kit should always include:
- Plush Microfiber Towels: This is non-negotiable. The deep, soft fibers of a quality microfiber towel are designed to pull bug particles up and away from the paint, trapping them safely. This dramatically reduces the risk of scratching.
- A Dedicated Bug Sponge: Look for one with a soft, honeycomb-style mesh. It provides just enough gentle scrubbing power to lift stubborn bits without being abrasive. It’s the perfect middle ground between a soft towel and something too aggressive.
- Detailing Clay Bar: For those fossilized, baked-on splatters that seem impossible to remove, a clay bar is the ace up your sleeve. It glides over the paint and literally shears off bonded contaminants, leaving behind a perfectly smooth surface. If you’re new to this, we have a complete guide explaining what clay bar treatment is and how to use it safely.
To help you decide what you really need, here’s a breakdown of the essential gear versus some of the more advanced tools you might consider.
Bug Removal Toolkit Essentials vs. Advanced Gear
| Tool or Product | Essential For | Best Use Case | Pro Tip |
|---|---|---|---|
| Bug & Tar Remover | All car owners | Safely dissolving fresh and moderately stubborn bug splatter. | Look for a pH-neutral formula to avoid stripping wax or sealants. |
| Plush Microfiber Towels | All car owners | Wiping away dissolved residue and for general washing/drying. | Use a separate towel for bug removal to prevent cross-contamination with your drying towels. |
| Dedicated Bug Sponge | Frequent highway drivers & detailing beginners | Gently agitating stubborn spots after a pre-soak. | Always use it soapy and wet; never apply pressure on a dry surface. |
| Detailing Clay Bar | Detailing enthusiasts & for deep cleaning | Removing baked-on, embedded bug etching that washing won’t touch. | Always use with plenty of clay lubricant to prevent marring the paint. |
| Foam Cannon | Serious enthusiasts & professional detailers | Applying a thick, clinging foam to pre-soak the entire front end. | Allows for longer dwell time, increasing the chemical’s effectiveness without it drying out. |
| Pressure Washer | Serious enthusiasts & professional detailers | Rinsing away loosened grime and for pre-soaking from a distance. | Use a wide-angle nozzle (40-degree) and keep a safe distance to avoid damaging paint or trim. |
Ultimately, even the basic kit will get the job done right if you use it with patience. The advanced gear simply makes the process faster and more efficient, especially if you’re dealing with bug issues constantly.
The Story of a Perfect Finish
I’ll never forget a black convertible that rolled into the shop after a cross-country road trip. The front bumper was a complete insect graveyard, baked solid by the sun. The owner, in a panic, had already tried scrubbing it with a green kitchen scour pad, leaving a horrible, hazy mess of scratches.
Instead of rushing in and making it worse, we started slow. We hit it with a gentle pre-soak, then let Titan’s Multi-Purpose Cleaner (MPC) dwell on the surface for a few minutes. You could literally see it dissolving the gunk. With just a soft bug sponge, about 90% of it wiped away with zero pressure. A quick, light pass with a clay bar took care of the last few stubborn spots.
It’s the perfect reminder: the right tools and a little patience can turn a potential disaster into a flawless shine, saving a finish from total ruin.
The Smart Way to Get Rid of Bug Splatter
Alright, you’ve got your tools ready, so let’s get to work. The secret to safely removing bug splatter isn’t about scrubbing harder—it’s about working smarter. You need to let your products do the heavy lifting for you. Following a methodical process is the only way to lift those baked-on bug guts without leaving swirl marks all over your paint.
The absolute first thing you must do is a pre-soak. I can’t stress this enough: never, ever attack a dry, bug-covered bumper with a sponge. You’re just asking for trouble by grinding those tiny, abrasive bits of exoskeleton into your clear coat.
Instead, grab your dedicated bug remover and generously spray it onto the affected areas. Let it sit there and work its magic for a minute or two. This “dwell time” is where the cleaner starts breaking down and softening the hardened proteins, making the mess surprisingly easy to wipe away.
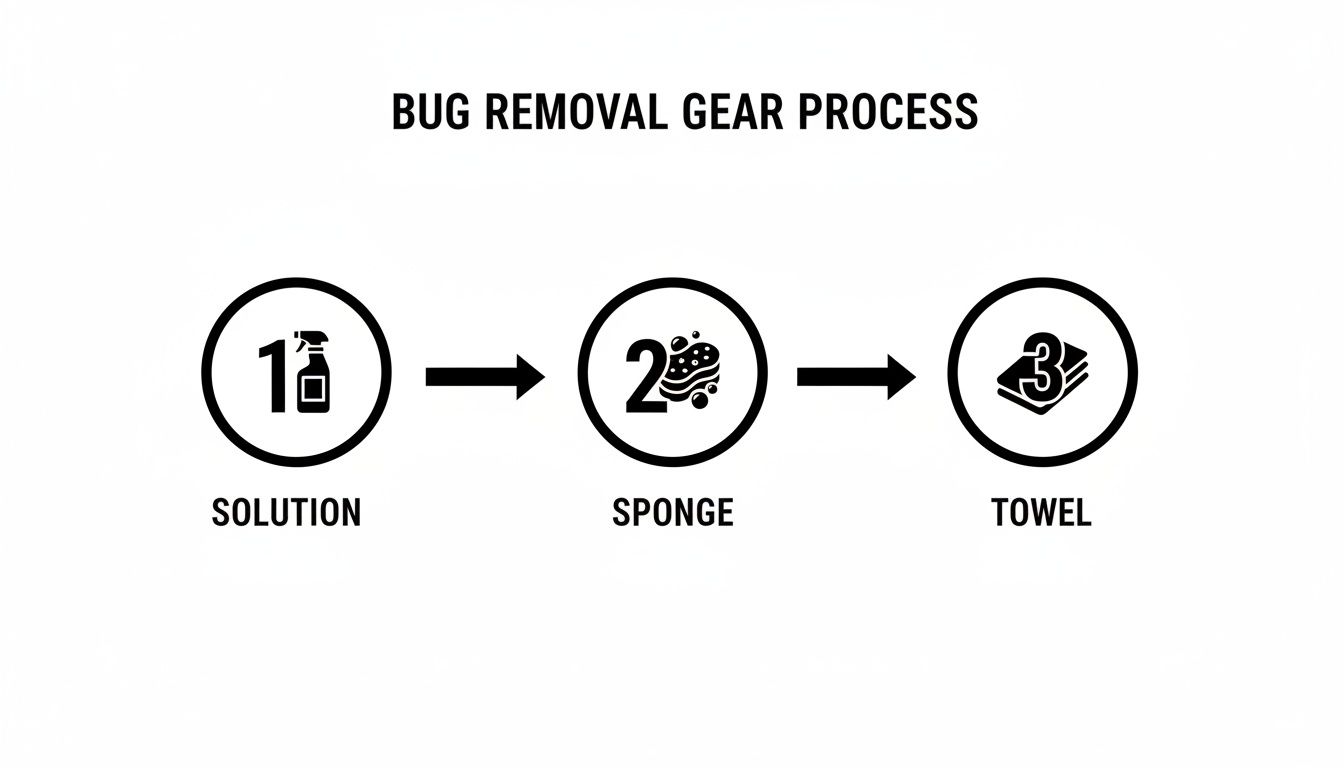
The basic flow is simple: you need your spray solution, a gentle bug sponge or microfiber towel, and another clean towel for drying.
This process relies on the chemical doing the work, followed by a gentle wipe—not brute force.
Let the Cleaner Do the Work
Once your pre-soak solution has had a chance to dwell (but before it starts to dry!), it’s time for some light agitation. Take your bug sponge or a plush microfiber towel, get it nice and saturated with soapy water, and gently wipe the area. Use straight-line motions, not circles.
Remember, the goal here is to lift the softened bug remains, not scrub them off. If you hit a really stubborn spot, resist the urge to apply more pressure. Just spray on a bit more bug remover, let it dwell a little longer, and try again. Patience is your best friend.
I’ll never forget a client who brought his pristine white sedan to me after a long summer road trip. The front end was an absolute graveyard of bug splatter, and he was convinced the paint was ruined. We just let a quality cleaner sit on the surface, and you could literally watch the guts melt away. A gentle wipe was all it took. No frantic scrubbing, no scratches.
This is a perfect example of why you trust the chemicals to do their job. The patience you show right here is what guarantees a scratch-free finish later.
Rinse, Inspect, and Finish Strong
After you’ve wiped away the last of the grime, you need to rinse the entire area thoroughly with clean water. This step is critical for washing away any leftover cleaner and bug particles. Whatever you do, don’t let the car air dry in direct sunlight, or you’ll just trade bug guts for stubborn water spots.
Grab a clean, dry microfiber towel and gently pat the area dry.
Now for the final inspection. Get some good lighting and look at the paint from a few different angles. You’re looking for any faint outlines or etching that might have been left behind. For any light film or minor spots, a quick wipe-down with a good detail spray is usually all you need. A product like Titan’s Auto Quick Detailer is perfect for this, as it cleans up any residue while adding a fresh, slick layer of protection.
Interestingly, you might have noticed that bug splatter isn’t quite the problem it was a decade ago. It’s not just you. Entomologists noted a significant drop in insect populations around 2017, which means fewer bugs hitting our cars. While this is a serious environmental concern, it does mean that most of today’s bug cleanups are much easier, often just needing a soft cloth and some soapy water. But it also makes those few, truly stubborn splatters all the more important to handle correctly.
Dealing with What the Bugs Left Behind: Etching and Stains
You’ve washed the car, you’ve used all the right bug removers, but you can still see a faint, ghostly outline of where that bug used to be. That, my friend, is what we call etching.
It’s not just a stain sitting on top of the paint; the acidic guts from the insect have physically eaten into your car’s clear coat. This is damage in the paint, not on it. Now you’re moving out of the realm of cleaning and into paint correction. It’s a frustrating spot to be in, but don’t panic. The key is to be methodical and always start with the least aggressive option first.
Choosing Your Weapon: Polish vs. Compound
For faint etching—the kind you can see but can’t feel when you run your fingernail over it—a good quality polish is where you should start. Polishing uses incredibly fine abrasives to gently level the clear coat around the damaged spot. Think of it as delicately smoothing the edges of a tiny valley until it’s level with the surrounding landscape, making the defect vanish and restoring that deep gloss.
But what if the etch is deeper? If you can feel a slight divot or texture, it’s time to consider a compound. Compounding is a more serious step. It uses larger, more aggressive abrasives to remove more clear coat material to level out that deeper damage. You have to be extremely careful here; using a compound incorrectly can burn right through your paint, creating a much bigger problem.
Getting into paint correction requires a bit of skill and a steady hand. If you want to learn more about the process, we break it down in our detailed guide on how to remove car scratches.
A Real-World Save: The Sports Car Hood
I remember a client bringing in his pride and joy after a long road trip. He was absolutely gutted. The hood had several spots where bugs had been left to bake in the hot sun for a week, leaving some nasty-looking etches. He was sure the entire hood needed a respray.
We didn’t jump straight to the heavy artillery. Instead, we started with a fine polish and a machine polisher. That alone took care of about 70% of the damage. For the few deeper spots that remained, we followed up with a very careful, light compounding pass, and then polished the area again to refine the finish and bring the gloss back. The result? A perfect, mirror-like surface. No repainting needed.
This exact scenario is why proper protection is a game-changer. A high-quality coating turns a potential paint correction job into a simple wipe-down. The acidic bug guts never even get a chance to eat into the clear coat.
Think of a shield that’s as hard as glass but flexible enough not to crack under stress. That’s the core idea behind our elastomeric coatings. Unlike many traditional ceramics that can become brittle, our elastic coatings flex with temperature changes, providing a more durable, longer-lasting barrier against the very etching that causes these headaches.
The Best Defense is a Good Offense: Proactive Protection with Titan Coatings

Let’s be honest, constantly battling bug damage is draining. What if you could stop reacting to the problem and just… prevent it? Imagine a shield on your car’s paint so effective that the whole routine of scrubbing off bug guts becomes a distant memory. This isn’t science fiction; it’s where modern protection technology shines.
I’ll never forget a beautiful show car I worked on. The owner drove it several states away for a weekend event, and despite his best efforts, the long drive through farmland left the front end looking like an abstract painting of insect carnage. He was beside himself, convinced the acidic mess had already etched into his flawless custom paint. It was a perfect, and painful, reminder that even the most dedicated owner is fighting a losing battle without the right defense.
The Titan Coatings Advantage
This is exactly why we developed Titan Coatings. We were the first to bring elastomeric coatings to the market, which was a massive leap beyond the old-school, brittle ceramic formulas. Our approach uses a powerful combination of nano tubes and our own Dark Matter tech to create a protective layer that’s not just tough as nails, but also incredibly flexible.
That flexibility is the secret sauce for real-world performance. Think about it: traditional coatings get rigid and can crack under stress, especially with the wild temperature swings from a freezing winter morning to a scorching afternoon. Our elastic coatings are different—they move with your car’s panels, expanding and contracting to ensure the bond stays solid and the protection never quits.
Meet Vulcan TX155: Your Car’s New Guardian
For the ultimate example, look no further than our Vulcan TX155. This isn’t just another product you splash on; it’s a serious, long-term investment in your vehicle’s finish. Applying Vulcan TX155 creates an unbelievably slick, non-stick surface that bug guts have almost nothing to cling to. Forget the harsh chemicals and frantic scrubbing—most of the time, a quick rinse with a pressure washer is all you’ll need to make them disappear.
- Hardness Meets Flexibility: It’s strong enough to fend off the chemical etching from acidic bug remains, yet pliable enough to handle extreme temperature changes without failing.
- Unbelievably Slick Surface: This super hydrophobic quality doesn’t just make water bead up and fly off; it stops grime like bug splatter from ever getting a solid foothold.
- Long-Term Preservation: It acts as a sacrificial layer, taking all the abuse from the environment so your factory clear coat stays perfect underneath.
Having this kind of shield completely changes your relationship with car care. You can actually enjoy that summer road trip without dreading the cleanup. Of course, the benefits of a professional coating extend far beyond just bugs, giving you a robust defense against nearly everything the road can throw at you.
While you’re fortifying your paint, considering professional window tinting options can add another layer of protection for your glass, helping with sun damage and even making bug removal a bit easier. At the end of the day, being proactive isn’t just about making your car easier to clean—it’s about keeping it shielded from damage in the first place.
Your Questions on Bug Removal Answered
Even with the best game plan, a few questions always seem to pop up when you’re staring down a bumper that looks like it went through a swarm. Getting straight answers can mean the difference between a quick, satisfying clean-up and a frustrating afternoon fighting stubborn stains. Let’s tackle the most common things people ask about getting bugs off their car.
How Long Can I Safely Leave Insect Guts on My Car?
Honestly, timing is everything. The golden rule is to get them off as soon as you spot them, especially if it’s hot and sunny. Bug guts are surprisingly acidic, and when the sun bakes them onto your paint, they can start to permanently etch the clear coat in as little as 24 to 48 hours.
The longer they sit, the harder they bake on, and the risk of lasting paint damage goes through the roof. It’s a race against the clock, and the sun is definitely not your friend in this scenario.
Can I Use Household Cleaners Like Windex or Dish Soap?
I see this question a lot, and I get the temptation. You’ve got it under the sink, it’s cheap, why not? But using household cleaners on your car’s paint is a recipe for disaster.
- Windex: Most glass cleaners are loaded with ammonia. That chemical is way too harsh for automotive paint and will slowly eat away at your clear coat and can even stain plastic trim.
- Dish Soap: It feels gentle on your hands, but dish soap is a powerful degreaser. Its entire purpose is to strip grease and oil, which means it will also strip every last bit of wax or sealant off your paint, leaving it totally naked and vulnerable.
Do yourself a favor and stick to a proper, pH-neutral car wash soap or a dedicated bug remover designed specifically for automotive finishes.
Does a Professional Coating Prevent All Bug Etching?
This is where the real magic happens. A high-quality elastomeric coating is, without a doubt, the best defense you can have. It creates a tough, sacrificial barrier that takes the hit from acidic bug guts so your car’s clear coat doesn’t have to.
I had a client who was a traveling salesman, and the front of his car was a constant bug graveyard. After we applied a professional coating, his cleanup routine completely changed. Instead of intense scrubbing, he could just hit the front end with a pressure washer, and the bug remains would just slide right off.
That’s the kind of difference this technology makes. While no coating can withstand extreme neglect forever, it gives you the highest level of protection possible. It makes bug removal ridiculously easy and all but eliminates the permanent etching you see on unprotected paint.
Our elastic coatings are especially effective. They’re hard like glass but have a built-in flex, so they won’t crack or fail with extreme temperature swings. From frozen winters to scorching summers, that flexible barrier stays intact, which is the key to their incredible long-term performance.
If you’re looking for a proactive solution that turns bug removal into an afterthought, you should really explore the advanced protection from Titan Coatings. Our Vulcan TX155 creates such an incredibly slick surface that bugs have almost nothing to stick to, keeping your car’s finish pristine for years.
0 Comments