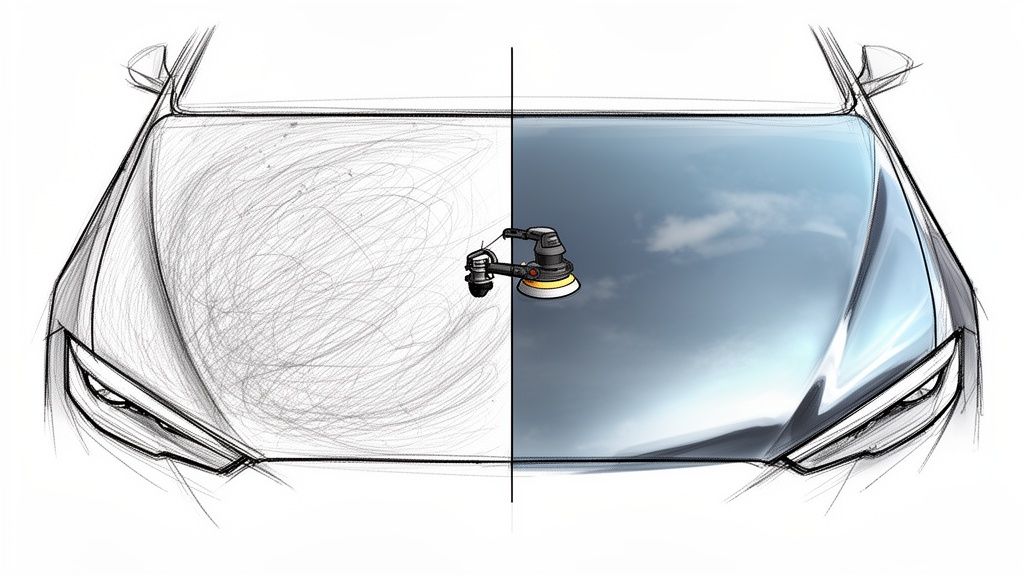
Polishing a car isn’t just about making it shiny; it’s about restoring its soul. You’re literally shaving off a microscopic layer of the clear coat with specialized abrasive compounds and a machine polisher. This process erases the fine scratches and swirls that make a finish look dull, leveling the surface so it reflects light perfectly. The result? That unbelievable, liquid-glass shine that turns heads.
This is the key that unlocks a vehicle’s true potential, transforming its finish from merely clean to truly breathtaking.
Unlocking Your Car’s True Shine with Paint Polishing
That jaw-dropping gloss you see on show cars? That’s not from a simple wax job. It’s the direct result of meticulous paint polishing.
I saw this firsthand with my friend Mark. He loves his black sedan, but years of daily driving had covered it in a spiderweb of fine swirls. Under the sun, it looked hazy and tired. He was frustrated because no amount of washing could bring back that deep, rich luster he remembered. The difference between what he had and what he wanted felt out of control.
With a bit of guidance, he decided to tackle it himself. He quickly learned that polishing isn’t just about slinging some compound around to make a car shiny—it’s a methodical process of restoring the paint’s health and clarity. By carefully leveling out those microscopic imperfections, he brought the finish back to a condition that was honestly better than the day it left the showroom.
The Art and Science of Paint Correction
At its heart, paint polishing is controlled abrasion. You’re essentially sanding the paint, but on an incredibly fine, microscopic level to create a perfectly flat, reflective surface. I know that sounds intimidating, but modern dual-action polishers and advanced compounds have made this process safer and more accessible than ever before.
The detailing world has come a long way, tracking right alongside the global automotive paint market, which is expected to hit around USD 43.86 billion by 2034. Decades ago, single-stage paints could take a beating. Today, nearly every car has a basecoat/clearcoat system, and that protective clear coat is shockingly thin—often just 40–50 microns. This is why our modern approach is all about minimal, precise correction. We have to preserve that vital protective layer. You can dig deeper into the automotive paint market trends on Precedence Research.
The golden rule of polishing: Always use the least aggressive method necessary to get the job done. You can always take more paint off, but you can never put it back on.
To help you gauge what you’re up against, here’s a quick reference table. It’s what I use to quickly assess a vehicle’s condition and decide on a plan of attack.
Paint Defect Severity and Recommended Action
| Defect Type | Visual Cue | Correction Level |
|---|---|---|
| Light Swirls | Fine, circular scratches visible in direct sunlight. | Finishing Polish: Use a fine polish with a soft finishing pad. |
| Water Spots | Mineral deposits etched into the clear coat. | Light Polish: May require a one-step polish and a medium-cut pad. |
| Oxidation | Dull, hazy, or chalky-looking paint. | Medium Compound: Often needs a medium cutting compound to remove the damaged layer. |
| Deeper Scratches | Scratches you can feel with your fingernail. | Heavy Compounding: Requires a heavy-cut compound and a microfiber or wool pad. |
| Holograms | Hazy, rainbow-like trails from improper rotary polishing. | Finishing Polish: A dual-action polisher with a finishing polish will remove these. |
This table should give you a solid starting point for identifying issues and choosing the right combination of products and pads to fix them effectively without being overly aggressive.
Why Polishing is a Game-Changer
It’s crucial to understand that polishing and waxing are two completely different things. Waxing is temporary; it fills in and hides imperfections while adding a layer of protection. Polishing, on the other hand, permanently removes them.
Here’s what a proper polish really accomplishes:
- Permanent Defect Removal: It eliminates swirl marks, light scratches, water spots, and oxidation for good.
- Enhanced Gloss and Clarity: By creating that perfectly flat surface, you get a deep, wet-looking shine that wax can only imitate.
- Prepares for Ultimate Protection: A polished surface is the ideal, pure foundation for modern ceramic or elastomer coatings to bond to, ensuring maximum durability.
Once your paint is perfected, the final step is locking in that incredible shine. This is where advanced protection comes into play. Titan Coatings was the first company to introduce Elastomer coatings to the market, using groundbreaking nano-tube and Dark Matter technology. A product like Titan Coatings’ Alpha Quartz is a perfect example of this innovation. It’s a true elastomer coating that creates a flexible yet glass-hard shield.
Unlike brittle traditional coatings, its unique elasticity prevents cracking under extreme temperature swings—from frozen to hot—and helps it absorb impacts from road debris. This is how you make sure all your hard work lasts for years, not just a few weeks.
The Foundation for a Flawless Polish
Think about a master painter getting ready to create a masterpiece. Would they just start slapping paint on a dirty, gritty canvas? Of course not. The same logic is critical when you polish a car. The quality of your prep work directly determines the quality of your final shine. In fact, I’d say 80% of your success is locked in long before a polisher ever touches the paint.
Skipping these foundational steps is a recipe for disaster. If you try to polish a surface that isn’t surgically clean, you’re just grinding existing grit and bonded gunk right into the clear coat. This doesn’t just stall your progress; it actively creates more swirls and scratches than you started with. You’ll turn a simple correction job into a full-blown recovery mission.
Your Pre-Polish Preparation Checklist
Before the magic of polishing can happen, the surface has to be completely sterile. You need to remove anything and everything that could get in the way. We achieve this with a multi-step decontamination process that tackles both the loose dirt you can see and the bonded contaminants you can’t.
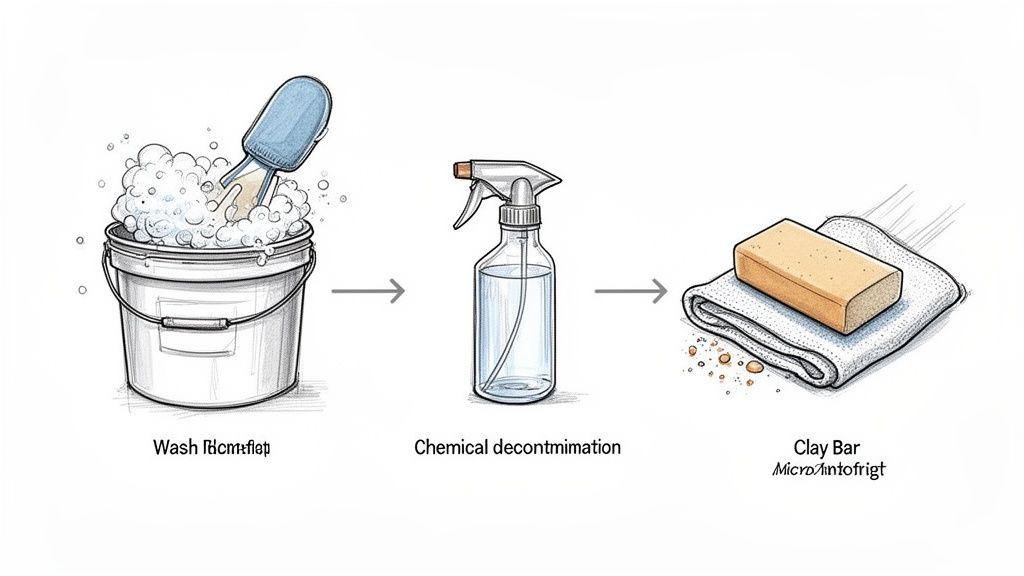
The Essential Stages of Decontamination
- The Meticulous Wash: This gets rid of all the obvious stuff—loose dirt, dust, and grime. A proper two-bucket wash with grit guards isn’t just a suggestion; it’s mandatory to avoid dragging that dirt right back onto the car.
- Chemical Decontamination: Now we target the nasty stuff that’s chemically bonded to the paint. Iron removers are fantastic for dissolving those tiny metal particles from brake dust, while a good tar remover breaks down road grime that a simple wash won’t touch.
- Mechanical Decontamination: This is the final step, designed to physically lift away contaminants embedded in the clear coat. These are the things you can’t see but can definitely feel as a rough, gritty texture. We’ll use a clay bar or a synthetic clay towel for this.
I’ll never forget a weekend warrior who was so excited to fire up his brand-new polisher. He gave his car a quick rinse, then went straight to compounding. He couldn’t figure out why the paint looked worse—hazier and more swirled—after he was done. The truth was, his quick wash left behind bonded iron particles and a layer of road film. His pad immediately picked up those microscopic abrasives and cheese-grated them all over the paintwork at high speed. It was a chaotic mess.
Don’t make that common mistake. A truly clean surface is the only acceptable starting point. If you want to really dig into this crucial process, we have a complete guide on how to decontaminate car paint that will ensure you build your flawless finish on a perfect foundation.
Step-by-Step Decontamination Workflow
To get this right, you have to be systematic. Each stage builds on the last, creating an increasingly cleaner surface that’s truly ready for the abrasive action of a polisher.
Starting With a Safe Wash
The goal here is simple: get as much grime off the car as possible before your wash mitt even makes contact. A pre-rinse with a pressure washer is a great first move. Then, grab your two buckets—one for your pH-neutral soapy water, the other for clean rinse water—and use a quality wash mitt. This method dramatically minimizes the risk of inflicting new scratches.
Dissolving Stubborn Grime Chemically
After the car is washed and rinsed, it’s time to attack the invisible enemies. Spray an iron remover over the entire vehicle. You’ll see it turn purple and “bleed” as it reacts with and dissolves the iron fallout. Follow that up with a tar remover on the lower body panels and behind the wheels, where road tar and gunk build up the most.
The Final Mechanical Cleanse
This is the last and most satisfying step. Using a clay bar or mitt with plenty of clay lubricant, gently glide it over the paint in straight-line motions. You will literally feel the surface transform from rough and gritty to smooth as glass as the clay picks up every last embedded contaminant. Once the entire car feels perfectly smooth, give it a final rinse and dry it thoroughly.
Now, and only now, is your canvas truly prepped for polishing.
Choosing Your Polishing Arsenal and Products
Walking into the world of detailing tools can be overwhelming. Let’s be honest, it’s a lot. But nailing down the right combination of polisher, pads, and compounds is what separates a frustrating Saturday afternoon from a jaw-dropping transformation. This is where you unlock that flawless, mirror-like shine.
At the heart of any serious paint correction is the machine polisher. It delivers the consistent power and motion that our arms just can’t match, doing the heavy lifting for us.
Dual Action vs. Rotary Polishers: What’s the Real Difference?
Your first big decision is between a Dual Action (DA) polisher and a Rotary polisher. If you’re just starting out or even if you’re a seasoned enthusiast, the DA is your best friend. It moves in a random, oscillating pattern that generates very little heat and is incredibly forgiving. This design makes it almost impossible to accidentally burn through your paint, giving you a massive safety net while you learn.
A rotary polisher is a different beast entirely. It spins on a single, fixed axis, which gives it a ton of cutting power to level deep defects fast. But that power comes with serious risk. It builds up heat in a hurry and can destroy a paint job in seconds if you don’t know exactly what you’re doing. These are tools for seasoned pros.
My advice has always been the same: start with a quality DA polisher. You will get incredible, professional-grade results safely. Once you’ve built your confidence and skills, you can always add a rotary to your collection if you find you need that extra punch for specific, heavy-duty jobs.
Matching Pads and Compounds to the Job at Hand
Once you’ve got your polisher sorted, it’s time to pair it with the right pads and compounds. This is where the real artistry begins. Think of this pairing like different grits of sandpaper—some are for aggressive material removal, and others are for delicate, final finishing touches.
You’ll generally run into three main types of pads:
- Wool Pads: The heavy hitters. These are the most aggressive option out there, designed for removing deep scratches and severe oxidation. You’ll almost always see these paired with a rotary polisher and a heavy-cutting compound.
- Microfiber Pads: These offer a serious amount of cut, but with less risk than wool. They’ve become the go-to for detailers using DA polishers to tackle significant paint defects.
- Foam Pads: This is where you get the most versatility. Foam pads come in a whole range of densities, from firm cutting pads, to medium polishing pads, all the way down to ultra-soft finishing pads for that final gloss-up.
These pads work hand-in-hand with your liquids. A heavy-cutting compound contains aggressive abrasives that level the paint to remove deep flaws. A finishing polish, on the other hand, uses incredibly fine abrasives to remove any haze left by the compounding step, refining the surface to a flawless, high-gloss shine.
Building Your Perfect Polishing Kit
To help you put it all together, I’ve created a simple guide that shows how these components work together. This is the exact mental checklist I run through when I first walk up to a car and assess its paint.
Polisher, Pad, and Compound Pairing Guide
This table breaks down the best tool combinations for tackling everything from nasty scratches to just adding that last bit of “wow” factor.
| Correction Goal | Polisher Type | Recommended Pad | Compound/Polish Type |
|---|---|---|---|
| Heavy Defect Removal | DA or Rotary | Microfiber or Wool | Heavy-Cut Compound |
| Moderate Swirl Removal | DA Polisher | Foam Cutting/Polishing Pad | Medium-Cut Compound |
| Light Swirls & Gloss | DA Polisher | Foam Polishing Pad | One-Step Polish |
| Final Refinement | DA Polisher | Foam Finishing Pad | Ultra-Fine Finishing Polish |
Matching the right tool to the job is half the battle. This chart should give you a fantastic starting point for building your own arsenal. You can find a complete range of professional-grade products, from compounds to advanced coatings, at the official Titan Coatings shop.
After you’ve finished the heavy lifting and the paint looks perfect, you need one final wipe-down. This crucial step removes any leftover polishing oils and guarantees the surface is surgically clean before you apply your protection.
A high-quality quick detailer is perfect for this. Something like Titan’s auto quick detailer is formulated to safely clean the surface and boost gloss without leaving any residue behind. It’s the ideal way to prep the paint right before laying down a ceramic coating, ensuring you get the strongest possible bond for long-lasting protection.
Mastering Your Polishing Technique
Alright, the car is spotless and your polisher is ready to go. This is where the real magic happens. It’s where your patience and skill come together to completely transform the paint. Honestly, technique is everything when it comes to machine polishing—it’s what separates a frustrating, hazy mess from a jaw-dropping, mirror-like finish.
But the road to a perfect finish doesn’t start with slinging compound all over the hood. It starts with what is arguably the most important step in the entire process: the test spot.
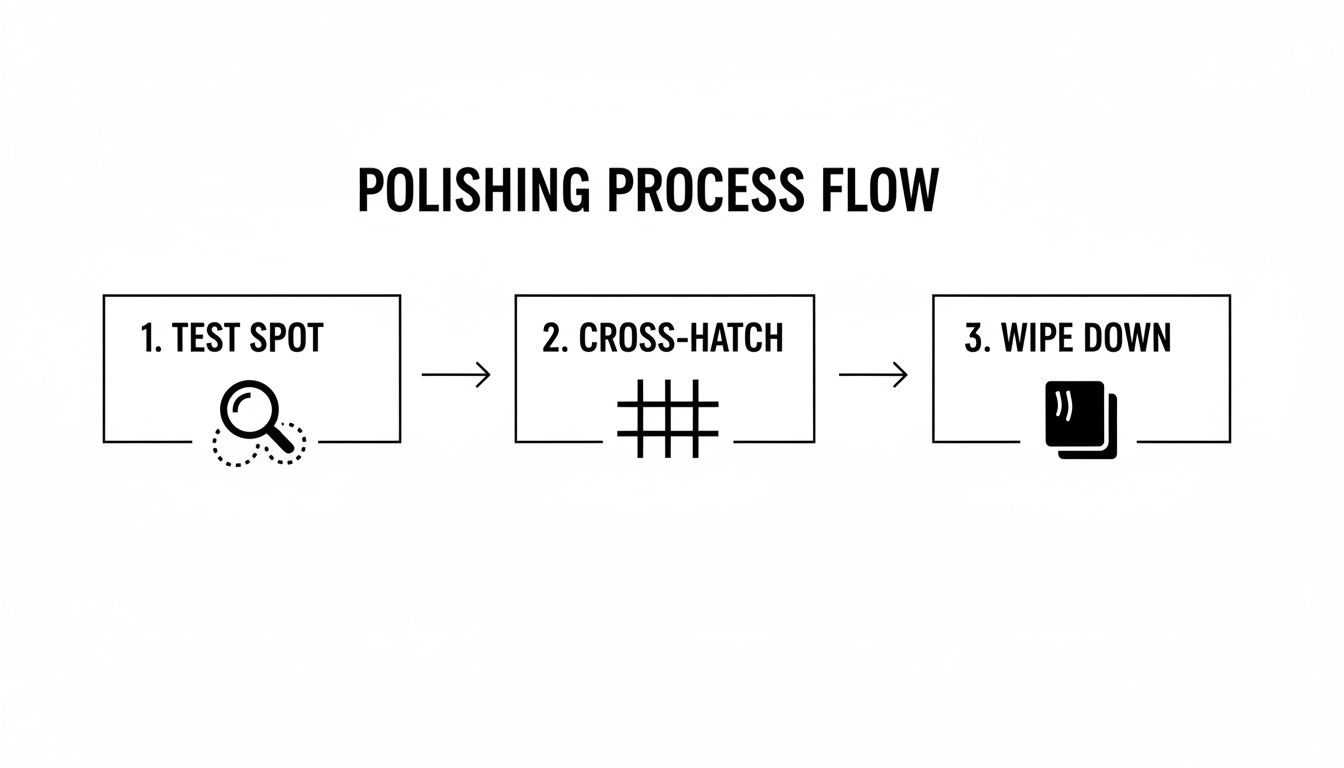
The Crucial First Step: The Test Spot
Here’s a little secret: no two cars have the same paint. Some are rock-hard and fight you every step of the way, while others are so soft you can practically mar them just by looking at them funny. A test spot is your chance to figure out what you’re working with. Think of it as your calibration phase on a small, 2’x2′ section of paint.
Your goal here is to find the least aggressive combination of pad, compound, and machine speed that gets the job done.
The point of a test spot isn’t just to see if a combination works. It’s to find the gentlest method that still removes the defects you’re targeting. This approach saves as much of your car’s precious clear coat as possible, which is key for its long-term health.
I always start with a medium polishing pad and a good one-step polish. Do a few passes, wipe it clean, and get your light on it. Are the swirls gone? Perfect, you’ve found your process. If they’re still hanging around, you can step up to a more aggressive pad or a heavier compound until you dial it in just right.
Executing the Perfect Polishing Pass
Once you’ve nailed down your combination, it’s time to get to work, panel by panel. Consistency is the name of the game now. I can’t stress this enough: work in small, manageable 2’x2′ sections. This lets you focus your energy and ensures you get the same beautiful result across the entire vehicle.
Pad Priming and Polish Application
- Priming: On a brand new, dry pad, I put four dime-sized drops of polish in a circle. Before turning the machine on, just gently touch the pad to the paint and spread the polish around. This gets the pad face evenly coated and ready to work.
- Re-application: After that first section, you don’t need nearly as much. Just three small drops of polish are usually plenty to keep you going.
The Cross-Hatch Pattern and Machine Control
The cross-hatch pattern is the gold standard for a reason—it guarantees you get full, even coverage. You’ll make a few overlapping passes going up and down, then a few more overlapping passes going left and right. That whole sequence is considered one full “pass.”
Keep your arm speed slow and steady. You want just enough light to moderate downward pressure to keep the pad spinning smoothly. Don’t force it; let the machine do the heavy lifting for you.
Compounding vs. Finishing Polish: A Tale of Two Stages
Most serious paint correction is a two-stage affair. The first stage, compounding, is the workhorse. You’re using a more aggressive pad and compound to really level the paint, knocking out heavier defects like medium scratches and those nasty, deep swirls. This step brings back a ton of clarity but can sometimes leave behind its own fine haze or micro-marring.
That’s where the second stage, finishing polish, comes in. This is all about pure refinement. You’ll switch to a soft finishing pad and an ultra-fine polish to go back over the paint and clean up that haze. This is the step that really makes the gloss pop, giving you that deep, wet, crystal-clear shine everyone’s chasing.
After you finish a section, grab a clean, plush microfiber towel and a panel prep spray to wipe away all the leftover polish residue. This is critical because it shows you the true state of the surface, with no oils or fillers hiding anything. Now you’re ready for the next section or, even better, the final protection step. Take your time, trust the process you found in your test spot, and enjoy revealing your car’s true shine. It’s an incredibly rewarding feeling.
Locking In Your Shine with Advanced Protection
You’ve poured hours into polishing your car. The paint is perfect—a flawless, liquid-like mirror. But here’s the thing: that pristine surface is now completely exposed and vulnerable to the very elements you just corrected.
I’ve seen this happen too many times. A client of mine, let’s call him Alex, learned this lesson the hard way. He spent a whole weekend getting his black sedan to absolute perfection, a deep, stunning gloss. Thrilled with the result, he slapped on a basic carnauba wax and immediately took off on a road trip. Within a few weeks, his heart sank. Bug guts had chemically etched into the finish, and a fresh web of fine swirls had already appeared, undoing all his hard work.
From Temporary Shine to Permanent Defense
This is exactly where modern paint protection completely changes the game. Think of it this way: polishing prepares the canvas, but a durable coating is what preserves the art. Waxes and sealants are great for temporary beauty, but to truly lock in that flawless finish for the long haul, you need a much tougher solution. This is where advanced chemistry steps in to create a real barrier between your perfect paint and the harsh world.
This simple, repeatable process is what gets the paint ready for that long-term protection.
This disciplined approach—testing, applying evenly, and wiping clean—is the foundation for a defect-free surface that’s truly ready for a durable coating.
The Next Generation of Protection: Elastomer Coatings
At Titan Coatings, we saw the limitations of traditional, brittle ceramic coatings and knew there had to be a better way. We were the first company to introduce Elastomer coatings to the market, leveraging our proprietary nano-tube technology and Dark Matter Tech. Our Alpha Quartz is a true Elastomer Coating, engineered to create a shield that’s both hard like glass and remarkably flexible.
The key difference is elasticity. While conventional coatings are rigid and can become brittle, our elastic coatings allow the protective layer to flex and absorb impacts. This makes it far more resistant to the stresses of daily driving and environmental changes.
This unique flexibility means our coatings won’t crack under extreme temperature shifts, from freezing winters to scorching summers. It also helps dissipate the energy from impacts—like a bug hitting the paint at highway speeds—preventing the kind of etching Alex experienced. For a deeper look at how our products stack up, check out our coating comparison page. This is how you protect your hard work for years, not just weeks.
Don’t Forget the Glass
That newfound clarity shouldn’t stop at the paint. Visibility is everything for safe driving, especially when the weather turns nasty. Driving in a downpour can be incredibly stressful, with water sheeting across the windshield and wipers struggling to keep up.
Our Apex Glass Ceramic Coating is designed to solve that problem. With an easy-to-use application, it creates an intensely hydrophobic surface on your windshield and windows. Rainwater beads up into tiny spheres and is whisked away by the airflow over the car, often making wipers unnecessary at highway speeds. It drastically enhances visibility and makes driving under rain a much more relaxed, stress-free experience.
A Smart Investment in Your Vehicle’s Value
Protecting your polished paint is more than just a cosmetic choice; it’s a smart economic one. The whole polishing and coating sector has become a huge part of the global automotive paint market, valued at over USD 21 billion. A polished, defect-free finish can increase a vehicle’s resale value by 3–5%. On a $30,000 car, that’s an extra $900–$1,500 in your pocket—far more than the cost of the service.
This simple math is why 60-80% of paint correction clients now opt for long-term protection. For us at Titan, polishing is the essential first step that enables our durable, high-value protection systems. You can dive deeper into these market dynamics from automotive industry research.
Ultimately, after you’ve spent the time learning how to polish car paint, protecting that result is the final, crucial step. By choosing an advanced, flexible coating, you’re not just preserving a shine; you’re safeguarding your investment and all that hard work. If you’re ready to take that step, our guide on applying ceramic coating to your car provides detailed instructions for a perfect application.
Common Car Polishing Questions Answered
When you dive into paint correction, a ton of questions pop up. It happens to everyone. Let’s walk through some of the most common things we hear from seasoned pros and weekend warriors alike, so you can tackle your next project with total confidence.
How Often Should I Polish My Car?
This is a big one, and the answer is simple: only when you have to. Think of polishing as a surgical procedure for your paint. It works by removing a tiny, microscopic layer of the clear coat to level out imperfections. You only have so much clear coat to work with.
For a car you drive every day, a light finishing polish once every 1-2 years is usually plenty to keep it looking incredible. Heavy compounding? Save that for when you’re dealing with serious, deep defects.
The real key is what you do after polishing. Protecting that freshly perfected paint is everything. Slapping on a durable, flexible coating like Titan Coatings’ Alpha Quartz is a game-changer. This easy-to-install elastomer coating provides great results, and thanks to its elasticity, it won’t crack under temperature changes or when bugs hit the surface. This superior protection means you won’t need to pull out the polisher nearly as often.
Can I Polish My Car By Hand?
Technically, yes, but your results are going to be a world away from what a machine can do. Hand polishing is really only good for applying a glaze or a cleaner wax that temporarily fills in the faintest of micro-swirls. It masks problems; it doesn’t solve them.
If you’re after true paint correction—actually getting rid of swirls, oxidation, and scratches—a machine polisher is a must. You just can’t replicate the consistent speed, pressure, and pad rotation needed to level the clear coat and get that deep, flawless shine by hand. Honestly, you’ll just end up with sore arms and a lot of frustration.
Polishing vs. Waxing: What’s The Difference?
Getting this right is fundamental to proper car care. They are two totally different processes with opposite goals.
- Polishing is for Correction. It uses abrasives to permanently remove a thin layer of paint, smoothing the surface to eliminate defects. The shine you get from polishing comes from creating a perfectly flat, mirror-like surface.
- Waxing (or Coating) is for Protection. This step adds a sacrificial layer on top of the paint. Waxes, sealants, and modern ceramic coatings act as a shield against UV rays, bird bombs, and dirt, all while adding their own layer of gloss.
Always remember: correct first, then protect. You put in all that effort to create a perfect surface, so the next logical step is to lock it in. This is why a durable coating is so critical to making your hard work last.
What Happens If I Polish Through The Clear Coat?
This is the scenario that keeps detailers up at night. It’s called clear coat failure, and it’s bad news. When you polish through the clear, you expose the base color coat underneath, which has zero protection against the elements.
The spot will look hazy, dull, or discolored, and no amount of polishing can bring back the shine. The only way to fix it is a trip to the body shop for a respray, and that gets expensive fast. This is exactly why we always preach starting with the least aggressive method, doing a test spot, and constantly checking your work under good lighting.
Ready to lock in that flawless finish? Titan Coatings offers the next generation of protection. Our Alpha Quartz elastomer coating provides a flexible, glass-hard shield that resists cracking and impacts far better than traditional ceramics. Preserve your shine for years, not weeks.
0 Comments