Parking under a shady tree seems like a great idea until you return to find your car peppered with sticky, golden droplets. It’s more than just a nuisance; it’s a direct assault on your car’s finish. Tree sap is a surprisingly aggressive contaminant, and understanding what makes it so destructive is key to fighting back effectively.
Why Tree Sap Is Your Paint's Worst Enemy
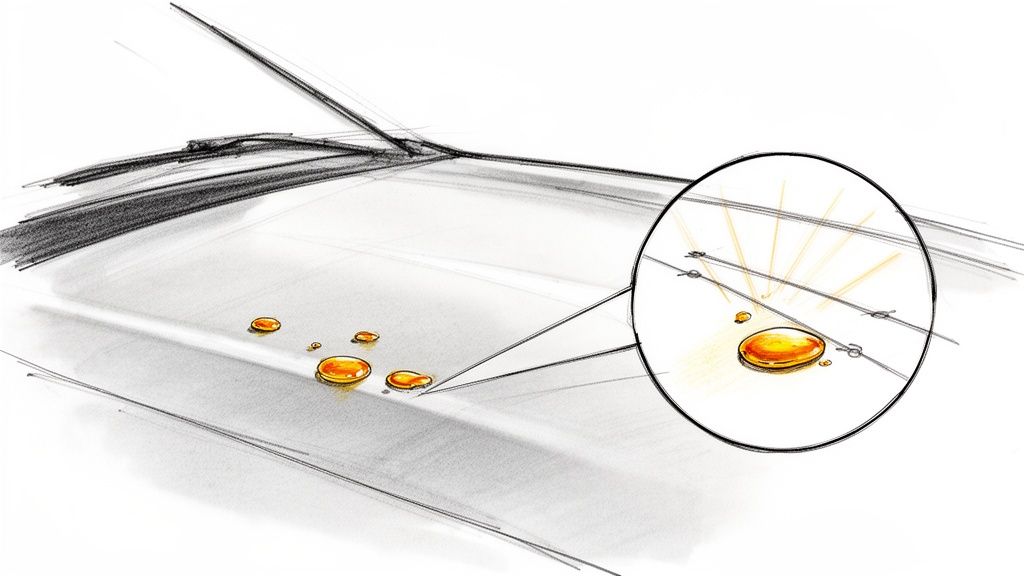
Before you can tackle the problem, you need to understand the enemy. That innocent-looking drip of sap is a complex cocktail of sugars and organic acids that immediately starts to bond with your car’s clear coat.
The real damage kicks in when the sun comes out. Heat essentially bakes the sap onto the surface, causing it to harden and shrink. As this happens, the acidic compounds concentrate and begin to actively eat away at the protective clear coat. It's a surprisingly fast process that can cause permanent etching in just a couple of days.
Think of it like a tiny chemical burn on your paint. Left untreated, what starts as a surface-level problem can quickly become a permanent scar, often requiring expensive paint correction to fix.
Time Is Not on Your Side
My friend Alex learned this lesson the hard way. He spotted a few sap drops on his new black car but figured he’d deal with them over the weekend. After a few hot, sunny days, what should have been a simple cleaning job turned into a detailing nightmare. The sap had etched right into the paint, leaving behind dull, crater-like marks that wouldn’t just wipe away.
His story highlights the golden rule of sap removal: tackle it within 24-48 hours. The longer it sits, especially in the sun, the stronger the bond becomes and the higher the risk of lasting damage.
This constant battle against environmental fallout is a huge reason the car care industry is booming. The global market for car care products was recently valued at USD 11.2 billion, and cleaning products—the first line of defense against sap—make up a massive 31.7% of that. People are realizing that contaminants like sap cause expensive problems if ignored.
Ultimately, while knowing how to decontaminate car paint is a crucial skill, prevention is always the best strategy. Keeping that sticky menace from bonding in the first place is how you truly win the war.
Gathering Your Sap Removal Toolkit
Before you even think about tackling that sticky, stubborn tree sap, you need to get your tools in order. Going in unprepared, or worse, with the wrong supplies, is a recipe for disaster. Grabbing a kitchen sponge or a harsh household cleaner might seem like a quick fix, but you could easily turn a small annoyance into a massive, expensive paint-correction job. The key is to dissolve the sap, not scrape it off.
The Must-Haves for a Safe Start
First things first, grab a good stack of clean, high-quality microfiber towels. Don't skimp here. These towels are your first line of defense against scratches, designed to lift and trap contaminants away from your paint. You’ll also need a quality car wash soap for the initial wash to remove any loose dirt and grime. If you're curious about what to look for, our guide on the best soaps for cars breaks it all down.
Choosing Your Sap Dissolver
Now for the main event: the sap remover. You've got a few solid options.
- Dedicated Sap Removers: These are products specifically engineered to break down tough, plant-based gunk without damaging your car's clear coat. Honestly, they're often the safest and most direct route to success.
- Isopropyl Alcohol (IPA): A 70% solution of high-purity IPA can work wonders. It's fantastic at dissolving sap, but it's a bit aggressive. It will absolutely strip any wax or sealant off the paint, so you must reapply protection to that spot when you're done.
- Citrus-Based Cleaners: For a powerful yet gentle alternative, a non-soapy citrus cleaning solution is a great choice. It cuts through the sticky residue effectively without leaving behind a film that just attracts more dirt later.
Pro Tip: No matter what product you land on, always test it on a small, hidden spot first. A lower door jamb or an inside section of the bumper is perfect. This quick check ensures the chemical plays nice with your paint before you apply it front-and-center.
Comparing Sap Removal Methods
To make the choice easier, here's a quick rundown of your options and where they shine.
| Method | Effectiveness | Risk Level | Best For |
|---|---|---|---|
| Dedicated Sap Remover | High | Low | The safest, most reliable option for any type of sap. |
| Isopropyl Alcohol (70%) | High | Medium | stubborn, dried-on sap, but requires immediate paint re-protection. |
| Citrus-Based Cleaner | Moderate to High | Low | Fresh to moderately cured sap; a great gentle alternative. |
| Clay Bar/Mitt | High | Medium | Removing stubborn, fossilized remnants after chemical treatment. |
Ultimately, a dedicated sap remover is your best bet for peace of mind, but the other methods work well when used correctly.
Tools for the Really Tough Spots
What about that sap that looks like it's been baked on since last summer? This is where a clay bar or a clay mitt becomes your best friend. After you've used a chemical to soften the sap, the clay will gently glide over the surface and shear off any lingering, bonded bits, leaving the paint feeling glassy-smooth. Just be sure to use plenty of clay lubricant—never use a clay bar on a dry surface!
Finally, think about what comes after. Most sap removers are strong enough to take off any wax or sealant you had on the car. You need a plan to protect that now-vulnerable spot. Have your favorite wax, sealant, or a high-quality ceramic spray ready to go. We're big fans of our Ultra Ceramic Spray for its dead-simple application and incredible water-beading protection. Sealing the area right away makes sure it’s shielded from the elements and makes the next cleanup that much easier.
A Practical Guide to Flawless Sap Removal
Alright, you've got your sap removal toolkit ready. Now it's time to get to work. Remember, the goal here isn't just to get the sap off; it's to do it so well that no one would ever know it was there. This whole process is about patience and using the right technique, not brute force.
First things first, and this is non-negotiable: give your car a proper wash. Never, ever try to tackle sap on a dirty surface. All that surface grit, dust, and road grime are basically tiny bits of sandpaper. The second you wipe a towel across it, you're dragging those particles all over your paint, creating a mess of swirls and scratches. A good wash clears the deck and lets you focus on the real problem.
The Gentle Art of Dissolving Sap
With the car clean and dry, grab your sap remover. Before you go spraying it everywhere, always test the product on an inconspicuous area first. A spot inside the door jamb or on the very bottom of a bumper works perfectly. This quick check makes sure the cleaner plays nice with your specific paint and won't cause any unexpected issues.
Once you've confirmed it's safe, apply the remover directly onto the sap droplet. The secret sauce here is dwell time. Don't just spray and immediately wipe. You have to let the product sit and work its magic, usually for about 30 to 60 seconds. This gives the chemicals time to penetrate and break down the sap's stubborn, hardened structure. You might even see the sap start to look like it's melting or loosening up.
Now, take a clean, plush microfiber towel, fold it into a small square, and gently place it over the treated spot. Use a soft blotting or lifting motion—think of it as picking the sap up and off the paint. Resist the urge to scrub. Aggressive rubbing is the fastest way to grind any leftover residue right into your clear coat.
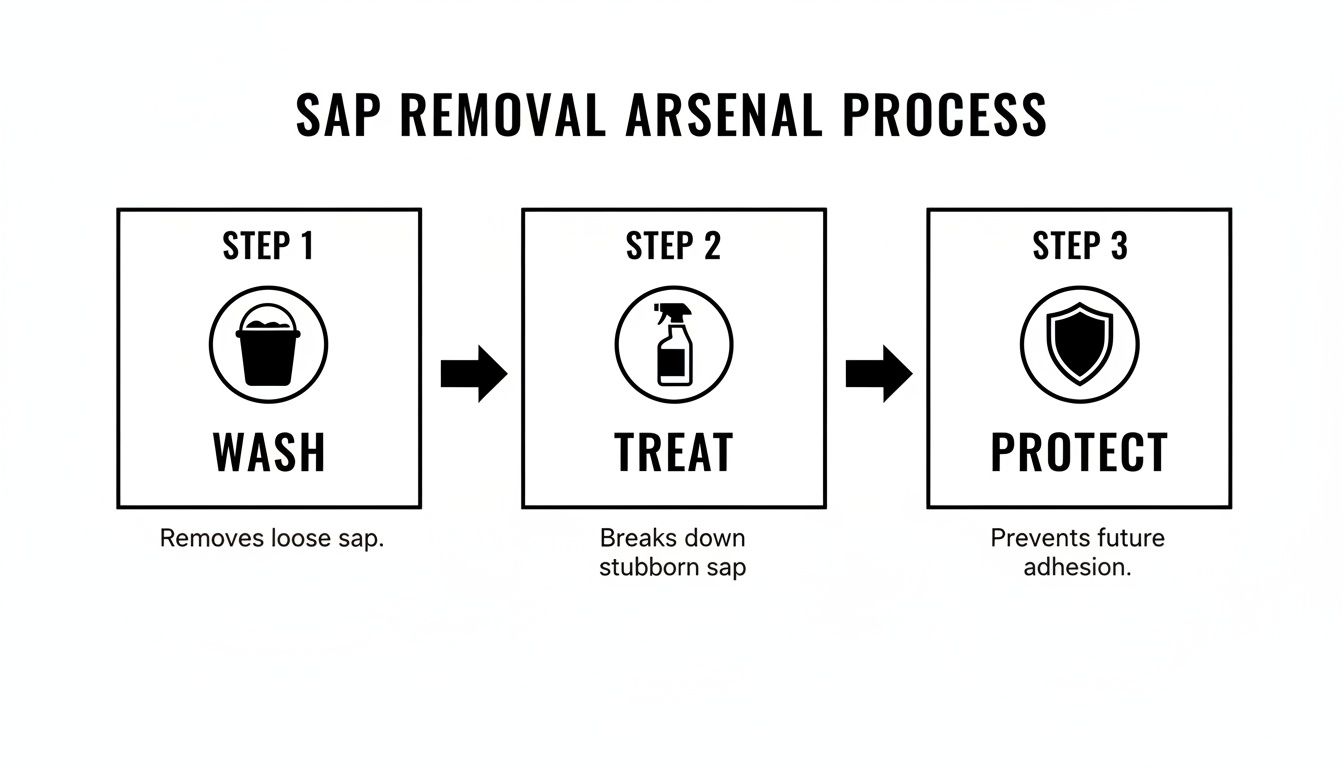
This really breaks it down: it's a three-stage process. You wash, you treat, and you protect. The steps before and after the actual removal are just as critical.
Handling Different Parts of Your Car
Sap doesn’t discriminate; it lands everywhere. You'll need to adjust your technique slightly depending on where you find it.
- Glass and Windshields: Sap on your glass is a real pain and can be a genuine safety hazard, smearing and blocking your view. You can use your sap remover just like you would on paint, but make sure to follow it up with a high-quality glass cleaner to get that crystal-clear, streak-free finish. For superior protection, a product like our APEX Glass Ceramic Coating not only makes sap removal easier but also dramatically enhances visibility in the rain.
- Plastic Trim: Be careful with unpainted plastic trim, as it can be more sensitive. Apply your sap remover sparingly and definitely don't let it dry on the surface. Once the sap is gone, it's a great idea to apply a plastic restorer to bring back its deep, rich color and protect it from fading.
What to Do When Sap Becomes a Fossil
We've all seen it: that one stubborn blob of sap that has been baked on by the sun for weeks and feels like a rock. If your chemical removers just aren't cutting it, it's time to bring in the clay bar.
After softening the sap as much as you can with your remover, grab your clay bar and plenty of clay lubricant. Gently glide the lubricated clay over the area. You'll feel it grab at first, but with a light touch, the clay will safely shear the bonded sap right off the paint, leaving a surface that's as smooth as glass. This is the same expert-level technique we use for other tough gunk, which you can read about in our guide on how to remove road tar from your car.
The Ultimate Defense Against Sticky Situations
What if you could make tree sap, bird droppings, and road grime non-issues? We all get tired of the endless cycle of washing, scrubbing, and hoping for the best. But what if the answer wasn't just cleaning the surface, but making the surface itself hostile to all that gunk?
Alex's Story: A Familiar Frustration
Let me tell you about Alex, a car guy who spent every weekend fighting a losing battle with the maple tree in his driveway. The frustration was real. No sooner would he get his prized car spotless than another sticky bomb would land, sending him right back to square one.
He was done with waxes and sealants that just didn't last. He needed a permanent solution, something that would stand up to the elements and give him his weekends back. His search led him past the usual suspects and toward the next generation of vehicle protection.
Beyond Ceramics: A Flexible Shield
Alex found his answer in Titan's ALPHA QUARTZ Elastomer coating. This isn't just another hard shell for your paint. It’s a complete transformation of the surface, born from our groundbreaking work with nanotube technology and proprietary Dark Matter Tech®. The result is a shield that's as hard as glass but, crucially, also incredibly flexible.
The unique elasticity of our coatings is the key to their longevity. They create a durable, resilient barrier that adapts to environmental stress rather than cracking under pressure.
Think about it. Traditional ceramic coatings can get brittle over time, leading to micro-fractures as they deal with a car's natural expansion and contraction from summer heat to winter cold. Our Elastomer technology is different; it's built to endure. The coating flexes with those temperature swings between frozen and hot, preventing cracks and ensuring it protects your car year after year.
This flexibility also helps it absorb the kinetic energy from small impacts, like bugs hitting your bumper at highway speeds, without chipping or failing. If you're weighing your options, the difference between a static barrier and a flexible one is a game-changer. We go into this in more detail when comparing paint protection film vs. ceramic coating.
The Hyper-Slick Surface Advantage
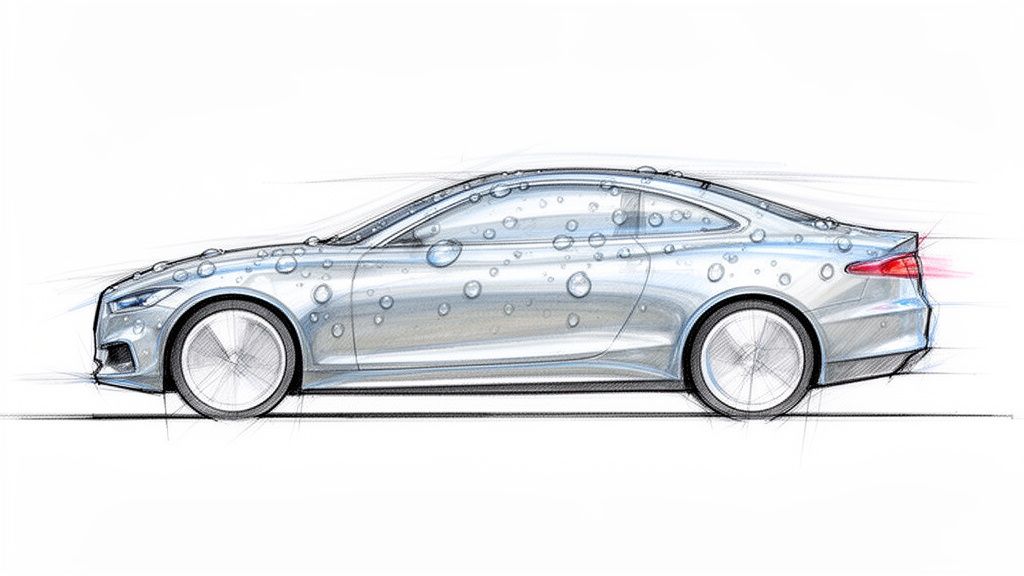
The real magic for Alex, though, was the hyper-slick, hydrophobic surface that ALPHA QUARTZ created. This intensely smooth finish makes it incredibly difficult for contaminants like tree sap to get a solid grip in the first place.
Instead of baking onto your clear coat, sap and other grime just sit on top of the coating, much like water beading on a freshly waxed hood. Often, a gentle wash is all you need to slide them right off. That dreaded detailing chore becomes a quick, satisfying rinse.
To give your vehicle the best all-around defense, pairing a great coating with solid, general car maintenance tips is the smartest approach for long-term preservation. For Alex, it meant no more constant worry—just more time to actually enjoy his car.
Protecting Every Surface Beyond The Paint
Let's be honest, true vehicle protection has to cover more than just the shiny painted parts. Sap on your car's body is annoying, for sure. But sap on your windshield? That's a straight-up safety hazard.
It can smear with your wipers, block your view, and create a blinding glare right when you least expect it, like during a sudden rainstorm. It’s a problem that needs a real solution.
This is exactly why we created Titan's APEX Glass Ceramic Coating. Think of it as more than just a rain repellent—it's a serious surface coating that lays down a super-hydrophobic and slick barrier right on your glass. Its main job is to make driving in the rain a whole lot less stressful by forcing water to bead up and zip right off the windshield. At highway speeds, you often don't even need to touch your wipers.
Making Glass a Tough Place for Sap to Stick
One of the best side-effects of that slick surface is how it stops contaminants like tree sap from getting a death grip on your glass. Just like with our paint coatings, the sap ends up sitting on top of the protective layer instead of digging into the glass itself. This turns a frustrating scrubbing session into a simple wipe-off.
The battle against sap has been going on for a long time. It really goes all the way back to the auto boom in the 1920s, when Model T owners had to resort to risky, paint-damaging methods like using gasoline to get pine pitch off. Today’s car care world is all about finding smarter solutions, especially since sap problems can jump by 40% in the spring and fall in heavily wooded areas. You can find more data on this growing market over at cognitivemarketresearch.com.
The clarity and protection you get from a dedicated glass coating are game-changers. If you want to dive deeper into the science and technique, we've laid out all the details in our guide on applying ceramic coating to glass.
An All-In-One Answer for Total Protection
For those who want a simpler, do-it-all solution, we developed our Ultra Ceramic Spray. It's the perfect product for the DIY car lover who wants comprehensive protection without going through the whole multi-step process of a professional coating.
The real magic of ULTRA is its versatility. It gives you professional-level hydrophobic properties and a slick, protective shield on pretty much every exterior surface of your car, all from one easy-to-use bottle.
This simple spray-on, wipe-off formula is designed to work everywhere:
- Paint: You get a deep, glossy finish that makes water bead like wild and protects against sap, bird droppings, and other gunk.
- Glass: It dramatically improves visibility in the rain and makes cleaning off bugs and sap almost effortless.
- Trim: It shields your plastic and rubber trim from fading and makes it way easier to keep clean.
It’s the perfect way to give your entire vehicle a powerful layer of defense, making sure that no matter where sap decides to land, the cleanup will be quick and painless.
Got Questions About Getting Rid of Tree Sap? We've Got Answers.
Even with the best guide, actually getting down to business with a stubborn spot of tree sap can bring up a few questions. Getting it wrong can lead to a bigger headache than you started with, so let's clear up some of the most common things people ask.
Can I Just Grab Some Hand Sanitizer or WD-40?
We hear this one all the time, and the answer is a hard no. Seriously, don't do it. While you might see these so-called "hacks" floating around online, they're a massive gamble with your car's paint job.
The high alcohol content in hand sanitizer is way too aggressive for your clear coat. It can easily soften and dull the finish, leaving a permanent haze. And WD-40? It's an oil-based lubricant that will leave behind a greasy, sticky film. Not only will that gunk attract every speck of dust and dirt, but it also makes it impossible for any wax or sealant to stick to the paint afterward.
What if the Sap Has Been Baked on for Weeks?
Okay, so you've got a fossilized blob of sap on your hood. Don't worry, it's probably not a lost cause, but you will need a bit more patience. The secret here is giving your dedicated sap remover enough dwell time to work its magic.
Go ahead and apply the cleaner generously to that hardened spot. The goal is to let it soak in and re-liquefy the sap. You might have to reapply the product a couple of times to keep the area wet and active. Once it starts to soften, you can gently lift it away with a fresh microfiber towel. If you see a faint stain or outline left behind, a clay bar treatment is the perfect next step to safely pull out any remaining residue.
This is exactly why a coating like our ALPHA QUARTZ is such a game-changer. Its tough, elastomer-based shield creates a barrier that sap just can't bond to as aggressively, turning a major chore into a simple wipe-off.
Will a Sap Remover Take Off My Wax or Sealant?
Yes, almost certainly. The solvents needed to break down something as tough as tree sap are powerful enough to dissolve your typical carnauba wax or polymer sealant right along with it.
This is a big one: After you’ve successfully removed all the sap, you absolutely have to re-protect that area. Leaving it exposed is an open invitation for UV rays, bird droppings, and, you guessed it, more sap.
This cycle of cleaning and reapplying protection is why so many car owners are switching to long-lasting, chemical-resistant ceramic coatings. A professionally installed elastomer coating can handle these kinds of cleaners without breaking a sweat, giving you a much more permanent and hassle-free solution for paint protection. You can see how our products stack up against the competition on our comparison page.
Ready to make sap a problem of the past and give your ride the best defense available? Titan Coatings has you covered with advanced solutions like ALPHA QUARTZ and our easy-to-use Ultra Ceramic Spray.
Discover the complete Titan Coatings collection in our shop and find the perfect protection for your car today.
0 Comments