
A friend once called me over to look at a “tiny paint bubble” on the lower edge of his door. I pressed it lightly with a fingernail, watched the edge crack, and there it was: the first orange stain underneath.
That moment is familiar to anyone who cares about cars. The good news is that car surface rust treatment is still very manageable when you catch it early, and with the right prep, repair, and protection, a DIYer can get a finish that looks clean and lasts.
That Sinking Feeling The Story of the First Rust Spot
Alex had the kind of car owner's routine I respect. Wash bucket on the weekend. Drying towel instead of air drying. Quick walkaround after every storm. So when he spotted a blister the size of a pencil eraser near the rear wheel arch, he knew it wasn't dirt and it wasn't a stone chip playing tricks on him.
He stared at it longer than he wanted to admit.
The first rust spot always feels bigger than it is. Not because of its size, but because of what it means. Rust is proof that moisture already got past the surface and started working below the paint film. Once that happens, ignoring it doesn't buy you time. It gives corrosion time.
Why that small bubble matters
Surface rust rarely announces itself with drama. It starts with a chip, a scratch, or a pinhole in the finish. Water sits. Oxygen stays available. The metal begins to oxidize. Then the paint loses its grip and lifts just enough to make you notice.
What catches people off guard is how ordinary the first sign looks. A little discoloration. A bubble at the seam. A rough patch that feels dry under your fingertips. That's why so many owners wait.
Most failed rust repairs don't fail at the paint stage. They fail because someone painted over contamination or left active corrosion in the pits.
Alex did what smart owners do after the initial frustration. He stopped guessing and made a plan. He cleaned the panel, marked the area with tape, and committed to fixing it before it spread into the seam. That's the right mindset. Rust repair is less about heroics and more about being early, methodical, and honest about what you're seeing.
What separates a solid repair from a temporary cover-up
A lasting result comes from three decisions:
- Admit what the damage is: If the metal is only stained and lightly pitted, you can treat it successfully. If it's swollen, layered, or perforated, the repair changes.
- Remove and neutralize everything active: Paint alone won't stop trapped corrosion.
- Protect the repair after it looks good: A glossy patch with weak protection is just a prettier version of the same problem.
That's where modern products help. Traditional rust repair is still labor-heavy, but modern coatings have changed the prevention side of the job. You can do the hard work once, then lock in the result with better protection than old-school waxes ever offered. That's the gap most rust guides miss.
Diagnosing the Enemy and Gathering Your Arsenal
The repair usually goes one of two ways right at the start. Either the rust is what it looked like from the outside, or the first pass with sandpaper exposes a much bigger problem. That's why I diagnose before I grind. Car surface rust treatment works when the metal is still worth saving and the repair plan matches what's there.
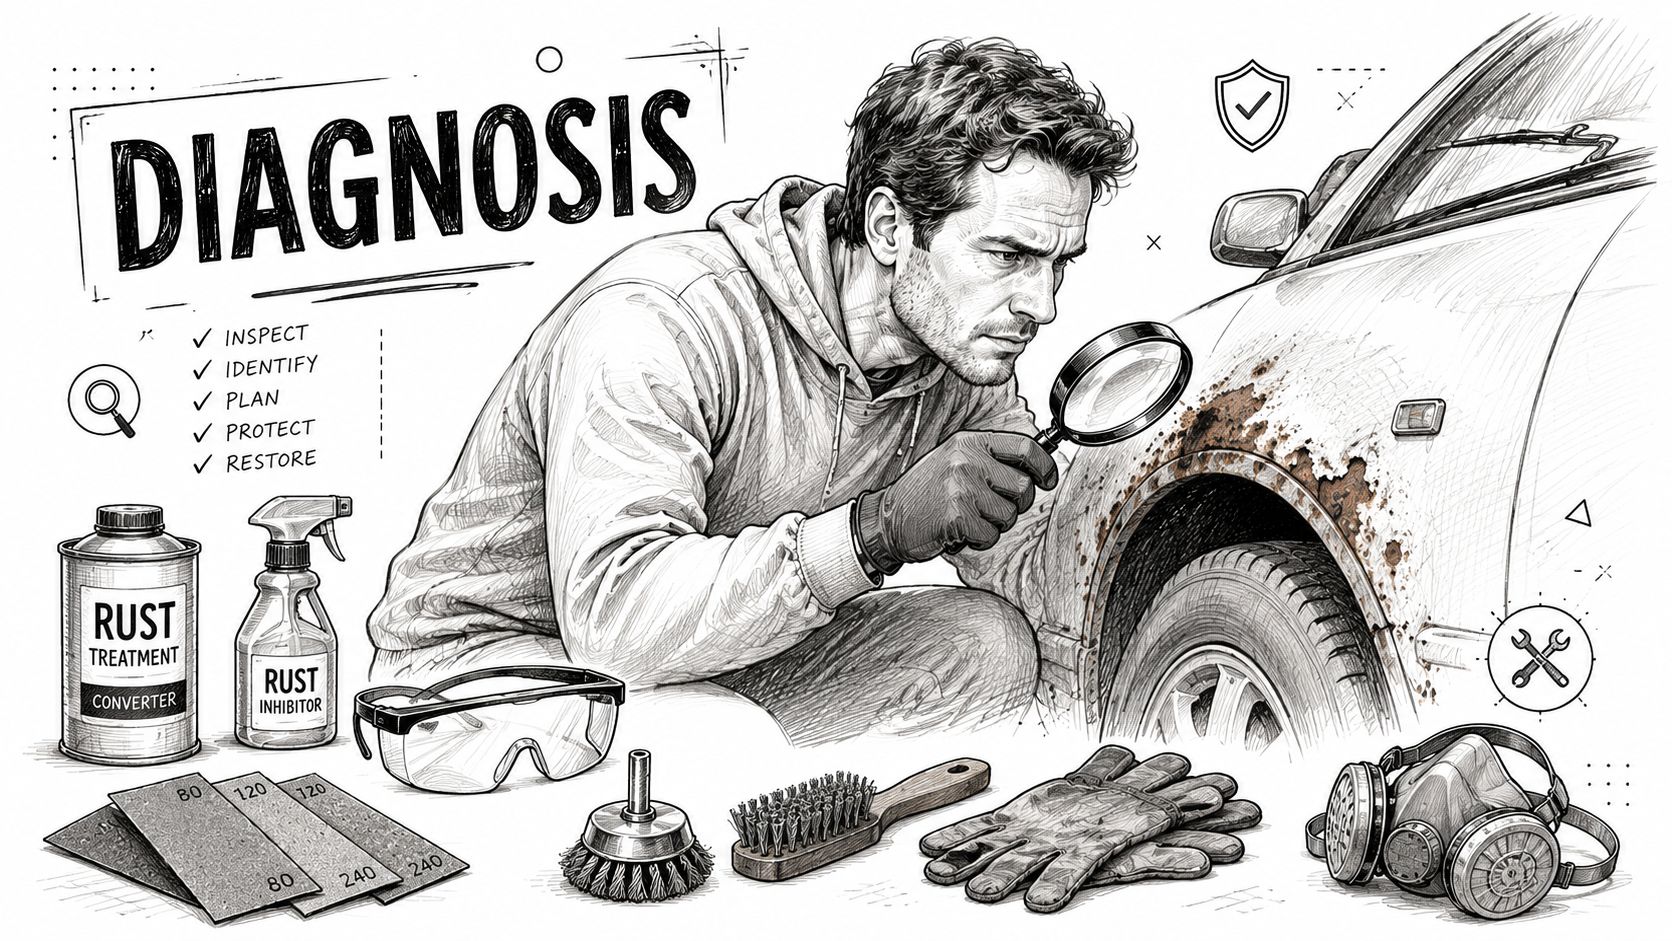
Three levels of rust you need to tell apart
This is the quick field check I use before I commit time and materials to a panel.
| Rust level | What it looks like | What it means |
|---|---|---|
| Light surface rust | Orange or brown staining, minor roughness, paint may still be mostly intact | Usually repairable with sanding and chemical neutralization |
| Moderate scale rust | Flaking, crusty texture, paint lifting, visible pitting | Needs more aggressive removal and a close check for thin metal |
| Severe penetrating rust | Soft spots, holes, swollen seams, cracking around edges | Usually calls for metal repair or replacement, not surface treatment |
Press around the spot with your thumb. Then probe the edge with a pick or screwdriver. Solid metal resists. Weak metal gives, flakes, or opens up fast.
That small test saves a lot of wasted effort. If the panel flexes more than the area around it, or if rust has already crept into a folded seam, plan for more than a cosmetic fix.
The spots that hide more rust than they show
Rust rarely starts in the middle of a flat panel. It starts where moisture sits and the coating gets stressed, chipped, or thinned.
- Wheel arch lips: Road grit packs into the inner lip and stays wet.
- Door bottoms: Blocked drains hold water inside the shell.
- Windshield trim and rear glass edges: Small seal failures let moisture work under the paint.
- Hood edges and trunk seams: Stone chips expose bare metal, then the seam traps contamination.
These areas deserve a closer look than the visible stain itself. Surface rust on the outside often means there is still contamination tucked into an edge, pinch weld, or hem flange. Traditional repair methods handle the visible damage. Long-term prevention comes from treating the area, then sealing it so moisture cannot start the cycle again.
The tool kit that keeps the job under control
Good rust repair is messy enough without hunting for supplies halfway through. I lay everything out before the first sanding pass because bare metal starts losing ground the moment it sits exposed in a damp garage.
- Safety gear: Gloves, eye protection, and a respirator. Rust dust, primer overspray, and chemical vapors are real exposure, not a minor nuisance.
- Mechanical removal tools: Wire brush, wire wheel, sanding block, and a dual-action sander if you have one.
- Abrasives: 80-grit to cut through rust and failing paint. 220-grit to smooth and feather the repair area.
- Surface prep materials: Wax and grease remover, clean rags, tack cloths, and masking supplies.
- Rust treatment products: Rust converter or neutralizer for pits and stubborn residue, used only as the product directs.
- Refinish materials: Rust-inhibiting primer, matched color coat, and clear coat if the repair calls for it.
- Inspection help: A paint thickness gauge for cars helps you track how much factory material is still on the panel before you sand through surrounding paint.
One practical rule matters here. If you stop mid-job to buy one missing item, the panel sits longer than it should, and fresh flash rust can start before primer ever touches the metal.
A clean, dry work area matters just as much as the tools. Dust under primer, moisture in pits, and rushed prep are what turn a decent-looking repair into one that bubbles back through in a season. The goal is not only to remove what you can see. The goal is to set up the panel so the finish lasts, and so the final protective coating has something solid to bond to.
The Art of Rust Removal and Neutralization
The repair either turns the corner here or starts failing before the paint even goes on. I've seen plenty of panels that looked decent in primer, then bubbled back up because the rust in the pits was never fully dealt with.
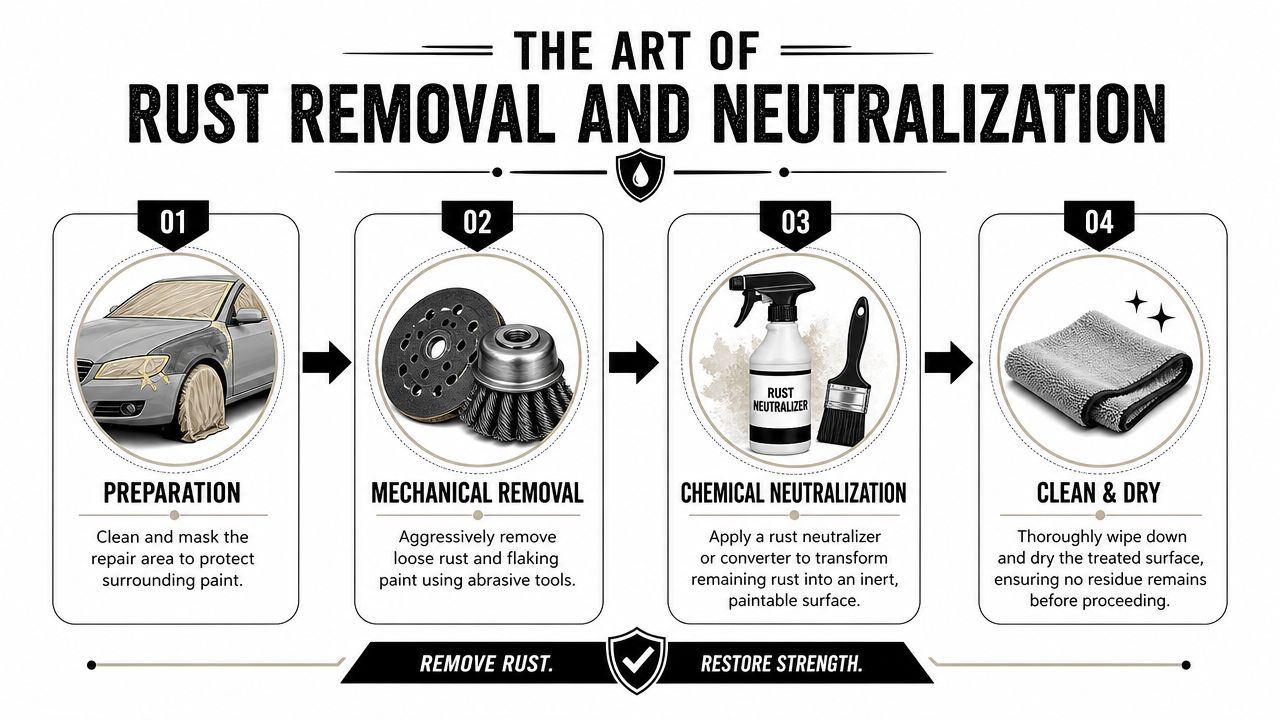
Mechanical removal when the rust is open and reachable
Mechanical removal is still the foundation. If the corrosion is on the surface and you can get a wheel, brush, or sandpaper on it, cut it back to clean metal first. Start with the loose paint and scale, then work the damaged area with 80-grit until the orange is gone. Switch to 220-grit to smooth the repair area and feather the edge into the surrounding finish.
That part is straightforward. The judgment call is knowing when to stop grinding and when to change methods. Flat, open rust usually responds well to sanding. Deep pitting, folded seams, and textured stampings do not. Keep chasing those spots too aggressively and you can thin the panel, distort the metal, or leave a low area that shows later under paint.
For a DIY repair, that trade-off matters. Good work is not about making every stain disappear with brute force. Good work is removing everything you can reach, then treating what remains in the pores of the metal so it does not come back under the new finish.
Chemical treatment when the pits still hold rust
Phosphoric-acid-based rust treatment has a place here. It is not a substitute for sanding, and it is not magic in a bottle. It works best after you have already removed the loose material and exposed the remaining corrosion in the pits.
Follow the product directions exactly, especially on dwell time, rinsing or neutralizing, and drying. Some products want a water rinse. Others do not. Some leave a conversion layer that can be primed over once cured. Others need a second cleaning step before coating. Skipping those details is how people trap residue under primer and end up blaming the paint.
Here's the practical comparison I use:
| Method | Best use | Weak point |
|---|---|---|
| Wire brush and sanding | Flat panels, visible rust, paint edge cleanup | Leaves rust in pits if used alone |
| Phosphoric treatment | Pitted spots, cavities, irregular texture | Needs correct dwell, neutralization, and drying |
| Converter-only shortcut | Temporary slowdown on rough hidden areas | Usually not ideal for a clean exterior finish |
The sequence that works in the real world
On exterior sheet metal, I stick to a simple order because it prevents missed steps and bad adhesion later.
- Clean the panel so road film, wax, and polish residue are gone.
- Mask wider than the visible spot because the repair area usually grows once sanding starts.
- Remove loose rust and failing paint with a wheel, brush, or abrasive.
- Sand to clean metal with 80-grit, then refine with 220-grit.
- Treat any remaining pitting with the rust neutralizer your product system calls for.
- Rinse or neutralize if required by that specific product.
- Dry the panel fully before primer touches it.
If the surrounding paint is chalky or oxidized, clean that up too so you are not blending fresh work into a dead surface. This guide on how to remove oxidation from car paint is a useful companion for that part of the job.
One line I follow every time. If I can still see dark pinpoints in the metal, I have more work to do.
A lot of guides stop at “remove the rust and prime it.” That gets a repair done, but it does not always keep it done. Long-term results come from treating the hidden corrosion now, then sealing the repaired area properly and adding a durable moisture barrier afterward. That last layer is why modern systems outperform the old sand-prime-paint routine on cars that live outside.
If the damage is spreading beyond a spot repair, or the panel already needs blending across a larger area, it may make more sense to hand the color work off to professional spray painting services. For everyone else, careful rust removal and proper neutralization are what make a clean DIY finish possible instead of temporary.
Priming and Painting for a Seamless Repair
Once the panel is clean, dry, and rust-free, don't leave it exposed. Bare metal starts losing ground fast, especially if humidity is up. Primer belongs on the panel as soon as the surface is ready.
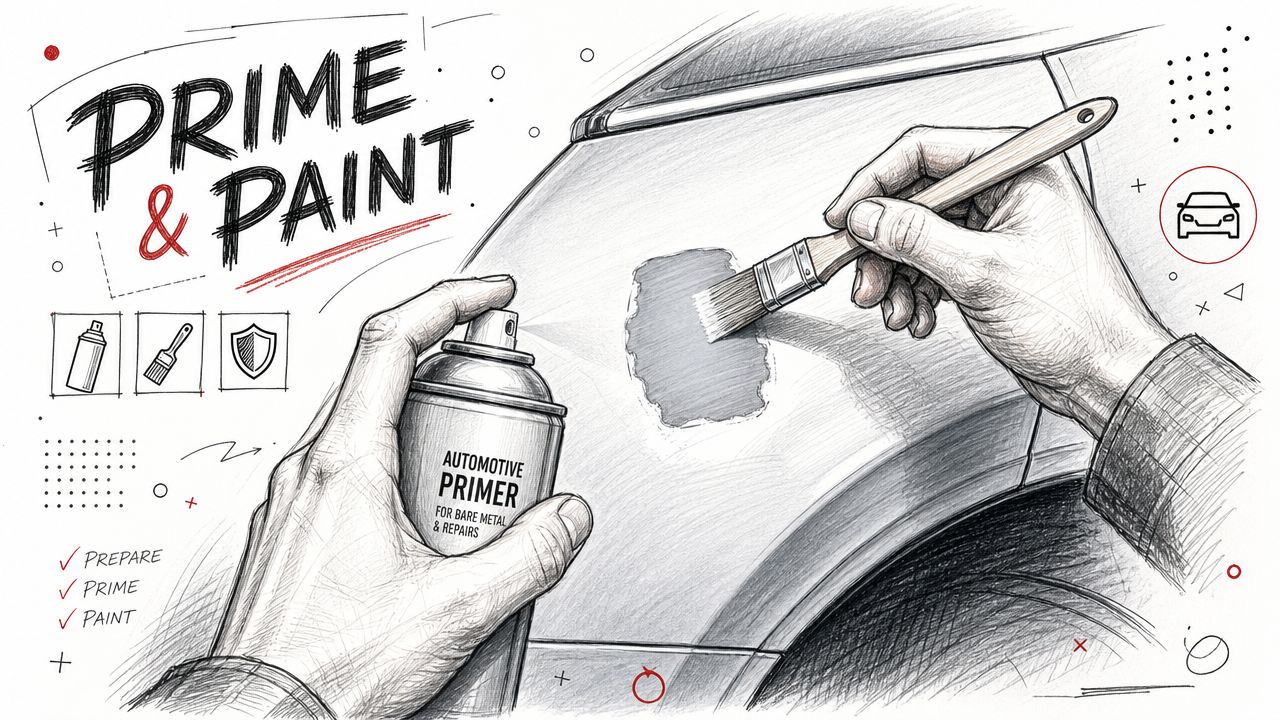
Why epoxy primer earns its reputation
For repaired metal, I trust a rust-inhibiting epoxy primer more than quick aerosol shortcuts. It seals the surface, gives topcoat materials a stable foundation, and reduces the chance that moisture sneaks back to the metal through a weak underlayer.
In more aggressive restoration work, sandblasting followed by acid etching and a high-grade epoxy primer containing rust inhibitors can extend structural life by 10–15 years in harsh environments, according to this automotive rust-proofing demonstration and discussion. That same source notes that sandblasting can remove up to 99% of surface and subsurface rust debris, and that properly applied systems can prevent recurrence for over 10 years. For a home garage panel repair, you may not go that far, but the lesson stands: the primer layer is not decoration. It's the barrier.
How to keep the repair from looking like a patch
Good paintwork is more about restraint than volume. Put on thin, even coats. Let each coat flash as directed. Don't try to bury a repair in one wet pass.
Use this order:
- Prime beyond the bare metal: Cover the repair and a small feathered margin around it.
- Sand the primer lightly once cured: You want it smooth, not shiny.
- Apply color in controlled passes: Build coverage gradually rather than chasing a perfect match in one coat.
- Finish with clear coat if your paint system requires it: Extend the blend slightly so the transition is softer.
If you're trying to understand what a clean sprayed finish should look like before you start, examples from professional spray painting services are useful because they show what even coverage, edge control, and surface consistency should aim for, even outside the automotive world.
The details that save the final result
A few habits make a big difference:
- Keep the edge soft: Hard masking lines make small repairs stand out.
- Watch the temperature and humidity: Paint can behave badly when the environment is working against you.
- Clean between stages: Dust nibs and fingerprint oils show up more than people expect.
- Use proper refinishing materials: Browsing dedicated automotive refinishing products helps you avoid mixing incompatible products that can wrinkle, haze, or lift.
The best rust repair I've seen on driver cars isn't the one with the thickest paint. It's the one where each layer was allowed to do its job.
Achieving a Flawless Finish
Stopping the rust is the first win. Making the repair disappear is the satisfying part. For this, patience matters more than force.
Leveling the texture
Fresh clear coat often sits a little proud or shows mild orange peel. That doesn't mean the paint failed. It means the final surface still needs refining. Once the clear is fully cured, wet sand the area with very fine paper and plenty of clean water.
I like to work gradually. Start with a fine grit only if the texture needs it, then move finer as the surface levels. The goal is to flatten the clear without cutting through it. Keep the paper clean, use a soft backing pad where possible, and stop often to dry the surface and inspect it.
Sanding marks are easy to create and annoying to remove. Check your work every few passes instead of assuming you're close.
Bringing back gloss without leaving haze
After wet sanding, the panel will look dull. That's normal. Polishing restores clarity and depth.
A machine polisher does this faster and more evenly than hand work, but only if you use the right pad and compound pairing. Start with a cutting step only as aggressive as needed, then switch to a finishing polish to refine the gloss. Keep the machine moving and don't stay on panel edges too long.
For a deeper walk-through on polishing technique, pad choice, and paint-safe correction habits, this guide on how to polish car paint is a useful reference.
What a finished repair should look like
A solid finish has a few clear signs:
- The repaired spot blends under normal light
- The gloss level matches the surrounding panel
- You can't feel a hard ridge at the edge
- No haze remains after wipe-down
If you can still find the repair from one angle under a harsh inspection light, don't panic. That happens even in professional environments. What matters on a real car is whether the panel reads as uniform in daylight, not whether it survives a forensic stare from two inches away.
The Ultimate Shield With Titan Elastomer Coatings
Alex's repair looked right when he finished. Clean metal underneath. Smooth primer. Color matched closely enough that the eye didn't stop at the old damage. Then he asked the question every careful owner asks after a rust job: how do I keep this from returning?
That's where most guides go quiet. They stop at paint. I don't.
Why old-style protection falls short
Wax has its place, but it's a maintenance layer, not a long-term rust strategy for repaired paint. It wears off, it softens under real-world abuse, and it doesn't give a repaired area the kind of durable barrier that modern coatings can provide.
Titan took a different path, creating its own coating technology and bringing elastomer-based coatings to the market using nanotube technology and Dark Matter tech. That matters because flexibility changes survival. A coating that's hard but brittle can crack under stress. A coating that's hard and flexible stands a much better chance.
According to Titan's technical explanation, Titan Coatings' proprietary technology utilizes elastomers and carbon nanotubes, enabling their coatings to stretch and return to their original shape, creating a durable, flexible membrane that enhances durability against surface stress and temperature changes.
Titan also describes ElastoTek® as a membrane-forming technology built from elastomers and carbon nanotubes that can stretch and recover while enhancing durability against surface stress, and Dark Matter Technology® as a system integrating carbon nanotubes with additives for mechanical strength, thermal stability, and wear resistance, as outlined on Titan's technology overview.
Why flexibility matters after rust repair
Freshly repaired panels live a harder life than people think. They deal with heat, cold, washing, bug strikes, road grit, and vibration. The protective layer above them needs to stay intact through all of it.
That's why elastic coatings are worth paying attention to. They're hard like glass and flexible, so they're built to last longer because they can move instead of turning stress into cracks. Temperature change matters too. Frozen mornings and hot panels won't affect the coating the same way when flexibility is part of the design.
If you want to understand the coating category itself, Titan's page on elastomer coating technology gives the core concept in plain language.
Three practical options that fit this repair
For a repaired vehicle, I'd look at protection as a system rather than a single bottle.
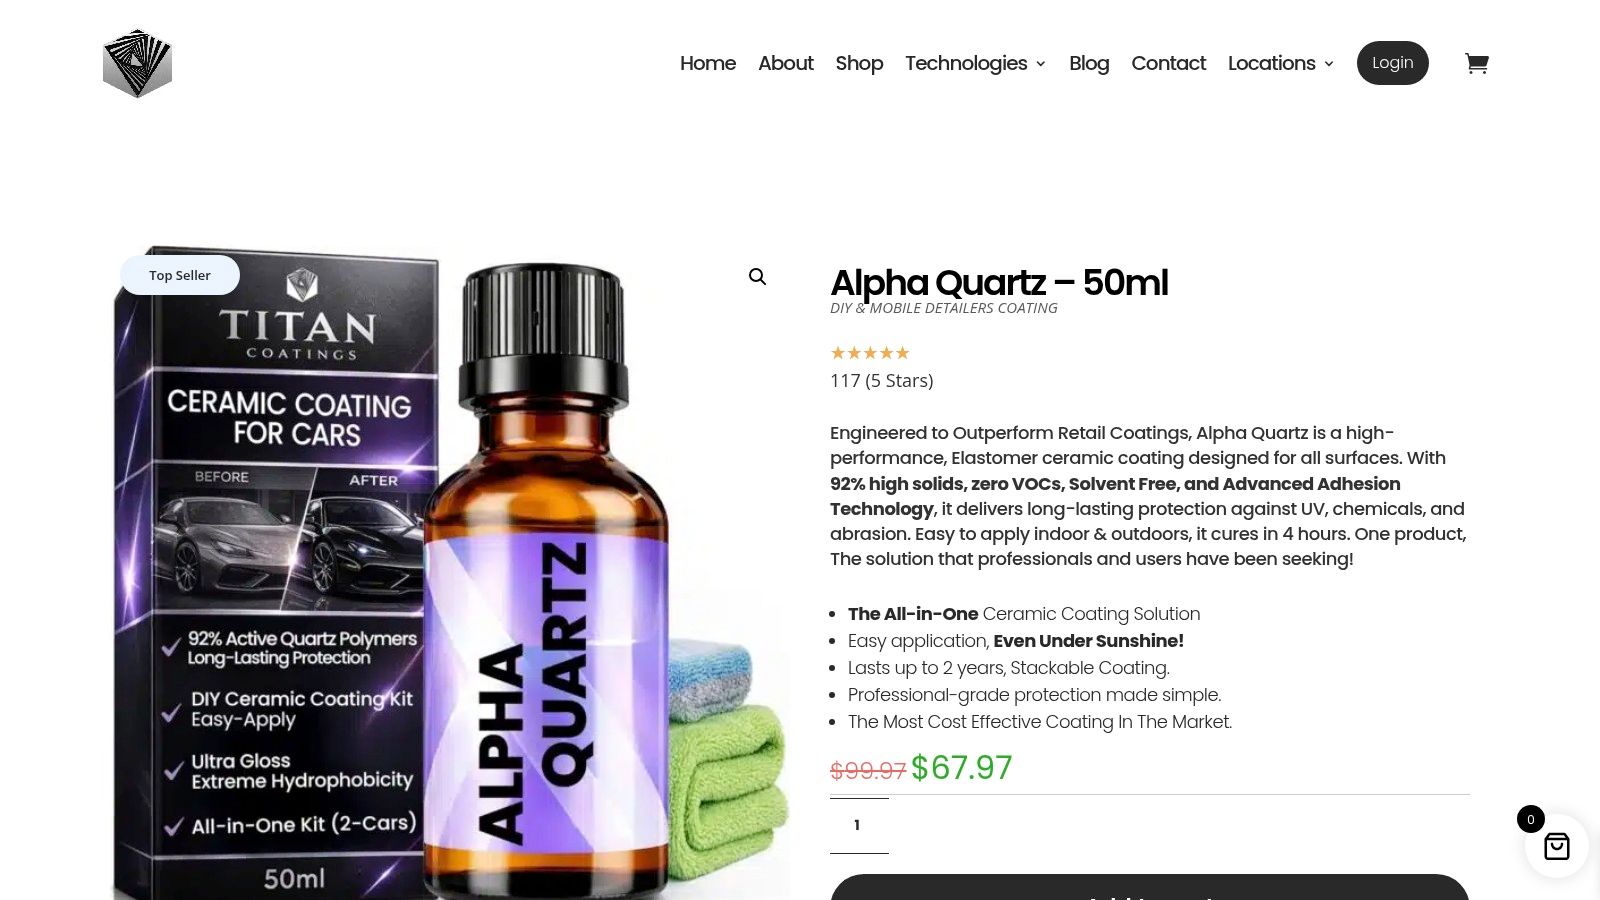
- Alpha Quartz for the main shield: Alpha Quartz is easy to install, gives strong visual results, and makes sense for DIYers and mobile detailers who want a serious protective layer without turning the application into a full-day ordeal.
- Ultra Ceramic Spray for easy upkeep: Ultra Ceramic Spray is the kind of product that helps owners maintain the surface without overcomplicating wash day.
- Apex Glass for windshield and glass: Apex Glass & Windshield Coating is easy to use and worth including in a total protection plan because a hydrophobic glass layer can make rain driving feel calmer and visibility more consistent.
Titan also states that its HyperGlass™ nanomembrane coating incorporates nano components that deliver hydrophobic properties and abrasion-resistant protection, helping repel water spots and maintain high gloss, according to this Titan coating product description.
For readers who want to browse options directly, Titan's coating product shop lays out the current lineup clearly. Their main site at Titan Coatings is also worth exploring if you want the broader technology background.
The bridge between rust repair and prevention is this: fix the metal properly, then protect the repaired area with something better than a temporary topper. That's how you stop doing the same job twice.
If you want to protect your paint, glass, and freshly repaired panels with advanced coating technology, take a look at APEX NANO – Titan Coatings. Their lineup is built around modern surface protection, with options that suit DIYers, mobile detailers, and owners who want durable results without overcomplicating the process.
0 Comments