
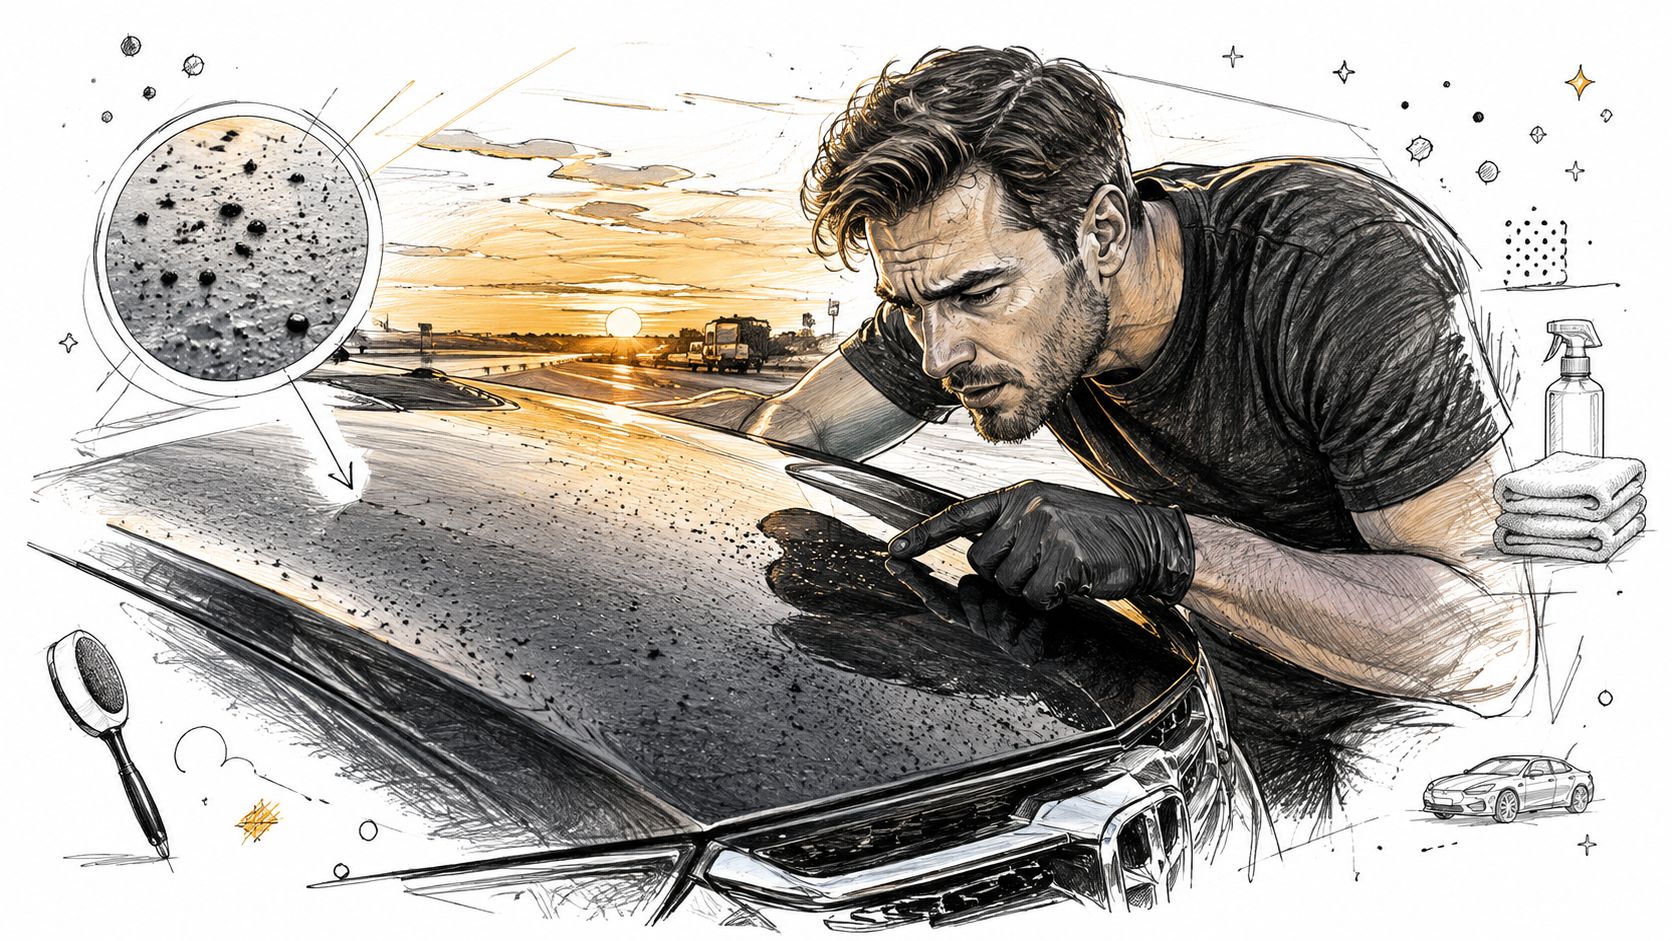
At sunset, I leaned over a freshly washed hood and saw what the owner had missed: black specks scattered across the paint after a highway run beside newly paved asphalt. They looked small, but each one had already started bonding to the surface.
The Moment You Notice Fresh Tar on Your Paint
Fresh road tar has a particular look. It sits as glossy black dots, short streaks, or soft smears across the lower doors, rocker panels, wheel arches, and sometimes the hood. Run a fingertip near one without pressing, and the contamination often feels raised and rubbery rather than gritty.
The owner beside me thought the wash had failed. It hadn't. The car was clean, but a normal wash isn't designed to dissolve petroleum-based road material. Road tar and asphalt contamination come from the same petroleum-based materials used in paving and maintenance, and fresh splatter is especially common after driving over newly paved or repaired roads, as described by this automotive tar-removal guide.
Why a quick response matters
A fresh deposit is still soft enough for a dedicated tar cleaner for cars to penetrate and release it. One industry guide notes that modern automotive tar removers can act in as little as 1–2 minutes when used as directed, which is why a spot that looks minor shouldn't be attacked with a dry towel or fingernail.
Heat changes the job. Sunlight warms the panel, and heat from the engine bay can raise the temperature around the hood and front fenders. The tar becomes more adhesive, spreads under pressure, and leaves a darker halo when someone tries to wipe it away before softening it.
A clean-looking panel can still be chemically contaminated. If the surface feels sticky or rough after washing, don't increase pressure. Change the chemistry first.
Tar removal also matters beyond appearance. The U.S. Geological Survey's research on coal-tar-based pavement sealcoat identifies this material as a major source of polycyclic aromatic hydrocarbon contamination in urban areas. The same source reports PAH concentrations in tar asphalt ranging from 2.3 to 4,800 mg/kg, while groundwater at most road sections measured below 0.08–0.53 μg/L. Those environmental findings don't mean every road spot creates the same exposure, but they do reinforce why controlled removal and responsible disposal are preferable to spreading residue around the vehicle.
The payoff is straightforward. Remove the sticky contamination while it's manageable, then place a flexible protective layer over the clean surface so the next highway trip leaves less for tar to grip.
Prep the Panel Before Any Solvent Goes On
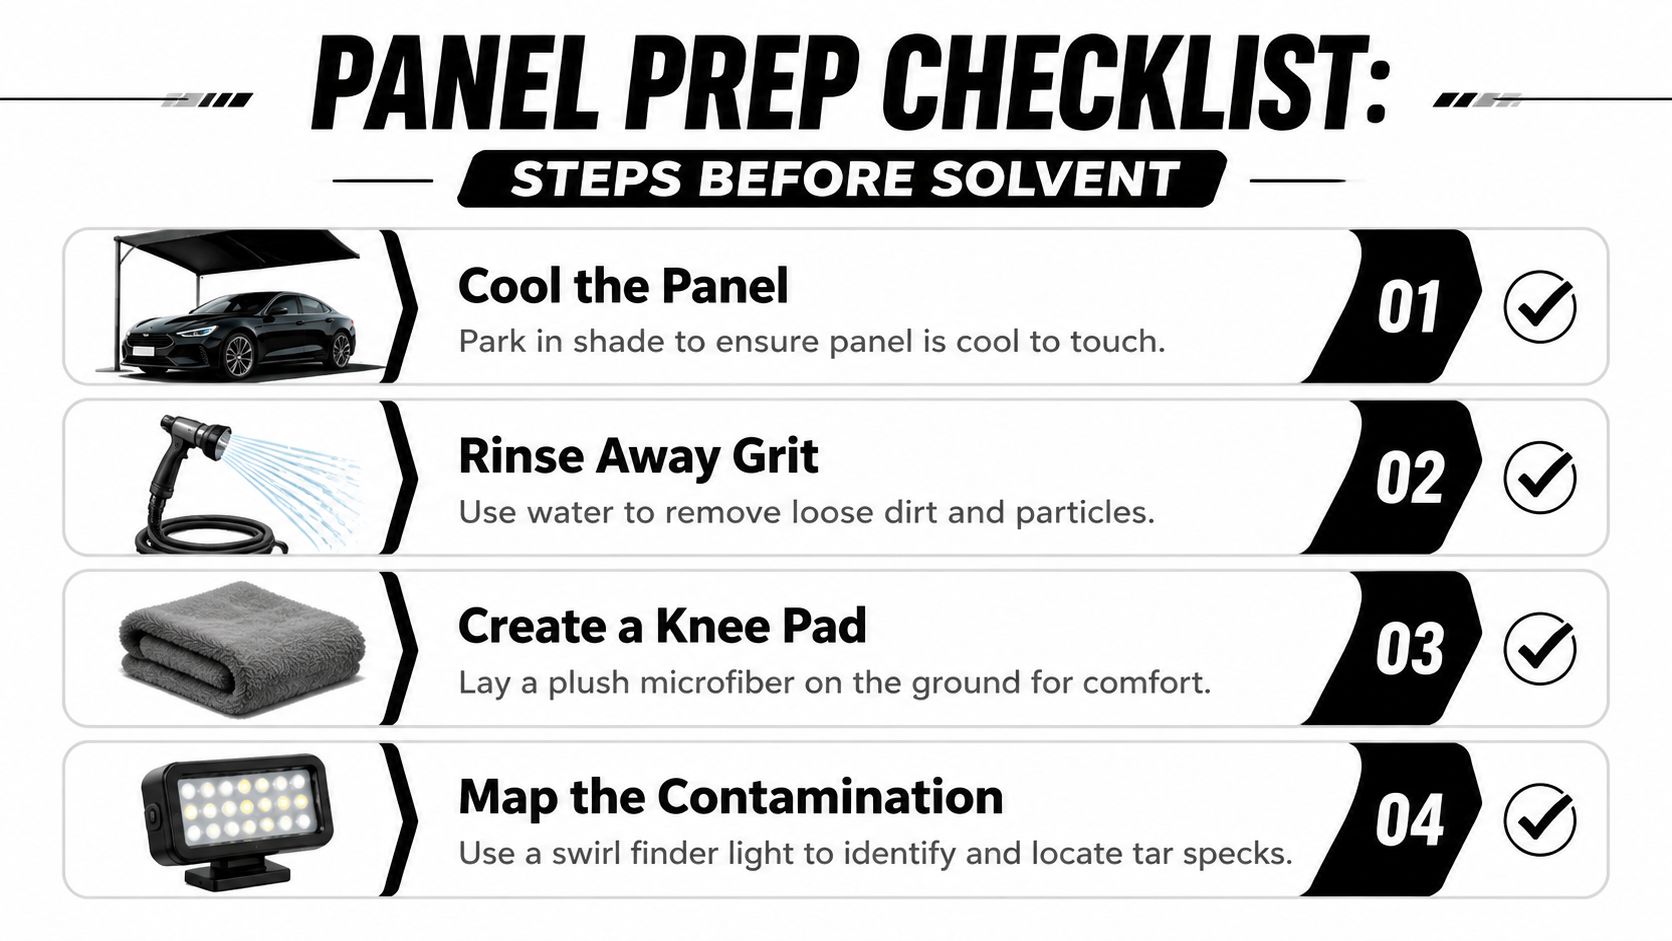
I start beside the fender, not with the bottle. The panel needs to be cool, shaded, and free of loose grit before solvent touches it. A tar remover can dissolve the black deposit, but it can't stop a sand particle trapped beneath a towel from dragging across the clear coat.
Rinse the vehicle or at least the affected area thoroughly. The purpose isn't to make the panel perfect. It's to remove loose road dust, sand, and dried mud that could turn a gentle wipe into abrasive contact.
Build a controlled working area
Park in shade and touch the panel with the back of your hand. If it feels hot, wait. Solvent behavior changes on hot paint, and a product that gives you manageable dwell time on a cool panel can flash too quickly or spread unpredictably in direct sun.
Lay a plush microfiber towel on the ground if you're kneeling beside a rocker panel. It sounds minor, but stable positioning helps you use light, deliberate pressure instead of leaning into the paint because your knee or shoulder is uncomfortable.
Use a bright LED inspection light to map the contamination. Look for tar dots, oily shadows, repaired areas, and edges where the deposit has reached trim or badges. Photograph the panel before applying anything, especially when working for a customer. That record shows the starting condition and helps distinguish old finish damage from anything discovered during cleaning.
Protect the vulnerable edges
Mask or shield matte plastics, porous trim, badge edges, decals, and exposed adhesives when practical. A major detailing reseller describes tar removers as solvent-based products that may be gentle on many painted surfaces and trim while still presenting a risk to plastics, adhesives, decals, and other sensitive materials. That makes localized application and prompt removal safer than saturating a whole panel.
Test a coin-sized area in an inconspicuous location, particularly on older paint, a repainted panel, soft single-stage finishes, or PPF. Apply a small amount, observe the surface, and wipe it away before proceeding.
For a broader preparation routine, use this car paint decontamination guide as a reference. The principle remains simple: cool the surface, remove loose grit, identify the contamination, and test before committing to the visible area.
Removing Tar the Right Way Without Marring Clear Coat
The towel should glide, not wrestle. I fold a clean microfiber into manageable sections, place the tar remover on the towel when working near trim or edges, and press it lightly over the spot. On open painted areas, follow the product label regarding direct application, but keep the treated area small enough that you control the dwell.
The goal is to soften the deposit before wiping. A short dwell of about 30 seconds to 2 minutes is common in practical detailing guidance, while PPF requires a much shorter dwell, around 30 seconds or less, according to CarPro TarX usage guidance. Don't let the product dry on the surface.
Let the solvent do the work
Watch the tar rather than the clock alone. It may bleed, wrinkle, or lose its grip. Once softened, use a straight, light rolling motion with the microfiber. Avoid circular scrubbing, fingernails, abrasive pads, gasoline, and lacquer thinner. Those methods can move softened grime across the finish or introduce a harsher chemical risk than the original contamination.
Turn to a clean towel face after the first pass. The first wipe dissolves and lifts the bulk of the tar. The second pass captures the oily residue left behind. If the spot remains, reapply rather than pressing harder.
If your wrist is doing the hard work, the tar probably hasn't softened enough.
Over-application creates its own problems. Watch for darkened plastic, hazed PPF edges, softened adhesive, damaged decals, or a visible halo where wax or sealant has been removed. A technical product guide recommends allowing the cleaner to react for roughly 2–3 minutes, while warning against leaving it on for more than 7–10 minutes. Longer dwell isn't automatically better.
Know when to change tools
Some contamination remains after the visible tar disappears. Rinse the panel, dry it, and inspect under direct light. If the surface still feels rough, use a clay bar or clay mitt only after chemical tar removal, with suitable lubrication and minimal pressure. This order reduces clay contamination and can lower the chance of marring.
The guide on what clay barring a car does is useful when you need to decide whether the remaining texture is bonded contamination rather than leftover tar. For related sticky contamination on painted surfaces, SwiftJet's tree sap removal guide offers another practical reference for controlled softening and wiping.
Comparing Tar Removal Products and DIY Alternatives
A customer once handed me a bottle of household solvent and asked why I didn't use it on a freshly corrected hood. The answer wasn't that it could never loosen tar. The problem was control. A product can dissolve the spot and still leave an oily film, strip surrounding protection, or react badly with nearby trim.
Dedicated automotive removers are formulated for sticky contamination such as tar, asphalt, grease, sap, and adhesive residue. Household products can be useful in an emergency, but they don't give you the same confidence about paint, coatings, plastics, or residue behavior.
| Product Type | Active Chemistry | Typical Dwell Time | Cost Per Use | Risk to Existing Protection | Best Use Case |
|---|---|---|---|---|---|
| Dedicated automotive tar remover | Citrus solvents, mineral spirits, d-limonene, or solvent blends | Short, product-dependent dwell | Usually modest for spot treatment | Can affect wax, sealants, plastics, adhesives, or decals if misused | Routine road tar and asphalt spatter |
| Household DIY solvent | WD-40, lighter fluid, kerosene, isopropyl alcohol, or nail-polish remover | Unpredictable and product-dependent | Often already available | Can leave residue or strip protection; acetone-based products are especially aggressive | Limited emergency use after testing |
| Detailing clay or clay mitt | Mechanical abrasion with lubricant | No chemical dwell, repeated passes | Moderate wear per job | Can mar paint if used on unsoftened tar or dirty panels | Fine bonded residue after chemical removal |
What the table doesn't show
A dedicated remover generally gives you a visible reaction and a defined wipe-and-rinse workflow. Isopropyl alcohol may remove oils, but it can underperform on thick, baked-on tar. WD-40 can loosen sticky deposits yet leave an oily film that complicates coating preparation. Kerosene and lighter fluid introduce stronger odor and handling concerns.
Nail-polish remover deserves special caution. Acetone-based formulas can strip wax and may dull or discolor sensitive finishes. Gasoline and diesel can dissolve tar, but their flammability, skin-contact risks, and aggressive effect on protection make them poor choices for a vehicle panel.
For routine spatter, choose a purpose-built Titan bug and tar remover and use it as a localized treatment. Keep clay as the finishing stage for residue that remains after chemical cleaning, not as the first tool against thick black dots.
The simple decision rule
Use a dedicated spray when the contamination is visible and sticky. Use a household product only when you understand the surface risk and have no better option. Reach for clay when the panel has been cleaned, rinsed, and dried but still feels rough under a clean hand.
That sequence protects the finish because each tool has one job. Solvent dissolves. Microfiber lifts. Clay removes what remains.
Tar Removers and Ceramic Coatings Compatibility Guide
Protection layers don't all respond the same way. Bare clear coat gives you the most direct view of the product's behavior, while wax and polymer sealants can lose performance after solvent contact. A cured ceramic coating usually tolerates brief, controlled exposure better, but no coating should be treated as immune to chemistry, heat, or careless dwell.
Strong petroleum distillates and aggressive citrus solvents may soften or remove wax and sealants in the treated area. A fast-flashing remover used briefly on a cured ceramic surface is often less disruptive, but the safest practice is still to test, keep the area small, prevent drying, and rinse promptly.
A practical compatibility check
Before spraying, confirm the coating has completed its stated cure period. Test an inconspicuous area, especially near a repaired panel, edge, decal, or PPF seam. Apply only enough product to dissolve the deposit, wipe with a clean microfiber, and rinse before the chemistry can dry.
The unresolved question for many owners is how much protection a remover removes. The answer depends on the product, the protection layer, the surface condition, and the dwell. Treat every tar spot as a localized maintenance event, then inspect the water behavior afterward instead of assuming the coating is unchanged.
Titan's approach adds a different material concept to this conversation. Its Elastomer coating technology is presented as hard like glass while remaining flexible, using nanotube technology and Dark Matter technology as part of its coating platform. Flexibility matters because coatings and vehicle panels experience temperature changes and impact. An elastomeric coating is designed to flex rather than behave like a purely brittle shell.
One coating specification demonstrates that flexibility can be measured, not merely described. It passed a 0°F half-inch bend test, with an application temperature starting at 50°F, according to the elastomeric coating specification. That doesn't establish performance for every automotive coating, but it illustrates the engineering principle behind flexible protection.
Why the membrane matters after tar removal
A rigid coating can be vulnerable when repeated thermal movement or impact creates defects. Titan's Elastomer membrane is positioned as a flexible layer that can accommodate movement and recover surface behavior after contact, while still providing a glass-like finish. The practical objective isn't to make tar impossible. It's to give contamination less opportunity to anchor tightly.
For a product-focused overview, see Titan's best car tar remover guide. Whether you choose an elastomeric system, a conventional ceramic coating, a sealant, or wax, follow the manufacturer's compatibility instructions rather than relying on a generic “safe for coatings” label.
Glass and Windshield Coatings for Stress-Free Rainy Drives
Tar rarely respects the hood line. Road film, bug residue, oily spray, and fine asphalt contamination can settle on the windshield, where the problem becomes visibility rather than appearance. A dirty windshield may smear under the wipers, scatter light at night, and make a rainy drive feel more demanding.
Glass needs its own preparation. Wash it, remove bonded contamination with suitable glass-safe clay, and use isopropyl alcohol to remove polishing oils or residue. Work in straight, overlapping passes when applying a glass coating, then respect the product's cure instructions before driving.
The visibility payoff
A hydrophobic glass coating changes how water behaves on the surface. Instead of forming a broad, uneven film, droplets gather and move more readily as the vehicle travels. That can reduce the amount of wiper work required, although visibility still depends on speed, rain intensity, wiper condition, lighting, and the cleanliness of the glass.
Titan's APEX Glass Ceramic Coating is designed for windshield and glass use, with an application process intended to be approachable for detailers and DIY users. The product fits the larger protection strategy because clean glass keeps the driver's view clear while protected paint reduces the effort required to maintain the bodywork.
The same discipline applies here as on paint. Don't coat over oily residue. Don't rush the wipe. Don't drive before the coating has reached the stated cure condition.
A complete hydrophobic envelope
Titan's Dark Matter technology is part of the company's broader coating platform, while its glass product is aimed at silica-based surfaces such as automotive glass. The useful connection is practical: a vehicle can have protected paint and neglected glass, or it can have a coordinated exterior surface where both areas are prepared and maintained deliberately.
A nanotube-based automotive coating report describes a carbon-nanotube coating that absorbed 99.9% of visible light and survived storage, water, humidity, and adhesion tests, as reported by The Brighter Side. That example concerns specialized optical coating behavior, not a guarantee for every automotive glass or paint product, but it shows why nanotube technology attracts attention in advanced coatings.
After the tar is removed from the paint, finish the job where the driver looks most often. Clean, coated glass is the visible reminder that surface preparation is about more than shine.
Sealing the Clean Paint So Tar Has Nothing to Stick To
The hood from my opening scene looked better after removal, but it wasn't finished. Tar had been dissolved and lifted, yet the treated areas needed protection restored. Leaving freshly decontaminated paint bare creates an uneven surface and gives the next road film a clean place to settle.
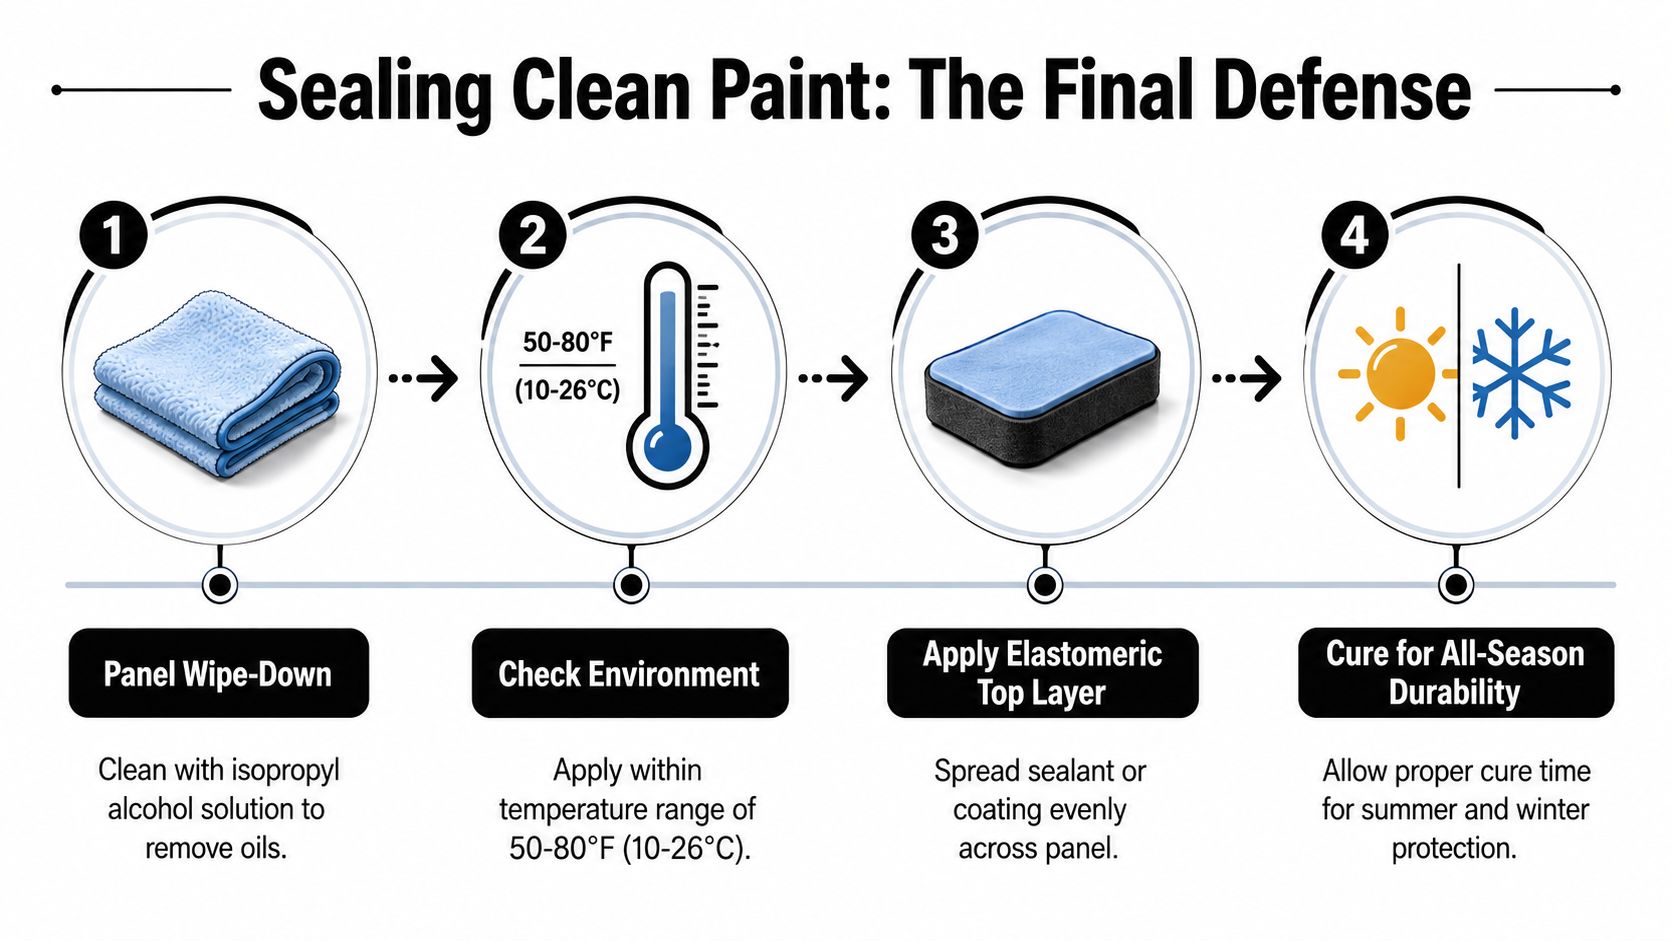
Start with a final panel wipe using an appropriate isopropyl alcohol solution to remove oily residue. Work on a cool, clean panel and follow the coating manufacturer's environmental requirements. The supplied applicator should spread the product evenly, with overlapping passes that keep coverage consistent without flooding edges or trim.
Flexible protection for changing conditions
Titan's Elastomer coatings are positioned as hard like glass and flexible, which is the central reason they suit vehicles exposed to repeated temperature changes and road impact. The flexibility is intended to help the coating move with the surface rather than crack when conditions shift from frozen temperatures to hot ones.
That flexibility also matters where bugs strike and where lower panels receive road debris. A durable membrane won't prevent every mark, but a smooth, resilient surface can make routine cleaning less aggressive. When fresh tar lands, the aim is to dissolve it quickly and wipe it away without needing force.
The best tar-removal session ends with protection restored, not merely with the black spot gone.
Apply according to the exact product instructions, including temperature, flash behavior, leveling, buff-off, and cure time. Don't assume that one coating's application window applies to another. For comparison and product-selection context, review this guide to the best automotive paint sealant.
Choose the finish that matches your workflow
Alpha Quartz is presented by Titan as an elastomer coating intended for straightforward installation, including DIY and mobile detailing work. Ultra Ceramic Spray is another option for owners and professionals who want a spray-applied coating format, with application details available on Titan's Ultra Ceramic Spray product page.
The broader point is control. A clean surface, a measured application, and a fully cured protective layer give tar fewer opportunities to bond strongly. Titan's shop provides access to its coating range through the Titan Coatings product shop, where users can compare formats before choosing a maintenance system.
After the final wipe, inspect the panel under direct light. The black specks should be gone, the surface should feel uniform, and the protection should be ready to face the next stretch of road.
APEX NANO – Titan Coatings offers coating options for the complete maintenance cycle, from removing tar and road film to protecting paint and improving visibility through treated glass. Visit APEX NANO – Titan Coatings to explore Alpha Quartz, glass coating, and spray-applied protection for your next detail.
0 Comments