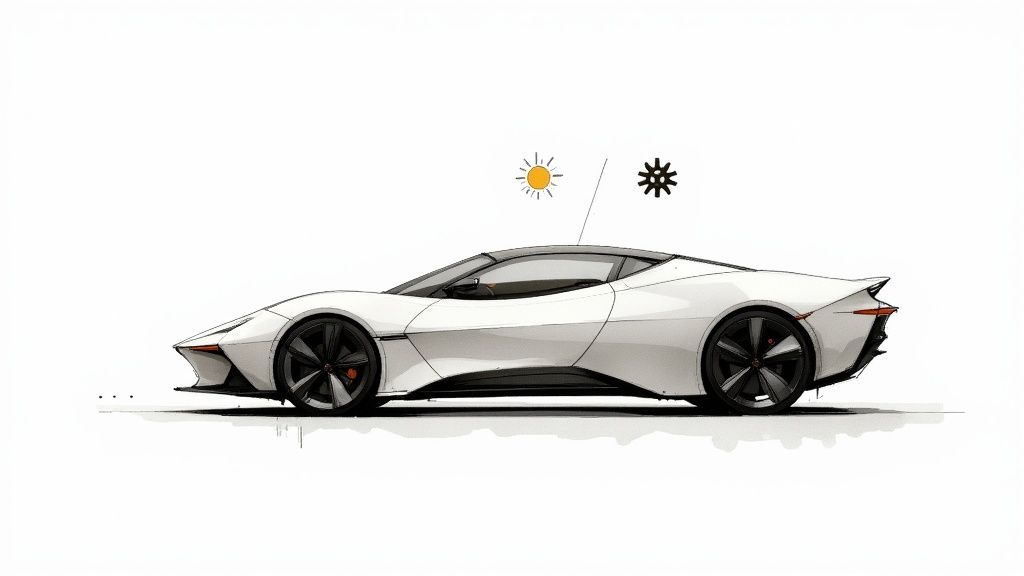
So you’ve just had your car ceramic coated, and it looks incredible. That deep, wet gloss is something special, isn’t it? But here’s something a lot of people miss: that showroom shine isn’t a one-and-done deal. It’s the beginning of a relationship with your car’s finish. Too many people think a ceramic coating is an invincible force field, but the real secret to keeping that stunning look for years is simple, consistent ceramic coat maintenance.
This guide is here to walk you through it, turning what might seem like a chore into a simple, rewarding routine.
Why Your Coating Needs a Little Upkeep
You made a smart investment to protect your paint. Now, let’s make sure you get the most out of it. Proper maintenance isn’t about damage control; it’s about being proactive to keep the coating in peak condition from day one. It’s how you ensure that water keeps beading like wild, the gloss never fades, and the protection stands strong against whatever the road throws at it.
And this isn’t just about looks—it’s about value. The global market for ceramic coating maintenance is already a $1.9 billion industry in 2024 and is on track to hit $4.3 billion by 2033. That boom tells you one thing: people are realizing that proper care extends a coating’s life and protects their car’s value.
What Makes Titan Coatings Different?
To take care of your coating, it helps to understand what it’s made of. Most traditional ceramic coatings are basically a super-thin layer of glass. They’re incredibly hard, which is great, but they can also be brittle. Over time, that rigidity can be a weakness.
This is where we decided to change the game. Titan Coatings was the first company to introduce elastomer coatings to the market, pioneering a new standard for durability with our nano tubes technology and proprietary Dark Matter tech. The result? Our elastic coatings are hard like glass but also incredibly flexible.
Think of it this way: a standard window pane will shatter if you hit it. But a sheet of reinforced plexiglass can absorb the impact and flex. Our elastic coatings act more like that plexiglass, giving you the best of both worlds.
This unique flexibility delivers some serious real-world advantages:
- Ready for Any Weather: Our coatings can expand slightly in the summer sun and contract in frozen temperatures without forming the tiny micro-cracks that degrade other coatings. The flexibility prevents them from cracking down due to temperature changes.
- Built to Absorb Impacts: The flexible layer helps absorb minor impacts from road debris and vibrations, dramatically reducing the risk of chipping that plagues brittle coatings.
- In It for the Long Haul: Because it can flex and adapt, the bond with your car’s paint stays stronger for much, much longer. You get to enjoy that flawless finish for years, not months.
The First Step is the Most Important
Before you even think about that first wash, you have to let the coating do its thing. The initial curing period is absolutely critical. This is when the coating is forming a permanent chemical bond with your vehicle’s clear coat.
Get this part right, and you’re setting the foundation for years of easy maintenance and incredible performance. If you want to dive deeper into the science, learning how long a ceramic coating takes to cure is a great place to start. It’s the first—and most crucial—step in your maintenance journey.
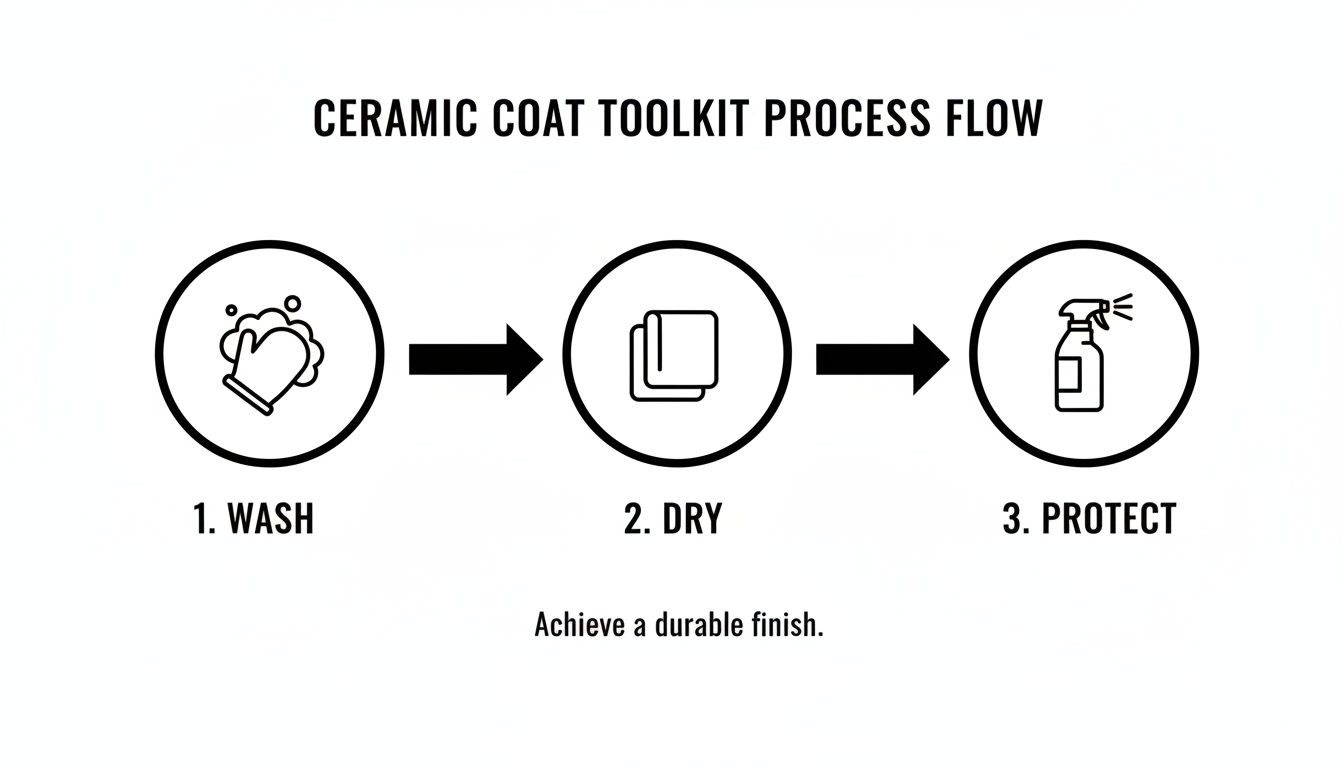
Building Your Essential Maintenance Toolkit
Before a single drop of water touches your car, let’s talk about getting your gear in order. This is easily the most critical part of keeping a ceramic coating looking and performing its best. Using the wrong stuff is like scrubbing a fine watch with sandpaper—you’re not just cleaning it; you’re causing real, lasting damage that dulls the gloss and weakens that protective shell you paid for.
Think of your maintenance toolkit less like a bucket of random car wash supplies and more like a specialized set of instruments. Your mission isn’t just to get the dirt off. It’s to do it without waging war on the sophisticated chemistry of the coating itself. Honestly, this is where most people trip up, grabbing whatever soap is on sale and accidentally causing micro-scratches or chemically degrading the surface.
Why Safe Cleaning Isn’t Just a Buzzword
The absolute cornerstone of your kit has to be a pH-neutral car shampoo. I can’t stress this enough. It’s not just marketing fluff; it’s a scientific necessity. Soaps that are too alkaline or acidic will literally etch the coating’s surface, killing its water-beading magic and leaving it looking flat and tired.
The way you wash matters just as much as what you wash with. The two-bucket wash method, with a grit guard in each bucket, is non-negotiable for anyone serious about their car’s finish. One bucket is for your soapy water, the other for clean rinse water. Dipping your mitt in the rinse water first traps all the grit and grime at the bottom, preventing you from dragging those abrasive particles right back across your paint. This simple technique is your number one defense against swirl marks.
Your tools are just as crucial. Plush microfiber wash mitts and dedicated drying towels are designed to gently lift dirt and absorb water without leaving a trace. If you have any old cotton towels, rough sponges, or worn-out wash rags in your kit, do yourself a favor and throw them out. Right now.
The Secret Weapon for Your Toolkit
While the right shampoo and towels are your front-line defenders, you also need a way to actively boost your coating. That’s exactly why we developed Titan Coatings’ Hyper-Rinse. It’s not just another rinse aid; it’s a maintenance powerhouse engineered from the ground up to work in perfect harmony with our unique elastomer coatings.
I remember watching our chemists go back and forth on the formula. The goal was bigger than just making water sheet off the car faster. The real challenge was creating something that could chemically bond with the flexible, nano-structure of a Titan coating. After countless tests, they nailed it—a simple spray-on, rinse-off solution that does three critical jobs at once:
- Cleans on a Chemical Level: It helps lift away any stubborn contaminants that have bonded to the surface.
- Supercharges the Hydrophobics: It instantly brings back that jaw-dropping water-beading you love.
- Adds a Sacrificial Layer: It lays down an ultra-slick protective layer that takes the daily abuse from the elements, preserving the powerhouse coating underneath.
Using Hyper-Rinse turns a routine wash into a full-blown restorative treatment. It’s the easiest way to guarantee your coating is always performing at its absolute peak.
Safe vs Harmful Maintenance Products
To make shopping for supplies straightforward, I’ve put together a quick-reference table. This breaks down exactly what you should be looking for and, more importantly, what to leave on the shelf. Choosing the right product from our shop is the difference between preserving your investment and slowly destroying it.
| Product Type | Safe for Ceramic Coatings | Harmful to Ceramic Coatings | Why It Matters |
|---|---|---|---|
| Car Shampoo | pH-neutral, pure soap formulas. Look for products without added waxes or “wash and wax” claims. | Dish soap, all-purpose cleaners, or shampoos with heavy waxes or degreasers. | Harsh chemicals strip the coating’s top layer, while waxes clog its pores, reducing hydrophobicity. |
| Wash Media | High-pile microfiber wash mitts or dedicated foam wash pads. | Rough sponges, bristle brushes, or old cotton towels. | Abrasive materials create fine scratches (swirls) that dull the finish, even on a hard coating. |
| Drying Media | Large, plush microfiber drying towels or a filtered air blower (leaf blower). | Chamois cloths, water blades, or standard bath towels. | Improper drying can leave behind mineral deposits (water spots) and inflict scratches. |
| Contaminant Removal | Iron removers and synthetic clay mitts/towels. | Aggressive, traditional clay bars or abrasive polishing compounds. | Harsh decontamination can mar the coating. For more on this, check out our detailed guide on what a clay bar treatment involves. |
Ultimately, building the right toolkit is about working with your coating, not against it. By investing in the proper supplies from the start, you’re ensuring that incredible gloss, protection, and ease of cleaning will last for years to come.
The Perfect Maintenance Wash Ritual
Washing a ceramic-coated car isn’t about brute force; it’s a craft. You can forget about those tunnel-of-terror automatic car washes with their paint-slapping brushes. The right approach is more like a satisfying ritual that keeps that unbelievable gloss looking its best and protects your investment. It’s all about working smart, not hard, and letting the coating do its job—making your life easier.
Let’s walk through what a proper maintenance wash looks like. Picture this: it’s been a week or so, and your car is covered in a light film of dust and road grime. Instead of seeing a chore, you should see an opportunity. This is your chance to bring back that flawless, just-detailed shine. You grab your gear, not because you have to, but because you know you’re doing it the right way.
Start with a Touchless Approach
First things first, let the water do the work. The pre-rinse is non-negotiable. Grab your pressure washer and, starting from the top down, systematically blast away all the loose grit, dust, and mud. This single step can safely remove up to 80% of the junk on your paint before a mitt ever makes contact. It’s the best insurance policy against wash-induced scratches.
Next up is the foam cannon, a true game-changer for ceramic coat maintenance. Drench the entire car in a thick blanket of pH-neutral suds. This isn’t just for show; the foam clings to every surface, softening and encapsulating any remaining dirt particles, gently lifting them away from the coating. You’re basically breaking the grime’s grip on a chemical level, which makes the hand-washing stage dramatically safer.
The Two-Bucket Hand Wash Method
Now we get to the heart of the matter: the classic two-bucket hand wash. Your technique here is everything. One bucket is for your pH-neutral car shampoo solution, and the other holds clean rinse water. Make sure both have a grit guard at the bottom—this little plastic insert is key to trapping dirt.
Here’s the rhythm you want to get into:
- Load up your plush microfiber wash mitt in the soapy water.
- Gently wash one panel at a time—the roof, the hood, a door—using straight-line motions. Absolutely no aggressive circular scrubbing. That’s how swirl marks are born.
- Before reloading with soap, dunk that dirty mitt into the clean rinse bucket. Agitate it against the grit guard and watch the grime fall to the bottom.
- Now, wring out the mitt and go back to your soap bucket for a fresh, uncontaminated load of suds.
This methodical process guarantees you’re only ever touching the paint with clean, lubricated suds, not dragging the same grit all over your car. Always work from the top down, saving the dirtiest parts like the lower doors and bumpers for the very end.
For a deeper dive into the best soaps for the job, our complete guide to choosing the right ceramic car wash has all the details you need.
The All-Important Drying Process
The final act—drying—is arguably the most critical. Letting a car air-dry is a one-way ticket to water spots. These are nasty mineral deposits left behind by evaporated water, and they can be stubborn enough to etch into your coating if ignored. The goal is to get every last drop of water off the surface, safely.
The two best ways to do this are with forced air or a high-quality drying towel. A leaf blower or dedicated car dryer is fantastic for blasting water out of every panel gap, mirror housing, and trim piece. Alternatively, you can use a large, ultra-plush microfiber drying towel. The trick is to lay the towel flat on a panel and gently pat it dry, or carefully drag it in one direction. Never aggressively rub the paint.
This simple workflow is the key to maintaining your coating’s performance and appearance.
When you nail this process, you’re not just washing your car; you’re preserving its protective layer. Step back, look at that perfect, spot-free gloss, and you’ll understand why taking the time to do it right is always worth it.
Reviving Your Coating with Decontamination
Even if you’re religious about your wash routine, your car is constantly battling invisible enemies. Over time, microscopic iron particles from brake dust, stubborn specks of tar, and sticky tree sap inevitably grab onto your coating. These contaminants create a rough, almost gritty feeling that completely smothers your coating’s slickness and weakens its water-beading magic, leaving it looking flat and tired.
This is exactly why decontamination is so critical. Think of it as a deep-cleansing facial for your car’s paint, a process you should plan on doing every six to twelve months to completely reset your coating’s performance.

A regular wash just skims the surface. Decontamination goes deeper, chemically and physically prying out the embedded grime that has anchored itself into the coating. It’s the difference between a quick sweep and a full-on deep scrub.
The Chemical Deep Clean with Iron Removers
The first move in this revival is chemical. An iron remover is a specialized spray that’s laser-focused on dissolving ferrous (iron) particles dug into your finish. Trust me, these particles are tiny, sharp, and can do serious damage if you try to scrub them off without loosening them up first.
The process itself is simple and, honestly, pretty satisfying to watch. After a thorough wash and dry, you just spray the iron remover generously across a cool panel. Within moments, you’ll see the “bleeding” effect—the clear liquid turns a dramatic purple as it chemically reacts with and dissolves the iron. That color-changing reaction is your proof that the product is working its magic, safely melting away those microscopic metal shards into a solution you can just rinse away.
Restoring That Glass-Like Smoothness with a Clay Mitt
Once you’ve rinsed off the iron remover, the metallic fallout is gone, but you might still have other bonded crud like tar or tree sap clinging on. This is where a little physical persuasion comes in. But forget the old-school, aggressive clay bars; those can easily mar a coating if you’re not careful. The modern, much safer tool for the job is a synthetic clay mitt or towel.
These tools use a high-tech rubber polymer layer that glides over the paint, gently plucking out any remaining embedded contaminants.
- First, generously lubricate the panel with a good clay lube or even a slick pH-neutral shampoo mix. You can’t use too much.
- Next, glide the mitt over the surface using straight-line motions and very light pressure. You will literally feel the surface transform from gritty to glass-smooth right under your hand.
- Rinse the mitt often to clean off any gunk it has picked up. You don’t want to be dragging that stuff back across the paint.
This step is what brings back that silky, satisfying feel to your ceramic-coated paint. For a more detailed walkthrough, check out our complete guide on how to properly decontaminate car paint to make sure you nail it.
The Final Touch: A True Elixir for Your Coating
Now the surface is perfectly clean and smooth. It’s time for the final, most rewarding part of the process: revival. You’ve stripped away everything holding your coating back, and now it’s time to feed it. This is where a specialized topper comes in, one designed to bond with and replenish the coating.
This is exactly why we engineered Titan’s Liquid-Gloss. A friend of mine, Mark, who is an absolute fanatic about his black Porsche, was convinced his coating was failing after about a year. The water beading was lazy, and the gloss just wasn’t popping. I walked him through this exact decontamination process and then handed him a bottle of Liquid-Gloss.
This isn’t just a spray that sits on top; it’s a true rejuvenating elixir formulated specifically for our elastomer coatings. It replenishes the coating’s top layer, cranking up the gloss to unbelievable levels and supercharging its hydrophobic power.
The next day, he sent me a video of water flying off his hood like it was scared of the paint. He was completely blown away. “It looks better than the day I got it coated,” he said. That’s the power of a proper decontamination and revival.
This whole process is vital because a well-maintained coating is your absolute best defense. That incredible water behavior, where water contact angles can hit 110-120 degrees, is what repels 95% of contaminants. But without pH-neutral soaps and a proper decontamination every six months, silica-based layers can degrade 25-35% faster. The numbers from pro detailers don’t lie: properly maintained coatings slash the risk of swirls by 80%. That’s a shocking figure, especially when you learn that 70% of all paint damage comes from improper washing.
Oops… Common Maintenance Mistakes and How to Fix Them
Look, we’ve all been there. You spend all this time and money getting a perfect ceramic coating, and then one small slip-up makes you think you’ve ruined it. Before you panic, take a deep breath. A top-tier coating is built to be tough, and this is where the flexible nature of an elastomer like Titan really comes into its own, giving you a buffer that rigid, old-school ceramics just don’t have. Let’s talk through a few of those “oh no” moments and the simple ways to walk them back.
I Took It Through an Automatic Car Wash… Now What?
It happens. You were in a rush, it was the only option, and now you’re staring at a dull finish where your glossy, water-beading car used to be. Did you just flush your investment down the drain?
Almost certainly not. The real villain in most automatic car washes isn’t just the swirling brushes (though they’re not great), it’s the brutally harsh, high-alkaline soaps they use. These detergents are designed to strip away grime aggressively, and in the process, they can leave behind a film that clogs up your coating, completely smothering its hydrophobic properties.
The Fix:
Thankfully, the solution is usually straightforward: a good decontamination wash. Give the car a proper hand wash using a pH-neutral shampoo. Follow that up with an iron remover to pull out any embedded brake dust and industrial fallout. This one-two punch will dissolve that chemical gunk from the car wash, unclog the coating’s pores, and bring back that slick, water-hating surface you love. The good news? The flexible structure of a Titan coating is far more resistant to the micro-scratching those abrasive brushes can cause.
My Car Stopped Beading Water!
Watching water fly off your paint is half the fun of having a coating. So when it stops beading and starts holding onto water in big, flat “sheets,” it’s easy to think the coating is dead. But a loss of beading is almost never a sign of coating failure. It’s a sign of a dirty surface.
Think about it: your car is constantly battling road film, exhaust fumes, oils, and all sorts of grime. Over weeks and months, this stuff builds up into an invisible layer on top of your coating. The water isn’t touching your coating anymore; it’s interacting with that layer of crud.
Your coating is still there, working hard underneath. It’s just being smothered by a layer of traffic film that needs to be removed. Think of it like a high-performance athlete wearing a heavy, dirty coat—the power is still there, just hidden.
A proper decontamination, just like we talked about above, is the fix. A deep chemical clean breaks down that bonded-on grime and reveals the slick, super-hydrophobic surface that was hiding underneath all along.
Those Dreaded Water Spots Won’t Budge
Water spots are the bane of every car enthusiast’s existence. They’re just mineral deposits (mostly calcium and magnesium) left behind when water evaporates. If you let them sit and bake in the sun, they can actually etch into the coating’s surface, leaving a stubborn blemish that a normal wash won’t touch.
If the spots are fresh, a quick detailer spray and a soft microfiber towel will often wipe them away. For the ones that have put up a fight, you’ll need a dedicated water spot remover. These are formulated with mild acids that dissolve the minerals without damaging your coating. Just apply a little to a microfiber, gently wipe the affected area, and rinse it thoroughly. It’s worth remembering that the Titan Vulcan TX155, our flagship elastomer, is engineered with Dark Matter technology for superior chemical resistance, which buys you more time to get these spots off before they cause any real trouble. You can see how it stacks up against other options on our coating comparison page.
Your Ceramic Coat Maintenance Questions Answered
Even after getting the full rundown on how to care for your new coating, questions are bound to pop up. I get it. You’ve made a serious investment in your vehicle’s protection, and you want to do it right. Let’s tackle some of the most common questions I hear from owners just like you, so you can feel 100% confident in your maintenance routine.
How Often Should I Wash My Ceramic Coated Car?
This is the big one, and the honest-to-goodness answer is, “it depends.” It really comes down to how you use your car.
If it’s your daily driver, getting a good maintenance wash in every one to two weeks is the sweet spot. That’s frequent enough to keep road film and everyday grime from building up and starting to smother your coating’s awesome water-beading effects.
Now, if you’re dealing with more aggressive stuff—bird bombs, a swarm of bugs on the front bumper, or road salt in the winter—you need to wash it off as soon as possible. Don’t let that stuff sit. The great news? A quality coating makes these quick washes a breeze. A simple, gentle wash is way less of a chore than it was on your old unprotected paint.
Can I Use Wax On Top Of My Ceramic Coating?
Please don’t. This is a hard “no,” and it’s probably one of the biggest mistakes I see people make. There’s this myth that adding a layer of old-school carnauba wax or a sealant will add even more protection. It actually does the complete opposite.
Think about it: those products were designed for paint, not the slick, glass-like surface of a ceramic coating. They have nothing to bond to. All they do is smear over the top, creating an oily, greasy film that completely kills the coating’s hydrophobicity and becomes a magnet for dust and dirt.
The only product that should ever touch your coating is a dedicated SiO2-based maintenance spray. These are chemically engineered to bond with the ceramic layer, effectively “feeding” it to boost gloss and bring that wild water-beading back to life.
What Is The Difference Between A Clogged And A Failing Coating?
Knowing this difference will save you a lot of unnecessary stress. A “clogged” coating is simply one that’s buried under a layer of bonded contamination. We’re talking road film, mineral deposits from hard water, and traffic grime that a regular wash won’t remove. This gunk masks the surface, making it look like the coating has failed because water stops beading so aggressively. The good news is the protection is still there, perfectly fine, just hidden. A proper decontamination wash almost always brings it right back.
A truly failing coating, on the other hand, is showing actual physical breakdown. You’d see it peeling, chipping, or having large, obvious patches where the protection is just gone. Honestly, this is incredibly rare with a professionally installed, high-quality flexible coating like ours. Titan’s elastomer technology allows the coating to flex with your vehicle’s body panels as they expand and contract, so it maintains its bond and integrity far better than old, brittle ceramics.
Is A Professional Maintenance Service Necessary?
While you can definitely keep your coating in fantastic shape with at-home washes, bringing it to a pro once or twice a year is a game-changer. A professional detailer has the right chemicals and tools to perform a deep, safe decontamination, inspect the coating’s health under specialized lighting, and apply a pro-grade topper to really recharge it.
Think of it as an annual check-up for your car’s armor. This little bit of expert attention is the single best way to guarantee you get the maximum performance and lifespan out of your investment. If you’re wondering just how long that can be, you can learn more about how long a professionally maintained ceramic coating can last right here. It really shows how proper care pays off in the long run.
Ready to give your coating that “just applied” look and feel? The Titan Coatings Liquid-Gloss was engineered as the perfect revival spray for our advanced elastomer coatings. It restores that amazing gloss and supercharges its hydrophobic power. Discover Titan’s Liquid-Gloss in our shop today.
0 Comments