If you’re ready to give your car a durable, brilliant shine that genuinely rivals what the pros can do, a DIY ceramic coating kit is the way to go. This isn’t just a step up from traditional waxes; it’s a whole new level of long-term surface protection you can achieve right in your own garage, preserving your vehicle’s condition and value for years to come.
Why a DIY Ceramic Coating Kit is a Game-Changer
Applying a professional-grade finish at home isn’t some far-off dream anymore. The detailing market has evolved, putting the power to get stunning, long-lasting results directly into the hands of car enthusiasts. You benefit from advanced yet user-friendly formulas that make the entire process straightforward.
The numbers don’t lie. The market for DIY-focused ceramic coating kits is on track to hit an incredible USD 4.5 billion by 2033, growing at a 15.1% CAGR. This massive shift shows a clear trend: more and more car lovers are taking paint protection into their own hands. You can see more about these market trends and dive into the research for yourself.
To put it simply, a high-quality DIY ceramic coating kit provides a host of benefits that old-school waxes just can’t match.
DIY Ceramic Coating Benefits at a Glance
| Feature | Benefit for Your Vehicle | Your Titan Coatings Advantage |
|---|---|---|
| Durability | Offers protection measured in years, not weeks. | You get a resilient, semi-permanent shield thanks to our exclusive HyperQuartz® technology. |
| Hydrophobicity | Water, mud, and grime bead up and slide right off. | Your car stays cleaner for longer because our formulas are engineered for an intense water-beading effect. |
| Gloss & Depth | Delivers a deep, “wet look” shine that enhances color. | You’ll see unmatched clarity and reflection as the coating fills microscopic imperfections in your clear coat. |
| Chemical Resistance | Guards against acidic rain, bird droppings, and bug splatter. | Your factory paint is protected from harsh contaminants because the coating acts as a tough sacrificial layer. |
These coatings aren’t just about looks; they’re about creating a robust, functional barrier that simplifies maintenance and preserves your investment.
The Titan Coatings Advantage
So, what really sets a premium DIY ceramic coating kit apart from the rest? It all comes down to the science. Unlike a simple wax that just sits on top of the paint, our coatings form a semi-permanent chemical bond with the surface. This means you benefit from a tough, microscopic shield created by our exclusive bonding technologies.
This bond delivers some serious real-world benefits for you:
- Superior Hydrophobicity: Your wash days become faster and easier because our formulas are engineered to create an intense beading effect, allowing water, mud, and road grime to slide right off.
- Enhanced Gloss and Depth: Your paint’s color will pop with a deep, wet-look shine because the coating fills in the tiny imperfections in your clear coat.
- Durable Environmental Protection: Your factory paint is preserved because the coating acts as a sacrificial barrier, taking the hit from harsh UV rays, acidic bird droppings, and bug guts.
By making the application process straightforward, a quality DIY ceramic coating kit empowers you to install long-term, professional-grade protection. It’s all about giving you control over how your vehicle looks and how well it’s preserved.
From Old-School Waxing to Modern Protection
For decades, carnauba wax was the go-to for a brilliant shine. It works, but the protection is temporary—you’re lucky if it lasts a few weeks. A DIY ceramic coating kit represents a fundamental shift in how we care for our cars.
Here’s the best way to think about it: wax is like a temporary jacket for your car, easily washed away by a few storms or trips to the car wash. A ceramic coating, on the other hand, is like a permanent suit of armor. You get lasting defense because our proprietary formulas, like HyperQuartz®, are designed specifically to ensure your investment stays protected for years, not months.
In this guide, we’ll walk you through every step to get that exact result.
How to Choose the Right DIY Ceramic Coating Kit
Picking the right DIY ceramic coating kit isn’t about finding a single “best” product. It’s about matching the right technology to your car, your climate, and what you ultimately want to achieve. With a crowded market, knowing what separates a great kit from a mediocre one is the key to getting the results and longevity you’re paying for.
This isn’t just a niche hobby anymore. The DIY ceramic coating scene has exploded, becoming a huge part of the global coatings market. It’s interesting to see how priorities shift depending on where you are. Here in North America, a lot of us are looking for a great balance of value and ease of use. Meanwhile, enthusiasts in Europe and Asia often lean towards high-tech formulas built for extreme durability. This boom, especially stateside, is driven by people like us who want professional-grade results from our own garages. For a closer look at the market forces at play, you can explore the research on ceramic coating trends.
What all this means is that the perfect coating for a daily driver baking in the Arizona sun is going to be very different from the one you’d choose for a weekend car in a damp, industrial city.
Aligning Durability with Your Goals
First things first: how long do you need this protection to last? DIY kits can range anywhere from one year to over eight years, and there’s no right or wrong answer. It all comes down to your goals.
- 1-3 Year Coatings: These are fantastic for leased cars or for detailers who just love the process of reapplying and trying new products. You get all the gloss and water-beading action without a long-term marriage to the product.
- 5-8+ Year Coatings: If you’re after maximum, set-it-and-forget-it preservation, this is your territory. You get a tough, semi-permanent layer that stands up to the elements for years because our kits are built with HyperQuartz® technology.
Think of it this way. A short-term coating is like a pair of high-performance running shoes—amazing for its purpose, but you know it has a limited lifespan. A long-term coating is more like a premium hiking boot, built from the ground up to endure season after season of abuse.
When you choose a coating with a longer lifespan, you’re investing in a more concentrated, robust formula. It’s a serious commitment to preserving your vehicle’s finish for the long haul.
Matching the Formula to Your Climate and Environment
Where you live and drive plays a massive role in how a coating performs. A formula that’s a rockstar in one climate might fall short in another. This is where specialized technology really starts to matter.
For instance, if you’re in a place with intense, year-round sun, you absolutely need a coating with top-tier UV inhibitors. You’ll get premium defense against the harsh UV rays that cause paint to oxidize and fade, because our proprietary Dark Matter Technology® was developed precisely for this purpose.
On the other hand, if your car battles industrial fallout or heavy road salt in the winter, your main priority should be chemical resistance. You need a coating that can shrug off acidic contaminants and corrosive grime. With a kit that has a high-purity silica dioxide (SiO2) concentration, you’ll benefit from a denser, more resilient barrier against that kind of chemical assault.
While a ceramic coating provides incredible chemical resistance, some owners want the ultimate defense against physical impacts like rock chips. To see how these two protection methods stack up, check out our guide on paint protection film vs. ceramic coating.
Understanding the Technology Inside the Bottle
Beyond how long it lasts or how it handles the weather, the science behind the coating is what truly separates the best from the rest. A premium DIY ceramic coating kit is defined by its chemical formulation and how it bonds to the paint. Look for brands that are upfront about their technology.
You benefit from a level of resilience and bonding strength that you just don’t find in typical consumer products, because our formulas began as military-grade polymers adapted for automotive use. This advanced chemistry translates directly into better real-world performance and a finish that actually lasts, thanks to a more complete, tenacious bond with your clear coat.
By zeroing in on these key factors—durability, climate-specific features, and proven technology—you can confidently pick a kit that will not only meet but exceed your expectations.
Mastering the Art of Surface Preparation
Think of your car’s paint as a canvas. You wouldn’t start a masterpiece on a dirty, flawed surface, and the same rule absolutely applies when you’re working with a diy ceramic coating kit. The secret to that jaw-dropping, mirror-like finish isn’t just in the bottle—it’s in the meticulous prep work you do long before the coating ever touches the paint.
A perfect bond requires a perfectly clean and smooth surface. Honestly, skipping any part of this process is the number one reason DIY applications fail. The coating simply can’t grab onto a contaminated or imperfect clear coat. This isn’t just a recommendation; it’s a non-negotiable part of the job if you want peak performance and that signature deep gloss.
Starting with a Foundation of Clean
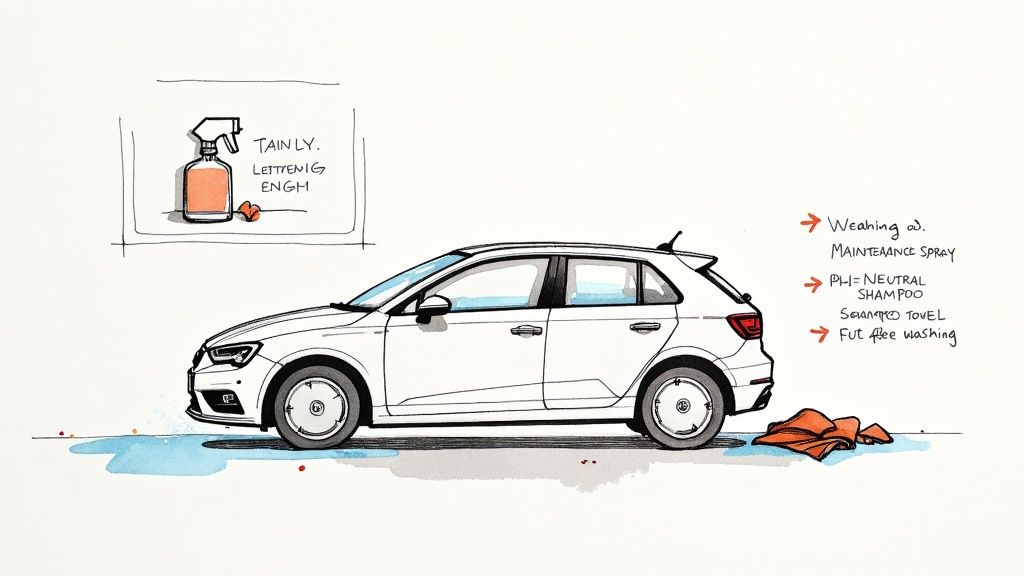
The journey begins with the most fundamental step in detailing: a thorough wash. And no, I don’t mean a quick run through the local automatic car wash. This is a deliberate process designed to get rid of all the loose dirt and grime without adding any new scratches into the mix.
The two-bucket wash method is a pro standard for a reason. You have one bucket for your pH-neutral soap solution and another with plain rinse water. By rinsing your wash mitt in the clean water bucket before reloading it with soap, you trap the dirt at the bottom instead of dragging it right back across your paintwork.
As professional detailers, we know that 95% of swirl marks come from improper washing and drying. A careful, methodical wash is your first line of defense in preserving your paint’s integrity before you even think about coating it.
Once you’re done with the final rinse, grab a high-quality microfiber drying towel or a filtered air blower to get the vehicle completely dry. This step is critical for preventing water spots, which are just mineral deposits that can etch into your clear coat and force you to polish them out later.
Decontaminating the Surface Chemically
Even after a great wash, your car’s paint is still covered in bonded contaminants you can’t see but can definitely feel. These microscopic particles create a rough, gritty surface that will physically block the ceramic coating from bonding properly.
- Iron Removers: Your paint is a magnet for tiny iron particles from brake dust and industrial fallout. An iron remover spray chemically dissolves them, often turning a dramatic purple color to show you it’s working its magic.
- Tar Removers: For the really stubborn stuff like tar, road grime, and old adhesive, you’ll need a dedicated solvent. A good tar remover breaks down these sticky messes so they can be wiped away safely.
This chemical deep-clean pulls all that embedded junk out of the paint’s pores. It’s an essential step that paves the way for the ceramic coating to bond directly to the clear coat itself.
Achieving a Glass-Smooth Finish Mechanically
With the chemical work done, it’s time to physically remove anything left behind. The easiest way to check your work is the “baggie test”—put your hand in a thin plastic sandwich bag and gently run your fingertips over the paint. If it feels gritty or rough, you’ve still got work to do.
A clay bar or a clay mitt is your tool for this job. Used with a proper clay lubricant, you’ll glide it across the surface panel by panel in straight lines. The clay gently shears off any lingering contamination, leaving the paint feeling incredibly smooth. That slick, glass-like feel is the green light that the surface is truly clean and ready for the next phase.
The Critical Role of Paint Correction
This is it. This is arguably the most important stage of the entire process. A ceramic coating is a semi-permanent layer of protection that will lock in whatever condition your paint is in right now. If you apply it over swirls, scratches, or oxidation, you’re just sealing those imperfections in for years to come.
Paint correction, or polishing, involves using a machine polisher with specific pads and compounds to carefully level the clear coat. You’re removing a microscopic layer to erase imperfections and create a flawless surface.
Why Polishing is a Must-Do
- Removes Imperfections: Swirl marks, fine scratches, and water spots are all leveled out, revealing the true color and depth of your paint.
- Maximizes Gloss: A perfectly flat, defect-free surface reflects light uniformly. This is what creates that deep, wet-look gloss that makes a ceramic-coated car stand out from the crowd.
- Ensures a Proper Bond: Polishing creates a virgin surface, completely free of old waxes, sealants, and oils. This gives you the cleanest possible foundation so our HyperQuartz® technology can form its tenacious chemical bond.
After all that polishing, there’s just one last thing to do before you can crack open that coating bottle. You need to wipe down every panel with an IPA (isopropyl alcohol) solution or a dedicated panel prep spray. This removes any leftover polishing oils and guarantees the surface is completely bare and ready for the diy ceramic coating kit. This meticulous prep work is your ticket to a durable, professional-grade result.
Your Ceramic Coating Application Walkthrough
Alright, your paint is prepped and looking like a perfect canvas. This next part is where the magic happens, but it’s all about precision, not speed. Getting that flawless, streak-free finish that lasts for years comes down to three things: your environment, your technique, and your timing.
You’re about to add a serious layer of protection to your vehicle, and you’re not alone. The demand for this kind of durability is exploding. The global ceramic coating market was valued at over USD 13.08 billion in 2025 and is expected to nearly double to USD 27.98 billion by 2035. That massive jump is fueled by people just like you who want to protect their investment. If you’re interested in the numbers, you can read the full research on the ceramic coatings market to see just how big this trend is.
Remember, all the hard work you put into washing, decontaminating, and polishing was the foundation. That effort is what makes a great result possible. This infographic is a great visual reminder of that essential workflow.
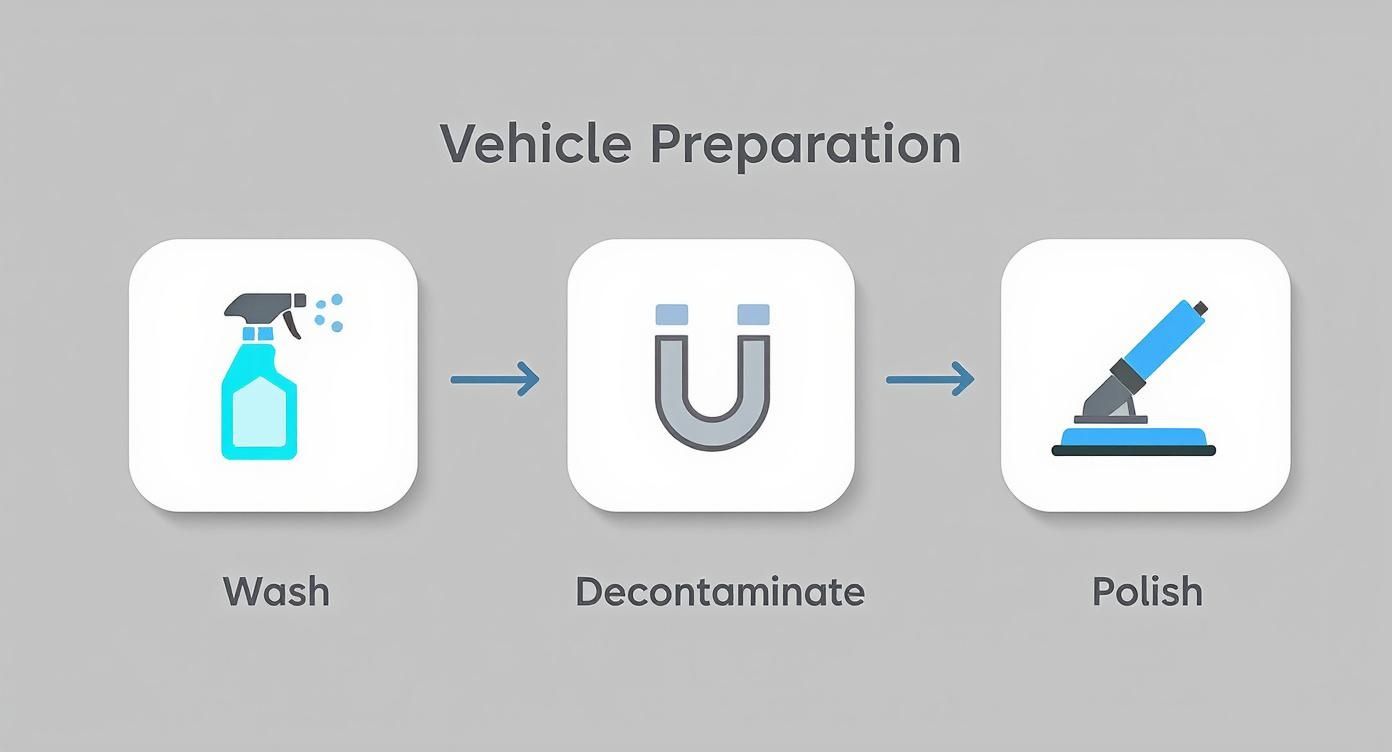
Each of those steps builds on the last, ensuring the paint is perfectly clean and ready to bond with the coating for the best possible gloss and protection.
Setting Up Your Workspace for Success
Where you work is just as important as how you work. Trying to apply a ceramic coating outdoors is a recipe for disaster. Direct sunlight, wind, and unpredictable humidity can make the coating flash almost instantly, leaving you with a streaky, frustrating mess.
Do yourself a favor and work in a well-ventilated garage or a covered carport. You’re aiming for a stable environment.
- Temperature: The sweet spot is between 60-75°F (15-24°C). If the paint is too hot, the coating will dry the second it touches the panel. Too cold, and the curing process will drag on forever.
- Humidity: Try to keep the humidity below 70%. Too much moisture in the air can interfere with the bond, sometimes leading to a hazy or oily-looking finish.
Good lighting is non-negotiable. You need to see what you’re doing. A combination of good overhead lights and a handheld inspection light will be your best friends for spotting high spots and making sure your coverage is perfect.
Priming and Applying with the Cross-Hatch Technique
With your workspace set, it’s time to lay down some product. Start by wrapping the suede cloth that came in your kit around the applicator block. Give the coating bottle a good shake. Squeeze a line of product down the center of the applicator, adding a few extra drops to get it properly saturated without being drippy.
Work in small, manageable sections. A 2 ft x 2 ft area is a good rule of thumb. This keeps you in control and prevents you from feeling rushed as the coating starts to flash.
The cross-hatch pattern is what the pros use, and for good reason—it guarantees you don’t miss a spot.
- First, apply the coating to your section using smooth, overlapping vertical strokes.
- Then, immediately go back over that same area with overlapping horizontal strokes.
This simple back-and-forth motion ensures a perfectly uniform layer. Let the applicator glide; there’s no need to apply heavy pressure.
Pro Tip: Application cloths are a one-time use. Once that coating starts to crystallize in the fibers, the cloth can easily scratch your paint. Have plenty of fresh suede cloths on hand so you can swap them out as needed.
Understanding and Timing the Flash
As soon as the coating hits the paint, the clock is ticking. You’ll hear the term “flash” a lot. This is simply the point where the solvents evaporate, leaving the protective ceramic solids behind. You’ll literally see it happen—the wet look will transform into a faint film that shimmers with an iridescent, rainbow-like effect, almost like an oil slick.
Depending on the temperature and humidity in your garage, this can take anywhere from 30 seconds to a few minutes. This visual cue is the most important signal in the whole process. Watching for the flash tells you exactly when it’s time to move on to the next step.
Leveling and Buffing Your Way to a Perfect Finish
This is it—the final wipe-down. It’s also where a lot of DIY jobs go wrong. If you wipe too soon, you’ll pull off too much of the coating. If you wait too long, the residue becomes incredibly tough to remove, leaving you with stubborn dark patches called “high spots.”
Grab two separate, high-quality microfiber towels for this.
- The Leveling Wipe: Take your first clean towel and gently wipe over the flashed section. Your goal here isn’t to remove the coating but to “knock down” the high spots and create a perfectly level layer. Keep folding the towel to a fresh, clean side.
- The Final Buff: Immediately follow up with your second, completely dry towel. Buff the area to a brilliant, streak-free shine. Use your inspection light and check the panel from different angles to hunt down any remaining residue.
Once that section is perfect, move on to the next, slightly overlapping the edge of the previous one for seamless coverage. Keep this panel-by-panel rhythm going until the entire vehicle is done. The patience you show here will pay off big time in the final result.
Curing and Aftercare for Maximum Longevity
That final buff isn’t the finish line; it’s actually the start of the most critical phase for your diy ceramic coating kit investment. The job isn’t truly done until the coating has fully hardened, and this initial period—followed by smart, consistent maintenance—is what locks in years of that insane gloss and protection.
Rushing this stage is a common mistake that can seriously compromise the coating’s bond and shorten its lifespan. Think of it like pouring a concrete foundation. It needs undisturbed time to set into a strong, resilient structure. Your ceramic coating is no different, forming a tough, semi-permanent shield on your vehicle’s paint.
The Curing Timeline Unpacked
Once you’ve laid it down, the coating starts a two-stage curing process. The first part happens pretty quickly—this is the initial tack-free cure. The surface becomes safe to touch and can handle very light moisture.
The second, and far more important stage, is the full chemical cure. This is where the magic happens. The coating cross-links and hardens to its maximum potential, creating that tough, glass-like layer that’s going to protect your paint for years. This full process can take up to 7-14 days, depending heavily on the temperature and humidity in your garage.
It’s absolutely crucial to shield your vehicle from any and all moisture—rain, sprinklers, even heavy morning dew—for at least the first 24-48 hours. Water hitting the surface during this initial window can etch permanent spots into the still-soft coating that can only be removed by polishing it all off.
Your best bet is to keep the car garaged and dry. Try to avoid parking under trees where bird droppings or sap could ruin your hard work. If any contaminants do land on the car, get them off immediately with a soft microfiber towel and a gentle detail spray.
To make things crystal clear, here’s a straightforward timeline you can follow after applying your ceramic coating. Sticking to this schedule ensures you’re giving the coating the best possible environment to cure and bond permanently.
Ceramic Coating Curing and Maintenance Timeline
| Timeframe | Required Action | Reasoning |
|---|---|---|
| 0-24 Hours | Keep the vehicle dry and indoors. Avoid driving. | The coating is in its most vulnerable state. Moisture can cause water spots and high spots. |
| 24-48 Hours | Continue to keep dry. Short, careful drives are okay if necessary. | The initial tack-free cure is complete, but the coating is still soft and susceptible to chemical etching. |
| 48 Hours – 7 Days | Avoid washing the car. Remove bird droppings or sap gently. | The coating is still hardening. Abrasive washing or harsh chemicals can hinder the full curing process. |
| 7-14 Days | Perform the first “safe” wash using pH-neutral soap. | The coating is now hard enough for its first gentle wash. This removes any dust accumulated during curing. |
| 1 Month & Beyond | Wash every 1-2 weeks. Apply a maintenance spray every 2-3 months. | Regular, proper maintenance keeps the coating clean, enhances its hydrophobic properties, and extends its lifespan. |
Following these milestones helps guarantee that you get the maximum performance and longevity out of the coating you just spent all that time applying.
Adopting a Safe Maintenance Routine
After that first week, your coating is durable enough for its first wash. But be warned: your old washing habits might do more harm than good now. A ceramic coating makes washing a breeze, but the wrong techniques can still inflict swirl marks and kill the incredible water-beading you worked so hard to achieve.
The right approach is all about preserving the finish:
- Use pH-Neutral Shampoos: Harsh, high-alkaline soaps will literally eat away at the coating’s protective layer. A quality pH-neutral car wash soap is designed to lift dirt gently without stripping your protection.
- The Two-Bucket Method: Don’t stop now. Keep using the two-bucket wash method to prevent dragging grit across the paint and creating new scratches.
- Safe Drying: Ditch the old chamois and bath towels. Use a high-quality, plush microfiber drying towel or a filtered air blower to safely wick away water without leaving streaks or scratches.
By adopting these professional habits, you’re ensuring the coating stays in peak condition. If you want to really dial in your process, our guide on the best practices for a ceramic-safe car wash dives deep into the right products and methods.
Boosting Performance with Maintenance Sprays
Want to get the absolute most out of your diy ceramic coating kit? Then you need to incorporate a ceramic-infused maintenance spray, or “topper,” into your routine. These products are specifically designed to complement and recharge your base coating.
Think of a topper as a sacrificial layer. When you apply it every few months, it refreshes the coating’s performance and takes the daily abuse from the environment, leaving the primary coating underneath pristine for much longer.
With these sprays, you’ll gain a few key benefits:
- Restores Hydrophobicity: Over time, surface contamination can make the water-beading effect look a little tired. A maintenance spray brings that insane beading right back to life.
- Adds Slickness and Gloss: It leaves the surface feeling incredibly slick to the touch and deepens the reflective shine, making your paint look like it was just coated yesterday.
- Acts as a Protective Booster: This sacrificial layer is the secret to extending the life of your coating, making sure your investment keeps protecting your vehicle for years to come.
This simple, proactive aftercare is the real secret to making your coating’s performance last. It keeps your vehicle looking “just detailed” and well-protected long after application day.
Common Questions About DIY Ceramic Coating
Even with the best guide in hand, you’re bound to have questions when you’re working with something as precise as a DIY ceramic coating kit. That’s totally normal. Getting the right answers is what separates a good result from a great one, so let’s walk through some of the most common things people ask.
A lot of folks wonder if they can really get a finish that holds up like a professional job. The short answer is yes, but the secret isn’t just in the bottle. It’s about respecting the entire process—from meticulous prep to long-term care—to ensure that coating bonds perfectly and lasts for years.
Can I Apply a Ceramic Coating Outdoors?
I get this question all the time. While you could technically apply a coating outside on a perfectly still, overcast day, I strongly advise against it. It’s a gamble. A garage or any controlled space is your best friend here.
Outdoors, you’re fighting a losing battle against variables you can’t control. A sudden gust of wind can kick up dust and ruin your finish. A bit of direct sun can cause the coating to “flash” almost instantly, making it a nightmare to level and buff off correctly. You’ll end up with a streaky, uneven mess. Working inside gives you the stable environment you need to get it right.
What Happens if I Miss a Spot When Buffing?
Don’t panic—this is probably the most common mistake and it’s usually fixable. You’ll spot it as a dark, slightly oily-looking patch, what we call a “high spot.”
If you catch it within the first hour or two, the fix is simple. Just apply a little more coating right over the high spot. This reactivates the solvents in the partially cured layer, essentially re-liquifying it, which allows you to immediately buff the area clean and level it out.
If that high spot has fully cured (usually after 12-24 hours), it’s hardened. At this point, the only way to remove it is to carefully polish the area with a machine polisher. Once it’s gone, you can simply re-coat that small section to blend it in.
How Do I Know When the Coating Is Ready to Buff?
You need to watch for the “flash.” This is the visual cue that tells you the carrier solvents have evaporated and the coating is ready to be leveled.
As you watch the surface, you’ll see the wet, oily look transform into an iridescent, rainbow-like film. It almost looks like oil on water. This flash can happen anywhere from 30 seconds to a few minutes after application, and it all depends on the temperature and humidity in your workspace. Once you see that rainbow effect, grab a clean microfiber and do your initial leveling wipe, then follow up with a final buff.
Do I Still Need to Wash My Car After It’s Coated?
Absolutely, yes. A ceramic coating is not a magic forcefield. Think of it like a high-end non-stick pan—it makes cleaning incredibly easy, but it doesn’t clean itself.
The super-slick, hydrophobic surface does a fantastic job of repelling dirt and grime, meaning your car stays cleaner for much longer. But road film, pollen, and other contaminants will eventually settle on the surface. Regular washes with a good pH-neutral soap are crucial for maintaining the coating’s performance and that jaw-dropping gloss. If you’re looking to stack layers of protection, you can learn more about the best automotive sealants for car paint and see how they complement a coating.
Ready to experience this level of protection and gloss for yourself? Choose a Titan Coatings DIY ceramic coating kit and give your vehicle the military-grade defense it deserves. Explore our full range of products at https://www.titancoatings.us.
0 Comments