Understanding The Ceramic Coating Process
Applying a ceramic coating isn’t just about wiping on a product—it’s a detailed, multi-layered detailing project. Skipping or hurrying any stage will lock imperfections under a semi-permanent shield, making corrections painful and time-consuming later on. Instead, think of your vehicle’s paint like a canvas: the more time you spend preparing it, the better the final result will be.
Titan Coatings’ advanced formulas are engineered to thrive on a chemically pure, mechanically smooth surface. This gives you the benefit of a stronger, more resilient bond that lasts for years, not months, by leveraging the synergy between deep cleaning, paint correction, and precise application.
The Three Core Phases
Every successful ceramic coating job breaks down into three main segments. Each builds on the previous one, ensuring you end up with a hydrophobic, scratch-resistant, high-gloss finish:
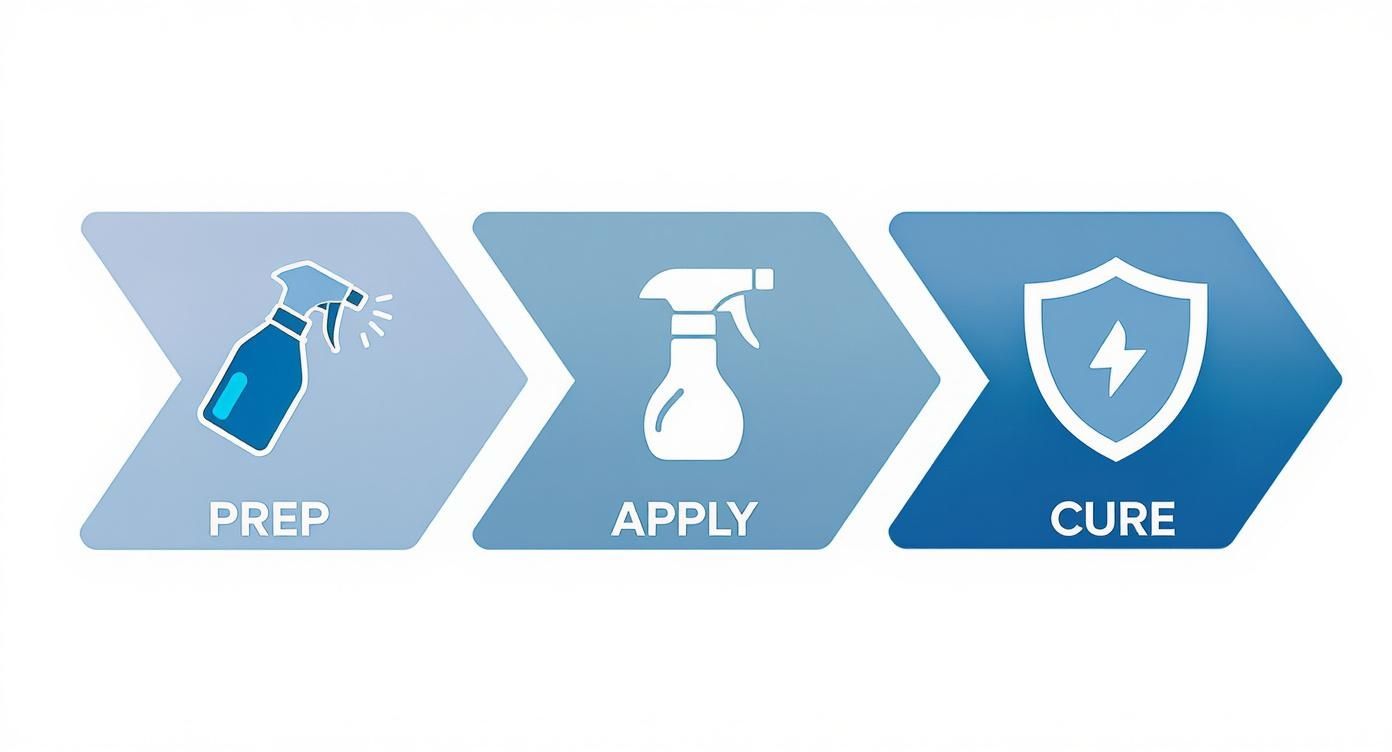
Below is your quick reference for what each phase involves, which tools you’ll need, and how much time to set aside.
Application Overview Table
| Stage | Purpose | Key Tools | Duration |
|---|---|---|---|
| Preparation | Eliminate dirt, tar, and bonded contaminants | pH-neutral car shampoo, clay bar, polishing kit | 2–4 hours |
| Application | Establish a strong bond on a clean surface | Titan Coatings applicator, lint-free microfiber | 1–2 hours |
| Curing | Harden the coating for maximum durability | Infrared lamp (or dry, shaded area) | 12–24 hours |
This table lays the groundwork for diving deeper into each step, so you know exactly what to expect and how to allocate your time.
Why Every Step Matters
No detail is too small when you’re chasing a flawless finish. Here’s why each phase is non-negotiable:
- Surface Preparation: A thorough wash, followed by chemical decontamination and clay barring, strips away everything that could block adhesion.
- Paint Correction: Removing swirl marks and fine scratches ensures the coating seals over a perfect surface. Remember, the coating locks in whatever is underneath—flaws included.
- Final Wipe Down: A wipe with an IPA or dedicated panel-prep solution removes residual oils. Without this sterile canvas, the bond strength takes a hit.
By dedicating the majority of your time—often 80% or more—to preparation and correction, you set the stage for a coating that not only looks incredible but also performs at its peak for its entire lifespan.
With this roadmap, you’re ready to tackle each detailed step with confidence. The next sections will walk you through real-world scenarios, troubleshooting tips, and maintenance advice so you can protect your investment and keep that showroom shine year after year.
Preparing Your Car for Ceramic Coating
Think of your car’s paint as the canvas for a masterpiece. If you try to apply a high-end ceramic coating onto a dirty or flawed surface, you’re not protecting it—you’re just locking in all those imperfections. The real secret to a stunning, long-lasting finish isn’t found in the coating application itself, but in the painstaking prep work that comes first.
This phase is non-negotiable. Its entire purpose is to ensure the coating creates a direct, powerful chemical bond with your car’s clear coat. This is how you get the jaw-dropping gloss and rugged durability you’re paying for. If you rush this part, you’ll end up sealing dirt, oils, and microscopic iron particles under a semi-permanent shield, which kills both the look and the longevity of the coating. The goal is to get the surface surgically clean.
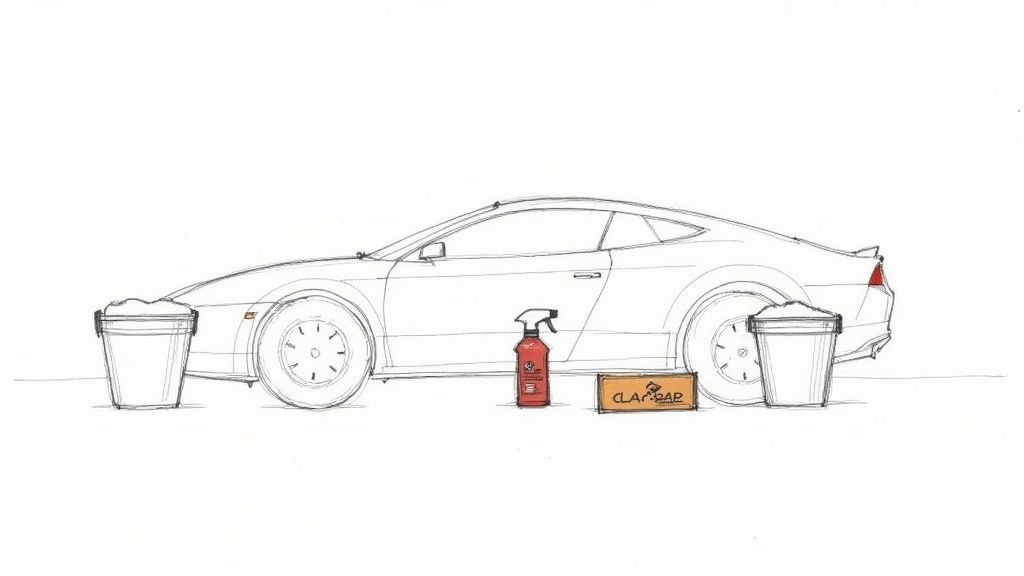
The Initial Deep Clean
First things first, you have to get rid of all the loose dirt, old wax, and general road grime. A quick trip to the automatic car wash just won’t cut it for this level of work; you need a hands-on, meticulous approach.
This is where the classic two-bucket wash method comes in. It’s a detailing standard for good reason. One bucket holds your pH-balanced car shampoo, while the other is filled with plain water for rinsing your wash mitt. This simple setup prevents you from picking up grit and dragging it right back across the paint, which is how most swirl marks are created in the first place.
Decontaminating The Surface
Even after a thorough wash, your car’s paint isn’t truly clean. Run your hand over the surface (inside a plastic bag for extra sensitivity), and you’ll likely feel a gritty texture. Those are bonded contaminants, and they have to go.
We’ll start with a chemical approach to tackle iron particles. These tiny specks of metal come from brake dust and industrial sources, and they embed themselves in your clear coat. Over time, they can even cause tiny rust spots. An iron fallout remover is the right tool for the job here. Just spray it on, and you’ll see it turn a deep purple as it chemically dissolves the iron without you having to scrub.
Next, it’s time for physical decontamination. Grab a quality clay bar or a clay mitt.
Key Takeaway: Using a clay bar is essential for a glass-smooth finish. It safely pulls out stubborn, embedded contaminants like tar and tree sap that a normal wash can’t touch. This step creates the perfectly pure surface the coating needs to bond to.
To do it right, work on a small section at a time. Spray a clay lubricant on the panel, then gently glide the clay bar back and forth with light pressure. You’ll literally feel the surface get smoother as the clay picks up the contaminants. For a deep dive into this technique, you can learn more about what a clay bar treatment does for your car’s paint.
To ensure you don’t miss a thing, we’ve put together a quick checklist covering these foundational steps.
Essential Preparation Phase Checklist
This table breaks down the crucial steps and tools needed before you even think about opening a bottle of ceramic coating. Following this ensures a flawless foundation.
| Step | Objective | Essential Tools | Pro Tip |
|---|---|---|---|
| Two-Bucket Wash | Remove loose dirt and grime without scratching the paint. | 2 buckets with grit guards, pH-neutral shampoo, microfiber wash mitt. | Always rinse the mitt in the clean water bucket before reloading it with soap. |
| Iron Decontamination | Chemically dissolve embedded ferrous metal particles. | Iron fallout remover spray, pressure washer or hose. | Apply to a cool, dry surface out of direct sunlight for best results. |
| Clay Bar Treatment | Physically remove bonded contaminants like tar and sap. | Clay bar or mitt, clay lubricant or quick detailer. | Knead the clay frequently to expose a clean surface as you work. |
| Final Wipe-Down | Strip all oils, polishes, and residues for a sterile surface. | Panel prep spray (IPA solution), clean microfiber towels. | Use two towels: one for the initial wipe and a second for the final buff. |
With these steps completed, your vehicle’s surface is now truly prepared for the next stage.
The Final Wipe Down
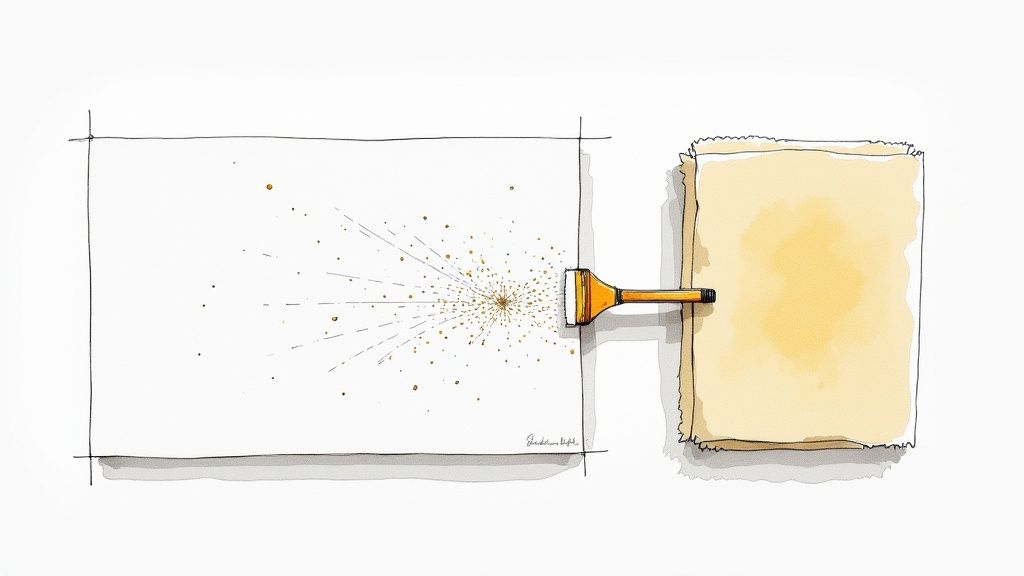
This is the last and arguably most important step before you either start paint correction or apply the coating. After all that cleaning, there can still be trace residues from lubricants, soaps, or even the oils from your fingertips. These invisible contaminants are public enemy number one for a ceramic coating, as they’ll block it from bonding correctly.
This is where a product like our Titan Surface Prep gives you a critical advantage. Its specialized formula strips away any lingering oils, waxes, or silicones, leaving the paint completely sterile. This creates the perfect environment for the coating to form a direct, powerful covalent bond, so you get the maximum durability you expect. The demand for this level of protection is exploding; the global ceramic coatings market was valued at USD 12.15 billion in 2024 and is on track to hit USD 25.60 billion by 2034.
Correcting Paint Imperfections
So, you’ve meticulously washed and decontaminated the paint. The surface is finally pure. But clean isn’t the same as perfect. Now we get to the heart of the prep work: fixing the flaws that washing can’t touch. We’re talking about swirl marks, light scratches, water spots, and oxidation.
Applying a high-performance ceramic coating over these blemishes is a cardinal sin in the detailing world. It’s like putting a beautiful picture frame around scratched glass. You’re not hiding the flaws; you’re locking them in for years, making them permanent and often even more obvious under the coating’s gloss.
This is where paint correction comes in. Think of it as the art of bringing a vehicle’s finish to a condition that’s even better than when it left the showroom. It’s absolutely critical before coating because it creates a perfectly smooth, level surface. This flawless foundation does two things: it gives the coating that insane visual “pop” and ensures it can form the strongest possible chemical bond with the clear coat.
Choosing Your Paint Correction Tools
The world of polishers and compounds can feel a bit overwhelming at first, but having the right tools makes all the difference. For both seasoned pros and serious DIYers, the dual-action (DA) polisher is the undisputed king.
Unlike an old-school rotary polisher that can quickly burn through paint if you’re not careful, a DA machine oscillates in a random pattern. This action generates far less heat and dramatically reduces the risk of causing damage. It’s a much safer, more forgiving way to achieve beautiful, swirl-free results every time.
Of course, the machine is only half the equation. Your choice of polishing compound and pad is just as important. They work as a team to gently abrade the clear coat on a microscopic level, smoothing out all those imperfections. The trick is to match their cutting power to the severity of the defects and the hardness of your specific vehicle’s paint.
- Pads: These come in a range of materials and “cut” levels. A heavy-cutting wool or microfiber pad is your go-to for deeper scratches, while a medium foam pad is perfect for most moderate swirls. You’ll always finish with a soft foam pad to refine the paint and bring out maximum gloss.
- Compounds and Polishes: A “compound” uses larger, more aggressive abrasives to remove bigger defects fast. A “polish” uses much finer abrasives to remove any light hazing left by the compound, creating that true mirror shine.
For most cars with typical light-to-moderate swirl marks, a medium-cutting foam pad paired with a quality one-step polish is a fantastic starting point.
The Paint Correction Process
With your tools ready, the key is to be methodical. You’ll want to work one small section of a panel at a time. A common rookie mistake is trying to polish a huge area at once, which just leads to inconsistent results and frustration. Keep your working area to a manageable 2×2 foot section.
Start by dabbing a few small drops of polish onto your pad. With the machine off, quickly spread the product over your 2×2 section. Now, turn the polisher on at its lowest speed to avoid slinging polish everywhere.
Once it’s spread, bump up the speed and work the polish using a cross-hatch pattern—a few passes up and down, followed by a few passes side to side. Use gentle, even pressure and just guide the machine; let it do the heavy lifting.
After a few complete passes, grab a clean microfiber towel and wipe the residue away. This is the moment of truth. You need a bright, focused light source—an LED inspection light is ideal, but even your phone’s flashlight will work in a pinch. This light will reveal any remaining swirls that are invisible in normal garage lighting. If you still see defects, you may need another pass or a slightly more aggressive pad-and-polish combo.
Pro Tip: Don’t skip the final panel prep wipe-down after you’re done polishing. The oils in many polishes can temporarily fill in tiny scratches, tricking you into thinking the surface is perfect. A thorough wipe with a panel prep spray removes these oils, revealing the true condition of the paint and ensuring the surface is sterile for the coating.
Once an entire panel is corrected to your standards, move on to the next. Yes, this process is time-consuming, but it’s the only way to guarantee the truly jaw-dropping finish that makes a ceramic coating worthwhile. This foundational step is what separates a good result from a spectacular one.
Applying Titan Coating with Precision
The paint is perfect, sterile, and ready. This is where all that prep work pays off. You’re about to transform a bottle of advanced chemistry into a hard, glossy shield for your vehicle. Applying a coating isn’t overly complicated, but it does demand a methodical pace. Rushing this stage is the quickest way to end up with high spots, streaks, and an uneven finish, effectively erasing hours of hard work.
Your environment is also a huge factor in getting this right. You absolutely want to be indoors, preferably in a garage with good lighting and ventilation. Aim for an ambient temperature between 60-75°F (15-24°C) and keep an eye on the humidity—you want it low. If it’s too hot, the coating will flash off way too fast; too humid, and you risk a hazy finish as the coating struggles to cure properly. And I can’t stress this enough: good lighting is non-negotiable. Get multiple light sources so you can easily spot the “flash” and catch any high spots before they set.
Mastering The Application Technique
The secret to a flawless finish is breaking the job down into small, manageable sections. A 2×2 foot area is the sweet spot. It’s small enough to give you complete control and prevents the coating from drying before you can properly level it.
Start by priming your microfiber block applicator. Squeeze a single line of Titan Coating down the center of the pad. Don’t oversaturate it; you just need enough for a smooth, even application. After this first section, a few small drops will be enough to recharge the applicator.
Now, apply the coating to that first 2×2 section using a simple but effective cross-hatch pattern. Glide the applicator over the area in straight, overlapping passes, first top-to-bottom, then immediately side-to-side. This ensures every square inch gets uniform coverage.
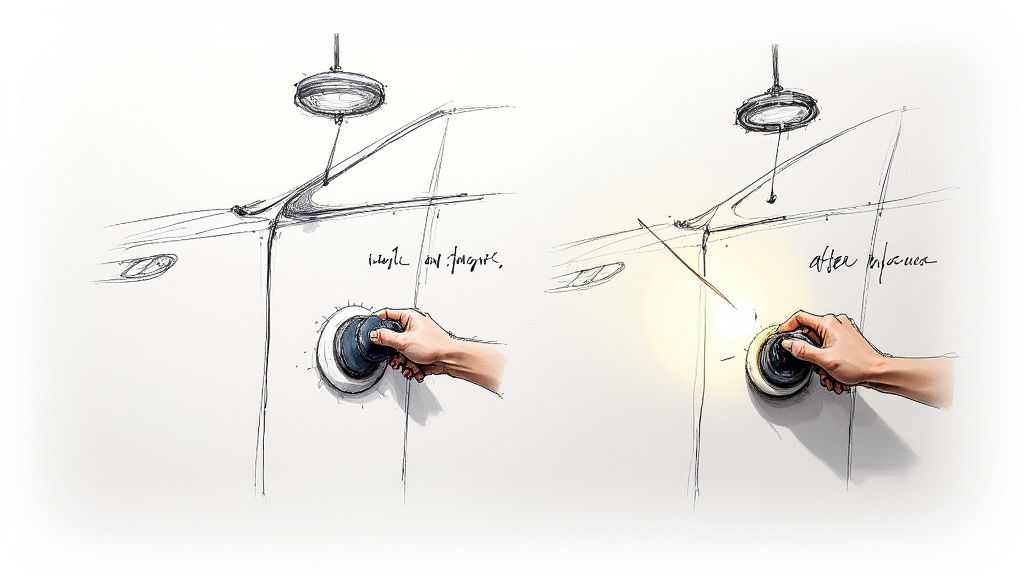
Identifying The Flash and Leveling
Once the coating is on the panel, watch it like a hawk. Within a minute or two (depending on your garage’s climate), you’ll see the solvent start to evaporate. This is the “flash.” The surface will get an oily, rainbow-like look, much like oil on water. That’s your cue to move to the next step.
As soon as you see that rainbowing, it’s time to level the coating. Take a clean, high-pile microfiber towel and gently wipe the section to knock down the excess product. The goal here isn’t to buff or apply pressure—you’re just lightly leveling it into a perfectly smooth, ultra-thin layer.
Grab a second, completely clean microfiber for a final, gentle wipe-down. This removes any last bit of residue. Use your inspection light and check the panel from every angle. High spots will look like dark, smudgy areas, and you need to catch them right now.
A rookie mistake is to keep using the same towel for too long. As it gets loaded with coating residue, it stops absorbing and just starts smearing product around. I recommend having a stack of clean towels ready—plan on using at least one fresh one per large panel for a perfect finish.
Ceramic coatings have come a long way, with the global market expanding as more people seek high-performance paint protection. A proper application is still an intensive process, involving a thorough wash, decontamination, paint correction, and finally, the coating itself.
Why Our Formula Gives You an Advantage
One of the greatest benefits you’ll experience with Titan Coatings is the user-friendly application process, made possible by our formula’s extended working time. Many other coatings flash almost instantly, creating a high-pressure situation where a moment’s hesitation can lead to a cured high spot that needs to be polished off.
Our exclusive chemistry provides a more forgiving window between application and leveling. This is a game-changer, especially for anyone learning how to apply ceramic coating to a car. It gives you the breathing room to check your work and perfect your technique without stress, ensuring you achieve professional-grade durability and shine.
Application Best Practices
To make sure things go smoothly, stick to these fundamentals:
- Work Panel by Panel: Fully complete one panel before you even think about starting the next. For big areas like a hood or roof, just split them into smaller, more manageable sections.
- Overlap Your Sections: When you start a new section, slightly overlap the edge of the one you just finished. This creates a seamless, uniform coat.
- Inspect Constantly: After leveling each section, hit it with a bright light from multiple angles. Catching a high spot or a streak right away is infinitely easier than dealing with it later.
Following this disciplined process is the key to achieving that stunning, deep gloss that will protect the vehicle for years to come.
Giving the Coating Time to Cure and Harden
You’ve wiped off the last high spot, stepped back, and the gloss is just incredible. It feels like the job is done, but honestly, this next part is just as important as the application itself. This is the curing stage, where the liquid coating chemically cross-links and hardens into that durable, glassy shield you’re after.
Getting the application right is only half the battle. Rushing the cure or letting the car get hit with rain too soon can ruin all your hard work. Think of it like this: you wouldn’t walk on freshly poured concrete, right? The coating needs its own uninterrupted time to set and reach full strength.
The First 24-Hour Lockdown is Non-Negotiable
Those first 12 to 24 hours are the most critical. The coating is still gassing off and is incredibly soft and impressionable. Your one and only job here is to protect it from three things: water, dust, and any kind of physical contact.
The car absolutely must stay in a controlled space, like a clean garage. Rain, dew, or even a night of heavy fog can leave permanent water spots etched into the semi-cured layer. Trust me, trying to fix those later is a nightmare. Dust is another enemy—it can settle on the tacky surface and get locked in forever.
Here’s the bottom line: Do not touch the paint. Not with your finger, not with a towel, not even a light brush from your shirt. The oils from your skin or a simple nudge can leave a permanent mark. The car has to be left completely alone.
What to Do During the Full Curing Period
Okay, so the surface might feel dry after a day, but the chemistry is far from finished. The coating will continue to harden and form strong covalent bonds with the paint for the next week or so. This is where you get the real scratch resistance and longevity.
You can start driving the car during this time, but you have to be smart about it.
- No Chemicals, Period: Do not wash the car with any kind of soap. If you get a bird dropping or some tree sap on it—and you will—you need to get it off immediately. Use a clean, damp microfiber towel with just plain water and gently blot or lift the spot off. No wiping.
- Avoid High Pressure: Stay far away from automatic car washes and high-pressure wands. The force is just too much for a coating that hasn’t fully cross-linked.
- Park with a Plan: This is simple but effective. Try not to park under trees that drop sap or attract birds. It’s also a good idea to keep the car out of the blazing hot sun for long stretches if you can help it.
A professional coating needs anywhere from 12 to 48 hours to set initially, and during this time, keeping it dry is everything. When properly cured and maintained, these coatings can realistically last between 2 to 5 years, which blows traditional waxes and sealants out of the water. You can get a sense of the industry growth and performance data by checking out the latest ceramic coating market trends on FortuneBusinessInsights.com.
Stick to these rules, and your Titan Coating will reach its peak potential for hardness, gloss, and that insane water-beading effect.
Curing Timeline and Best Practices
To make this crystal clear, I’ve put together a simple timeline of what to do—and what not to do—as your coating cures. Following this is the surest way to guarantee a perfect, long-lasting finish.
| Curing Phase | Timeframe | Required Actions | Activities to Avoid |
|---|---|---|---|
| Initial Set | First 12–24 Hours | Keep the vehicle indoors, dry, and in a temperature-controlled environment. | Any contact with water, dust, chemicals, or physical touch. |
| Full Chemical Cure | Day 2 to Day 7 | Drive normally but be mindful. Spot-clean contaminants gently with water only. | Washing with soap, using high-pressure sprayers, parking in high-risk areas. |
| First Wash | After 7 Days | Perform the first maintenance wash using a pH-neutral shampoo and the two-bucket method. | Using aggressive wash mitts or automated car washes. |
By respecting this curing process, you’re allowing the advanced polymer science in Titan Coatings to do its job and fully bond to the paint. That’s how you get the show-stopping results that last for years.
Keeping Your Ceramic Coating Flawless for the Long Haul
You’ve put in the work, and the result is a finish that looks like it was poured on. But here’s something seasoned pros know: a ceramic coating isn’t a one-and-done deal. Think of it as a serious upgrade that makes keeping your car clean worlds easier, not something that eliminates the need for washing altogether. The secret to getting years of stunning gloss and insane water-beading from your Titan Coating lies in proper, consistent maintenance.
If you let the car go, traffic film, hard water minerals, and everyday grime will eventually build up on the surface. Over time, this film can start to clog the coating, which is when you’ll see its hydrophobic power start to fade. The water won’t dance off the paint anymore; it’ll start to cling. The great news? A simple and disciplined wash routine is all you need to keep that from happening.
Getting the Wash Routine Right
Your washing technique is, without a doubt, the most critical part of maintaining the health of your coating. Harsh, high-pH soaps or, even worse, the bristly brushes at an automatic car wash will slowly eat away at your hard work. You need to switch to a gentler, more deliberate approach.
This is where the two-bucket wash method becomes your best friend—it’s not optional. You’ll have one bucket for your pH-neutral car shampoo and a second one filled with clean water and a grit guard at the bottom. After you wash a single panel, dunk your wash mitt in the clean water bucket and scrub it against the grit guard before ever putting it back into the soap. This tiny step is what stops you from dragging grit all over your beautiful finish, which is exactly how new swirl marks are born.
Keeping That Water-Beading Action Strong
A high-quality ceramic coating does an incredible job of shrugging off dirt and water. In fact, a professionally applied coating creates a surface so hydrophobic it can repel roughly 90%-95% of contaminants, which is why your car stays cleaner for longer. It’s a huge value proposition, which helps explain why transportation applications make up about 32% of the entire ceramic coating market’s revenue. You can find more data on these market trends at ResearchNester.com.
To protect that performance, always use clean, premium microfiber towels for drying. I’m a big fan of using a leaf blower to get the bulk of the water off without ever touching the paint. Then, I’ll follow up with a gentle pat-down using a plush drying towel to catch any last drops. It’s all about minimizing physical contact to avoid scratching.
Pro Tip: Never, ever let your car air-dry, especially in the sun. Your tap water is loaded with minerals. When the water evaporates, those minerals are left behind as stubborn water spots that can actually etch into the coating. Proactive drying is your best defense against this.
Topping Up and Boosting Your Protection
Even with a perfect wash routine, your coating will thank you for a little boost now and then. Using a ceramic-infused detail spray or a dedicated topper every few months is a brilliant strategy for maximizing its life and performance.
These products are engineered to be a sacrificial layer, reinforcing the main coating and rejuvenating its hydrophobic punch. It’s kind of like applying a fresh coat of wax, but with advanced chemistry that’s designed to bond with your Titan Coating. It adds another slick layer of protection and brings back that intense “just-coated” feel and water behavior. A quick spray-and-wipe after a wash is all it takes to keep your finish in peak condition.
Common Questions We Hear About Ceramic Coating Application
Even when you follow a guide to the letter, you’re bound to run into some questions when you’re in the thick of a ceramic coating job. Knowing the answers to the common “what ifs” ahead of time can be the difference between a frustrating mistake and a flawless, professional-grade finish.
Let’s walk through some of the most frequent questions we get from both seasoned pros and first-time applicators.
“Can I Just Apply the Coating Over a Few Scratches?”
I hear this one all the time, and the answer is a hard no. A ceramic coating is purely a protective layer; it’s not a filler, a polish, or a concealer. Think of it like a sheet of glass over your paint. Applying it over swirl marks, light scratches, or rock chips will only magnify those imperfections. You’re essentially locking them in under a super-durable, high-gloss shield.
Before a single drop of coating touches the paint, a full paint correction is non-negotiable. This means polishing the surface to create a perfectly smooth, defect-free canvas. For any deeper chips, you’ll want to use touch-up paint and let it cure completely before you even think about moving on to the coating stage.
“How Long Until I Can Wash My Car?”
This is where patience really pays off. You absolutely must wait at least seven days before giving the car its first real maintenance wash. I know, it’s tempting, but here’s why that waiting period is so critical.
While the coating might feel dry to the touch in under 24 hours, it’s still chemically active. On a microscopic level, it’s busy forming strong covalent bonds with the vehicle’s clear coat. Hitting it with detergents or high-pressure water too soon interrupts that crucial process. Doing so can weaken the coating’s durability and hydrophobic properties, which ultimately shortens its lifespan.
If you get bird droppings or tree sap on the car during that first week, just gently lift the contaminant off with a damp microfiber towel and plain water—no chemicals.
The longevity of your coating is directly tied to a proper cure and diligent maintenance. Skipping this initial waiting period is one of the most common ways people undermine their own hard work.
For a deeper dive into what you can expect from your coating’s lifespan, check out our guide on how long ceramic coatings last with proper care.
“Help! I Found a High Spot. What Do I Do?”
Finding a high spot—that dark, oily-looking smudge of excess coating—can make your heart sink. But don’t panic. The fix is all about timing.
- If you catch it within 30-60 minutes: You’re in luck. The coating is still in its solvent phase. Just add a little fresh coating onto your applicator and wipe it over the high spot. This reactivates and re-liquefies the area, letting you level it properly with a clean microfiber towel. Easy fix.
- If you find it after it has cured: Once it’s hardened, the only way to fix it is with mechanical abrasion. You’ll need to grab a fine polish and a machine or hand applicator to gently buff out the blemish. After polishing, it’s crucial to wipe the area down with a panel prep solution to remove any oils, then re-apply the coating to that spot to ensure you have uniform protection.
“Can I Apply a Coating in the Sun or When It’s Humid?”
Your working environment is just as important as your technique. You should never apply a ceramic coating in direct sunlight or on a panel that’s hot to the touch. The heat drastically speeds up the flashing process, causing the product to cure almost instantly. This makes it impossible to level correctly and is a surefire way to end up with a streaky, uneven mess.
High humidity is another enemy. All that moisture in the air can interfere with the chemical curing process, sometimes leading to a hazy or cloudy finish that won’t go away.
The sweet spot? A well-lit, ventilated garage with an ambient temperature between 60–75°F (15–24°C) and low humidity. Control your environment, and you’ll control your results.
At Titan Coatings, we believe you deserve superior results, which is why we combine exceptional products with expert knowledge. Our military-grade polymers are engineered to give you peak performance, so by following these guidelines, you can achieve that durable, show-car finish right in your own garage. Explore our full range of advanced coating solutions at https://www.titancoatings.us.
0 Comments