There’s a right way and a wrong way to fix a car scratch. The secret isn’t some miracle product; it’s about methodically leveling the paint surface with the right abrasive for the job. For those faint surface scuffs, a good polishing compound is usually all you need. But for the deeper stuff, you’re looking at a more involved process—think wet sanding, touch-up paint, and compounding to bring back that smooth, factory finish.
That First Scratch and Your Action Plan
It’s a gut-wrenching feeling every car owner knows. That moment you spot a fresh, ugly scratch on your otherwise perfect paint. Whether it’s from a runaway shopping cart, a branch you didn’t see, or just a moment of bad luck, it’s frustrating. But don’t let that frustration get the best of you. Instead, channel it into a smart plan of attack.
Real-world scratch repair isn’t magic. It’s about knowing your enemy and matching the technique to the damage. I’ve seen it a hundred times. I once had a client with a beautiful black sedan covered in a bizarre web of light scratches. He was convinced he needed a full repaint after using a cheap, dirty car cover all winter. A few hours with a good polisher, though, and we brought back that deep, mirror-like shine he thought was lost forever. That’s why understanding your car’s paint is the most powerful tool you have.
Understanding Your Paint Layers
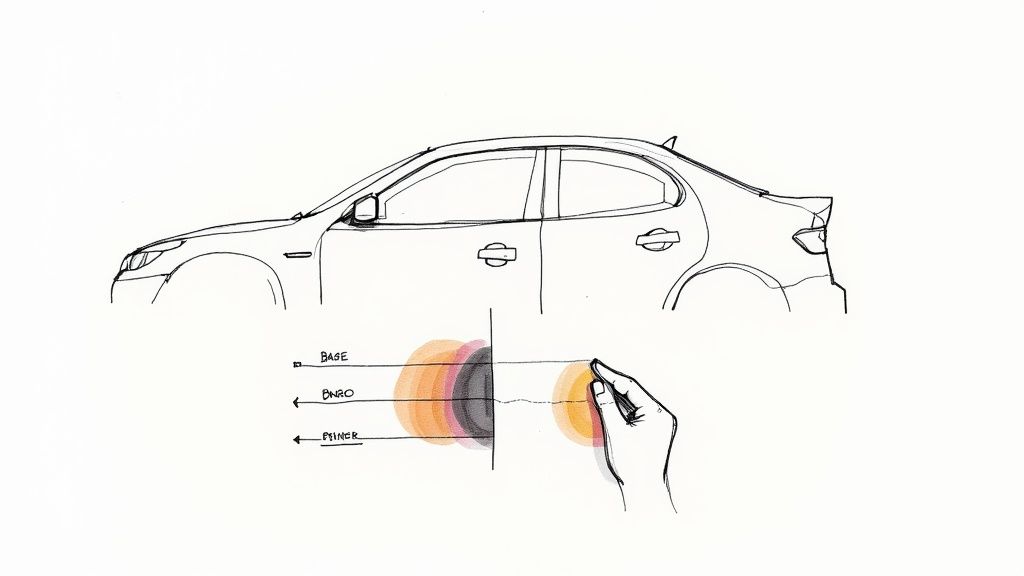
Before you even think about grabbing a bottle of anything, you need to know what you’re working with. A car’s paint job is a sophisticated, multi-layer system built for both looks and durability.
- Clear Coat: This is the top, transparent layer. It’s the bodyguard for your paint, providing the gloss and protecting the color from UV rays and minor scrapes. Most surface-level scratches live and die here.
- Base Coat: This is the fun part—the layer that holds your car’s actual color.
- Primer: Hiding beneath the color, the primer is the unsung hero. It helps the paint stick to the car’s body and adds another layer of defense against rust.
- Bare Metal: The steel or aluminum panel that forms the foundation of your car.
The whole game of DIY repair hinges on one thing: figuring out how deep the damage goes. And for that, you don’t need any fancy equipment.
To figure out what you’re up against, it helps to quickly assess the damage. This simple table breaks down what you need to look for and what your likely game plan will be.
Quick Scratch Severity Assessment
| Scratch Type | How to Identify (Fingernail Test) | Recommended DIY Fix | Difficulty Level |
|---|---|---|---|
| Light Swirls/Scuffs | Fingernail glides right over it; no catch. | Polishing Compound or Scratch Remover | Easy |
| Clear-Coat Scratch | Fingernail barely catches on the edge. | Compounding, followed by polishing. | Moderate |
| Paint-Penetrating Scratch | Fingernail clearly catches; you may see white (primer). | Touch-up paint, wet sanding, compounding. | Difficult |
| Down-to-Metal Scratch | Deep groove; you can see shiny bare metal. | Professional repair is highly recommended. | Very Difficult |
This quick check gives you a solid starting point and helps you avoid making a small problem worse by using the wrong approach.
The Fingernail Test: Your First Diagnostic Tool
The most crucial assessment you can make takes about two seconds. It’s called the fingernail test, and it’s what the pros use to make a quick field diagnosis. Just run your fingernail gently across the scratch.
If your nail glides smoothly over it without catching, the damage is almost certainly just in the clear coat. This is fantastic news. It means the fix is likely straightforward with a simple polish.
If your fingernail catches in the groove, the scratch is deeper. It has sliced through the clear coat and is into the base coat (color) or even the primer. This is a more serious injury that requires a multi-step repair.
This simple test is the foundation of your entire repair strategy. It stops you from going nuclear with an aggressive compound on a light swirl and prevents you from wasting an afternoon trying to polish out a deep gouge. It’s the key to choosing the right tools and getting the job done right the first time.
Erasing Light Scratches and Swirl Marks
Alright, let’s get to the satisfying part—tackling those aggravating swirl marks and light scuffs that seem to appear out of nowhere. You know the ones. They haunt you under direct sunlight or the fluorescent lights at a gas station.
It’s a story I’ve heard a hundred times. A client once came to me, completely stressed about the spiderweb of marks that had taken over his brand-new car after just one season of using a car cover. He was convinced a full repaint was his only option.
The good news? He was wrong. These blemishes are almost always confined to the top clear coat, which makes them surprisingly straightforward to fix. With a little patience and the right technique, you can restore that deep, glossy finish all on your own.
The Manual Polishing Method
You don’t need a professional machine polisher to get amazing results on minor imperfections. Your best friends for this job are a quality polishing compound and a good microfiber applicator pad. The real secret, though, is in the technique.
First things first: always work on a clean, cool, and dry surface. Pull the car into a garage or at least into the shade. If you try to apply compounds to a hot panel, they’ll dry out almost instantly, making them a nightmare to work with and far less effective. Before you even think about polishing, make sure the paint is spotless. We have a great guide on the fundamentals of a proper ceramic car wash that walks you through getting the surface perfectly prepped.
Now, grab your compound and squeeze a small, pea-sized amount directly onto your applicator pad. Focus on one small section at a time—think two feet by two feet. Gently work the polish into the paint using overlapping, straight-line motions. Go back and forth, then switch to up and down. Whatever you do, avoid aggressive circular motions; that’s a classic way to create a whole new set of swirl marks.
The key is to use firm but even pressure. Let the fine abrasives in the polish do the work for you. Your goal is to gently level the clear coat, effectively erasing the tiny valleys that your eyes perceive as scratches. After a few passes, grab a clean, plush microfiber towel, wipe away the residue, and inspect your handiwork.
Achieving a Flawless Finish
The DIY automotive scene is booming. It’s no surprise that in the United States, over 55% of vehicle owners now prefer to handle routine maintenance themselves to save a few bucks. This shift has pushed companies to create user-friendly products that can deliver professional-grade results right in your driveway.
Once the initial scratches have vanished, you might notice a slight haze. This is where you can take the finish from “good” to “perfect.” A fine finishing polish like Titan Coatings’ Vulcan TX150 is designed for exactly this. It removes any subtle cloudiness left by the first compound and seriously amps up the gloss and clarity.
The application is the same: straight, overlapping motions and gentle pressure. This final step is what truly separates a decent repair from a completely invisible one. If you find yourself up against more stubborn swirls or want to dive deeper, it’s worth exploring professional paint correction techniques for more advanced guidance.
Repairing Scratches That Break the Surface
When you run your fingernail across a scratch and it snags, that’s your tell-tale sign. You’re no longer dealing with a simple surface scuff; this one has dug into the clear coat. It’s a more involved repair, for sure, but don’t dial the body shop just yet. This is absolutely a job you can tackle yourself with the right tools and a bit of patience.
I remember a client with a beautiful dark gray SUV who had a nasty run-in with a garage door. She was panicked, certain it was a professional-only job. The scratch wasn’t down to the metal, but it was a glaring white line that drew your eye immediately. We spent a Saturday afternoon gathering the supplies and methodically bringing the panel back to life. Seeing her relief—and pride in her own work—was fantastic.
Preparing for a Deeper Repair
Unlike buffing out a swirl mark, fixing a moderate scratch is a multi-stage operation. You aren’t just smoothing out the top layer; you’re carefully rebuilding the damaged area from the base up. The secret to getting this right is all in the prep work and maintaining a light touch.
First thing’s first: the surface has to be surgically clean. Any speck of dust or grit left behind will get dragged into your repair, creating a whole new set of finer scratches. Give the car a thorough wash, then follow it up with a clay bar treatment. If you’ve never used one, our guide on what clay bar treatment is breaks down how it lifts away the bonded contaminants that washing misses. This gives you a perfectly smooth canvas to work on.
The Art of Wet Sanding and Touch-Up
With the area clean and prepped, it’s time to gently knock down the hard edges of the scratch. This is where wet sanding comes in. Using an ultra-fine grit sandpaper (we’re talking 2000-3000 grit) and a lubricant, you’ll carefully smooth the area. The goal isn’t to sand the scratch away but to feather the edges so your touch-up paint can blend in seamlessly. Remember: very light pressure and keep the surface wet.
Next up is the touch-up paint. The absolute key here is to apply several paper-thin layers instead of one thick, goopy one. A fine-tipped applicator gives you the most control. You want to slowly fill the scratch, letting each layer dry completely before adding the next, building it up until it’s just a hair higher than the surrounding paint. Patience is your best friend during this step. Rushing it is the #1 reason for a sloppy-looking repair.
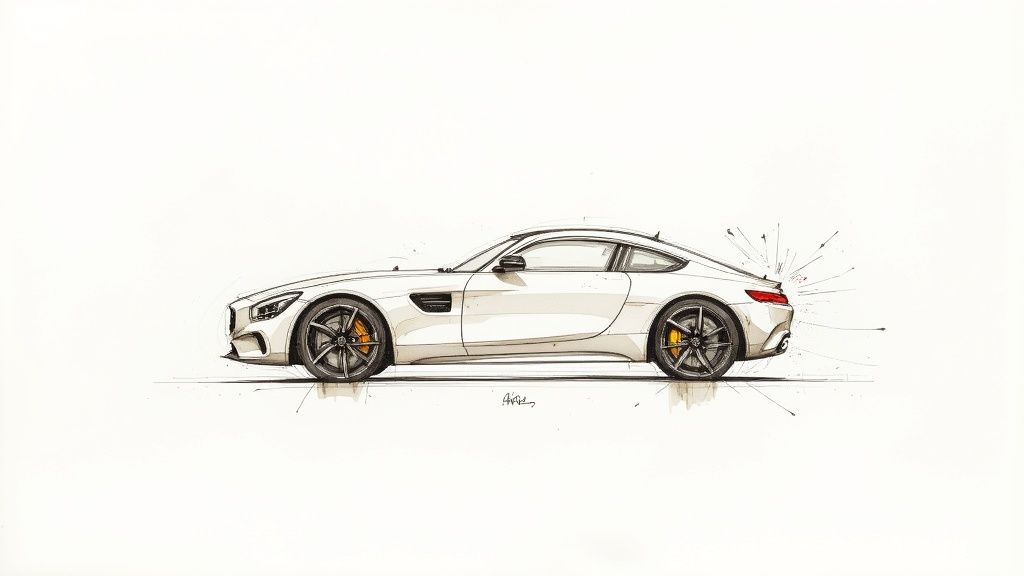
This little diagram captures the essence of the final blending stage, which you’ll do after the touch-up paint has fully cured.
This final sequence—compounding, polishing, and buffing—is what makes your repair melt away, perfectly integrated with the rest of the panel.
After letting the touch-up paint cure for at least 24 hours, you’ll use a rubbing compound to gently level the new paint down to the same height as the original clear coat. A good finishing polish afterward will eliminate any remaining haze and bring back that deep, brilliant gloss. It’s a deliberate process, but when you nail it, the original scratch becomes virtually invisible. You’re not just fixing a flaw; you’re performing a miniature paint correction, and the result is incredibly rewarding.
Knowing When to Trust a Professional
Embracing a DIY project can be incredibly satisfying, but the smartest enthusiasts I know are the ones who recognize their limits. When it comes to car scratch repair, the most critical skill isn’t how you hold a polisher—it’s knowing when to put the tools down and call a pro. This isn’t admitting defeat; it’s making a smart call to protect your car’s value and finish.
I once met a guy at a car show who tried to fix a deep, down-to-the-metal gash on his classic Mustang’s door. He used a touch-up pen and some compound, thinking he’d nailed it. A few weeks later, he noticed bubbling around the spot. He’d trapped moisture underneath, and rust had already started to creep in. His quick fix turned a simple repair into a costly body shop visit.
The Point of No Return
So, where’s the line in the sand? It’s actually pretty clear: if you can see bare, shiny metal at the bottom of the scratch, it’s time for a body shop. A scratch this deep has blown through every protective layer—the clear coat, the color, and the primer—leaving your car’s steel or aluminum panel completely exposed.
This is far more than just a cosmetic flaw. Exposed metal is an open invitation for rust and corrosion to set in. Worse yet, it can spread unseen beneath the paint, silently compromising the entire panel.
A DIY fix on exposed metal can easily trap moisture, leading to mismatched colors, an uneven finish, and hidden corrosion that eats away at your car long after you think the problem is solved.
Why Pros Are Worth It for Deep Scratches
Professional body shops have the specialized equipment and controlled environments that are simply impossible to replicate in a home garage. They can properly strip, prime, and repaint the damaged area to match the factory finish perfectly.
More importantly, they ensure the metal is permanently sealed against the elements, preventing future rust issues. It’s a guaranteed, durable repair.
The market for at-home solutions is definitely booming. Valued at $1.58 billion, the global car scratch remover market is projected to hit $2.27 billion by 2029, a clear sign that car owners love affordable DIY options. You can dive deeper into these market trends from industry analysts.
But this trend doesn’t change the basic chemistry of rust. For those severe, panel-deep gouges, trusting a professional isn’t just an expense—it’s a crucial investment in your vehicle’s long-term health and resale value.
Don’t Just Fix Scratches—Prevent Them
You’ve just spent hours—maybe even a full weekend—sanding, compounding, and polishing your car’s paint back to perfection. It looks incredible. Now, imagine the sinking feeling of spotting a brand-new scratch just a week later.
It’s a scenario I’ve seen play out countless times. A client once meticulously restored a deep scratch on his prized show car, and he was beaming with pride. Two weeks later, he called me, completely deflated. A neighborhood cat had decided to use his hood as a shortcut, leaving a fresh set of claw marks. This isn’t just bad luck; it’s a hard lesson on the vulnerability of an unprotected finish.
After all that work, it’s time to shift from a reactive mindset to a proactive one. Let’s talk about keeping that finish looking perfect.
A Modern Shield for Your Paint
This is where today’s protection technology completely changes the game, leaving traditional waxes in the dust. At Titan Coatings, we were the first to bring Elastomer coatings to the market—a genuine leap forward in paint defense. We engineered something fundamentally different using a unique blend of nano-tube structures and our proprietary Dark Matter tech.
Many ceramic coatings on the market are incredibly hard, but they can also be brittle and rigid. Our elastic coatings are engineered to be as tough as glass yet remain flexible.
That elasticity is the secret to their durability. The coating can expand and contract right along with your car’s metal panels as they heat up and cool down. This prevents the cracking and premature failure you see with lesser products, especially in climates with extreme temperature swings from freezing cold to blistering hot.
The Power of a Flexible, Self-Healing Barrier
The absolute best way to deal with scratches is to stop them from ever happening. Think of a high-quality coating as a tough, sacrificial shield that takes the abuse so your factory clear coat doesn’t have to.
Our Titan Vulcan TX154 Self-Healing Coating is a perfect example of this philosophy. It’s designed to resist the very swirls and light scratches that come from daily driving and washing, effectively locking in your hard work and protecting your car’s value.
The automotive care industry is booming, with new nano-technology formulations making products more effective than ever. The market for car scratch removers alone is projected to grow at a CAGR of 6% through 2033, and you can learn more about the growth of the car care market on archivemarketresearch.com. These same scientific breakthroughs are making protective coatings more powerful, too.
Choosing the right protection is key, and it really comes down to what you need. To get a better sense of the options, you can compare paint protection film vs. ceramic coating in our detailed guide. At the end of the day, sealing that perfect finish with a durable, flexible coating is what gives you true peace of mind on the road.
Common Questions About Car Scratch Repair
After diving deep into the methods of scratch repair, it’s natural to have a few lingering questions. Let’s clear up some of the most common points of confusion and bust a few myths I hear all the time, ensuring you can finish your project with total confidence.
One of the wildest stories I ever heard involved a client who took a tube of whitening toothpaste to a scuff on his brand-new truck. He’d read online it was a “secret” detailing trick. Instead of a quick fix, he ended up with a dull, hazy patch that was far more noticeable than the original scratch. This is a perfect example of why getting your information from trusted sources is so critical.
Can You Really Use Toothpaste to Fix Scratches?
Let’s tackle this persistent myth head-on. The short answer is no, you should absolutely not use toothpaste on your car’s paint. Toothpaste is an abrasive designed for tough tooth enamel; it’s far too coarse and unpredictable for a delicate clear coat.
Using it almost always results in a mess of fine scratches and a dull finish, doing much more harm than good. Stick to products specifically formulated for automotive paint to avoid a costly, frustrating mistake.
How Do You Find the Perfect Touch-Up Paint Match?
Getting an exact color match isn’t about guesswork—it’s about finding a specific code. Every vehicle has a factory paint code sticker located somewhere on the body.
You’ll usually find this sticker in one of a few places:
- Inside the driver’s side doorjamb
- Under the hood near the firewall
- Inside the glove compartment
This code is your golden ticket to ordering touch-up paint that will blend seamlessly. Without it, you’re just guessing, and even a slightly off-shade color will stick out like a sore thumb.
Pro Tip: Once you have the code, you can order a small touch-up paint pen or bottle directly from your dealership or a reputable online supplier. This is the single best way to guarantee a perfect match for your vehicle.
How Long Should You Wait Before Waxing a Repair?
This is a fantastic question and one that’s crucial for the longevity of your repair. After applying touch-up paint, you need to give it adequate time to “cure,” not just dry. Curing is a chemical process where the paint hardens completely and bonds to the surface.
As a rule of thumb, wait at least 30 days before applying any wax or sealant over a fresh touch-up paint repair. Applying wax too soon can trap solvents that are still trying to escape, preventing the paint from curing properly and potentially leading to a soft, vulnerable finish. Patience here really does pay off.
Beyond immediate repairs, consistent car care and paint protection are crucial. You can find more comprehensive articles and tips on vehicle maintenance and longevity in an automotive blog for further reading.
Protecting that perfect finish is the final, most important step. At Titan Coatings, we pioneered the use of flexible Elastomer coatings to provide a durable shield that moves with your vehicle, preventing cracks and failure. Discover how our advanced nano-tube technology can safeguard your hard work and keep your car looking flawless for years to come at https://www.titancoatings.us.
0 Comments