It’s a moment that makes any car lover’s heart sink. You walk out to your car, expecting to see that familiar gleam, but instead, you find it covered in a fine, gritty mist of tiny paint specks. This isn’t just dust that’ll wash off; it’s paint overspray, and it has chemically bonded to your car’s clear coat, turning that smooth-as-glass finish into something that feels like sandpaper.
Believe me, this happens way more often than you’d think.
Picture this: you’ve just spent your weekend detailing your pride and joy. It’s looking perfect. You park downtown for a couple of hours, and when you come back, your deep, glossy black paint is peppered with thousands of tiny white dots. What happened? A construction crew was painting a nearby building, and the wind did the rest. That flawless surface you worked so hard for is now rough and contaminated.
Where Does This Stuff Even Come From?
This kind of scenario plays out all the time. Paint overspray can ambush you from all sorts of places, often when you least expect it. Knowing the common culprits can help you steer clear in the future.
- Big Construction Jobs: Think bridges, water towers, or industrial buildings. When they spray paint on that scale, the atomized mist can travel for miles on a breezy day.
- Neighborhood DIYers: Your neighbor deciding to spray paint their fence on a windy afternoon is a classic recipe for overspray disaster.
- Road Crews: Those yellow and white lines on the highway are laid down with powerful sprayers. If you drive by at the wrong moment, your car can get a nice misting.
- Sloppy Body Shops: It’s ironic, but sometimes the very places that are supposed to fix paint are the ones causing the problem, letting overspray drift out of their bays and onto unsuspecting cars.
Here’s the critical thing to understand: overspray isn’t just sitting on your paint, it’s bonded to it. If you ignore it, those little particles can work their way deeper into the clear coat, making them a nightmare to remove and potentially causing permanent damage. Acting fast—and correctly—is everything.
Why You Can’t Afford to Wait
The sheer size of the paint remover market tells you how widespread this issue is. We’re talking about an industry valued at around USD 7.86 billion in 2024, and it’s still growing. A big part of that growth is driven by people just like you looking for safe, effective ways to solve problems like overspray. If you’re curious, you can find out more about these market trends and their environmental impact.
The good news? As frustrating as finding overspray is, getting rid of it is totally doable. You just need the right approach and the right tools. This guide will walk you through exactly how to tackle it, ensuring you don’t accidentally make a small problem much, much worse.
Assembling Your Overspray Removal Toolkit
Before you even think about touching that gritty, overspray-covered surface, let’s talk strategy. Charging in with the wrong supplies is like trying to defuse a bomb with a hammer—you’re just going to make a bigger mess. I’ve seen it happen. A successful paint overspray removal job is 90% preparation and 10% execution.
Having the right tools ready to go isn’t just about convenience. It’s your first and best line of defense against turning a minor annoyance into a costly, soul-crushing trip to the body shop. Think of this as your mission briefing; every tool has a specific job in lifting those stubborn paint specks without hurting the delicate clear coat underneath.
The Core Essentials for a Safe Start
First things first, let’s gather the non-negotiables. These are the foundational tools you’ll need for pretty much any level of overspray contamination.
- Two Buckets with Grit Guards: This is non-negotiable. One bucket holds your soapy water, the other is for rinsing your wash mitt. This simple setup is the key to preventing the dirt you just took off from being ground right back into the paint.
- High-Quality Car Wash Soap: Stick with a pH-neutral soap. The goal is to clean the surface, not to strip off any wax or sealant you might already have on there.
- Plush Microfiber Wash Mitts and Towels: Please, forget old bath towels or sponges. High-GSM (grams per square meter) microfiber is your friend. It’s designed to trap dirt particles deep within its fibers, pulling them away from your paint instead of just dragging them across it.
Specialized Gear for Tackling the Grime
Once the car is perfectly clean, it’s time to bring in the specialized equipment. This is where the real work begins.
- Detailing Clay Bar: This is your primary weapon. For most overspray, a medium-grade clay bar is the perfect choice. It works by gently grabbing and pulling any contaminants that have bonded to your paint’s surface.
- Clay Lubricant: I can’t stress this enough: never use a clay bar without a proper lubricant. Dry-claying is a surefire way to create scratches and marring. A quality lubricant, like a dedicated quick detailer, creates a slick, protective barrier for the clay to glide on. For a high-quality option that provides excellent slickness, check out our versatile Titan Auto Quick Detailer.
- Automotive Solvent or Tar Remover: Got some really stubborn, cured-on overspray? A dedicated solvent can be a lifesaver, dissolving the paint specks without harming your clear coat. Just make sure you choose one specifically made for automotive use.
This handy decision tree helps visualize that first critical assessment: do you need to tackle this now, or is a simple wash enough for the moment?
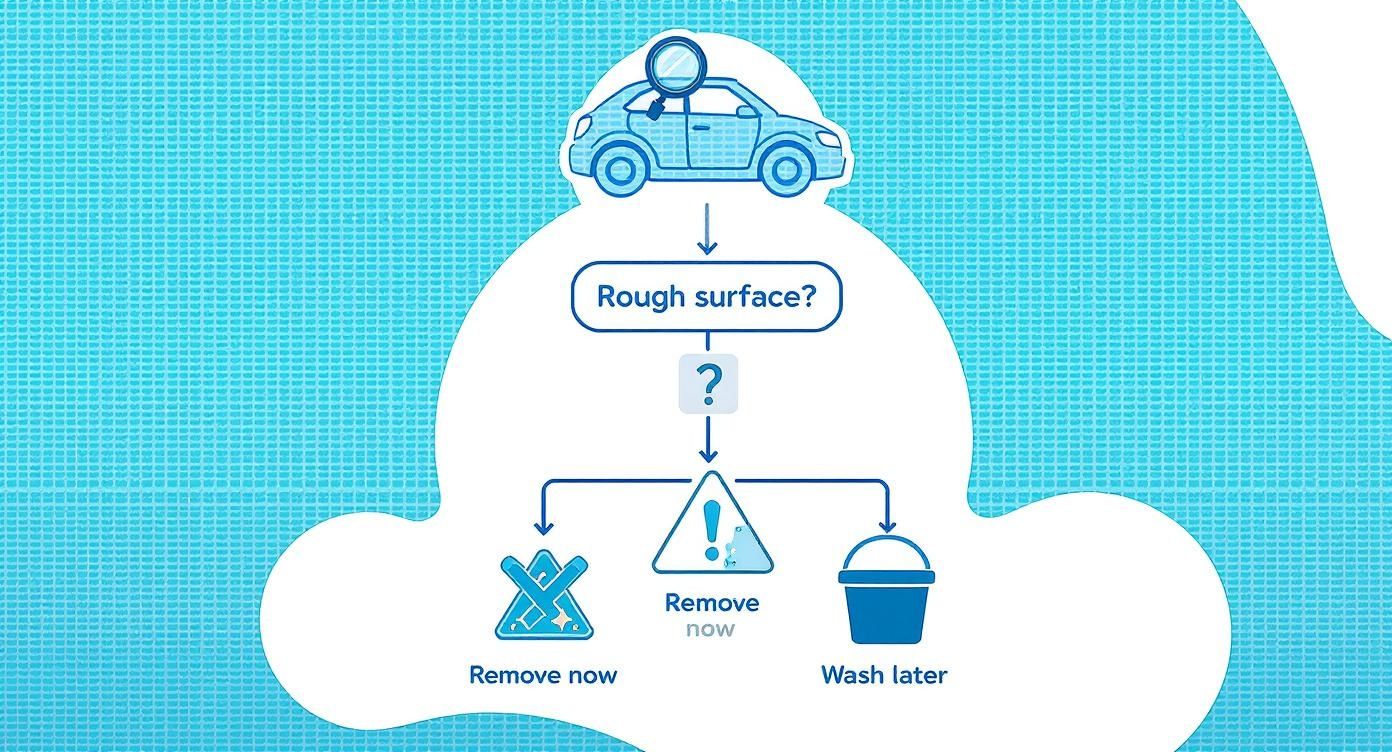
As the flowchart shows, that rough, gritty feeling is the dead giveaway. If you feel it, you need to act carefully and quickly to stop the overspray from bonding even more tightly to your paint.
Overspray Removal Method Selector
Choose the best removal method based on the overspray severity and surface type. Always start with the least aggressive option first.
| Severity | Recommended Method | Surfaces | Key Tip |
|---|---|---|---|
| Light | Clay Bar & Lubricant | Paint, Glass, Chrome | Keep the surface very well lubricated. |
| Moderate | Solvent / Tar Remover | Paint, Metal, Glass | Test on a small, hidden spot first. |
| Heavy | Polish / Compound | Paint Only | Use a dual-action polisher for best results. |
| Extreme | Wet Sanding | Paint Only (Thick Clear Coat) | This is a last resort and often best left to pros. |
This table is just a guide. Your car’s specific situation will dictate the best approach, but it gives you a solid game plan to start with. You can browse our shop to find our products and check the comparison page to see the differences.
Don’t Forget Your Personal Safety
Working with these products, especially chemical solvents, means you need to take some basic safety precautions. Protecting yourself is every bit as important as protecting your car’s paint. A clean and well-prepared surface is key, not only for paint adhesion but also for safely removing any unwanted blemishes; you can learn more about the principles of a clean workspace from these proper wall preparation techniques.
Always prioritize your safety. Nitrile gloves will keep chemicals off your skin, and safety glasses are an absolute must to shield your eyes from accidental splashes. It only takes a second for a mistake to happen, so don’t skip this.
In the end, your toolkit is your best friend in this process. By getting these items together beforehand, you’re setting yourself up for a smooth, effective, and safe removal, transforming that rough, disappointing surface back into the flawless finish you know and love.
Mastering the Clay Bar: Your First Line of Defense
When you’re dealing with light to moderate paint overspray, a detailing clay bar isn’t just another tool—it’s your absolute best friend. This is the go-to method for pros because it physically shears away those bonded specks of paint without being harsh on your clear coat.
Think of it less like scrubbing and more like giving your car’s paint a super-close, careful shave. It lifts away the gritty imperfections and brings back that slick, smooth surface you’re missing.

Prepping the Surface for a Flawless Finish
Before you even think about touching the paint with a clay bar, the car must be spotlessly clean. Trying to clay a dirty car is a guaranteed way to cause damage. Any loose grit will get trapped in the clay and dragged across the paint, leaving behind a web of fine scratches.
Start with a proper two-bucket wash to get rid of all the surface-level dirt. After rinsing—but before you dry it off—you’re ready to move on. For a full breakdown of this crucial prep work, our guide on how to decontaminate car paint covers everything you need to know.
The Art of Claying: Technique is Everything
With the car washed and still wet, it’s time to get to work. The process itself is simple, but your technique will make all the difference.
- Prep Your Clay. Grab a piece of the clay bar (about a third of it) and knead it in your warm hands until it’s soft and easy to shape. Flatten it into a small pancake that fits comfortably across your fingers.
- Get Generous with Lubricant. Spray a good quality clay lubricant all over a small, 2×2 foot section. Seriously, don’t be shy here. You cannot use too much lube. The goal is to create a slick barrier for the clay to glide over effortlessly.
- Glide, Don’t Press. Gently slide the clay across the lubricated panel using only light fingertip pressure. Let the clay do the work. You’ll feel—and probably hear—a gritty resistance as the clay grabs the overspray particles.
- Check, Fold, and Repeat. After a few back-and-forth passes, the resistance will disappear, and the clay will glide silently. That’s your cue to stop. Wipe the area with a clean microfiber towel and feel the surface. It should be perfectly smooth. Now, look at the clay. You’ll see all the tiny paint specks it pulled off. Fold the dirty clay in on itself to expose a fresh side, and move on to the next section.
This methodical process is incredibly satisfying. As you work panel by panel, you can literally feel the rough, sandy texture transform into a slick, glass-like finish. It’s tangible proof that you’re winning the battle against the overspray.
Common Clay Bar Mistakes to Avoid
A clay bar is a safe tool, but a few common mistakes can turn a simple job into a headache. Keep these in mind:
- Dropping the Clay: This is the number one rule. If the clay hits the ground, it’s done. Throw it away immediately. It will be embedded with abrasive grit that will absolutely scratch your paint.
- Not Using Enough Lube: If you feel the clay starting to drag or stick, stop and spray more lubricant. Dry-claying will mar your finish, guaranteed.
- Working in Direct Sunlight: A hot panel makes the lubricant evaporate too quickly and can cause the clay to get gummy. Always work in the shade on a surface that’s cool to the touch.
Learning how to properly use a clay bar is a fundamental skill for removing paint overspray. It takes a bit of patience, but the results are fantastic. Once you’re done, you’ve created a perfectly clean foundation, ready for a protective wax, sealant, or coating to bond to.
Advanced Removal for Stubborn Paint Overspray
Sometimes, you’ll encounter paint overspray that just laughs at a clay bar. This is what separates a minor annoyance from a real problem. It usually happens when the paint is a tougher, more industrial type—think two-part epoxy from a bridge project—or when it has been baking on your car’s surface for weeks, even months.
When this happens, you have to escalate your approach, but you need to do it with extreme caution. We’re moving beyond simple decontamination and into the realm of true paint correction.
Imagine this scenario: a buddy of mine spent a whole weekend claying his truck after parking near a freshly painted warehouse. The light mist came off, sure, but he was left with clusters of stubborn specks on the hood and roof that wouldn’t budge. They were bonded so tightly the clay just glided right over them. That’s the exact moment you need to consider stepping up your game.
Reaching for Chemical Solvents Safely
Before you even think about anything abrasive, a dedicated automotive solvent is your next logical move. These products are engineered to dissolve specific contaminants like tar, adhesive, and—most importantly—certain types of paint without immediately trashing your car’s factory clear coat.
But here’s the critical part: not all solvents are created equal. You must avoid harsh chemicals like lacquer thinner, acetone, or general-purpose paint strippers at all costs. I can’t stress this enough. These will soften or completely strip your clear coat in seconds, causing irreversible damage.
Here’s how to use a proper automotive solvent the right way:
- Do a Test Spot: This is non-negotiable. Find an inconspicuous area, like a low door jamb, and apply a small amount of the solvent with a microfiber applicator. See how it reacts before you touch a visible panel.
- Apply and Let It Work: On a cool, clean panel out of direct sunlight, apply the product. Let it sit for the manufacturer’s recommended time—usually just 30-60 seconds. You might see the paint specks start to soften or even “bleed” a little.
- Gently Agitate, Don’t Scrub: Use a clean, soft microfiber towel to gently wipe the area. The goal is to let the chemical do the heavy lifting, not your elbow grease.
- Neutralize and Clean: Immediately after wiping, wash the area thoroughly with car soap and water. This neutralizes the solvent and gets any residue off the paint.
Choosing the right product is everything. The industry has been forced to move away from nasty chemicals due to health and environmental concerns. New regulations, like the U.S. EPA ban on methylene chloride, have pushed manufacturers to create safer, bio-based paint removers. While that’s great for our health, it means you absolutely must read and follow the instructions on these newer, more sensitive formulas.
Machine Polishing for a Flawless Finish
If a safe solvent still leaves contaminants behind, it means the overspray has bonded so aggressively that it needs to be mechanically abraded off. This is where a machine polisher and a cutting compound enter the picture. A compound is essentially a liquid abrasive that, when used with a polisher, shaves off a microscopic layer of your clear coat.
The process levels the surface by cutting the clear coat down to just below the embedded overspray, removing it completely. It’s incredibly effective, but it also requires a certain level of skill. Using too much pressure, the wrong pad, or staying in one spot for too long can “burn” right through the clear coat. That’s a mistake that can only be fixed with a trip to the body shop.
If you’re facing another common painting mistake, you might find some useful guidance on how to fix paint drips, as the principles of careful surface correction are quite similar.
The Last Resort for Stubborn Specks on Glass
What about glass? Good news—since glass is much harder than your car’s paint, you have one final option for those impossibly stubborn specks: a fresh, single-edge razor blade.
Warning: This is for glass only. NEVER use a razor blade on paint, plastic trim, or tinted windows (if the tint film is on the outside). You will cause permanent damage.
To do this safely, lubrication is key. Generously spray the glass with a quality glass cleaner. Hold the razor blade at a flat, 45-degree angle to the surface and gently push forward in one direction to “shave” the paint specks off. Never drag the blade sideways or use its corners, as that’s a surefire way to etch deep scratches into the glass.
At this point, you’ve exhausted the safest and most effective DIY methods. If that pesky overspray is still there, it’s time to stop. Put the tools down and call a professional detailer before you risk causing expensive damage.
The Ultimate Defense: Protecting Your Paint with an Elastomer Coating
After putting in all that effort—the washing, the claying, maybe even some polishing—you’ve finally gotten rid of that stubborn overspray. The paint is smooth again. Now what? You certainly don’t want to go through all that again anytime soon.
This is the perfect moment to shift from being reactive to being proactive. It’s time to put a real shield on your paint.
Let’s revisit my buddy’s story. Once his truck was finally clean of that warehouse overspray, he was determined to make sure this was a one-time problem. He wasn’t looking for a wax that would wash away in a few months; he needed something serious, something durable. That’s what led him to our elastomer technology here at Titan Coatings. We were the first company to introduce elastomer coatings to the market using nano tubes and our proprietary Dark Matter Tech.
A Smarter Kind of Shield
Most people have heard of ceramic coatings. They’re known for being incredibly hard, which is fantastic for resisting light scratches. But that hardness has a downside: it often makes them brittle.
Think about what a car goes through. It bakes in the hot sun, then gets hit with a cool rain shower. Those temperature swings make the body panels expand and contract. A rigid coating can’t handle that stress forever and can develop tiny micro-fractures, which eventually compromises the protection.
That’s where we took a completely different path. Titan pioneered the use of elastomers in automotive coatings, creating a formula that blends hardness with incredible flexibility. Imagine a coating that’s hard like glass but can flex and stretch like rubber. That’s the magic.
In short, our elastic coatings don’t just sit on top of the paint like a stiff sheet of glass. They become a dynamic, living part of the surface. This flexibility is the secret to their incredible longevity, as the coating won’t crack down due to intense temperature changes between frozen and hot conditions.
How Flexibility Beats Future Overspray
So, how does a flexible coating prevent another overspray disaster? It comes down to two simple but powerful properties: slickness and chemical resistance.
- Unbelievable Slickness: The surface of an elastomer coating is ridiculously slick. That super low-energy surface makes it almost impossible for contaminants like airborne paint particles to get a grip. They just can’t bond. Instead, they sit loosely on top, ready to be washed away with ease.
- Tough Chemical Resistance: Our coatings form a powerful barrier that shrugs off chemical and environmental attacks. This means that even if some overspray lands on your car, it has a much harder time etching into or bonding with the protective layer itself.
Want to get into the weeds on the technology? You can learn more about how Titan Coatings’ elastomer technology works and see why it’s a leap forward from old-school ceramic products.
Your Best Defense: The Titan ‘Hyper-Quartz’ Hybrid Coating
For perfectionists like my friend who want the absolute best defense, our Titan ‘Hyper-Quartz’ Hybrid Coating is the answer. It’s a professional-grade system that gives you the best of both worlds: our flexible elastomer base is topped with an ultra-hard quartz layer.
This hybrid approach creates a shield that is purpose-built to defeat the things that make overspray such a pain. Thanks to its extreme chemical resistance and slickness, a simple maintenance wash is usually all it takes to remove contaminants that would have meant hours of claying on an unprotected finish.
By investing in a modern elastomer coating, you’re not just making your car shiny. You’re installing a flexible, durable, and highly resistant shield that turns future problems like paint overspray into a non-issue. It’s the best peace of mind a car owner can have.
Common Paint Overspray Questions Answered
Even with the best plan, you’re bound to run into a few tricky “what-if” scenarios when you’re trying to get paint overspray off your car. Let’s tackle some of the most common questions head-on so you can finish the job with confidence.
Can I Just Use Gasoline or Acetone on My Car?
Let me be crystal clear: absolutely not. I know it’s tempting to grab a strong solvent you have lying around, but things like gasoline, acetone, or lacquer thinner are a death sentence for your car’s finish.
These chemicals are far too aggressive for automotive paint. They will soften, haze, or even completely dissolve your clear coat, leaving behind a permanent, ugly mess. They’ll also destroy plastic trim, rubber seals, and headlight lenses. Always, always stick to products made for cars, like a quality tar and adhesive remover, and even then, test it on a hidden spot first.
The Clay Bar Left Scratches! What Did I Do Wrong?
If you’re seeing a web of fine, shallow scratches after claying, that’s called marring. Nine times out of ten, it’s caused by one of two things: not enough lubrication or a dirty piece of clay.
The surface needs to be soaking wet with clay lube. If the bar ever feels like it’s grabbing or dragging, stop and spray more. More importantly, if you drop your clay on the ground, throw it away. Don’t even think about rinsing it off. It’s now embedded with grit that will act like sandpaper on your paint. You can usually fix light marring with a quick polish, but it’s so much easier to just prevent it.
It’s no surprise that people are looking for the right products. The global paint remover market was valued at around USD 1 billion in 2022, largely driven by industries like automotive refinishing. This just underscores how critical it is to use industry-approved solutions, not something from under the kitchen sink.
When Should I Give Up and Call a Professional?
Knowing when to wave the white flag is a skill. If you’ve already tried a good clay bar and a proper automotive solvent with no luck, it’s time to press pause.
If the overspray is incredibly thick, feels like sandpaper, or you have a bad feeling it’s something tough like a two-part epoxy, don’t push your luck. Calling a professional detailer is the smart play. Trying to fix it with aggressive compounding or wet sanding without the right experience can burn right through your clear coat, turning a simple problem into a very expensive trip to the body shop.
Will This Mess Up My Ceramic Coating?
This is a fantastic question, and the answer really depends on the removal method you use and the quality of the coating itself. A gentle claying session with tons of lubricant might not hurt a top-tier, professionally installed coating.
However, any kind of chemical solvent or machine polishing will almost certainly weaken or completely strip the coating from that spot. This is where a high-quality coating really proves its worth. Our Titan coatings, for example, use flexible elastomer technology that offers incredible chemical resistance and makes it much harder for contaminants to stick in the first place. You can learn more in our guide to the best paint protection for new cars. Just remember, after any aggressive spot cleaning, you’ll definitely need to re-coat that area.
0 Comments