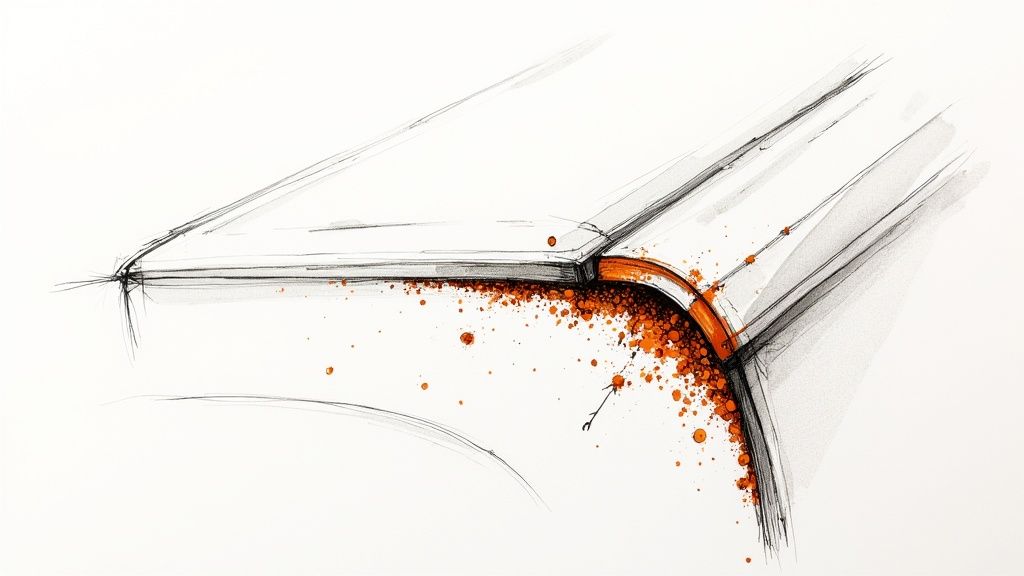
Let’s be blunt: your car’s finish is under constant attack. Tiny, razor-sharp particles of metal are digging into the clear coat, and a simple wash won’t get them out. This isn’t just road grime; it’s iron fallout—superheated metal fragments from brake dust and industrial pollution that actually bond with your paint. Over time, they rust, creating those tell-tale orange pinpricks that can permanently damage the finish.
Understanding Iron Fallout and the Damage It Does
You know the feeling. You’ve just spent an hour washing your car, it looks great, but when you run your hand over the paint… it feels like fine-grit sandpaper. That rough, gritty texture is the number one sign of embedded iron fallout. These microscopic ferrous particles are an unavoidable part of driving.
The two main sources are brake dust (hot, sharp metal shavings from brake pads and rotors) and industrial fallout from railways, construction sites, and factories. These particles fly through the air, land on your car, and their sharp edges and heat allow them to embed right into the clear coat.
How the Contamination Works
Once those iron specks are lodged in the paint, the real damage begins. As soon as they’re exposed to oxygen and moisture—rain, dew, or even just humidity—they start to oxidize. In other words, they rust. This creates a powerful chemical bond with your car’s surface that regular car shampoo simply can’t break. The result is a rough finish that kills your car’s gloss and weakens its protective layers.
But this isn’t just a cosmetic problem. As the iron particles rust, they swell, creating tiny fractures in the clear coat. If you leave it alone, that corrosion will work its way deeper, hitting the color coat and eventually the metal panel itself. That’s when you get irreversible paint failure. Our specially formulated iron fallout remover provides you with the power to stop this exact process in its tracks, protecting your investment.
The real magic of a dedicated iron remover is that it performs a chemical decontamination. Instead of you scrubbing and potentially dragging those sharp metal bits across the paint, our advanced formula gives you a safer way to detail. It targets and dissolves iron at a molecular level, so you can safely lift the contaminants away from the surface without any harsh abrasion.
How to Spot the Problem
Catching iron contamination early is the key to preventing serious damage. While the “sandpaper feel” is the most common giveaway, there are a few other visual cues that tell you it’s time for a deep clean.
If you suspect your vehicle is contaminated, here’s a quick-glance table to help you spot the tell-tale signs.
Common Signs of Iron Contamination
| Symptom | Visual Cue | Primary Locations |
|---|---|---|
| Rust Specks | Tiny orange or brown dots that look like pinpricks of rust. | Especially visible on white and light-colored paint. |
| Gritty Texture | Surface feels rough to the touch, even after a thorough wash. | Horizontal surfaces like the hood, roof, and trunk. |
| Poor Water Beading | Water lies flat or “sheets” poorly instead of forming tight beads. | Can affect both coated and uncoated paint. |
| Dull Appearance | The paint lacks depth and gloss, looking muted or hazy. | Most noticeable on dark-colored vehicles. |
Recognizing these symptoms means you can act before the contamination gets out of hand and causes permanent issues.
The need for high-quality decontamination products has never been greater. As more car owners and professional detailers understand these risks, the global market for iron fallout removers has grown to an estimated USD 1.34 billion in 2024. You can find more details on this trend in a market growth report from DataIntelo. This isn’t just a niche product anymore; it’s an essential part of modern vehicle care.
Our advanced formula tackles the problem head-on. Our smart chemistry gives you the confidence of knowing ferrous particles are being chemically dissolved the moment the product makes contact. You’ll see it work as the liquid turns a deep, dramatic purple—a clear visual sign that gives you peace of mind, showing the chemical reaction is neutralizing the iron and saving your paint. This process is the safest, most effective way to cleanse your vehicle’s delicate finish, so you can stop corrosion before it ever gets a foothold.
How to Prep Your Vehicle for Decontamination
Every professional detailer knows that the final result is only as good as the prep work. Before you reach for an iron fallout remover, you need to give it a clean slate to work on. If you skip this, the remover has to battle through road film, grime, and loose dirt, which drastically reduces its power to find and dissolve the embedded iron it’s designed to attack.
A few minutes spent on proper prep ensures the chemical can go to work immediately, giving you a more effective and efficient decontamination. This is how you achieve the flawless, glass-smooth results your clients expect.
Setting the Stage: The Right Environment
The first rule of chemical decontamination is simple: control your environment. The car’s surface must be cool to the touch. Period.
Spraying an iron remover onto a hot panel, especially one that’s been baking in the sun, is a recipe for disaster. The product will flash-dry almost instantly, not only wasting it but also creating the potential for stubborn water spots and chemical stains that are a nightmare to polish out. Always work in the shade, inside a garage, or wait for the cooler parts of the day like early morning or late evening. A cool panel is essential for giving the product enough dwell time to work its magic.
A rookie mistake is rushing this step on a warm day. You see the purple “bleeding” effect and think it’s working, but if the product dries in 60 seconds, that chemical reaction was cut short. It never had the chance to fully break down the iron, leaving you with a half-finished job.
The Critical Pre-Wash
Once the car is cool and in the shade, it’s time for a proper wash. This isn’t just a quick rinse-off; you need to remove every bit of loose contamination that’s sitting on top of the clear coat.
Grab a quality, pH-neutral car shampoo and use a two-bucket wash method to avoid re-introducing grit and causing new swirl marks. I always focus extra attention on the lower body panels, the area behind the wheels, and the rear end—these spots are magnets for heavy road grime. After a thorough wash, rinse every panel completely to get rid of any soap residue.
Finally, dry the vehicle. Whether you use a high-quality microfiber drying towel or a filtered air blower, the goal is a bone-dry surface. This allows you to see exactly where you’re applying the product and prevents any leftover water from diluting the formula.
Your Pre-Decontamination Checklist
- Vehicle Surface: Must be 100% cool and completely dry.
- Location: Shaded area, out of direct sun.
- Tools: Nitrile gloves, a stack of clean microfiber towels, a soft-bristled brush (for wheels), and a hose with a good spray nozzle.
This level of preparation is what separates a good detailer from a great one. It ensures that when you spray the iron fallout remover, it can get straight to work on the bonded contaminants. This is the foundation for achieving a truly clean surface, which is the perfect handoff to the next phase, like claying. To see how that fits into the process, check out our guide that breaks down what a clay bar treatment involves.
Applying Iron Fallout Remover to Paint and Wheels
Once the car is washed and prepped, it’s time for the magic. This is where you get to see the chemical decontamination happen in real-time, pulling out the invisible gunk bonded to the surface and leaving behind a finish that’s truly clean. The secret to getting this right is a methodical approach, whether you’re tackling a big panel like a hood or a complex set of wheels.
I always recommend working one section at a time—a door, a fender, the roof. This gives you total control and prevents the product from drying, which is the number one thing you want to avoid. Lightly mist an even coat of the iron fallout remover across the panel. You’re aiming for full coverage, but not so much that it’s running off in streams.
This quick infographic covers the essential prep work you should do before you even grab the bottle.
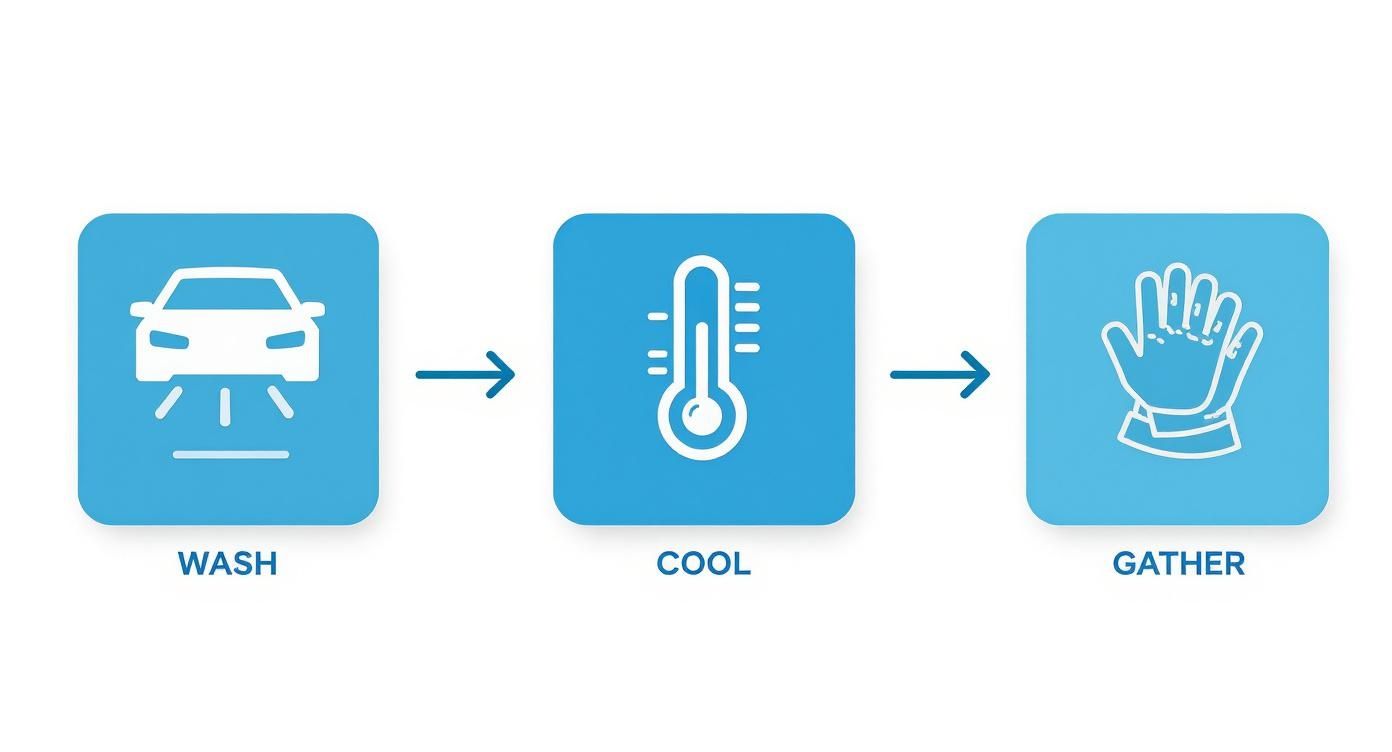
Nailing these three simple things—Wash, Cool, and Gather—sets the stage for the remover to work as effectively as possible.
What That “Purple Bleeding” on Your Paint Really Means
Almost as soon as the product hits the paint, you’ll start to see the famous “bleeding” effect. The active ingredients are designed to react only with ferrous (iron) particles. When the clear liquid finds embedded iron, it triggers a chemical reaction that turns it a deep, dramatic purple. This is more than just a cool visual; it’s your proof that the product is working, showing you exactly where the contamination is and that it’s being dissolved.
Let the product dwell for a few minutes. The sweet spot is usually 2 to 5 minutes, but this can change depending on the temperature and how dirty the car is. The golden rule is simple: never let the iron fallout remover dry on the paint. If you see it starting to flash, just give it another light mist or rinse it off right away.
After the dwell time, blast the panel with a strong stream of water from your hose or pressure washer. I always rinse from top to bottom to make sure all the purple residue is completely washed away. When you’re done, the paint should feel noticeably smoother, almost like glass. That’s how you know the bonded contaminants are gone.
That purple color change isn’t just for show. It’s a real-time chemical indicator that gives you complete confidence that the iron is being neutralized. Once the runoff turns clear, you know the job is done and the vast majority of the ferrous particles have been safely dissolved and removed.
A Targeted Approach for Wheels
Wheels are ground zero for iron contamination. They get a constant beating from hot, corrosive brake dust, making them the perfect test for any fallout remover. The process is pretty similar to working on paint, but often needs a little extra elbow grease to get perfect results.
Start by spraying the remover generously all over the wheel—the face, between the spokes, and deep into the inner barrel. You’ll likely see an intense, fast-acting purple reaction because of the heavy buildup. This is where our high-quality, pH-neutral formula gives you peace of mind, as it’s completely safe for all common wheel finishes, from clear-coated alloys to painted and powder-coated surfaces.
My Go-To Wheel Decontamination Workflow
- Spray: Hit the cool, dry wheel with a liberal coat, ensuring you get into every nook and cranny.
- Dwell: Give it 2-5 minutes to sit. You’ll see the brake dust start to dissolve and run down in purple streaks.
- Agitate: For the really stubborn, baked-on brake dust, grab a soft-bristled wheel brush. Gently work the product into tight spots, around the lug nuts, and between the spokes. This little bit of mechanical agitation makes a world of difference.
- Rinse: Use a powerful jet of water to rinse everything away, focusing on all the crevices to flush out the loosened grime.
This one-two punch of chemical power and light agitation gets wheels cleaner than a simple wash ever could.
The fact that modern removers are so effective yet safe is a huge advancement. Our pH-neutral formulation means our iron remover is tough on iron but gentle on your clear coat and any existing ceramic coatings, so you can detail without worry. This focus on safety has driven massive demand. In fact, the global market for pH-neutral iron fallout removers was valued at USD 1.12 billion in 2024, which shows just how much detailers and enthusiasts value products that work without causing damage. You can dive deeper into the market trends in the full industry report.
By getting these application techniques down, you’re doing more than just cleaning a car. You’re performing a true chemical decontamination that brings back smoothness, amps up the gloss, and perfectly preps the surface for whatever comes next, whether it’s polishing, sealing, or coating.
Pro Tips for Advanced Detailing Results
Getting that flawless, glass-like finish isn’t just about a good wash and wax. It’s about tackling the contaminants you can’t always see, the ones buried deep in the pores of the paint. This is where a professional-grade iron fallout remover becomes your secret weapon, bridging the gap between a good detail and a truly exceptional one.
When you use our advanced pH-neutral formula, you’re doing more than just cleaning the surface—you’re performing a chemical reset. This step is absolutely critical for prepping the paint for what comes next. It provides the assurance that any sealants or coatings bond directly to a pure, uncontaminated clear coat, which is the key to getting maximum durability and gloss for your client.
Working in Harmony with Ceramic Coatings
One of the biggest questions I hear from detailers and owners of coated vehicles is whether a powerful chemical cleaner will harm their expensive ceramic coating. That’s a valid concern, but it’s precisely where our formula shines. Our pH-neutral chemistry is engineered to be completely safe for all modern paint protection, giving you the confidence to use it on high-end, multi-layer applications like those from Titan Coatings.
It doesn’t strip or weaken the protective layer; it actually makes it better. Over time, even the best ceramic coatings get clogged with bonded iron particles, which you’ll notice as a drop in water-beading performance. Our remover gently dissolves these embedded particles, which revitalizes the coating by unclogging its microscopic pores and bringing its hydrophobic properties back to life. You’ll give your clients the benefit of seeing that “just-coated” water behavior return right before their eyes.
Think of it as a deep clean for your coating. You can give your clients the renewed performance they love by clearing out all the contamination smothering the surface, restoring the slick, self-cleaning properties they invested in without ever compromising the protection itself.
This makes it a safe and highly effective way to maintain peak performance between annual service appointments, ensuring your client’s vehicle looks and feels like it was just coated yesterday.
The Professional Workflow: Chemical Before Mechanical
For a truly pristine surface, the industry standard is a two-stage decontamination process: chemical first, then mechanical. Our iron fallout remover is the perfect chemical first strike, giving you the ability to safely melt away the sharp, jagged ferrous particles that pose the biggest threat to your paint.
Jumping straight to a clay bar is a recipe for disaster. If you try to remove these particles mechanically, you’re just dragging microscopic metal shards across the clear coat. The result? Fine scratches and swirl marks that you’ll have to machine polish out.
By using our remover first, you get the benefit of eliminating up to 90% of these harmful particles chemically, all without any physical contact. This makes the next step with a clay bar or clay mitt so much safer and more efficient. The clay can then focus on what it does best—lifting away any remaining non-ferrous contaminants like tree sap, tar, and stubborn road film.
The Correct Decontamination Sequence
- Thorough Wash: Always start with a clean, cool, and dry surface.
- Chemical Decon: Apply the iron fallout remover to dissolve all ferrous particles. Rinse it off completely.
- Mechanical Decon: Now, use a clay bar with plenty of lubrication to safely lift away anything left behind.
- Final Polish/Protection: The surface is now perfectly prepped for polishing, sealing, or laying down a new protective coating.
Verifying Your Work with the Baggie Test
So, how do you know for sure that you’ve removed all the bonded gunk? The “baggie test” is a classic detailer’s trick that lets you feel what your bare fingertips can’t. It dramatically amplifies your sense of touch.
After you’ve washed and rinsed the iron remover, place your hand inside a thin plastic sandwich bag. Gently glide your hand over the paint. The plastic isolates your skin and magnifies any roughness, making even the tiniest bonded particles feel like little bumps.
If the surface feels perfectly smooth as glass, you’re good to go. If you still feel a gritty texture, it tells you one of two things: you either need a second light pass with the iron remover, or the remaining contaminants are non-ferrous and it’s time for the clay bar. Once the full decontamination is done and the surface is silky smooth, you can move on to a quality finishing product. For more on that, you can learn about our auto quick detailer and its benefits. This simple test gives you instant, honest feedback and ensures you never leave a contaminated panel behind.
Locking In Your Flawless Finish

Once you’ve finished the chemical decontamination, the vehicle’s surface is as pure as it gets. It’s now surgically clean, slick to the touch, and totally free of the iron particles that were dulling its shine. But this clean slate is also an exposed one, making this the single most critical moment to lay down some serious protection.
With all that embedded iron gone, the clear coat is a perfect, uniform canvas. This allows waxes, sealants, and especially advanced ceramic coatings to grab on tight and form a much stronger, more direct bond. You can pass on a key benefit to your clients: without microscopic iron fragments getting in the way, their protective layer can adhere flawlessly.
A better bond translates directly into longer-lasting protection and a deeper, more liquid gloss. You’re not just cleaning the paint—you’re prepping the perfect foundation for a complete vehicle protection system.
Creating a Synergistic Shield
Our entire ecosystem of products is designed to work in harmony. Applying one of our ceramic-infused sealants or a full professional coating right after using our iron fallout remover creates a powerful, synergistic shield. The remover does the prep work, and the coating locks in that perfection.
This crucial step elevates a simple decontamination wash into a full-on preservation treatment. It’s the difference between a car that’s clean for a week and one that’s protected for years.
A freshly decontaminated surface is at its most receptive. Skipping the protection step is like washing your hands and then immediately touching a dirty railing—you’re leaving the pores wide open, inviting new contaminants to move right back in.
This is a critical mindset for both professional detailers and serious enthusiasts. The demand for robust vehicle care is undeniable. The global rust remover market, which shares a lot of chemistry with iron removers, is on track to grow from USD 580.7 million in 2025 to USD 856.5 million by 2032. That’s a huge shift toward preventative maintenance in the automotive world. You can find more details on this trend in this global market analysis.
By following up decontamination with a high-quality sealant or coating, you’re directly meeting this demand for long-term care and keeping the vehicle looking its absolute best for much longer.
The Long-Term Benefits of Sealing the Deal
Protecting the surface after an iron treatment isn’t just an upsell; it offers real advantages that clients can see and feel. It’s an essential part of any professional detailing workflow.
- Enhanced Durability: Your Last Step Product (LSP) of choice will last significantly longer because it’s bonded to a pure, uncontaminated surface—not just sitting on top of microscopic grime.
- Superior Gloss and Slickness: With no iron particles to interfere with the curing process, the coating can level out perfectly, maximizing light reflection for a deeper, almost-wet shine.
- Easier Maintenance: A protected surface is slick and hydrophobic. Future contaminants like dirt, water spots, and even new iron fallout will have a much harder time sticking, making routine washes faster, safer, and more effective.
At the end of the day, using an iron fallout remover isn’t just about getting rid of the bad stuff. It’s about preparing the surface for something great. It’s the essential prep work that unlocks the true potential of today’s best protective coatings. To learn more about what a properly prepped and protected vehicle can offer, check out our guide on the benefits of ceramic coating.
Your Iron Fallout Remover Questions Answered
Even the most thorough guide can leave a few questions unanswered. When you’re in the middle of a detail and need a quick, practical answer, this is the place to look. We’ve pulled together the most common questions we hear from detailers about using iron fallout removers.
Think of this as your go-to reference for getting the most out of your chemical decontamination process.
How Often Should I Use an Iron Fallout Remover?
This is easily the question I get asked most, and the honest answer is: it really depends. There’s no magic number that fits every car, but there are some solid rules of thumb based on how and where the vehicle is driven.
For a typical daily driver in a suburban area, a treatment every 6 to 12 months is a great preventative measure. This is often enough to keep iron buildup in check without going overboard.
Now, if the car lives in a harsher environment, you’ll want to step up the frequency.
- Urban or Industrial Areas: Parking near railways, construction sites, or industrial zones? Those environments are full of airborne iron. A treatment every 4 months is a smart move.
- High-Performance Brakes: Cars with aggressive, high-performance brake pads are notorious for kicking out tons of hot iron particles. A quarterly treatment is almost essential to keep those wheels looking sharp.
- Winter Driving: Road salt and the grime that comes with it can really accelerate corrosion. A thorough decontamination at the end of the winter season is non-negotiable.
Is This Safe for My Ceramic Coating?
Absolutely. This is one of the biggest advantages of a modern, pH-neutral formula like ours. You can detail with complete confidence knowing it is safe for all quality ceramic coatings, from DIY applications to professionally installed multi-year coatings. It will not strip, weaken, or damage the protective layer.
In fact, it provides the benefit of revitalizing the coating. Over time, a coating’s surface gets clogged with these bonded iron particles, which can make it feel rough and reduce its hydrophobic properties. Our remover dissolves these contaminants, essentially “unclogging” the coating. This simple chemical process helps you restore that slick, glassy feel and brings back the sharp water-beading you expect.
A common myth is that any cleaner powerful enough to dissolve metal must be harsh. Our chemistry is smarter than that. Our exclusive formulation provides a highly specific, surgical strike that only reacts with ferrous (iron) particles, so you can be sure the advanced polymers in your coating are left completely alone.
Iron Remover vs. Clay Bar—Which Do I Use First?
This is a critical process question, and getting the order right is the difference between a flawless finish and one covered in fine scratches. You must always use the iron fallout remover first.
Here’s the logic: think of it as a “touchless” first strike. The iron remover’s job is to chemically dissolve the sharp, jagged metal particles embedded in your paint. It melts them down into a liquid, giving you the ability to simply rinse them away. No rubbing, no friction.
If you jump straight to a clay bar, you’re essentially grabbing those microscopic metal shards and dragging them all over the paintwork. That’s a surefire way to inflict swirl marks and micro-scratches that you’ll have to polish out later.
The professional workflow is always:
- Chemical Decontamination: Use the iron fallout remover to safely dissolve and remove the most harmful iron particles.
- Mechanical Decontamination: Then, follow up with a clay bar or clay mitt to safely pull out any remaining embedded contaminants like tar, sap, or industrial fallout that the chemical remover didn’t target.
The iron remover does the dangerous heavy lifting, making the claying process much safer and more effective. It’s the cornerstone of a proper decontamination.
Ready to achieve that perfectly clean, glass-smooth finish? The advanced technology and built-in safety of Titan Coatings products deliver the professional-grade results your vehicle deserves. Take a look at our full line of detailing solutions and see how you can elevate your next project.
Discover superior protection at https://www.titancoatings.us.
0 Comments
Trackbacks/Pingbacks