
You're halfway through a correction when the full-size polisher reaches its limit. The paint around a mirror mount is still hazy, the pillar has a narrow scuff running beside the trim, and the bumper contour won't hold a large pad flat. For these jobs, 3 inch polishing pads aren't a novelty. They're the practical bridge between broad paint correction and controlled spot work.
A small pad won't automatically produce a better finish. It gives you a smaller, more concentrated contact area, which can improve control while increasing heat and the consequences of poor technique. The result depends on the pad material, backing system, machine, defect, and the protection you apply after correction.
The Critical Role of Small Format Pads
The difficult part of a correction often appears after the easy panels are finished. A large dual-action polisher moves efficiently across a bonnet or door, but it becomes awkward around a mirror base. The pad may touch the trim, lose stable contact on the curve, or force you to work at an angle that reduces correction efficiency.
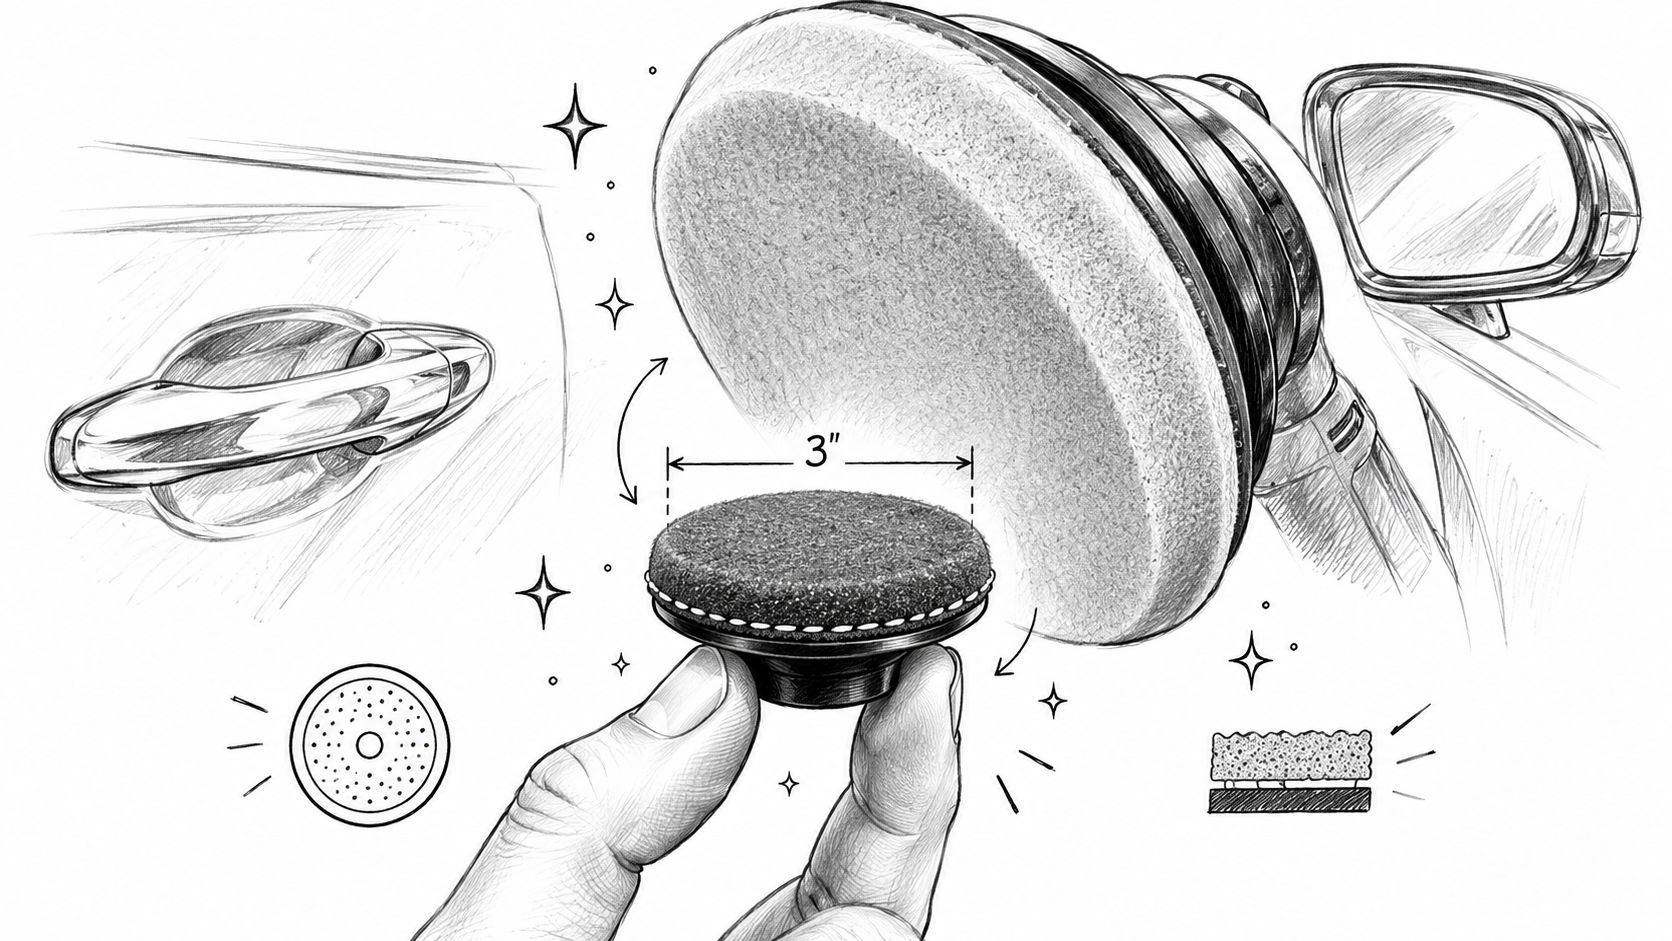
That's where a 3 inch polishing pad earns its place. I reach for one when a defect is localised, the panel narrows sharply, or surrounding trim leaves little room for a full-size tool. Mirrors, pillars, bumpers, aero vents, headlight bezels, and isolated scratches all benefit from a smaller working footprint. Independent detailing guidance identifies pad sizes from 1 inch to 8 inches and above, with mini and micro polishers commonly using 3 inch, 2 inch, and 1 inch backing plates. Detailing pad size guidance reflects how central the 3-inch format has become for controlled work.
Why the format stayed relevant
The size also has a historical connection to machine polishing. Meguiar's introduced its foam buffing pad in 1965, and later detailing commentary describes early and assembly-line style pads as being about 3 inches, often used with small air polishers for rapid correction and wipe-off work. A history of polishing pad development helps explain why today's professional systems still offer 3-inch pads for scratch and swirl removal.
The practical advantage isn't access alone. A small pad lets you isolate the work area, keep compound away from adjacent trim, and see how the paint responds without disturbing a broad section of the panel. That matters during spot repair, where removing more clear coat than necessary is a poor trade.
Practical rule: Use the smallest pad that gives you stable contact and enough correction speed. Smaller doesn't mean safer by default.
A 3-inch setup won't replace larger pads for open panels. It can slow production when used across broad paint, increase the number of passes, and load quickly if you apply too much compound. For a mobile detailer or a studio correcting modern vehicles with complex bodywork, the useful setup is not “small pads only.” It's a larger system for efficient panels and a small system for the areas where control matters more than coverage.
For a related option when the work area calls for a slightly broader footprint, compare the construction and intended use of Titan's 4-inch foam pads. The decision should follow the panel and defect, not a belief that the smallest accessory is always superior.
Understanding Pad Materials and Backing Systems
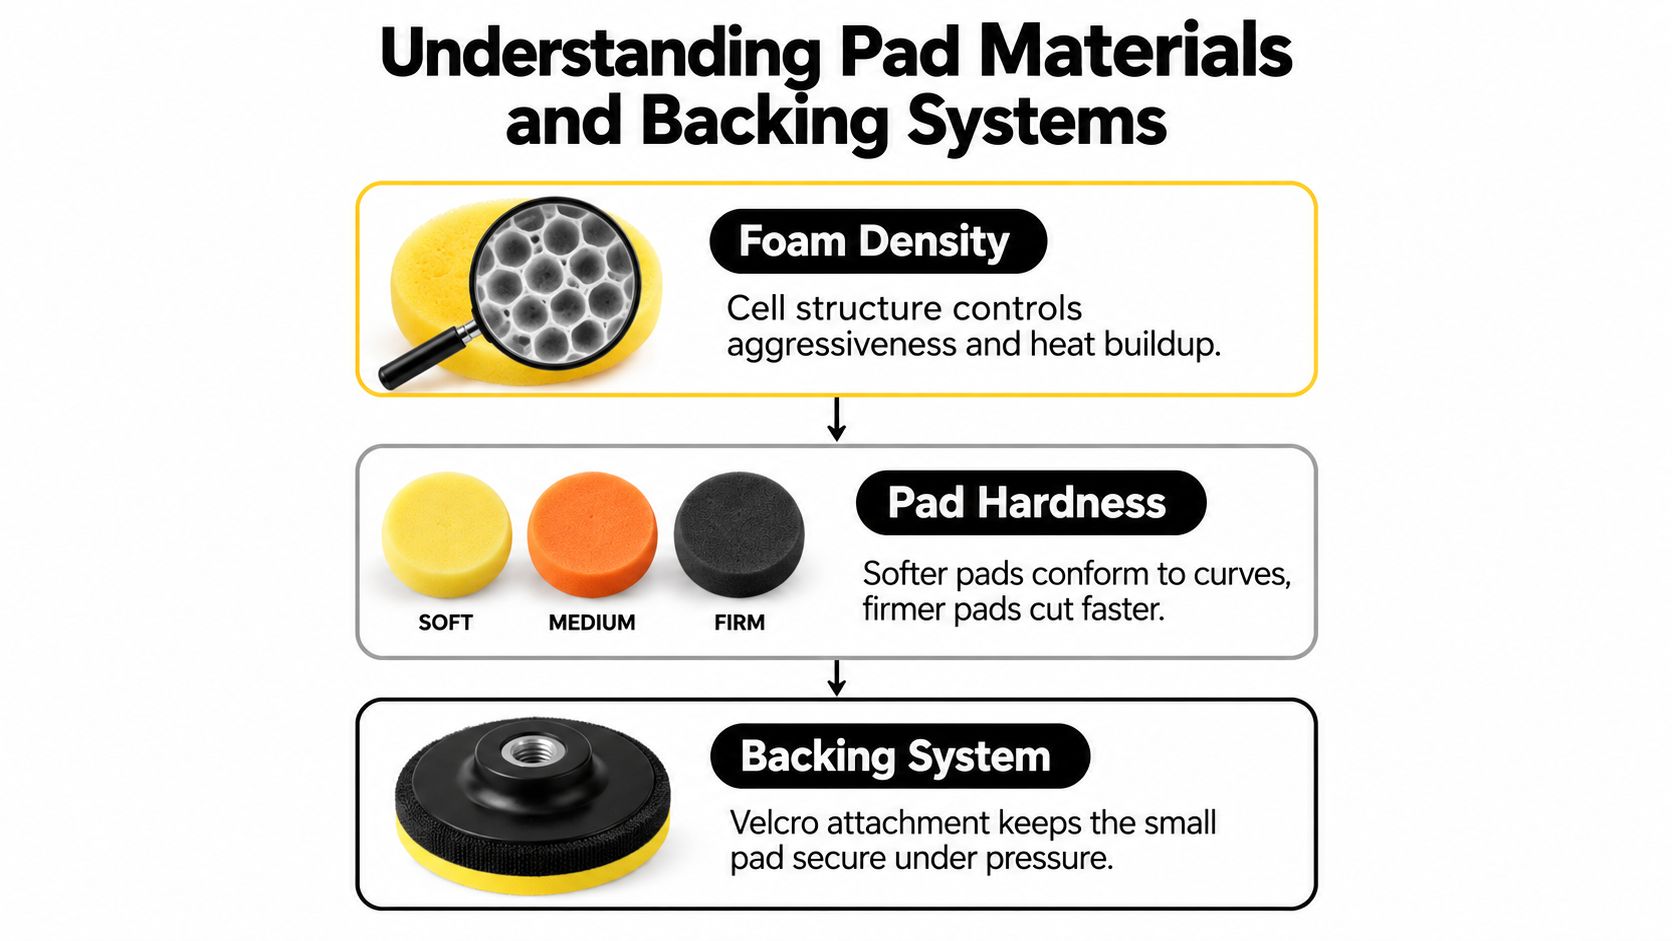
Pad choice starts with the defect, but material determines how the machine transfers energy into the paint. Foam softness, density, and cell structure influence how aggressively the pad cuts, how it conforms to a curve, and how quickly it manages or builds heat. 3M's polishing pad information describes foam cut in relation to softness and cell structure, while 3-inch systems are available in different densities for cutting, polishing, and finishing.
Material changes the correction
Soft finishing foam conforms well and spreads finishing polish smoothly, but it usually isn't the first choice for a pronounced defect. Firmer foam can create more useful mechanical action on localised marks, though it also transmits pressure more directly into a small area. Microfiber can provide strong correction with a different loading and cleaning routine, while wool offers another cutting behaviour and can be useful when foam isn't giving the desired response.
The important distinction is that material and compound work together. A firm foam paired with an aggressive compound can create unnecessary heat on a tight curve. A soft pad with a mild polish may refine haze effectively but do little against a deeper mark. Start with the least aggressive combination likely to solve the defect, then inspect under consistent lighting before escalating.
The backing system carries the load
Hook-and-loop attachment keeps the pad secured to the backing plate, but the interface still needs attention. The pad should sit flat, remain centred, and match the plate's intended diameter. A skewed pad creates vibration and an uneven working edge, which is especially noticeable with a small-format system.
Check these points before starting:
- Foam condition: Reject a pad with torn edges, hardened residue, or a delaminating face. Small defects in the pad can become unstable contact at the panel.
- Centre alignment: Press the pad onto the plate evenly. Don't rely on the machine to correct an off-centre attachment.
- Product dosing: Use enough compound to lubricate and work the section, but don't saturate the face. Excess product masks the pad's behaviour and encourages loading.
- Heat awareness: Short, controlled work cycles are easier to monitor than long, forceful passes over a small area.
- Cleaning discipline: Blow or brush residue from the face during the job, then wash cutting and finishing pads separately.
A 3-inch pad concentrates machine pressure across a smaller contact patch. That can improve localised defect removal, but it also makes pad alignment, pressure, arm speed, and product quantity more consequential. A small pad is a precision component, not a disposable miniature version of a large one.
For a broader look at available pad types and compatible accessories, use the Titan polishing and buffing pad range as one reference point, then match the material to the paint and correction stage.
Matching Pads to Your Detailing Tool
A pad is only useful when the machine can drive it predictably. The same 3-inch foam can feel controlled on a compact dual-action polisher and abrupt on a rotary tool, particularly when the operator adds pressure on a curved panel.
A dual-action machine is generally the more forgiving choice for small-format correction. Its oscillating movement helps reduce the risk associated with holding a rotating pad in one place, though it doesn't remove the need to manage heat and edge exposure. The machine's throw also matters. A long-throw DA can move a small pad aggressively, while a compact or short-throw tool may provide more measured control in a narrow area.
A rotary polisher gives direct rotational action and can correct quickly in skilled hands. It also demands more discipline around edges, body lines, and panel transitions. With a 3-inch pad, the concentrated contact area can make an aggressive rotary combination unforgiving if the pad tilts or the operator dwells on one point.
Fit the plate to the pad
The backing plate and pad must work as a system. Industry guidance says the pad should be at least the same diameter as the backing plate for safe operation, especially when the pad is used under machine pressure. Lake Country's polishing pad FAQ also explains why small backing plates suit tight contours and spot-correction zones.
A rotary backing pad marketed as 3 inches may accept pads from 3 inches to 4 inches, according to the Harbor Freight backing pad guidance. Centre the pad carefully to reduce imbalance and vibration. A DA plate can also sit slightly inside the pad edge. One example uses a 2 7/8-inch plate with a 3-inch pad, keeping the plate recessed from the foam edge for safety, as described by Marine 31's backing plate information.
| Tool choice | Where it makes sense | Main caution |
|---|---|---|
| Compact dual action | Pillars, mirrors, bumpers, localised haze | Monitor heat and pad loading |
| Long-throw dual action | Small corrections where speed is useful | Avoid forcing the pad across sharp contours |
| Rotary polisher | Skilled spot correction and direct cutting | Edge exposure and dwell time require close control |
Before polishing glass, keep the process separate from paint correction. Apex Glass Coating- 50ml is an advanced hydrophobic glass and windshield coating with deep pore bonding and water-repellent performance. It enhances visibility, reduces wiper use, and lasts up to 2 years, according to the product information. The glass must be properly prepared, and a paint pad should never carry abrasive residue onto a windshield.
Use a machine designed for the job, such as the equipment listed in Titan's car buffer and polisher selection, but judge the combination by control at the panel, not by the machine label alone.
From Paint Correction to Durable Protection
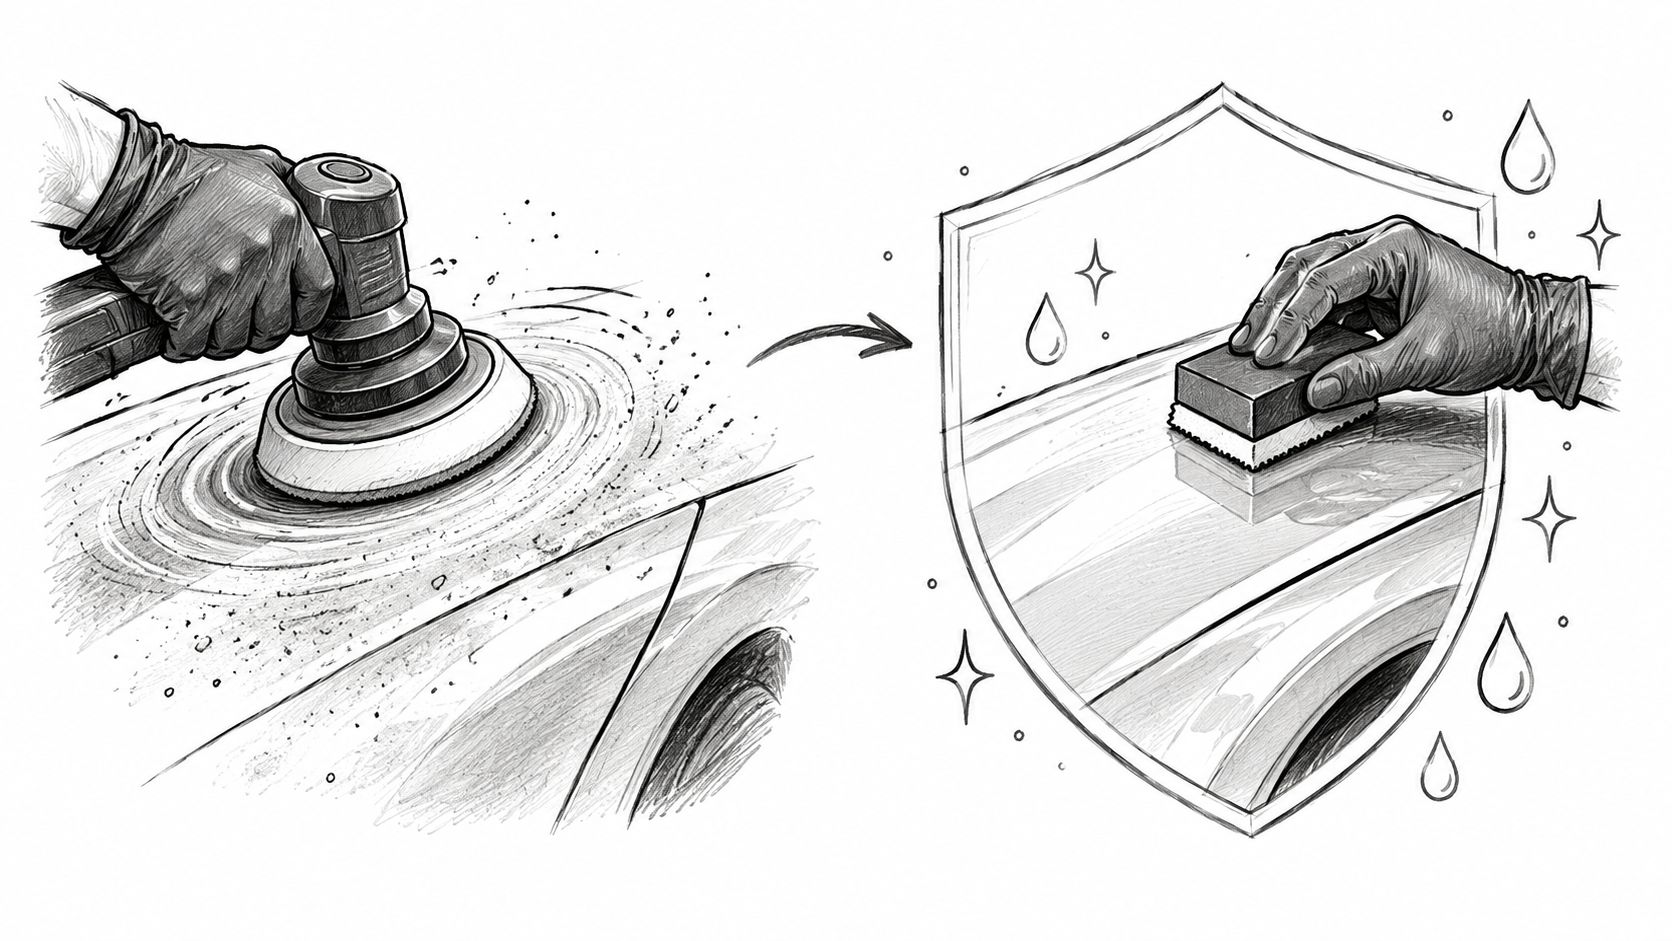
The first time I see a properly corrected panel under direct lighting, the temptation is to stop there. The surface looks deeper, reflections become cleaner, and the localised work disappears into the surrounding paint. But polishing leaves the finish ready for protection, not protected by the polishing itself.
Correction removes or reduces visible defects through controlled abrasion. The newly refined surface still faces ultraviolet exposure, chemicals, road contamination, wash friction, and temperature movement. That's why preparation before coating matters. Paint correction before ceramic coating should be treated as a connected process, not two unrelated services.
Hardness without brittleness
Titan Coatings has developed its own coating technology around elastomer coatings, nano tube technology, and Dark Matter technology. The practical appeal of an elastomer approach is the balance between surface hardness and flexibility. Titan's coating guide describes elastic coatings as engineered to be hard like glass and flexible, allowing them to flex and absorb impacts while handling dramatic temperature changes without cracking or delaminating. Titan's coating material reference provides that material description.
That flexibility matters after precision correction. A rigid protective layer can look impressive at application but may be poorly suited to a surface that expands, contracts, flexes, and receives impact from road debris. An elastic coating is intended to move with the substrate rather than treating flexibility as a weakness.
Titan's Alpha Quartz elastomer coating is positioned for straightforward installation by DIY users and mobile detailers. Its elastic behaviour is intended to help the coating resist cracking during temperature changes and when insects strike the vehicle surface. Application still depends on correct preparation, even coverage, and careful removal of residue. A coating can't compensate for polish dust, oils, or an incompletely inspected panel.
A finish needs a protection plan
The same principle applies to spray products. Titan's Ultra Ceramic Spray is presented as an easy-to-install ceramic spray coating for users seeking a practical application process and a finished protective layer. It belongs in a workflow where the paint is clean, residue-free, and ready to receive the product, rather than being used to conceal poor correction.
The pad creates the finish you want to preserve. The coating determines how that finish faces daily exposure. Treating both stages as one material system leads to better decisions than choosing the most aggressive pad first and thinking about protection later.
Maintaining Your Investment in Polishers
Small pads collect residue quickly because the working face has less room to distribute compound. A loaded pad can stop cutting cleanly, generate more heat, and leave a different finish from the one you expected. Cleaning isn't cosmetic maintenance. It keeps the pad's contact behaviour consistent.
During the job, pause before the face becomes saturated. Use compressed air or a suitable pad brush to remove dried compound while holding the pad away from the paint. If the product has hardened, don't attack the foam aggressively and tear the cell structure. Replace a pad when the face has lost its shape or the backing begins to separate.
Separate the correction stages
Never allow a finishing pad to inherit heavy cutting residue from a previous task. Mark pads by function or colour, and keep wool, microfiber, cutting foam, polishing foam, and finishing foam in separate storage groups. Cross-contamination can turn a mild finishing step into an unpredictable correction pass.
A simple routine works well:
- Clean soon after use: Fresh residue is easier to remove than cured compound.
- Rinse thoroughly: Follow the pad manufacturer's cleaning guidance and avoid leaving detergent in the foam.
- Dry completely: Store pads only after moisture has left the face and backing.
- Store flat or upright: Don't compress small foam faces under heavy equipment.
- Inspect before use: Look for hardened product, damaged edges, loose hook-and-loop material, and distortion.
A pad that looks clean can still hold abrasive residue in its cells. Treat inspection as part of setup, not as an afterthought.
Avoid mixing wet pads with dry accessories in a sealed container. Give each pad enough airflow to dry, then store it where dust and heat won't alter the material. A clean 3-inch pad gives more reliable feedback, which is essential when the defect is small and the working margin is narrow.
Achieving Professional Grade Results
Professional results don't come from owning the smallest pad. They come from making a defensible choice at every stage. The defect decides the correction approach, the panel decides the pad diameter, the paint response decides the compound, and the machine decides how much control the operator has.
A 3-inch system is valuable because it solves a specific problem. It reaches areas that a larger pad can't address cleanly, isolates spot correction, and lets the operator work around trim and body lines with less interference. It becomes counterproductive when used across large flat panels, when the operator expects diameter alone to create precision, or when a compact pad is paired with excessive pressure and an aggressive compound.
A repeatable decision process
Start with inspection under suitable lighting. Identify whether the defect is contamination, haze, transfer, a scratch, or a deeper mark that polishing shouldn't chase indefinitely. Test a small section with a conservative pad and compound combination, then wipe and inspect before increasing aggression.
Use the machine with a deliberate pace. Keep the pad centred, maintain stable contact, and monitor the panel with your hand and eyes rather than assuming that a small diameter prevents heat. On edges and raised contours, reduce pressure and shorten the work cycle. If the pad starts to skip, cake, or feel too hot, stop and correct the cause.
The professional workflow usually includes:
- Large pads for broad correction: They cover open panels efficiently and keep production moving.
- 3-inch pads for precision: They handle mirrors, pillars, bumpers, vents, bezels, and isolated defects.
- Material-specific choices: Foam, microfiber, and wool each change the correction and cleaning response.
- Protection after preparation: A corrected surface deserves a coating selected for its intended use and application conditions.
The final stage is preservation. Wash methods, chemical exposure, storage, and regular inspection all affect how long the refined finish remains easy to maintain. A coating won't eliminate the need for careful care, but it can form a protective layer that supports the work completed with the polisher.
For studios that want to formalise this approach, Titan's professional car polishing guidance can sit alongside the machine, pad, and coating manufacturer instructions. The central lesson remains practical: precision comes from matching the pad to the defect, then matching the protection to the surface.
APEX NANO – Titan Coatings offers coating options that connect directly with this workflow, including elastic coating technology for a hard, flexible protective layer and easy-install spray solutions for prepared paint. Visit APEX NANO – Titan Coatings to review the available products and choose the protection that fits your correction process.
0 Comments