It’s a story every car owner knows all too well. You spend a Saturday morning meticulously washing and drying your car, stepping back to admire that flawless, mirror-like finish. Then, the neighbor’s sprinkler system misfires, or a surprise five-minute rain shower rolls through. Before you know it, the sun is out, baking those tiny water droplets into stubborn, chalky spots that completely trash your hard work.
Frustrating, isn’t it? These aren’t just bits of dust; they’re mineral deposits—calcium and magnesium—that have been left behind. If you ignore them, they can actually etch into your car’s clear coat, leaving permanent damage. This guide is your complete playbook for winning the war on water spots, from simple fixes to permanent solutions.
Understanding the Enemy
The struggle against water spots is universal. In fact, the global market for automotive water spot removers hit an estimated $1.23 billion recently, a figure that screams just how common and aggravating this problem is. That number is even expected to climb to $2.05 billion by 2033. Clearly, this isn’t a battle that’s going away on its own.
Of course, the best way to win any fight is to go straight to the source. For many car owners, that means looking at their water supply. Taking the time to start investigating whole house water filtration systems can be a game-changer, as it drastically cuts down the minerals that cause these spots in the first place.
A Modern Defense Strategy
A good friend of mine, Mark, was losing his battle with his black SUV. It was an unbelievable cycle. Every single week, he’d wash it, and within a day or two, it would be covered in new spots. He was caught in a frustrating loop of washing and polishing that was just eating up his time. He finally decided to stop treating the symptoms and find a real cure.
That’s when he stumbled upon Titan Coatings and our different way of thinking about paint protection. Most traditional ceramic coatings are incredibly hard, but they’re also brittle, which makes them vulnerable to environmental stress. As the first company to introduce Elastomer coatings to the market, we pioneered a new approach using nano-tube and Dark Matter technology.
The result is a protective layer that is hard like glass but remains flexible. This elasticity is a game-changer, allowing the coating to withstand extreme temperature changes—from freezing cold to blistering heat—without cracking.
That built-in flexibility means the protection is far more durable, creating a shield that truly lasts. By investing in a modern defense, Mark finally broke the cycle of endless washing and spot removal. We put together a detailed guide on https://titancoatings.us/how-to-protect-car-paint/ that explores these preventative strategies in-depth. Think of it as your manual for not just removing spots, but for making them a problem of the past.
Figuring Out What You’re Dealing With: The 3 Types of Water Spots
Before you grab a single bottle or towel, you need to play detective. Not all water spots are the same, and going in with the most aggressive solution is a classic rookie mistake. Attacking your car’s paint without knowing what you’re up against is a fast way to turn a minor annoyance into a major, expensive headache.
Think of it this way: you wouldn’t use sandpaper to get a smudge off your glasses. The goal here is to use the least aggressive method that gets the job done. This preserves your car’s precious clear coat and, frankly, saves you a ton of time and elbow grease. The secret is figuring out how bad the damage really is.
Type 1: Fresh Surface Deposits
This is your best-case scenario. Type 1 spots are just mineral deposits—usually calcium and magnesium from tap water or sprinklers—sitting right on top of your paint. They look like faint, chalky rings and haven’t had a chance to bake in and bond with the clear coat.
Catch them early, and they’re a breeze to deal with. It’s like wiping up a spill on the counter before it gets sticky. Let them sit in the sun for a few days, though, and they’ll quickly evolve into a much bigger problem.
To really get what’s happening, it helps in understanding the nature of water-stained windows. It’s the same basic principle: minerals left behind after the water evaporates are the real enemy.
Type 2: Bonded Minerals
When you let those fresh spots linger, the minerals start a chemical reaction and literally bond to your clear coat. Now you’re in Type 2 territory. These spots won’t budge with a normal wash, and you can often feel a slight roughness when you run your hand over them.
This is the perfect time for the old-school “baggie test.” Wash and dry the area, then put a thin plastic sandwich bag over your hand. Gently slide your fingers over the spots. If you feel bumps and texture through the bag that you couldn’t feel with your bare hand, you’ve got bonded minerals.
Pro Tip: The baggie test is a must-know for any car enthusiast. It amplifies your sense of touch, letting you detect tiny imperfections your fingertips would otherwise miss. It’s the easiest diagnostic tool in your arsenal.
Type 3: The Dreaded Etching
This is the one we all fear. Type 3 spots, or etching, mean the water didn’t just dry on your paint—it ate into it. This happens when corrosive elements, like those in acid rain or very hard water, are left to sit for too long. They physically etch a crater into the clear coat.
Here’s the kicker: when you do the baggie test on an etched spot, it will feel completely smooth. Why? Because the damage isn’t on the surface anymore; it’s below it.
These stubborn marks are a detailer’s nightmare because no chemical cleaner or water spot remover will fix them. The only solution is to physically level the surrounding clear coat through paint correction, like polishing or compounding, to make the blemish disappear.
Your Essential Water Spot Removal Toolkit
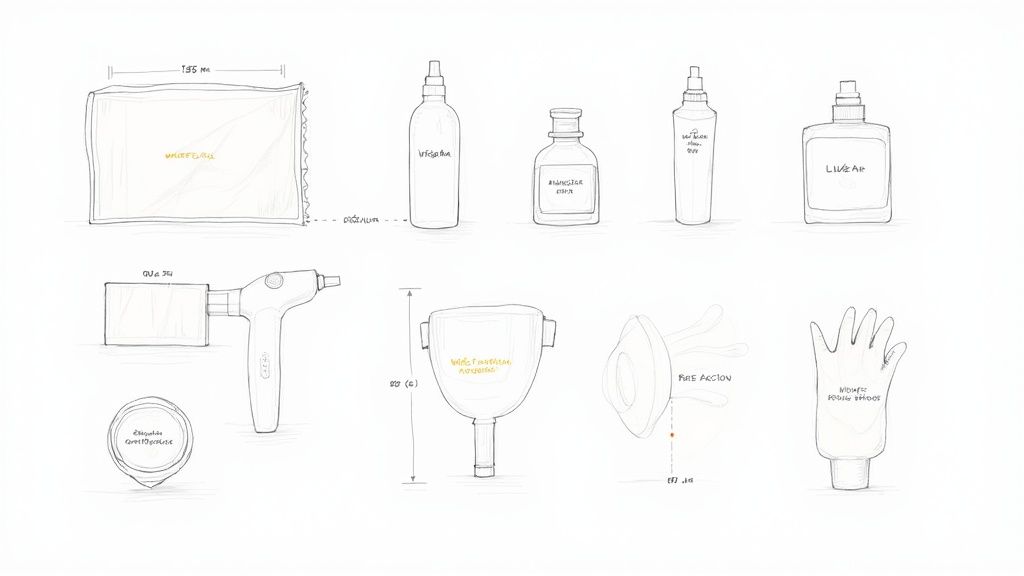
Having the right gear is the difference between a frustrating afternoon of scrubbing and a stunningly successful one. This isn’t about buying every gadget on the detailing aisle; it’s about building a smart, effective arsenal tailored to the specific type of water spot you’re facing.
For those fresh, annoying Type 1 spots, your setup will be pretty simple. When you move up to more stubborn, bonded minerals, your toolkit needs a bit more specialized firepower. And for that dreaded etched-in damage? That’s when we bring in the paint correction heavy hitters.
Let’s assemble your kit.
Level 1: For Fresh Surface Deposits
This is your first line of defense. These tools are designed to be gentle on your paint but tough on those fresh mineral rings. Think of this as your quick-response kit that you should always have on hand.
- Plush Microfiber Towels: Don’t even think about using old rags. You need high-quality, clean microfiber towels that can lift away minerals without scratching the clear coat. Always have several ready to go.
- Distilled White Vinegar Solution: A classic for a reason. Mixing a 50/50 solution of distilled water and white vinegar creates a mild acid that works wonders on the alkaline mineral deposits left by most hard water.
- Spray Bottle: Get a dedicated, clean spray bottle just for this. You need it to apply your vinegar solution evenly and safely without cross-contaminating.
Level 2: For Bonded Mineral Stains
When a simple wipe-down just smears the problem around, it’s time to step up your game. These tools are designed to break the chemical bond that Type 2 spots have formed with your car’s paint.
A dedicated chemical water spot remover is the pro’s choice here. These are formulated with specific mild acids and cleaning agents designed to safely dissolve mineral deposits without damaging your paint. Honestly, they’re worlds more effective and predictable than a basic vinegar solution.
Another indispensable tool is a quality clay bar. A clay bar works by physically grabbing and lifting embedded contaminants—including those stubborn bonded minerals—right off the paint’s surface, leaving it perfectly smooth. It’s a crucial decontamination step. If you’re new to the process, our guide on what is clay bar treatment breaks it all down.
Pro Tip: Always work in a cool, shaded area. Applying chemicals or using a clay bar on a hot panel can cause the product to flash-dry, leading to streaks or even more damage. Patience is probably the most important tool in any detailer’s kit.
Interestingly, we see a clear pattern in when people tackle this problem. Google search data shows a seasonal spike for car water spot removers every year, peaking in August. It makes sense—that’s when we’re all washing our cars more, and the summer sun makes those spots impossible to ignore.
Level 3: For Etched-In Damage
When you’re facing Type 3 etching, you’re no longer just cleaning the surface; you’re repairing it. This requires more advanced tools and a careful approach, but the results are incredibly rewarding.
- Polishing Compound: This is essentially a micro-abrasive liquid. It’s designed to gently remove a microscopic layer of the clear coat, effectively leveling the surface and erasing the etched-in spots for good.
- Dual-Action (DA) Polisher: While you can polish by hand, a DA polisher makes the job monumentally faster, easier, and delivers far superior, haze-free results. Its orbital motion is also much safer for beginners than a high-speed rotary polisher.
- Foam Polishing Pads: You’ll need a few different pads, from more aggressive cutting pads for the initial work to softer finishing pads to refine the gloss and clarity.
Finally, no toolkit is complete without the right safety gear. Always wear nitrile gloves. This protects your hands from chemicals and, just as importantly, keeps the oils from your skin off the paint. It’s a simple step that ensures both your safety and a cleaner, more professional result.
Putting Your Water Spot Removal Plan into Action
Alright, you’ve figured out what you’re up against and gathered your supplies. Now it’s time to get to work. The key to removing water spots safely is to use a “least aggressive first” strategy. You always start with the gentlest method and only escalate if the spots are being stubborn. This approach protects your car’s clear coat and prevents you from accidentally causing more damage.
Let me tell you about a client, Dave. He brought in his gorgeous classic Mustang, panicked because a broken sprinkler head had coated the entire driver’s side with those awful, chalky deposits. He was convinced the paint was ruined. But by following this exact process, we brought it back to a flawless, mirror-like shine without ever reaching for the heavy-duty stuff.
Believe me, this is a common battle. In fact, the global car detailing market was valued at $41.40 billion and is expected to climb to $58.06 billion by 2030. That massive number shows just how many people are looking for solutions to problems exactly like this. You can dig into the specifics by checking out industry reports on car detailing services.
Starting with the Basics for Fresh Spots (Type 1)
If you caught the water spots early, a simple, gentle approach is usually all you need.
First things first: give your car a proper two-bucket wash. This isn’t optional. Trying to remove spots from a dirty car is a recipe for disaster—you’ll just grind grit and dirt into the paint, creating a mess of new scratches.
Once the car is perfectly clean and dry, it’s time for the secret weapon: a 50/50 mix of distilled white vinegar and distilled water.
- Grab a spray bottle and lightly mist the solution onto one small section at a time. Never spray the whole car at once.
- Let it sit for about 30-60 seconds. This gives the mild acid just enough time to start dissolving those mineral deposits.
- Gently wipe the area with a plush, clean microfiber towel. Let the towel do the work; no scrubbing required.
- It’s a good idea to follow up with a quick detail spray to neutralize any leftover vinegar and boost the shine.
Crucial Tip: Never, ever do this in direct sunlight or on a hot panel. Heat makes the vinegar solution evaporate almost instantly, which can leave its own residue behind. Always find some shade and make sure the surface is cool to the touch.
Targeting Stubborn Bonded Minerals (Type 2)
So, the vinegar trick didn’t quite do it? If you can still see faint outlines, you’re likely dealing with Type 2 spots. These minerals have bonded more aggressively to the clear coat and need something with a little more chemical muscle.
This is where a dedicated, pH-balanced water spot remover becomes your best friend. These products are engineered specifically to dissolve stubborn mineral deposits without harming your paint—something household vinegar just can’t compete with.
The process is pretty similar:
- Apply the remover directly to the spots in a small, manageable area.
- Let it dwell for the time recommended on the bottle, which is typically around a minute.
- Gently wipe it away with a fresh microfiber towel.
- Rinse the section thoroughly with water to neutralize the chemical and wash away any residue.
If you still see spots after a dedicated remover, your next move is a clay bar treatment. A clay bar works mechanically, gliding over the surface and literally shearing off those bonded mineral bumps. Just be sure to use plenty of high-quality clay lubricant to avoid marring the paint.
Demystifying Paint Correction for Etched Spots (Type 3)
You’ve tried the chemicals, you’ve tried the clay bar, but the ghostly silhouette of the water spot is still there. Congratulations, you’ve found a Type 3 etched spot. This is where a lot of people get nervous, but there’s no need to be intimidated. The goal here isn’t to clean on the paint anymore; it’s to carefully level the clear coat itself.
You’ll need a dual-action (DA) polisher, a light finishing polish, and a foam polishing pad.
- Start by applying just a few small drops of polish to your pad.
- Focus on a small, 2×2 foot section at a time. This keeps you in control.
- Set your machine to a low speed and spread the polish evenly across the section.
- Kick the speed up a notch and work the polish using overlapping passes—first side-to-side, then up-and-down. Let the machine do the heavy lifting; all you need is light, consistent pressure.
- After about four to five complete passes, wipe the residue off with a clean microfiber and inspect your work under a bright light.
The etched spot should be completely gone, replaced by a deep, liquid gloss. This process shaves off a microscopic layer of the clear coat, effectively erasing the “crater” and restoring a perfectly flat, reflective surface. It’s the ultimate fix for bringing your paint back from the brink.
To help you decide which path to take, here’s a quick comparison of the methods we’ve covered.
Water Spot Removal Method Comparison
This table breaks down how each removal method stacks up against the different types of water spots, factoring in the skill required and any potential risks involved.
| Method | Best For | Skill Level | Potential Risk |
|---|---|---|---|
| Vinegar Solution | Type 1 (Fresh Spots) | Beginner | Low; can leave residue if used in sun/on hot panels. |
| Chemical Remover | Type 2 (Bonded Minerals) | Beginner | Low; must follow dwell times and rinse thoroughly. |
| Clay Bar | Type 2 (Bonded Minerals) | Intermediate | Moderate; can cause marring if not used with enough lubricant. |
| Polishing | Type 3 (Etched Spots) | Advanced | High; can burn through clear coat if done improperly. |
Ultimately, the right tool for the job depends entirely on the severity of the spot. Always start small and work your way up to ensure you get a perfect finish without taking unnecessary risks.
End the Fight with Advanced Paint Protection
It’s one thing to get good at removing water spots, but let’s be real—the real win is stopping them from ever showing up in the first place. Imagine having a shield on your car so slick that water just can’t get a grip, forcing it to slide right off and take all those paint-killing minerals with it. That’s not some far-off dream; it’s exactly what modern coating technology delivers.
I’ve seen this firsthand with countless clients. Take John, a car guy who was stuck in a frustrating weekend loop. He’d spend hours washing and polishing away those infuriating water spots on his black SUV, only for them to return after a single run-in with a sprinkler system or an unexpected rain shower. He was just treating the symptom, not the root cause, and he was getting tired of the constant battle.
The Problem with Traditional Protection
For a long time, old-school ceramic coatings were the best answer we had for long-term protection. They offered a fantastic deep gloss and decent hardness, but they came with a critical flaw: they were often brittle. Think of them like a super thin sheet of glass—rigid and prone to micro-cracking when put under stress.
This weakness really shows when temperatures change. A car’s metal body panels are constantly expanding and contracting, even just from a cold night to a warm, sunny morning. A rigid coating can’t flex with the metal, which eventually leads to tiny fissures that weaken the entire protective barrier.
A Story of Innovation and Flexibility
John’s frustration led him to discover a better path forward with Titan Coatings. He learned pretty quickly that not all coatings are made the same. We were never satisfied with the industry standard, so we engineered something entirely different. As the first company to introduce elastomer coatings to the market, we pioneered the use of nano-tube technology combined with our own Dark Matter Tech to create a protective layer with a unique dual personality. On one hand, it’s incredibly hard, giving you serious defense against scratches and environmental gunk. On the other, it’s remarkably flexible.
This elasticity is the secret to true longevity. Our elastic coatings flex right along with your car’s body panels as temperatures fluctuate. Whether you’re dealing with blistering summer heat or a deep winter freeze, the coating won’t crack under pressure, giving you an unbroken shield of protection all year round.
You truly get the best of both worlds—the hardness of glass with the resilience of a flexible polymer. It’s this advanced approach that unlocks the full range of ceramic coating benefits that today’s technology can offer, blowing older, more rigid formulas out of the water.
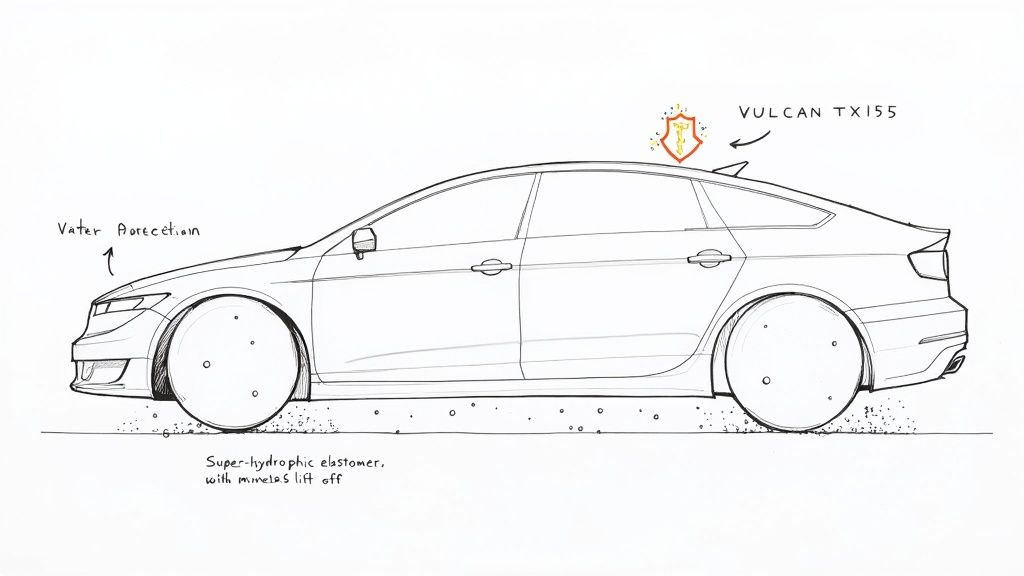
Unleashing the Power of Extreme Repellency
For the ultimate knockout punch against water spots, we recommend Titan’s Vulcan TX155. This isn’t just another coating; it’s a dedicated layer of armor engineered to make your car’s surface intensely hydrophobic.
Here’s how it ends the water spot war for good:
- Creates a Super-Hydrophobic Surface: Vulcan TX155 radically increases your paint’s surface tension. Any water that lands on it is instantly forced into tight, perfect little beads.
- Encourages Sheeting and Rolling: Because those beads can’t flatten out and stick around, they roll away with almost no effort, even on flat panels like a roof or hood.
- Takes Contaminants With It: As the water beads escape, they act like tiny cleaning crews, grabbing the very minerals and dirt that would normally be left behind to etch your paint.
John finally had his SUV treated with our elastomer system and topped with Vulcan TX155. That was the end of his weekly detailing cycle. Water from sprinklers and rain now flees the surface, leaving absolutely nothing behind. He went from constantly chasing spots to just enjoying a car that stays clean.
This is how you stop reacting to the problem and start preventing it altogether. By investing in a coating that’s not just hard but also flexible and intensely hydrophobic, you create a surface that is fundamentally hostile to water spots. You win the fight before it even begins.
Got Questions About Water Spots? We’ve Got Answers.
Tackling water spots can feel like a rabbit hole of “what ifs.” You’ve got the plan, but real-world questions always come up. That’s totally normal. Let’s clear the air and go over some of the most common questions I hear from car owners, so you can get this done right.
Can I Just Grab Some Windex or Vinegar for This?
I get this question all the time. Please, step away from the household cleaners! Products like glass cleaner or all-purpose sprays are designed for tile and countertops, not your car’s delicate clear coat. They’re often way too aggressive and will strip off any wax or sealant you have, and can even start to dull the paint itself.
The only time you might consider something like a heavily diluted white vinegar solution is on brand new, super-light spots. For anything else, you need a product made for cars. Stick with a dedicated automotive water spot remover to be safe.
A Good Car Wash Should Get Rid of These, Right?
If only it were that simple. A regular wash is great for getting rid of loose dirt and road grime, but it’s not going to do a thing for bonded or etched-in water spots. Think of it this way: the minerals have either fused to the surface like glue or have already started eating into the clear coat.
A thorough wash is always your first move—you have to work on a clean surface. But you’ll need to follow it up with a specific treatment, whether that’s a chemical remover, a clay bar, or polishing, to actually solve the problem.
Here’s the bottom line: A car wash cleans the slate. A dedicated treatment corrects the problem. Don’t expect soap and water to fix damage that’s already bonded to your paint.
How Can I Tell if the Spots Are Actually Etched into the Paint?
This is a big one, and there’s a simple trick we use in the detailing world to figure it out: the “baggie test.”
Once the car is washed and completely dry, slip a thin plastic sandwich bag over your hand. Now, lightly glide your fingertips over the spots.
- If you feel a gritty, rough texture, you’re in luck. That means the mineral deposits are just sitting on top of the paint. A chemical remover or clay bar should knock them right out.
- But if the surface feels perfectly smooth under the plastic, yet you can still see the spot, that’s etching. The damage is now in the clear coat, and you’ll likely need to polish the area to level the surface and remove it.
Will Waxing My Car Stop Water Spots from Happening?
A good coat of wax or sealant is a great first line of defense. It creates a hydrophobic barrier that makes water bead up and slide off, which definitely helps. But here’s the catch: it’s not a permanent shield. If those beads of water sit on a hot hood and bake in the sun, they’ll evaporate and leave their mineral deposits behind, and you’re right back where you started.
For truly next-level prevention, you have to look beyond traditional waxes. A friend of mine, David, was driving himself to distraction. He’d wax his black car every few weeks, but one rainstorm or sprinkler incident would cover it in spots again. He was fighting a losing battle.
He finally invested in a professional-grade coating, and it was a total game-changer. He went with an advanced Elastomer coating from Titan Coatings, which uses some seriously impressive nano-tube and Dark Matter tech. These coatings create a flexible, ultra-hydrophobic shield that is so slippery, water just can’t stick around long enough to cause a problem. It’s the difference between putting up a temporary umbrella and building a permanent roof over your paint.
Tired of fighting the same spots over and over? End the water spot battle for good. Explore the superior, flexible protection of Titan Coatings and see how their advanced Elastomer technology can keep your car looking flawless.
Find out more at https://www.titancoatings.us.
0 Comments