Applying a ceramic coating is the final, crucial step to locking in a deep, long-lasting gloss that traditional waxes just can’t touch. It’s a meticulous process that involves intensive cleaning, flawless paint correction, and a very precise application to create a true chemical bond with the vehicle’s clear coat.
This guide will walk you through the professional techniques I’ve learned over the years to get that perfect, flawless finish every single time.
The Secret to a Showroom-Perfect Finish
Imagine a car’s finish that’s so deep and glossy it looks perpetually wet. A surface that sheds water and grime so effortlessly it almost seems like magic. This isn’t just a fantasy reserved for high-end show cars; it’s the direct result of a masterfully applied ceramic coating.
This guide is your blueprint. We’re going beyond the generic advice you find everywhere else to reveal the specific techniques that separate a good job from a truly exceptional one.
This entire journey starts with one non-negotiable truth: meticulous preparation is the absolute foundation for a durable, glass-like bond. It’s a game of inches where every single detail matters. To see how this level of prep fits into the bigger picture, it’s worth seeing how professional car detailing services build their entire workflow around this principle, from the initial wash to the final protective layer.
Beyond Hardness: The Power of Flexibility
I’ll never forget a client, Mark, who brought in his prized weekend car. He had used a different brand of ceramic coating a year earlier, only to find it covered in tiny, spiderweb-like fractures after a harsh winter followed by a hot summer. He was beyond frustrated, feeling like his investment had completely failed to deliver on its promise. I see this story play out all the time.
This is exactly where the game has changed. Older, traditional coatings focus on being hard, but that hardness can also make them brittle. Titan Coatings saw this problem and pioneered a new path by introducing Elastomer coatings, built on our exclusive nano-tube technology and Dark Matter tech.
This technology creates a coating that’s as hard as glass but remains incredibly flexible. This elasticity is the key. It allows the protective layer to expand and contract right along with the car’s metal panels during drastic temperature swings, preventing the exact kind of micro-cracking that ruined Mark’s previous coating.
This built-in resilience means the protection doesn’t just look good on day one; it actually lasts.
Why Professionals Are Choosing Advanced Coatings
The demand for real, durable paint protection is exploding. In fact, the automotive ceramic coatings market is projected to hit $2.5 billion globally by 2025. What’s more, professional applications are expected to dominate 80% of that market simply because of the skill required for a proper installation. This isn’t a trend; it’s a fundamental shift away from temporary waxes toward semi-permanent protective solutions.
For detailers who are serious about delivering top-tier results, working with a product like Titan Coatings TITAN is a genuine game-changer. It’s not just another bottle on the shelf—it represents a massive leap forward in durability and performance. It’s specifically engineered for professionals who understand that the best results only come from using the best technology available.
This isn’t just about applying a coating; it’s about installing a semi-permanent shield that delivers both stunning looks and robust, long-term protection. Let’s get ready to transform your next project into a masterpiece of protective gloss.
Mastering the Art of Surface Preparation
Let’s be brutally honest: a flawless ceramic coating finish is decided long before you even crack open the bottle. I’ve seen it a thousand times—detailers, both rookies and veterans, rushing this stage only to lock ugly imperfections under a semi-permanent shield. A tiny flaw suddenly becomes a lasting, glossy headache.
The hard truth is that the final result is 90% prep and only 10% application.
Cutting corners here isn’t just a bad idea; it torpedoes the entire job. This is where you earn your stripes, setting the stage for a perfect chemical bond and a finish that makes jaws drop. You wouldn’t paint a masterpiece on a dirty, busted-up canvas, right? The same logic applies with absolute force when you’re working on a client’s car.
Running the Decontamination Gauntlet
Before you even dream of firing up your polisher, the paint needs to be surgically clean. And I mean clean. This goes way beyond a quick wash. We’re talking about a multi-step decontamination that rips out every bonded and embedded contaminant that would otherwise get in the way of a proper bond.
Start with a meticulous two-bucket hand wash. It’s basic, but it’s the best way to keep from dragging grit across the paint and creating more work for yourself later. Once the car is washed and rinsed, it might look clean, but it’s still covered in invisible enemies.
- Iron Fallout Removal: Those tiny, sharp iron particles from brake dust and industrial fallout are digging into the clear coat. A good iron remover dissolves them on contact, usually “bleeding” a dramatic purple color to let you know it’s working. It’s a satisfying and crucial step.
- Clay Bar Treatment: Next, grab a clay bar or clay mitt to gently lift off anything that’s still stuck to the surface, like stubborn tree sap or road tar. When you’re done, the paint should feel as smooth as glass under your fingertips.
This deep cleaning is non-negotiable. For a play-by-play on the entire process, our complete guide on how to decontaminate car paint lays it all out before you move on.
Paint Correction: Revealing the True Canvas
With a perfectly clean surface, it’s time to deal with the swirls, scratches, and holograms in the paint itself. This is the paint correction stage, and frankly, it’s what separates the pros from the amateurs.
Slapping a high-end ceramic coating over marred paint doesn’t hide the flaws—it puts a massive, glossy magnifying glass on top of them.
A dual-action (DA) polisher is your best friend here. It gives you the power to safely level the clear coat with the right compounds and polishes, permanently erasing those imperfections instead of just temporarily filling them in. This is how you create that deep, mirror-like canvas that makes a coating look incredible. It takes time and patience, but the visual payoff is enormous.
The Final, Non-Negotiable Wipe-Down
After all those hours of polishing, the surface is slick with polishing oils and residue. If you leave that stuff on the paint, it will completely block the ceramic coating from bonding directly to the clear coat. The coating will fail, and it will fail fast.
The final, absolutely critical step is a thorough wipe-down with an Isopropyl Alcohol (IPA) solution.
Grab a stack of clean microfiber towels and meticulously wipe down every single panel. This strips away any lingering oils or fillers, leaving behind a perfectly sterile surface that’s ready for the coating. Don’t rush it. Don’t skip it.
This level of meticulous prep is why professional applications, which make up 75% of the market, deliver such bulletproof results. Since popping up in the late 2000s, ceramic coatings have exploded into a massive global industry, valued at $12.15 billion in 2024 and on track to hit $25.60 billion by 2034. That growth is fueled by coatings that extend paint life by five to seven times compared to old-school waxes. This entire legacy of protection is built right here, on the foundation you create during prep.
Your Guide to a Flawless Coating Application
Alright, the hard work is done. The paint is a perfect, mirror-like canvas, and now it’s time for the main event—laying down that durable, glass-like shield. This is where your precision and patience pay off. Rushing this final stage after hours of meticulous prep is a mistake you don’t want to make.
This part of the job is all about finesse, not force. We’ll be walking through the process using a seriously advanced product as our example: Titan Coatings Vulcan TX155. This isn’t your average ceramic; it’s a true Elastomer, which brings a whole new level of flexibility and rugged durability to the table, setting it miles apart from traditional, rigid coatings. Its unique formula, packed with nano-tubes and Dark Matter tech, is engineered to be incredibly hard yet pliable.
Why does that flexibility matter? It’s the secret to longevity. A car’s panels expand and contract with temperature swings. A rigid coating can develop micro-fractures under this stress, leading to premature failure. Titan’s elastic coatings, on the other hand, move with the vehicle, preventing those cracks and keeping the protection locked in, season after season.
Before you even think about cracking open that bottle, this is the prep work that absolutely must be complete.
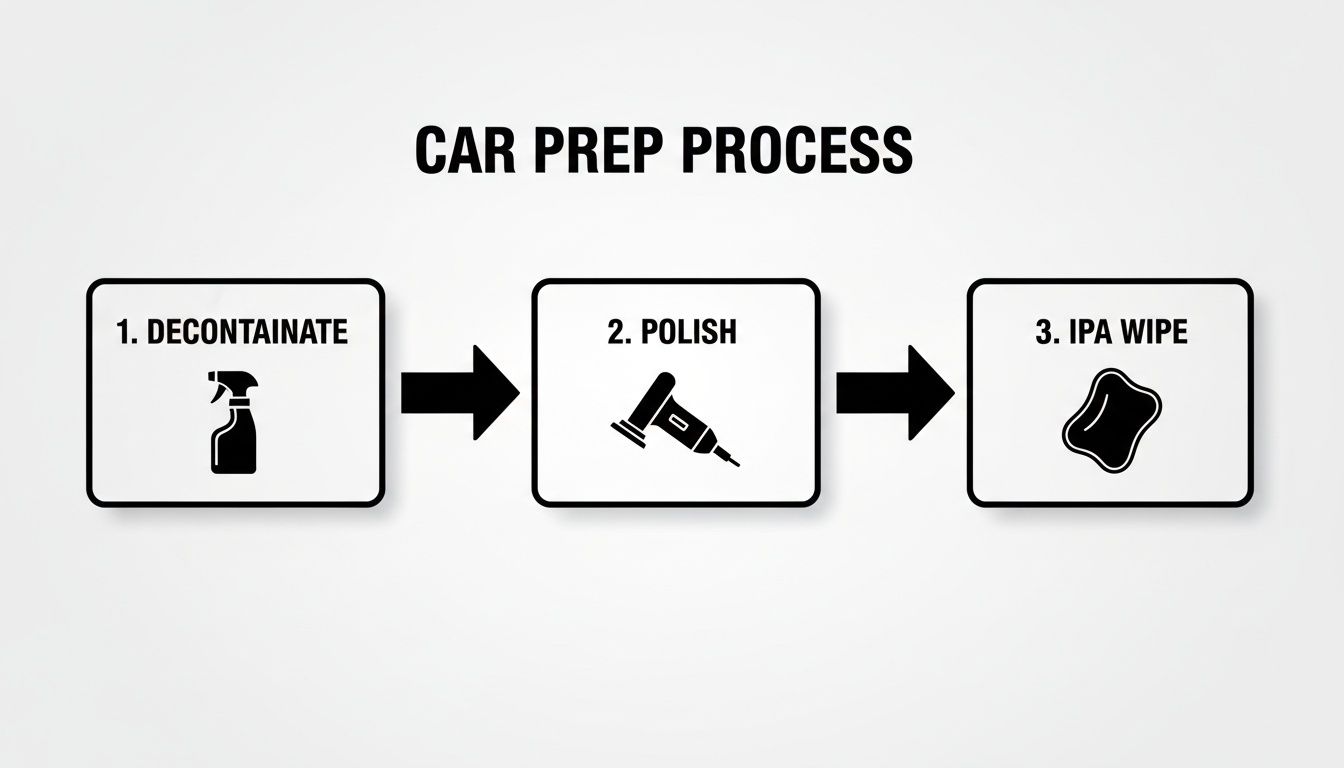
Every one of these steps—Decontaminate, Polish, and that final IPA Wipe—is non-negotiable. They ensure the coating can grab on and form a perfect chemical bond directly with the clear coat.
Setting the Stage for Application Success
Your workspace is just as critical as your technique. This isn’t a job for the driveway on a sunny afternoon. To get professional results, you need a controlled environment.
You’re looking for a well-lit, clean, and dust-free garage or bay. Temperature and humidity are key. Your sweet spot is between 60-75°F (15-24°C). Good lighting is an absolute must; you have to be able to see exactly what you’re doing, especially when you’re watching for the flash and wiping away residue. If it’s too humid or you’re in direct sun, the coating’s solvents will evaporate too quickly, making it a nightmare to level and leaving you with streaks and high spots.
The Cross-Hatch Method for Even Coverage
Once your environment is dialed in, it’s time to get started. Give that bottle of Vulcan TX155 a solid shake to make sure everything is mixed properly. Now, prime your suede applicator by applying a single, straight line of coating down the middle.
The golden rule here is to work in small, manageable sections. I find a 2×2 foot area is perfect. It gives you complete control over the application and leveling without feeling rushed before the product starts to set up.
Apply the coating to the panel using a methodical cross-hatch pattern.
- First, glide the applicator across your section in straight, overlapping vertical lines.
- Immediately go back over that same area with straight, overlapping horizontal lines.
This simple technique is the key to getting complete and even coverage, ensuring you don’t leave any gaps or thin spots. Use consistent, light pressure—let the applicator and the product do the work. Mastering this is foundational for anyone serious about offering top-tier professional ceramic coating products and services.
Mastering the Flash and Final Buff
This next part is the most critical moment of the entire process: watching for the “flash.” As the solvents in the coating begin to evaporate, you’ll see an iridescent, rainbow-like haze appear on the surface. This is your signal. It tells you the coating is ready to be leveled.
Timing is everything. Wipe too early, and you’ll pull the coating right off the panel. Wait too long, and it’ll be a bear to level, leaving you with stubborn high spots. The flash time changes with temperature and humidity, so you have to keep a close eye on the panel itself, not the clock.
The second you see that rainbow effect, it’s time to move.
- The Leveling Wipe: Grab your first clean, premium microfiber towel and gently wipe over the section. You’re not trying to remove the coating, just knock down the high spots and even it out.
- The Final Buff: Immediately follow up with a second, perfectly clean microfiber towel. Buff the area to a brilliant, streak-free shine.
Once that section is crystal clear, you’re ready to move to the next 2×2 foot area, overlapping your new section slightly with the previous one for seamless coverage. And a pro tip: never reuse your leveling or buffing towels on another panel. They get loaded with coating residue fast and will cause major streaking. Fresh towels are the best insurance policy for a flawless finish.
Curing and Aftercare for Lasting Protection
You’ve wiped away the final high spot, and the finish looks like a perfect, liquid mirror. The application might be done, but the job isn’t over. Not by a long shot. This next phase—the curing process—is where the coating truly transforms from a liquid into the tough, semi-permanent shield you’ve worked so hard to create.
Think of it like laying fresh concrete. The moment you’re finished, it’s at its most vulnerable. You have to protect your work from the elements to guarantee it reaches maximum hardness and durability.
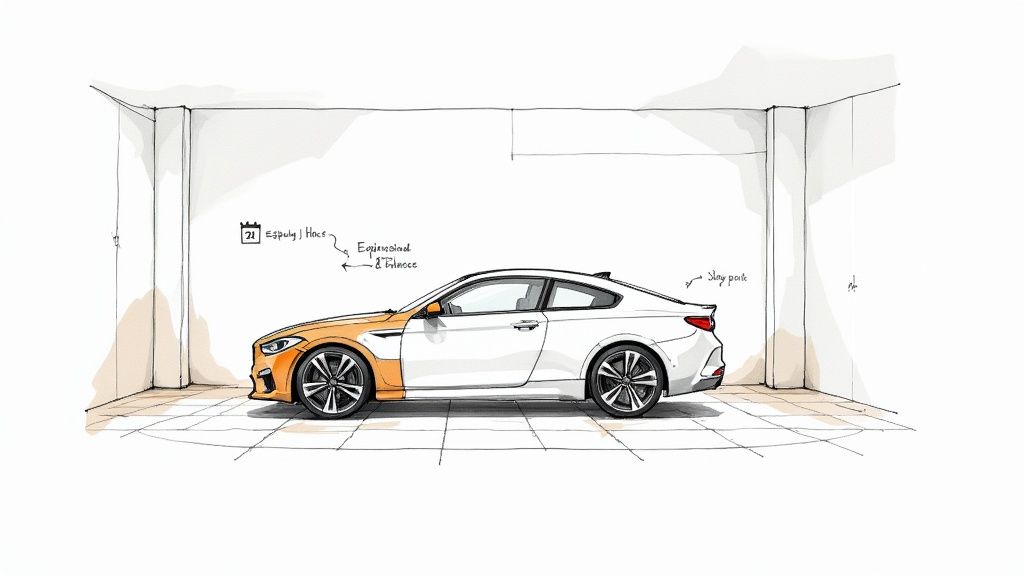
The Initial 24-Hour Lockdown
The first 24 hours are absolutely critical. During this initial cure, the coating starts to harden and form its primary bond with the paint. It’s non-negotiable: the vehicle has to stay indoors in a controlled environment, completely safe from any moisture, dust, or curious fingers.
Even a bit of morning dew or a surprise rain shower during this window can cause water spots that etch right into the still-soft coating. That forces you to polish the area and re-apply. It’s a costly, frustrating mistake, so make it crystal clear to your clients why the car has to stay garaged and dry.
The Full Cure and The Elastomer Advantage
After that first day, the vehicle can be carefully driven outside. But don’t be fooled—the coating is still hardening on a chemical level for the next 7 to 14 days. Throughout this full curing period, it’s essential to avoid washing the car or exposing it to any harsh chemicals.
This is where the unique properties of Titan’s Elastomer technology really come into play. I remember a client whose previous, traditional ceramic coating developed fine cracks after a brutal Canadian winter. The extreme temperature swings—from freezing cold to a warm garage—caused that rigid coating to fracture as the car’s metal panels expanded and contracted.
With a flexible product like Vulcan TX155, that problem is a thing of the past. Its foundation in nano-tube technology and Dark Matter tech creates a coating that’s as hard as glass but remains remarkably pliable. This elasticity allows it to move with the vehicle, preventing micro-cracking and ensuring the protective shield maintains its integrity, whether it’s facing a blizzard or a heatwave. You can dive deeper into the science behind this in our article explaining how long it takes for a ceramic coating to fully cure.
Educating Your Clients on Long-Term Care
Once the coating is fully cured, proper maintenance is what guarantees longevity. Your job isn’t just applying the product; it’s educating the owner on how to protect their investment.
Here are the non-negotiable rules for aftercare you need to pass on:
- Use pH-neutral soaps: Aggressive, high-alkaline soaps will degrade the coating over time. A quality, pH-neutral car shampoo is a must.
- Avoid automatic car washes: The harsh brushes and strong chemicals in most tunnel washes are the mortal enemy of a ceramic coating. Hand washing is the only way to go.
- Use the two-bucket wash method: This simple technique drastically reduces the risk of inflicting new swirl marks.
- Apply a ceramic topper: Using a ceramic-infused maintenance spray every few months boosts the hydrophobic properties and adds a sacrificial layer, keeping the base coating pristine.
Ceramic coatings offer a robust defense against corrosion, a global issue that costs an estimated $2.2 trillion annually. Applying ceramic creates a nano-bonded shield far thicker than wax, chemically fusing with the paint for long-term defense. It’s a real investment, as coated vehicles often retain 15-20% higher resale value after three years. The return comes from both savings on washes and avoiding potential corrosion damage.
Mastering the curing and aftercare phases ensures the protection you delivered actually lasts. For a deeper understanding of all the options out there, you might find a detailed comparison of Ceramic Coating vs. PPF really insightful. Ultimately, it’s this commitment to lasting quality that builds your reputation and keeps clients coming back.
Troubleshooting Common Application Mistakes
Every detailer, no matter how seasoned, has been there. You’ve done hundreds of flawless applications, and then one day, a little hiccup throws you for a loop. The real mark of a pro isn’t about never making a mistake—it’s about knowing exactly how to fix it on the fly, with confidence. Let’s break down the common issues you’ll run into and how to handle them like you’ve seen it all before.
I’ll never forget a black SUV I coated early in my career. The lighting in my shop wasn’t quite perfect, and I missed something. The next morning, there they were: faint, dark streaks on the rear quarter panel. My stomach just dropped. These are high spots, and they are without a doubt the most common mistake in the game. They’re caused by excess coating that wasn’t fully leveled and buffed off.
The Problem of High Spots
A high spot is basically a tiny, cured puddle of coating. It looks darker, almost like an oil slick, compared to the surrounding paint and can be a real pain if you don’t tackle it the right way.
The good news? If you catch it early, the fix is surprisingly simple.
- Caught within a few hours: The coating is still fresh enough to be reactivated. Just dab a little more of the same coating onto the high spot with your applicator. This re-liquefies the area, letting you immediately level it and buff it off properly, just like you should have the first time.
- The coating has cured (24+ hours): At this point, reactivating is off the table. That high spot is now fully hardened. You’ll need to grab a fine polish and a machine polisher. Gently work on just the affected area until the blemish disappears, do a thorough IPA wipe-down to clean the slate, and then re-apply the coating to that section.
Environmental Pitfalls to Avoid
Your workspace can either set you up for success or for a complete nightmare. I once watched a guy try to apply a coating outside on a warm, windy day. The product was flashing almost instantly, turning into a sticky, unworkable mess before he could even level it. It was an expensive and frustrating lesson for him.
Direct sun or high humidity will make the solvents in the coating evaporate way too fast, cutting your flash time from a couple of minutes down to just seconds. This makes it nearly impossible to get an even, level finish. Always, always work indoors in a controlled environment.
The name of the game is consistency. When you control your environment, you control how the coating behaves. This removes a massive variable from the equation and lets you focus purely on your technique, which is the key to a perfect finish, every single time.
Another environmental curveball is water spotting during the cure. If any moisture gets on the fresh coating before it’s fully hardened, it can leave behind mineral deposits that etch into the surface. These spots can be notoriously stubborn. You can find a deep dive on how to deal with them in our guide to effective water spot removal.
Gear and Product-Related Errors
Last but not least, your tools can be your greatest asset or your biggest liability. Using cheap, low-GSM, or contaminated microfiber towels is just asking for trouble. They won’t pick up all the coating residue, leaving behind subtle streaks. Even worse, they can shed lint that gets permanently trapped under the coating. You can never have too many fresh, high-quality towels on hand for a coating job.
This is especially critical when you’re working with advanced formulas like Titan Coatings’ elastic products. These coatings use nano-tube technology to create a surface that’s both incredibly hard and flexible, which is amazing for preventing cracks from temperature shifts. But that resilience means any mistake you seal in—like a stray piece of lint from a cheap towel—becomes just as durable as the coating itself.
Common Ceramic Coating Questions, Answered
Even after years in the business, I still get great questions about the finer points of ceramic coating. It’s a complex process, and the details matter. Let’s break down some of the most common things that come up for professionals and serious enthusiasts.
How Long Does a Professional Ceramic Coating Application Take?
Let’s be clear: a true professional ceramic coating is not a quick job. I tell every client to plan for their car to be with me for 2-3 days. The total hands-on time can range anywhere from 8 to over 20 hours, and almost none of that is the actual coating part.
The initial wash and decontamination alone can easily eat up 2-3 hours. The real time sink, though, is the paint correction. Depending on how swirled and scratched the paint is, you could spend anywhere from 4 to over 15 hours just on polishing. Only then do you apply the coating, which takes another 2-4 hours. After all that, the car needs to sit undisturbed indoors for a 24-hour initial cure.
Rushing the prep work is the single biggest mistake you can make. The final finish and the coating’s lifespan are a direct reflection of how good your prep was. Period.
Can I Layer Different Ceramic Coatings?
Absolutely. Layering is a go-to technique for experienced detailers who want to stack specific benefits like extra durability, a deeper gloss, or unbelievable slickness. The key is to follow the manufacturer’s instructions to the letter.
For example, with the Titan Coatings lineup, a popular combination is laying down the pro-grade TITAN as your base. This gives you that ultra-hard, chemical-resistant foundation. After letting it cure for the recommended 1-2 hours, you can top it with HyperQuartz. This adds an unbelievable slickness and that fantastic water-beading action everyone loves. You end up with a multi-layer shield that combines the best of both worlds.
What Makes Elastomer Coatings Different From Traditional Ceramics?
This is a story I tell clients all the time. Think of traditional ceramic coatings as a thin, rigid sheet of glass built on an SiO2 structure. It’s incredibly hard, but that rigidity is also its Achilles’ heel. A car’s panels are constantly expanding and contracting with heat and cold. That inflexible coating can’t move with the surface, so it develops micro-cracks over time, which leads to failure.
Titan Coatings took a completely different path with Elastomer technology. We engineered a formula that incorporates flexible nano-tubes and our proprietary Dark Matter tech. The result is a structure that’s both glass-hard and incredibly pliable. This elasticity lets the coating flex and move with the vehicle’s panels, preventing those micro-cracks and giving it far greater longevity and resistance to real-world stress. It’s a genuine leap forward in coating science.
What Is the Best Way to Maintain a Ceramic Coated Car?
Proper maintenance is what keeps a coating looking and performing its best for years. It’s not complicated, but consistency is everything.
- Smart Washing: Always use a two-bucket wash with grit guards. Stick to high-quality, pH-neutral car shampoos to avoid prematurely wearing down the coating.
- Avoid Drive-Thru Washes: Just don’t do it. Those spinning brushes are loaded with grit from hundreds of other cars, and their harsh, high-alkaline soaps are designed to strip away everything—including your coating.
- Safe Drying: Use a high-quality, plush microfiber drying towel or, even better, an air blower. The less you physically touch the paint, the lower the risk of adding new swirls.
- Use a Topper: Every few months, hit the car with a ceramic-infused detail spray or a dedicated topper like Titan’s HyperQuartz. This revitalizes the hydrophobic properties and adds a fresh sacrificial layer of protection.
Following this simple routine ensures the coating lasts. When a client sees how durable and easy their car is to clean a year or two down the road, it’s easy to see why ceramic coatings are a worthwhile investment for anyone who cares about their vehicle.
Ready to experience the next level of protective technology? Titan Coatings offers a full suite of professional-grade Elastomer coatings designed for maximum durability and an incredible finish. Explore our advanced solutions and find the perfect product for your next project in our shop: https://titancoatings.us/shop/
0 Comments