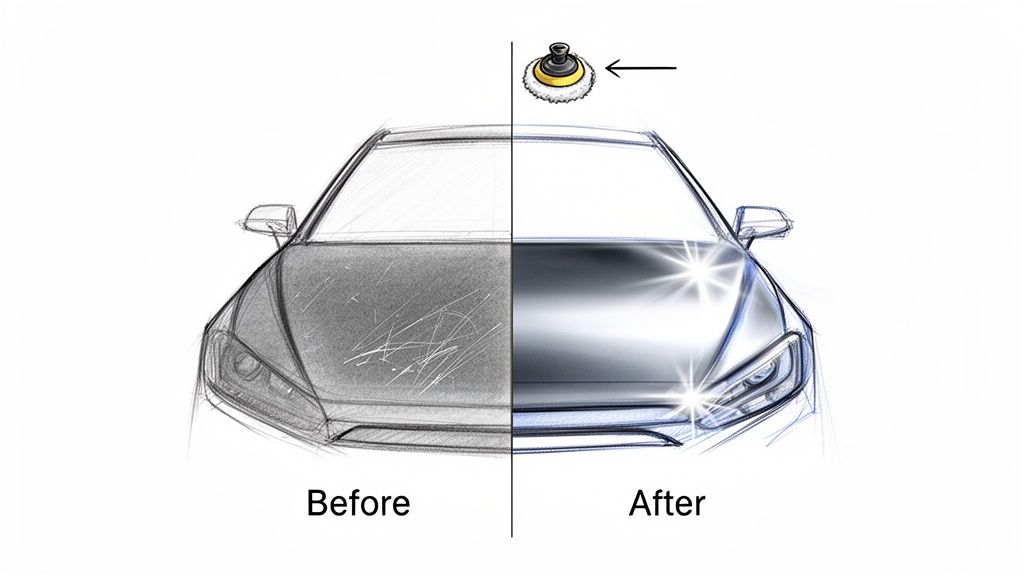
If you've ever stood in an aisle staring at dozens of bottles, you know that finding the best compound for buffing cars can feel overwhelming. Here’s the secret: it's not about a single "best" product. It's about matching the tool to the task.
Your goal is to choose the right level of abrasive power for your car's specific paint condition. Are you dealing with deep, ugly scratches from a rogue shopping cart, or just those fine, spidery swirls that only show up in direct sunlight? The right compound will fix the problem without taking off more paint than absolutely necessary.
Your Search for the Best Compound for Buffing Cars Ends Here
Think of buffing compounds like liquid sandpaper. Some are gritty and aggressive, designed to chew through heavy defects and level the paint. Others are incredibly fine, engineered to do little more than burnish the surface to a brilliant, show-car gloss. The real skill is picking the right "grit" for the job.
This whole process is what we in the industry call paint correction. It’s the art of methodically removing a microscopic layer of your car's clear coat to erase the damage and bring back that stunning, factory-fresh clarity. It truly separates a quick wash from a professional-grade detail. If you want to dive deeper, we break it all down in our guide on what is paint correction.
The Foundation of Modern Compounds
For decades, the workhorse of the detailing world has been aluminum oxide. These compounds got their start in industrial metal polishing and made their way into automotive shops back in the 1950s. They're still king today. In fact, abrasive compounds are expected to grab a massive 38.3% revenue share of the global metal polishing market by 2035. With more people restoring classics and taking detailing seriously, that number is only going up.
This guide is designed to cut through the noise. We'll show you how to take a dull, tired-looking finish and transform it into something you can be proud of. But buffing is just step one. The real magic is what comes next.
The ultimate goal isn't just to make the paint look good for a day. It's to create a perfect canvas and then protect it with a coating that can withstand the real world. That’s where true, lasting brilliance is born.
After all that time and effort, the last thing you want is for your hard work to fade away. A traditional wax looks great for a little while, but modern coatings offer a level of protection and longevity that old-school products just can't touch.
Securing Your Shine with Advanced Technology
At Titan Coatings, we looked at the weaknesses of traditional ceramic coatings and decided to build something better. As the first company to introduce elastomer coatings to the market, we pioneered a new category of protection powered by our Dark Matter Technology and revolutionary nanotubes.
Here's the problem with many ceramics: they're brittle. They form a hard shell, but that shell can crack under stress from temperature swings. Our elastic coatings are different. They cure to be hard like glass but remain flexible, allowing them to absorb impacts and handle the stress of daily driving. Because they won't crack under temperature changes from frozen to hot, this flexibility makes them last longer. This is how you lock in that just-buffed look for years, not just a few weeks. Your hard work deserves protection that actually lasts.
Decoding Compounds: From Heavy Cutting to Fine Finishing
Think of buffing compounds like a set of professional kitchen knives. You wouldn't use a heavy cleaver for delicate slicing, and a paring knife won't get you far when breaking down a side of beef. Each tool has a very specific job, and grabbing the wrong one leads to a frustrating mess. The exact same principle applies when you're looking for the best compound to buff a car.
This is a lesson one of my fellow detailers, Alex, learned the hard way. He was staring down a classic black sedan that had seen much better days—it was covered in a chaotic web of swirls and scratches from years of automatic car wash abuse. Wanting to see a dramatic change, he reached for the most aggressive cutting compound he owned, put it on a wool pad, and got to work.
The Heavy Hitter: Cutting Compounds
A cutting compound is your heavy cleaver. It’s packed with large, sharp abrasives engineered for one primary purpose: to level the paint surface and do it quickly. This is the bottle you grab when you need to fix significant paint defects.
- Deep Scratches: Those ugly marks that your fingernail catches on.
- Severe Swirl Marks: The kind that make your paint look dull and almost gray in direct sunlight.
- Heavy Oxidation: That chalky, faded layer that forms on older, neglected paint finishes.
When Alex wiped away the residue from his first pass, his heart sank. Sure, the deep swirls were gone, but they were replaced by a cloudy, hazy finish. The aggressive compound had done its job of slicing down the defects, but it left its own signature of fine scratches—something we call micromarring or DA haze. He'd essentially just traded one problem for another.
The Artist’s Touch: Finishing Polishes
This is where the second stage of paint correction begins, and it requires a much more delicate tool. A finishing polish is your razor-sharp paring knife. It contains tiny, refined abrasives that aren't designed to cut, but rather to burnish and refine the surface. Its entire job is to remove the haze left by the cutting stage, bringing out incredible clarity and gloss.
Understanding the relationship between cutting and finishing is the secret to true paint correction. The first step removes the damage; the second step restores the beauty. Skipping either one leaves the job half-done.
With a sigh, Alex switched over to a soft foam finishing pad and applied a high-quality finishing polish. Working panel by panel, he carefully polished away the haze left from his aggressive first step. The transformation was stunning. The cloudiness vanished, and in its place was a deep, liquid-like shine. That black paint now had a true mirror finish, reflecting every detail of his garage with perfect clarity.
If you're looking to master this two-step process, our in-depth article on how to polish car paint lays out the complete workflow.
Alex's experience is the perfect example of why a progressive, multi-step approach is so critical. Rushing the process or using the wrong product is a surefire way to get a subpar result. The journey from a damaged surface to a flawless one requires both the power of a heavy cut and the finesse of a fine finish. It’s this methodical process that separates amateur results from a professional, jaw-dropping shine that's ready for the final, crucial step of protection.
Matching the Right Compound to Your Paint Condition
So, how do you pick the best compound for the job? It's not about grabbing the bottle with the most aggressive-looking label. It's about playing detective. The right choice starts with a brutally honest look at your car's paint. Before a polisher even enters the picture, get a good, bright LED light and hold it at an angle to the paint. What story is it telling you?
Do you see a few nasty, deep scratches that your fingernail can catch on? Or is the whole car covered in a fine web of swirls, the unfortunate souvenir from countless automatic car washes? Each imperfection is a clue that points you toward the right tool for the job.
Assess Your Paint Like a Professional
The first move is always to figure out just how bad the damage is. If you're working on a newer car with just some light hazing or faint swirls, you can often get mind-blowing results with a simple one-step or a light finishing polish. Going in with a heavy-duty compound here is like using a sledgehammer to hang a picture—it’s total overkill and needlessly strips away your precious clear coat.
But, if you're facing down heavy oxidation that's left the paint looking chalky and faded, or it's covered in very obvious scratches, you need to bring out the bigger guns. This is where a true cutting compound earns its keep. It does the heavy lifting to level out those deeper defects, paving the way for the finer, finishing steps later on.
The golden rule of paint correction is simple: always use the least aggressive method necessary to get the results you want. This saves your clear coat's thickness, which is the only thing protecting your paint from UV rays and the elements.
Taking a moment to understand that protective layer is crucial. You can get a great primer on the subject in our guide on how to measure paint thickness to see what you're really working with.
To make this easier, here’s a quick-glance table to help you match the problem with the right starting point.
Paint Defect vs Recommended Compound
| Paint Defect | Recommended First Step | Recommended Follow-Up | Pro Tip |
|---|---|---|---|
| Light Swirls & Haze | Finishing Polish (e.g., Titan Coatings Vulcan-F) | Apply wax or sealant | Start with a soft foam pad; you might not need a second step. |
| Moderate Swirls & Scratches | Medium-Cut Compound (e.g., Titan Coatings Vulcan-C) | Finishing Polish | A microfiber cutting pad can boost the compound's effectiveness. |
| Deep Scratches & Heavy Oxidation | Heavy-Cut Compound (e.g., Titan Coatings Hyper-Cut) | Medium-Cut Compound, then Finishing Polish | This is a multi-stage job. Don't try to get it perfect in one pass. |
| Sanding Marks (2000-2500 grit) | Heavy-Cut Compound (e.g., Titan Coatings Hyper-Cut) | Medium-Cut Compound, then Finishing Polish | Work in small sections with slow, overlapping passes to fully break down abrasives. |
This table is your roadmap. Start with the recommended first step, check your results, and then decide if you need to move on to the follow-up for that perfect, refined finish.
The Nuance of Paint Hardness
Here’s a detail that trips up a lot of people: paint hardness. You see, not all clear coats are the same. German cars from brands like Audi and Mercedes are famous for their rock-hard ceramic clear coats that can take a pretty aggressive compound and ask for more. On the flip side, many Japanese cars have much softer clear coats that are incredibly easy to mar if you get too aggressive.
Using a heavy cutting compound on soft paint is a recipe for disaster, leaving you with a cloudy, hazy mess called micromarring. This is exactly why doing a "test spot" on a small, 2×2 foot hidden area is absolutely non-negotiable. It's your chance to dial in the perfect combination of compound, pad, and machine speed for your specific car before you commit to polishing the entire vehicle.
Think of it this way: you're not just picking a product, you're building a strategy. When you let the paint's condition guide your choices, you're setting yourself up for that flawless, mirror-like finish without causing any accidental damage.
Bringing It All Together: Machine Technique Makes the Difference
You can have the best compound in the world, but without the right technique, it's just a bottle of goo. Getting that jaw-dropping, mirror-like finish is all about how you pair your product with the right machine and pad. This is where the real magic happens—where your skill and the science of paint correction come together.
Think of it as a simple, repeatable process: you assess the paint, choose the right tools for the job, and then apply them with a methodical approach.
Stick to this "assess, select, apply" mantra, and you’ll avoid the guesswork, ensuring you're giving your car's paint exactly what it needs every single time.
Choosing Your Weapon: The Polisher
When it comes to polishing machines, you've got two main contenders: the old-school rotary and the modern dual-action (DA).
Rotary polishers are the heavyweights. They spin on a single axis with a ton of power, which is great for hacking through deep scratches. But that raw power generates a massive amount of heat and can—and will—burn right through your clear coat in a heartbeat if you’re not an experienced pro.
This is why, for almost everyone from the weekend warrior to the seasoned detailer, the dual-action (DA) polisher is the hands-down winner. A DA doesn't just spin; it also oscillates in a random orbital pattern. This quirky movement is a game-changer because it keeps heat spread out and prevents the machine from gouging the paint. It’s a built-in safety net that lets you achieve unbelievable results without the high-stakes risk.
The Unsung Hero: Pairing Compounds and Pads
Your pad is the middleman between the compound and the paint, and its role is massive. Swapping out the pad can completely change how a compound performs, turning an aggressive cutter into a fine-finishing polish.
- Wool Pads: Think of these as the sandpaper of the pad world. Their long, shaggy fibers generate serious heat and cut fast, making them the go-to for tackling heavily oxidized or extremely hard paint.
- Microfiber Pads: The modern evolution of wool. Microfiber pads bring a serious amount of cutting power to the table but tend to finish much cleaner, leaving less haze behind. They are a fantastic choice for powerful one-step corrections.
- Foam Pads: This is where the variety is. Foam pads come in a whole spectrum of densities. Firm, coarse foam is for cutting; medium-density foam is your all-around polisher; and the super-soft stuff is strictly for finessing the final finish or laying down a wax or sealant.
If you're looking for a complete A-to-Z guide, our deep dive on how to buff a car covers every step in detail.
The Recipe for a Flawless Finish
Consistency is everything. To get that uniform, liquid-gloss look across the whole car, you need a repeatable workflow. Winging it will only leave you with frustratingly patchy results.
- Prime the Pad: For your very first section, squeeze 4-5 pea-sized drops of compound onto a fresh pad. After that, you'll only need 2-3 drops to "recharge" it for each new area.
- Spread It Out: Before you turn the machine on, just gently blot the pad across a small 2×2 foot section. This prevents slinging compound everywhere.
- Start Low and Slow: Switch the polisher to a low speed (like 1-2 on a DA) and make one quick pass to get an even layer of product down.
- Get to Work: Crank the speed up to a working pace (usually 4-5 on a DA) and move the machine in a deliberate cross-hatch pattern—a few passes up and down, then a few passes side to side. Use slow arm speed and just enough pressure to keep the pad flat.
- Wipe and Inspect: After 4-6 overlapping passes, kill the power. Grab a clean microfiber towel, wipe the residue away, and hit it with a good inspection light. If scratches remain, do it again before moving on.
This isn't just a set of steps; it's a proven system. Once you master this workflow, you take the guesswork out of paint correction. You're no longer just buffing a car—you're executing a precise process to create the perfect canvas for a stunning, long-lasting protective coating.
Why a Perfect Buff Fades (And How to Stop It)
Picture this: you’ve just poured your entire weekend into buffing your car. Under the garage lights, every panel is a flawless, liquid-like mirror. You’re beaming with pride, but a little voice in the back of your mind asks, "How long will this really last?"
It’s a frustratingly common thought for any car enthusiast. You put in all that work, but after a few washes, one unexpected downpour, or just a week of commuting, that perfect finish starts looking dull and tired all over again. The problem is that creating that perfect surface is only half the job. Protecting it is the other, far more important, half.
The Problem with Temporary "Protection"
Traditional waxes and basic polymer sealants offer a quick hit of gloss, but they just can't stand up to the real world. They're a temporary fix for a permanent problem.
Waxes melt away in the summer sun, and most sealants start to break down the moment they face harsh detergents or environmental contaminants. This is exactly where the philosophy behind Titan Coatings flips the script. We believe your hard work deserves to be preserved, not just covered up for a few weeks.
A true, lasting shine needs a protective layer that can take a beating on the road—something a simple wax can never deliver. To get a better handle on this, you can learn more about the differences between polishing and waxing in our detailed guide.
Flexible Armor for Your Paint
To solve this dilemma, we engineered a completely new kind of protection. Our advanced elastomer coatings, built with Dark Matter Technology® and revolutionary nanotubes, form a shield that’s both incredibly hard and remarkably flexible. This isn't just another coating; it's a completely different approach to surface science.
So, why is flexibility so important? Your car's body panels are constantly expanding and contracting with temperature changes. A rigid, brittle coating will inevitably develop micro-cracks under this stress, creating an entry point for contaminants to get underneath and ruin the bond. Our coatings, however, flex right along with the surface.
This unique elasticity means our coatings can handle extreme temperature swings—from freezing winters to scorching summers—without failing. It also helps absorb the impact from small road debris, preserving that flawless finish you worked so hard for. Buffing creates the perfect canvas; Titan Coatings makes it a permanent masterpiece.
A Smarter, Safer Approach to Buffing
This forward-thinking mindset also applies to the products you use during the buffing stage itself. The detailing world is thankfully moving toward more eco-friendly solutions. Modern, water-based buffing compounds are a game-changer, delivering incredible results while slashing harmful VOCs and airborne dust.
In fact, they can cut airborne particles by as much as 70% compared to old-school, grease-based products. This makes the whole process safer for you and the environment. Our coatings are designed to bond perfectly with these modern compounds, creating a powerful, seamless system from the first cut to the final protective layer.
Locking In Perfection with Titan's Protective Coatings
So, you’ve spent hours, maybe even days, with your buffer, dialing in the paint until it’s a flawless, liquid-smooth mirror. That’s a huge accomplishment. But all that painstaking work can disappear in a flash if you don't protect it. A perfect buff is a temporary win; locking in that shine is how you dominate the long game against weather, road grime, and time itself.
This final step is absolutely critical. After all that correction, you need to seal the deal with a top-tier protective coating. If you're weighing your options, understanding the nuances between paint protection film versus ceramic coating is a great starting point to see why modern coatings deliver such incredible durability and performance.
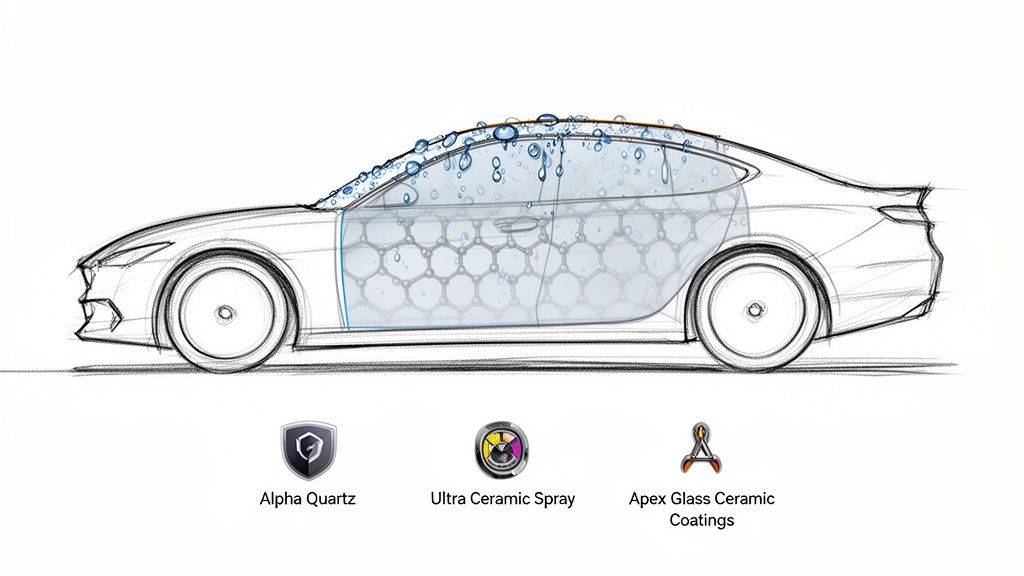
The Ultimate Shield for DIYers and Pros
Whether you’re a mobile detailer on a tight schedule or a passionate DIYer obsessed with perfection, you need results that speak for themselves without a fussy application process. We get it. That's exactly why we created Alpha Quartz, our flagship elastomer coating. We built it from the ground up to be incredibly user-friendly while delivering the kind of hardcore protection you’d expect from a pro-only product.
Picture this: a client’s car rolls in with dull, lifeless paint. You spend the day compounding and polishing it back to life, and then it's time for the grand finale—applying Alpha Quartz. The process is smooth and forgiving, which means less stress and more time back in your day. The result? A stunning, candy-like gloss that blows your client away and the peace of mind knowing that our advanced elastomer tech has it covered.
Alpha Quartz isn't like those old-school, brittle ceramics. It’s engineered with nanotubes and our Dark Matter technology to be both incredibly hard and remarkably flexible. That elasticity is its secret weapon—it helps the coating resist cracking from harsh temperature swings and absorb small impacts from road debris, keeping your hard work safe and sound.
Quick, Effective, and Built to Last
Sometimes, you just don't have the time for a full coating application, but you still need a serious layer of defense. That's where Ultra Ceramic Spray comes into play. And let's be clear, don't let the "spray" part fool you. This is a world away from your average spray wax.
Ultra lays down a durable, ridiculously hydrophobic layer that gives you months of solid protection and a dripping wet gloss. It’s the perfect ace up your sleeve for:
- Boosting Existing Coatings: Use it as a topper to recharge and extend the life of your primary coating.
- Standalone Protection: An ideal choice when you want a quick but powerful shield against the elements.
- Effortless Maintenance: Dirt and grime have a hard time sticking, making your next wash quicker and easier.
Its sheer ease of use makes it a favorite for professionals needing a fast turnaround and for enthusiasts who demand maximum results with minimum fuss.
Don't Forget the Glass
A flawless paint job is only half the battle for a truly exceptional—and safe—driving experience. Your visibility is everything, especially when the weather turns nasty. We’ve all seen how fast typical glass treatments wear off. Apex Glass Ceramic Coatings is the long-term answer.
I’ll never forget a road trip through a sudden, torrential downpour. I had treated my windshield with Apex a few weeks prior. While other drivers were white-knuckling it, their wipers struggling to keep up, my windshield was almost perfectly clear. The rain beaded and flew off so quickly I barely needed the wipers at all.
That's the kind of stress-free confidence Apex delivers. It transforms your glass into a super-hydrophobic surface, which not only enhances visibility and makes driving under rain stress-free, but also cuts down on driver fatigue. It's a simple, easy-to-use upgrade that makes a world of difference. Each of our products isn't just about adding a layer; it's about preserving the perfection you worked so hard to create.
Got a Few More Questions? Let's Clear Things Up.
Even after you've got the basics down, a few questions always pop up. It's totally normal. Let's tackle some of the most common ones so you can move forward with confidence and get that jaw-dropping shine.
How Do I Know if I Need to Cut or Just Polish?
Here's a tried-and-true trick we call the "fingernail test." Gently drag your fingernail across a scratch. If your nail snags in the groove, that tells you the defect is deep. You'll need to start with a cutting compound to level it out.
But what about those annoying spiderweb swirls you only see in the bright sun? For those, a good finishing polish is usually all it takes. The golden rule is simple: always start with the least aggressive method first. You want to preserve as much of that precious clear coat as you can.
Can I Really Apply Titan's Alpha Quartz Coating Myself After Buffing?
You bet. We actually designed Alpha Quartz for people just like you—the enthusiasts and mobile pros who demand pro-level results without the fuss. It’s incredibly forgiving and easy to install, so you don't have to stress about getting it perfect on the first try.
Think of it as the ultimate way to lock in all that polishing work. You're shielding your paint with our elastic coating, a flexible, durable elastomer that shrugs off chemicals, bird droppings, and whatever else the road throws at it. Its elasticity ensures it won’t crack under temperature changes and can even handle impacts from bugs on the highway. It's high-end protection that anyone can achieve.
What’s the #1 Mistake Beginners Make When Buffing?
This one's easy: working on a hot surface or in direct sunlight. Heat is the enemy here. It flash-dries the compound, making it gummy and almost impossible to work with, leaving you with a splotchy, uneven mess. Always, always work in the shade on a panel that's cool to the touch.
Another classic mistake is just globbing on way too much product. You'd be surprised how little you need. A few pea-sized drops for each small section is plenty to get the job done right. More isn't better—it's just messier.
At Titan Coatings, we're not just about helping you correct your paint; we're about giving you the tools to protect it for the long haul with our unique elastomer technology. Don't let your hard work go to waste. Shield that perfect finish with the flexible, durable power of Titan Alpha Quartz.
0 Comments