
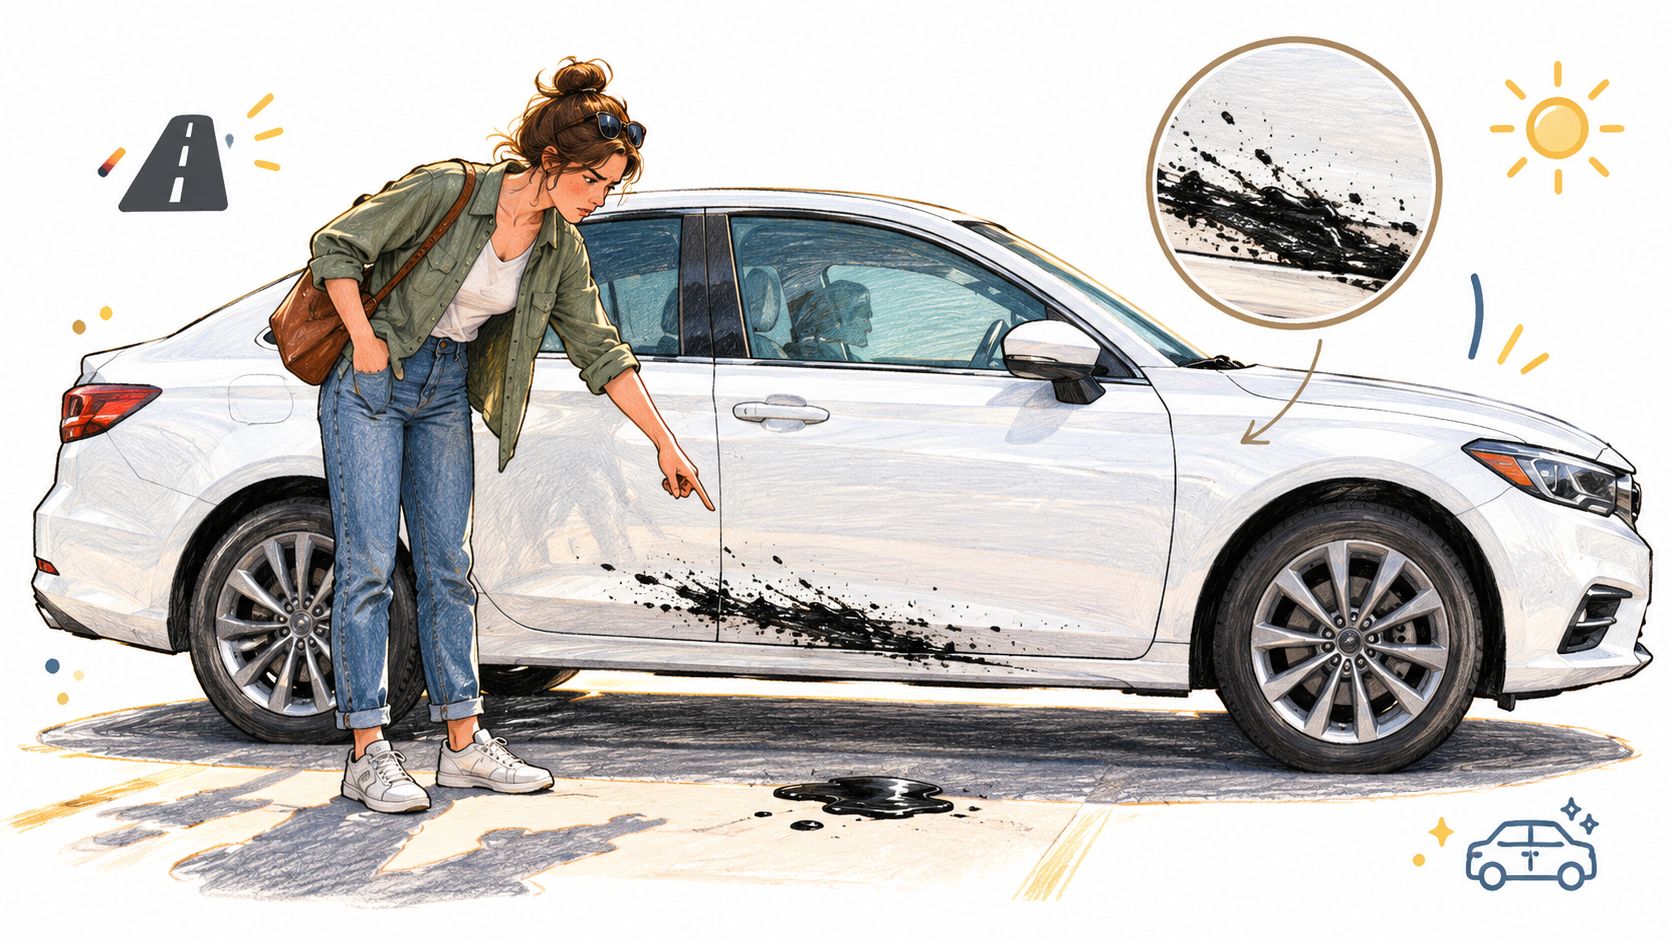
You roll out of a freshly paved lot, coffee still warm, and spot it at the fuel stop. A black smear runs across the lower door, with smaller specks behind the front wheel. Your first instinct is to rub it with whatever is in the trunk. Don't. Learning how to clean tar correctly is less about force and more about protecting the finish you will want to coat, wax, and live with long after that spot is gone.
The Saturday Morning Tar Spot
Marcus brought me a white sedan on a Saturday with exactly that problem. He had found a hardened spot on the painted bumper and was ready to use a sharp metal tool. I talked him out of it before the tool touched paint. A rigid metal edge can cut through softened tar and straight into clear coat, while a dissolved deposit usually lifts with far less pressure.
What That Black Smear Actually Is
Road tar is mainly asphaltic binder, mixed with oils and fine aggregate flung up from warm pavement. It's hydrophobic, so water beads on it instead of loosening it, and it grips warm paint stubbornly. A normal wash removes loose grit around the deposit but rarely breaks that bond.
That is why scraping feels effective for two seconds and then disappoints. You shear off the top, smear the rest thinner, and drag grit across the panel. Guidance on delicate surfaces favors softening first and lifting residue with wood or plastic rather than metal, with gloves, eye protection, ventilation, and thorough rinsing built into the process, as described in the Natural Stone Institute guidance on stain removal and surface-safe scrapers.
Treat every tar spot as a test of the finish underneath. Pass the test by dissolving the deposit, not by winning a wrestling match against it.
The stakes rise if the car already carries a ceramic or elastomer coating. An aggressive solvent may remove tar while also dulling protection, and leftover petroleum residue can interfere with the next wax or coating layer. A U.S. Department of Defense evaluation of tar and asphalt cleaners for vehicles made the same point in a tougher setting, judging products on removal, material compatibility, toxicity, flash point, and wastewater handling rather than raw strength alone, in its study of cleaning tar and asphalt from tactical and transportation vehicles.
The same gentle mindset applies elsewhere on the car and around the home. If you also need to avoid scratches when cleaning window bird mess, the principle is identical. Soften first, lift second, and never grind contamination into a surface you care about.
Prep the Panel Before You Touch the Tar
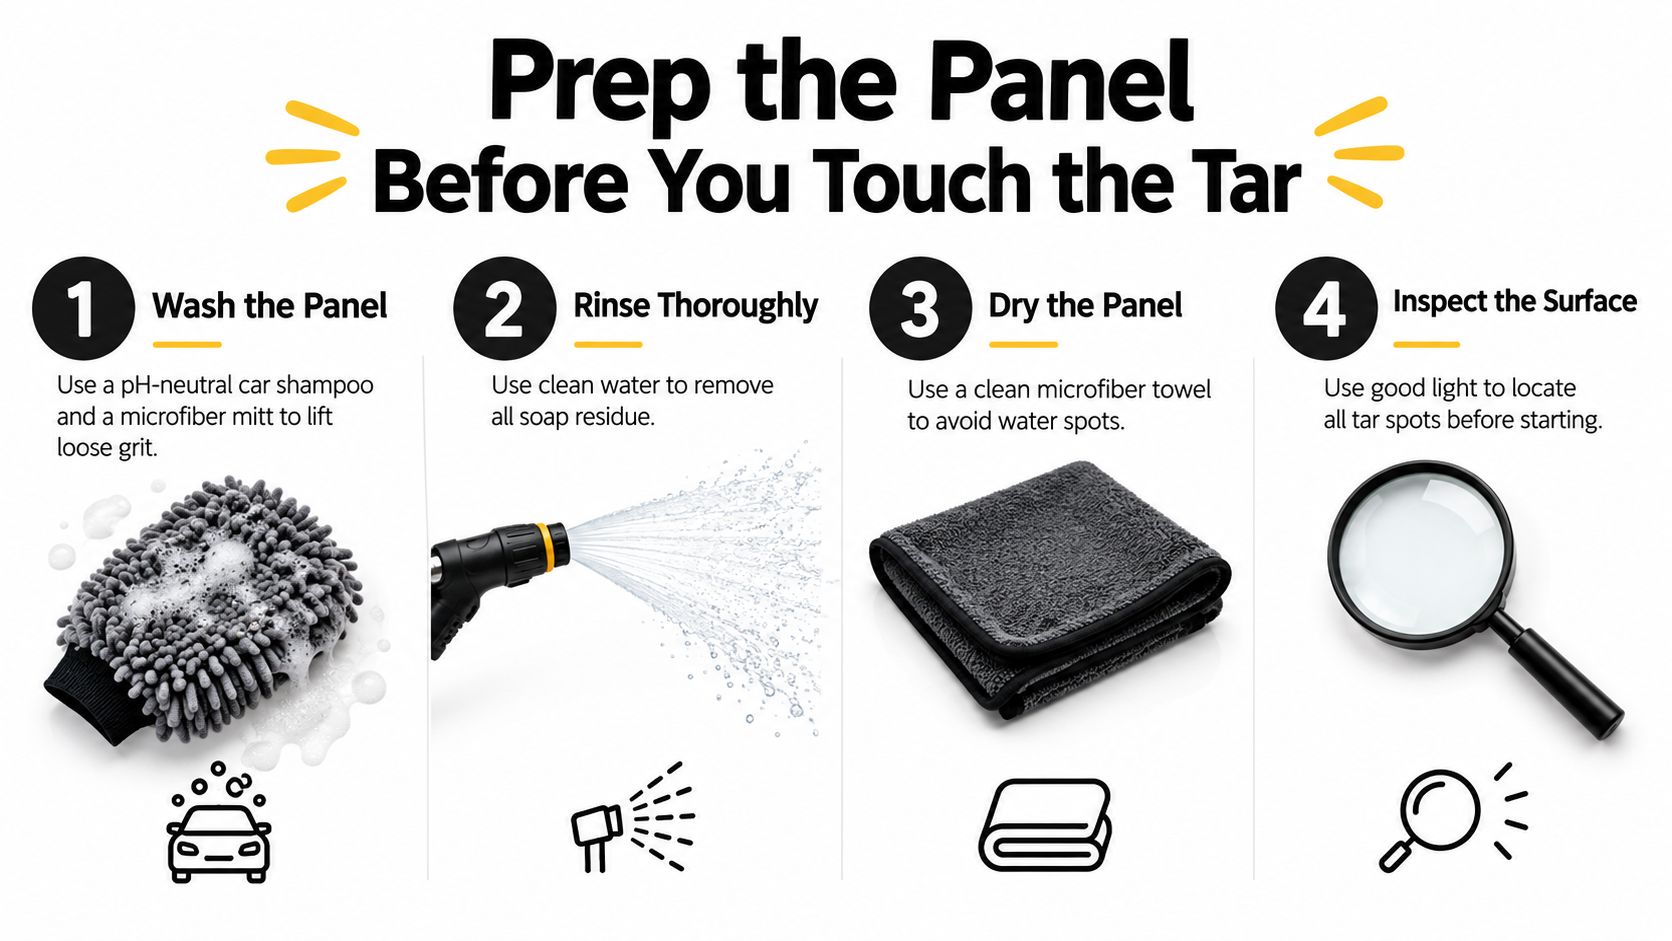
Most damage I see happened before the tar remover came out of the bottle. Someone wiped a gritty panel dry, worked in full sun, or sprayed solvent across trim without checking what it would do. Prep feels slow. It is also what makes the actual removal short and predictable.
Start with a proper wash so loose sand and road film do not become abrasive under your towel. A structured car pre-wash routine for lifting grit before contact washing helps here, because you want the solvent meeting tar, not mud. Rinse well, then dry the panel completely with a clean microfiber. Standing water dilutes contact and hides smaller specks you would otherwise catch in good light.
Shade, Cool Paint, and a Small Test
Pull the car into shade and touch the panel. If it's hot, wait. Solvent flashes off hot paint before it can soften the binder, and you end up compensating with pressure. Work in small sections so dissolved tar stays contained instead of migrating onto clean paint.
Then run a hidden-area compatibility test. Put a small amount of product low on the panel or inside a door edge area that matches the surface, wait briefly, wipe, and inspect for dulling, swelling, or color change. That two-minute habit catches most expensive surprises.
- Mask vulnerable neighbors: Tape or shield window gaskets, unpainted plastic trim, decals, badges, and fresh repair areas before spraying.
- Wear the basics: Use nitrile gloves and eye protection, and work with ventilation rather than in a closed garage.
- Stage clean towels: Set out several microfibers so you are never tempted to keep wiping with a blackened face.
- Control runoff: Keep rinse water and dissolved residue out of drains where local rules require containment.
Priya learned the masking lesson during a winter cleanup when one product behaved very differently across materials on the same car. A manufacturer sheet for an asphalt and tar remover warns that solvent-sensitive surfaces can include synthetic finishes, window gaskets, acrylic, polycarbonate, reflective films, plastic, and paint, and tells users to protect nearby surfaces from cleaner, rinse water, drift, and fumes, as set out in the PROSOCO asphalt and tar remover product data sheet. Identify what surrounds the spot, protect it, and only then open the remover.
Choosing the Right Tar Remover
The strongest solvent on the shelf is rarely the smartest buy. Gasoline, acetone, and lacquer thinner can soften tar quickly, but they also raise the risk of softening, staining, or stripping the finish. You want a dedicated tar and asphalt remover chosen for controlled dwell, compatibility, and manageable residue.
The Two Solvent Families That Matter
A Red River Army Depot demonstration on vehicle and paving equipment surfaces found two broad families capable of removing asphalt from metal. Those were terpene-based solvents or esters and blends of aliphatic hydrocarbons with esters assisted by surfactants, in the Red River Army Depot demonstration on asphalt removal chemistry. One citrus-based formulation in that work completed removal within approximately 30 to 45 minutes under study conditions, stayed water-rinsable, and allowed dilution of up to 50%. Those numbers come from heavy equipment conditions, so do not copy them as dwell times for clear coat.
The useful lesson is the direction, not the stopwatch. Tar needs time for a solvent to penetrate because it's hydrophobic and strongly adhered. Immediate dry rubbing wastes effort and adds scratches, while a patient dwell lets chemistry do the heavy work.
Tar Remover Solvent Families Compared
| Chemistry | Dwell Time | Surface Compatibility | Best Use |
|---|---|---|---|
| Terpene or citrus ester | Short on paint, longer only if the label allows | Often water-rinsable, still test on trim and coatings | Light to moderate fresh deposits |
| Aliphatic hydrocarbon with esters and surfactants | Controlled and kept wet | Effective on asphaltic binder, verify on plastics and rubber | Heavier road film and repeated passes |
| Strong shop solvents such as acetone or gasoline | Very fast, hard to control | Higher risk to clear coat, decals, and seals | Avoid on automotive finishes |
Read the label for more than marketing claims. Look for clear dwell instructions, paint compatibility, rinsing directions, and warnings about plastics or coatings. Lower VOC content, lower toxicity, higher flash point, and lower flammability make a product easier to use safely in a driveway or mobile setup.
Buying rule: Choose the mildest product that visibly softens the deposit during a controlled dwell, then repeat the cycle instead of escalating chemistry.
If the panel is coated, do not assume paint safe means coating safe. Check the coating maker's chemical resistance guidance first. That one check protects the layer you paid to install.
The Removal Sequence on Paint
With prep done, the hands-on work should feel almost boring. Apply, wait, lift, rinse, inspect. If you are sweating and scrubbing, something upstream went wrong, usually dwell time or towel discipline.
Apply the remover only to the contaminated area. Manufacturer technical guidance for a dedicated tar product specifies a 2 to 5 minute dwell, keeping the product wet and not allowing it to dry on the surface, as stated in the NOVOL Carever Tar technical data sheet. Watch the edges of the deposit. When the binder starts to soften and look glossy or begins to run slightly, it's ready to lift.
Wipe Like You Mean to Keep the Gloss
Fold a clean microfiber into quarters and wipe in one direction with light pressure. Work from the outside edge toward the center so you do not spread dissolved tar onto clean paint. Daniel used that outside-in approach on a fresh wheel-arch spot, saturating a cloth, allowing a few minutes for penetration, and blotting as the tar softened, a method consistent with practical guidance on dwell time and gentle blotting for tar removal.
Flip to a fresh towel face as soon as you see black transfer. A contaminated face does not clean, it redistributes. For heavier deposits, use a soft brush only after softening, with a lifting motion rather than scrubbing strokes.
- Keep it wet: Mist more product if the spot starts to flash dry during dwell.
- Repeat, don't force: A second controlled cycle is safer than heavier pressure on the first.
- Rinse thoroughly: Use active foam or pressurized water to clear dissolved tar and solvent residue.
- Inspect in strong light: Look for a remaining shadow, streaking, or micro-marring before moving on.
Independent detailing guidance describes the same rhythm, with a short dwell of roughly 30 seconds to a few minutes until the binder visibly softens, followed by light one-direction wiping and reapplication instead of force, in its decontamination guidance on bug and tar remover use. That sequence also fits neatly into a broader paint decontamination process before polishing or coating, because tar removal is decontamination, not a substitute for washing.
The panel is done when it looks untouched, just cleaner. No gray smear, no dull halo, no towel marks. Anything less means another gentle cycle or a proper wash and reassessment, not a harder scrub.
Glass, Trim, Wheels, and Wraps
A road-trip car rarely keeps tar politely on one door. Last summer a client came back with specks on the windshield, black plastic arches, chrome trim, and both front wheels. Same contamination, four different risk levels. You adjust dwell, pressure, and protection to the surface, not the other way around.
Glass Rewards Patience and Protection
Glass tolerates careful solvent work better than paint, but wipers will smear softened tar if you rush. Apply product with a towel rather than flooding the windshield, let it soften, and lift with clean microfiber faces. Finish with glass cleaner and check at an angle, because a thin oily film shows up first as nighttime glare.
That cleanup is also the right moment to protect the glass. Apex Glass Coating- 50ml is described as an advanced hydrophobic glass and windshield coating with deep pore bonding and water-repellent performance that enhances visibility, reduces wiper use, and lasts up to 2 years. Better water behavior makes rain driving calmer, and future bugs and road film release more easily during washing. Pair that with sound technique from guidance on the best way to clean an auto windshield and the glass stays clearer between details.
Trim, Wheels, and Film Need a Lighter Hand
Unpainted trim and rubber seals can bleach, swell, or turn tacky if solvent sits on them. Mask them when you can, apply product by towel, and wipe promptly. If a trim piece changes sheen during your test spot, stop and switch to a gentler approach or professional help.
Wheels depend on finish. Powder coat, chrome, painted alloy, and bare aluminum do not share the same chemical tolerance. Test behind a spoke, keep dwell short, and rinse completely so residue does not sit around lugs or barrel edges.
Vinyl wraps and paint protection film sit at the cautious end of the scale. Use the shortest dwell that softens the spot, apply with microfiber instead of broad spraying, and avoid aggressive agitation at film edges. Heat plus solvent plus pressure is how edges lift.
Match the method to the most sensitive material near the spot, not to the toughest one.
That single habit prevents most collateral damage. Paint may forgive a product that trim, rubber, or film will not. Slow down, isolate the area, and let each surface get the treatment it can handle.
When the Surface Is Already Coated or Compromised
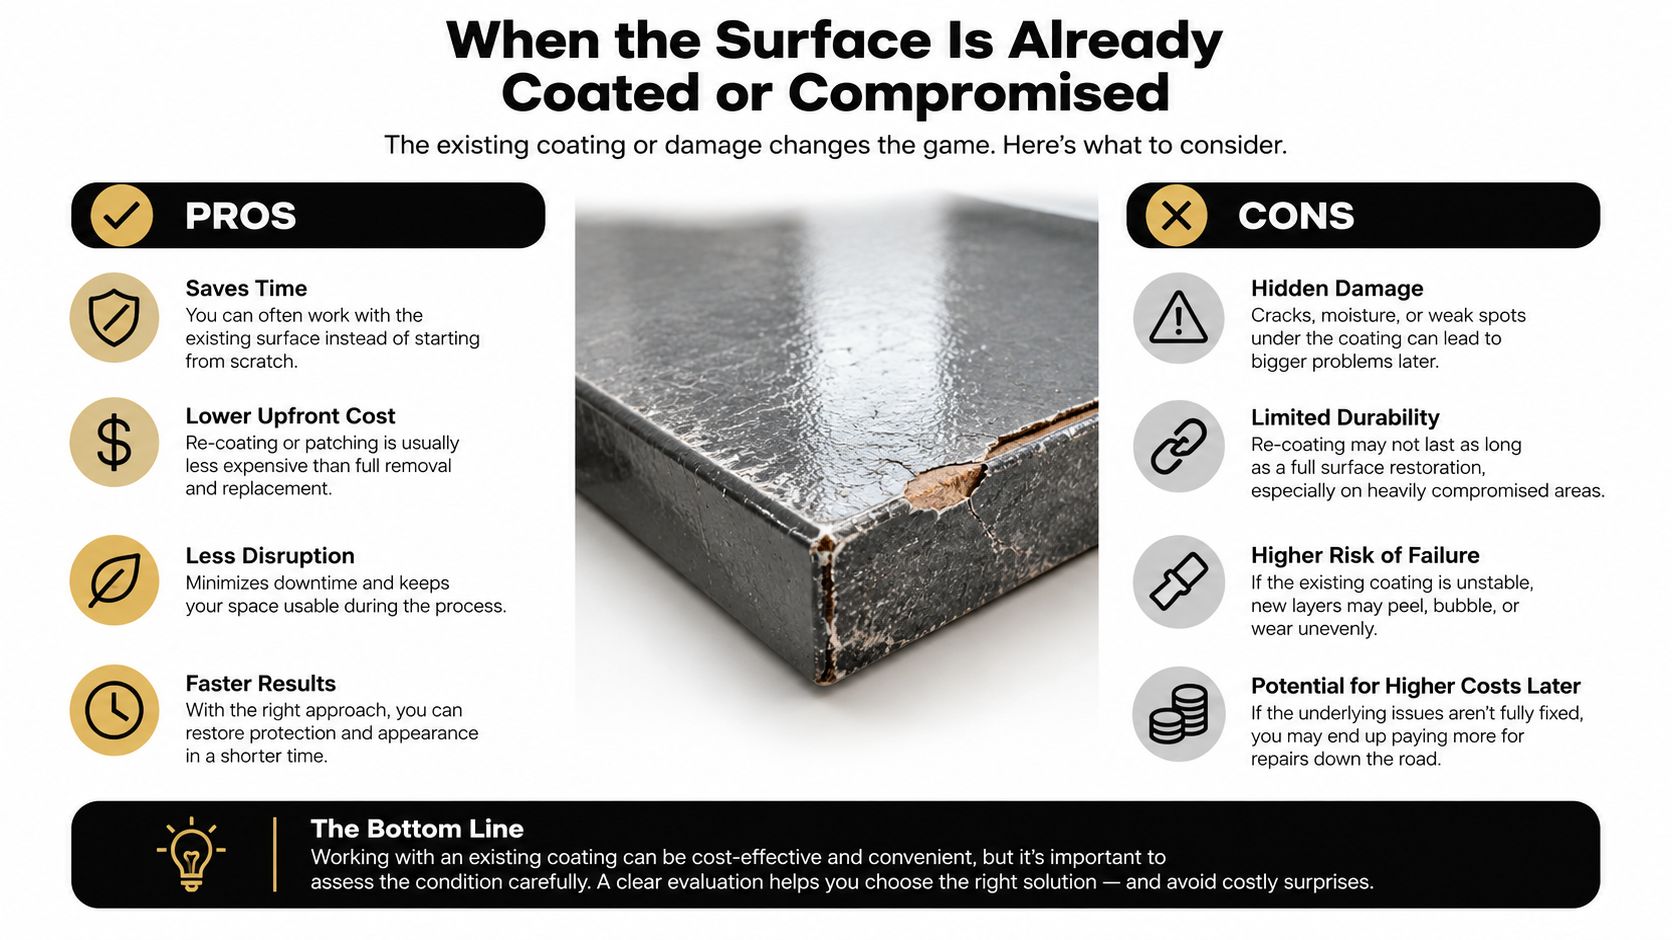
Generic tutorials assume healthy factory clear coat. Real cars arrive coated, wrapped, repainted, matte, or already failing. That is where routine advice breaks down, and where knowing how to clean tar becomes part cleaning and part diagnosis.
Coated, wrapped, repainted, and matte surfaces change the risk profile because aftermarket coatings, fresh paint, and vinyl can react differently to solvents than factory clear coat. A hidden-area test plus short controlled dwell is the standard conservative response, as explained in guidance on removing asphalt from coated and sensitive car surfaces. Broad spraying is the wrong opening move here. Apply by microfiber to the spot only.
Tar Residue or Coating Trouble
After a softening pass, read what the panel tells you. Remaining tar usually looks dark, raised, or smeary and continues to transfer to a fresh towel. It responds to another gentle cycle.
Damage looks different. Watch for these cues and stop adding solvent if you see them.
- Dull patch: The spot loses gloss compared with surrounding paint even after rinsing.
- Swelling or tackiness: The surface feels soft or grabby under a gloved fingertip.
- Color transfer: Pigment or coating color appears on the towel instead of only black tar.
- Uneven water behavior: One area suddenly sheets or beads differently after a mild test.
Those signs may indicate coating or clear coat failure rather than leftover contamination. More dwell will not fix failing clear coat. It can make the boundary worse and turn a diagnostic moment into a repair bill.
Matte finishes deserve special restraint because you cannot polish out a shiny mistake without changing the look. Fresh repaint deserves restraint because new paint may not share factory chemical resistance. In both cases, shorten dwell, skip brushes, and escalate to a professional if the finish looks compromised.
For coated vehicles, check your ceramic coating maintenance routine and chemical limits before reaching for solvent. A product that is fine on bare paint may still shorten the life of a particular coating. That is also why people ask why gloss changed after tar removal. Sometimes technique caused it. Sometimes the tar was hiding a finish that was already on its way out.
Aftercare and Re-Protection
Tar gone does not mean job done. Dissolved hydrocarbons and solvent residue remain on the panel, and anything you apply over them will bond poorly and look uneven. Wash the area again with car shampoo, rinse thoroughly, dry it, and inspect under bright light from several angles.
Look for streaks, high spots, and faint shadows where the deposit sat. Feel the panel with a clean hand inside a thin plastic bag if you want extra sensitivity, but trust your eyes first. Only when the surface is clean and dry should protection go back on, following sensible car paint protection tips for maintaining a sealed finish.
Why Flexible Protection Changes the Next Cleanup
Titan Coatings built its coating technology around Elastomers, nano tubes technology, and Dark Matter Technology, positioning elastomer coatings as hard like glass yet flexible. That flexibility matters in real weather. A coating that can move with the panel is less prone to cracking as temperatures swing between frozen and hot, and it can better tolerate everyday impacts such as bugs striking the front end.
For paint, Alpha Quartz 50ml Ceramic coatig is presented as a high-performance elastomer ceramic coating for all surfaces, with 92% high solids, zero VOCs, solvent-free formulation, advanced adhesion technology, indoor and outdoor application, and a 4 hour cure. That profile suits DIY users and mobile detailers who need controlled application without a permanent booth. For upkeep between deeper jobs, an easy spray topper such as the Ultra Ceramic Spray coating for simple maintenance application gives you a practical way to refresh slickness after washing. You can review the current range in the Titan Coatings shop for coating and maintenance products and match the product to the surface you just cleaned.
Keep this checklist on your phone for the next job.
- Prep: Wash, dry, shade, cool panel, mask trim, test a hidden spot.
- Soften: Apply remover to the spot only and keep it wet during dwell.
- Lift: Wipe one direction, outside in, with fresh microfiber faces.
- Rinse and rewash: Remove solvent and dissolved residue completely.
- Inspect and protect: Check under strong light, then restore your coating or sealant.
Avoid the repeat mistakes. Don't apply solvent to hot paint, let it flash dry, scrub hardened deposits, reuse a contaminated towel face, or skip the final wash. Don't assume paint safe automatically means coating safe.
Done well, tar removal becomes a maintenance task instead of a rescue mission. A clean, flexible, glass-hard layer gives tar less grip next time, so future spots soften faster and release with less chemistry and less risk to the finish underneath.
If today's tar spot showed you how exposed your paint and glass really are, APEX NANO – Titan Coatings offers elastomer and glass coatings built to stay hard, stay flexible through frozen and hot conditions, and make the next cleanup far easier. Visit the site to choose the right protection for your paint, windshield, and maintenance routine, then put a durable barrier between your car and the road.
0 Comments