
Mark found the chip while drying his new car after a Saturday wash. One fleck of road gravel had punched through the front edge of the hood, and once he saw it, that tiny white scar was all he could see.
The Agony of the First Chip and the Path to Perfection
By the time Mark finished staring at that nick in the hood, he had already done what careful owners always do. He traced it with a fingertip, checked it in direct light, and started weighing whether it was worth fixing now or putting off until later.
That hesitation is common. It is also how a clean, controlled repair turns into a larger correction job.
A paint chip breaks more than the appearance of the panel. It opens the coating stack, exposes weaker layers underneath, and gives water, salt, and contamination a place to sit. If the chip reaches bare metal, the clock starts. The question is whether you want to address it while the defect is still small and precise, or after staining, corrosion, and edge failure make the repair harder to hide.
What a tiny chip can turn into
Repair cost rises fast once a small impact becomes an area problem. Major consumer automotive outlets regularly note that minor paint damage is far cheaper to correct early than after rust starts or blending becomes necessary. That lines up with what I see in the shop. A fresh, clean chip is usually a detailing repair. A neglected one can become paint work.
Practical rule: If the chip is still tight, clean, and stable around the edges, you can usually repair the defect itself. If the paint around it starts lifting or the base shows corrosion staining, the job expands.
That distinction matters because the goal is not to hide a white dot for a week. The goal is to rebuild the damaged spot so it stays sealed through heat cycles, wash chemicals, and weather.
Why casual touch-ups fail
A touch-up pen used like a marker rarely solves the problem. It leaves excess material on top of the paint, misses the crater walls, and often dries with a texture or gloss mismatch that stands out even more on black, blue, and red finishes.
Proper car detailing paint chip repair is a layer job. The cavity has to be cleaned, stabilized, filled with control, and leveled so the repair does not print through later. Then it needs protection beyond ordinary wax or a quick spray sealant. That is the part standard guides skip.
My preferred process finishes the repair with a flexible elastomer nano-coating. That top layer matters. It adds a crack-resistant, chemical-resistant barrier over the repaired spot, so the chip is not just covered. It is sealed with a coating that can handle expansion, contraction, and daily use better than a brittle finish left on its own. Owners who want broader front-end defense often combine chip repair with paint protection film for high-impact areas, especially on hoods, bumpers, and mirror caps.
That is the path to a repair that looks right now and holds up later.
Assessing the Damage and Gathering Your Arsenal
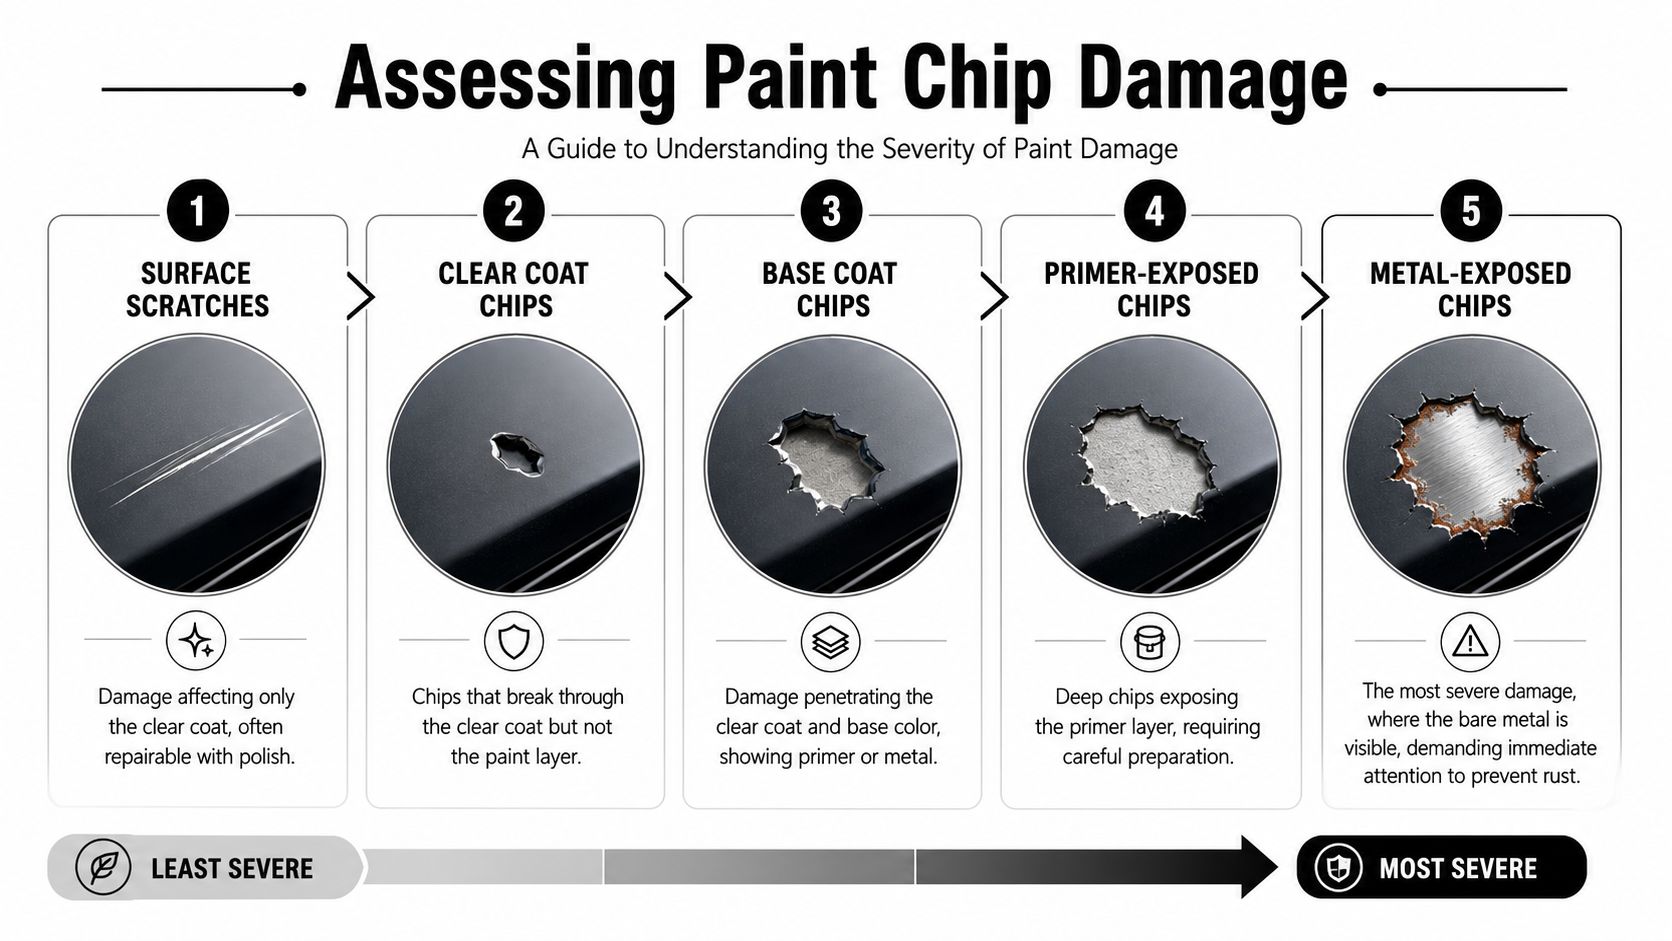
Before you open a bottle of paint, get close to the chip with magnification and good light. Most bad repairs start with bad diagnosis. A clear-coat nick, a primer-exposed pit, and a metal-exposed chip do not get the same treatment.
Read the chip before you repair it
The repair path changes based on what you see at the bottom of the defect.
- Surface scratch: Usually limited to the top of the finish. This may need correction rather than filling.
- Clear-coat chip: The crater breaks the upper layer but doesn't appear to expose deeper color loss.
- Base-coat chip: Color is compromised and the defect looks darker or uneven through the center.
- Primer-exposed chip: The bottom looks light gray or off-white.
- Metal-exposed chip: You can see bare substrate, and this is the one you don't leave sitting.
That last distinction matters most. According to depth-assessment guidance for paint chip repair, success rates exceed 90% when technicians use magnification to distinguish metal-exposed, primer-only, and basecoat-only chips, and use etch primer only when bare metal is visible.
Don't guess depth by color alone. Metallic paint, shadow, and residue can fool you. Clean first, inspect second, repair third.
If you're working like a pro, paint thickness awareness also helps you avoid turning a small defect into a larger one during prep. That's why detailers who want tighter control should understand how to measure paint thickness before correction work.
Build a repair kit that works
You don't need a drawer full of gimmicks. You need a compact set of tools that each solve one job well.
| Tool | Why it matters |
|---|---|
| Magnification | Confirms true chip depth and edge condition |
| OEM-matched touch-up paint | Gives the repair a chance to disappear visually |
| Etch primer | Reserved for bare metal exposure |
| Fine applicators or micro brushes | Place paint inside the cavity instead of smearing it around |
| Wax and grease remover | Clears contamination that ruins adhesion |
| Sanding pen | Feathers sharp chip edges with control |
| Ultra-fine wet sanding paper | Levels the filled repair carefully |
| Polish and finishing pad | Restores gloss after leveling |
A generic touch-up pen on its own is usually too blunt an instrument for good chip work. Precision tools slow you down in the best way. They force you to treat each defect as a miniature refinish, not a dab-and-go shortcut.
The Critical Art of Surface Preparation
Most visible repairs fail before paint ever touches the panel. Dirt, wax residue, loose edges, and rushed prep create the lumpy, haloed look that gives touch-up work a bad name.
Clean until the chip is honest
Wash the panel first. Then isolate the defect and use a dedicated wax and grease remover to strip anything that can interfere with bonding. If the panel has seen spray sealants, waxes, polishing oils, or road film, a basic wash isn't enough.
A properly cleaned chip looks stark. The edges become clearer, the base of the crater is easier to read, and any hidden contamination stops masking the true damage.
Shape the edge, not the panel
Loose paint at the rim has to go. If it's left hanging, your repair will sit on an unstable ledge and fail visually even if the paint color is correct. For this, a sanding pen earns its place.
Use light, controlled rotation on the edge of the chip only. The goal is to soften the abrupt lip so new material can transition into the surrounding finish without leaving a hard ridge.
For prep discipline on the surrounding area, I like the same mindset used in broader correction work. The panel should be handled the way you'd approach car paint prep before coating or polishing: clean, decontaminated, and stripped of anything that interferes with adhesion.
A chip should feel crisp, dry, and stable before you fill it. If the edge still feels flaky or gummy, it isn't ready.
What cutting corners looks like
Rushed prep usually leads to one of these outcomes:
- Raised islands of paint: The fill sits on contamination instead of in the defect.
- Dark rings around the repair: Residue stays trapped at the edge and shows through later.
- Peeling at the perimeter: Loose factory paint keeps lifting after the touch-up cures.
- A repair that looks bigger than the chip: Aggressive prep damages the surrounding finish.
This stage rewards patience more than talent. When the cavity is clean, the perimeter is feathered, and the surface around it is stable, the rest of the repair gets easier. When prep is sloppy, every later step turns into damage control.
Perfecting the Paint and Clear Coat Application
Chip repair is won or lost in a few millimeters.

Good color match helps, but placement matters more. The goal is to rebuild the missing paint stack inside the defect, keep the repair compact, and leave enough control for leveling later. Sloppy application forces you to sand a larger area, and that is where a small chip repair starts turning into a visible spot repair.
Build the repair in controlled layers
Use a fine applicator, not the bottle brush. A micro-brush, needle-tip tool, or sharpened matchstick gives better control and keeps the paint inside the cavity instead of smearing it across healthy clear coat.
Apply the base color in thin deposits and let each one settle before adding more. Two light passes usually give better shape than one heavy pass because the paint stays down in the chip instead of crowning over the edges. Leave room for clear coat. If color fills the defect to the top, the clear has nowhere to sit and the repair often ends up proud, soft-edged, and obvious under direct light.
I look for a slight recess after the color stage. That tells me the base is where it belongs.
The application sequence that keeps the repair tight
A clean repair usually follows this order:
Set the first drop of color into the deepest part of the chip
Let capillary action pull the paint outward instead of dragging the applicator against the edge.Allow it to flash and inspect under direct light
Check for shrink-back, voids, or paint climbing onto the surrounding finish.Add a second light color layer if needed
Build coverage without overfilling the cavity.Top with clear coat in small amounts
The clear should complete the paint stack and leave a slight mound for later leveling.
That last point matters. Clear coat gives you material to refine. Without enough of it, the repair can look flat, porous, or slightly sunken after cure.
Clear coat is only part of a lasting fix
Standard chip repair guides stop once the clear is on. That is where better repairs start to separate from temporary ones.
Fresh touch-up clear is harder than basecoat, but it is still a small repair sitting in a high-stress area that sees heat cycles, wash friction, road grit, and seasonal expansion. On front-end chips especially, I want more than a cosmetic fill. I want a sealed repair that resists edge failure.
That is why I like to finish the cured repair with a flexible protective layer rather than leaving the new clear exposed. A modern elastomer coating adds a thin barrier over the repaired area, helps seal the perimeter, and moves with the panel instead of turning brittle. Applied after leveling and polishing, it gives the chip repair a stronger long-term finish than paint alone. For the sanding stage that prepares a repair for that final refinement, these wet sanding clear coat best practices are the right reference.
Mistakes that make chips stand out later
These habits cause trouble fast:
- Overloading the applicator: Too much paint spreads beyond the defect and increases correction work later.
- Trying to get full coverage in one pass: Thick paint skins over, traps solvent, and can shrink unevenly.
- Letting clear flood the perimeter: The repair widens visually and becomes harder to level cleanly.
- Ignoring product behavior: Thin paint runs. Thick paint bridges. Both leave a weaker fill.
A good fill looks almost understated before sanding. Under inspection light, the white fracture point is gone, the color sits where the chip used to be, and the repair has enough clear on top to level cleanly and seal properly.
Blending Sanding and Final Polishing for Invisibility
The repair usually looks its worst right before it disappears.
After the paint and clear have cured, the chip often sits slightly above the surrounding finish. That raised spot catches light, throws a hard edge, and tells on the repair from a few feet away. Leveling fixes that, but only if it is done with restraint. The goal is to remove the extra height without thinning healthy clear around it.
Why cure time changes the result
A soft repair does not sand cleanly. It rolls, smears, or sinks later, and that is how a repair that looked flat on day one shows up again after a few washes and a hot afternoon in the sun.
Let the fill harden fully before you touch it with abrasives. Then work the spot with fine wet sanding media and light pressure. If you need a refresher on technique, review these wet sanding clear coat methods that keep leveling controlled. The principles matter even more on a small chip because there is no room for sloppy contact.
How to level the fill without creating a halo
Use a small, firm interface pad or a precision block. Fingertip sanding feels safer to beginners, but it follows the panel too closely and cuts a shallow crater around the repair. That crater is what creates the dull ring many touch-ups never recover from.
A controlled process works better:
- Keep the surface wet: Lubrication reduces stray scratching and helps the paper cut evenly.
- Work in short passes: A few strokes at a time gives you a clean read on progress.
- Watch the repair perimeter: The moment the mound drops to panel level, stop sanding.
- Keep your pressure centered: Letting the paper wander into surrounding paint expands the correction area fast.
I check the spot under a sharp inspection light after every few passes. Once the high point is gone and the edge looks even, sanding is finished. Chasing perfection with more paper usually creates more polishing work than the chip ever needed.
Polishing restores the reflection
Sanding levels the repair. Polishing makes it disappear.
Refine the area with a light-cut polish first, then finish with a finer polish that restores full clarity. On dark colors especially, this step decides whether the repair blends into the panel or leaves a faint texture shift that only shows in direct sun. Good polishing does more than add gloss. It brings the repaired spot back into the same optical behavior as the factory finish, which is what makes the chip stop drawing the eye.
This is also the stage that sets up the upgrade most guides miss. A properly leveled and polished repair gives the elastomer top layer a clean, stable surface to bond to, so the finished chip is not only harder to see, but better sealed against the cracking and edge failure that tend to come later.
The Titan Advantage to Future-Proof Your Repair
For years, the weak point in chip repair wasn't the paint fill. It was what happened after the repair had cured, been leveled, and gone back into daily weather. A lot of repairs looked fine at first, then lost their edge under heat, cold, washing, and impact.
That's where modern elastomer coating technology changes the conversation.
Why a repaired chip needs a better seal
Traditional repair guides usually stop at paint and polish. That leaves the repaired area looking finished, but not necessarily reinforced in a smarter way than before. The more advanced move is sealing the corrected spot with a coating that doesn't behave like a brittle shell.
According to Titan's coating technology overview, Titan Coatings was the first company to introduce elastomer coatings using nano-tube technology and proprietary Dark Matter Technology®, creating a protective layer that is hard like glass yet retains critical flexibility. That combination matters on repaired paint because the area you just rebuilt is exactly where you don't want a rigid top layer telegraphing stress.
The practical role of Alpha Quartz and Ultra Ceramic Spray
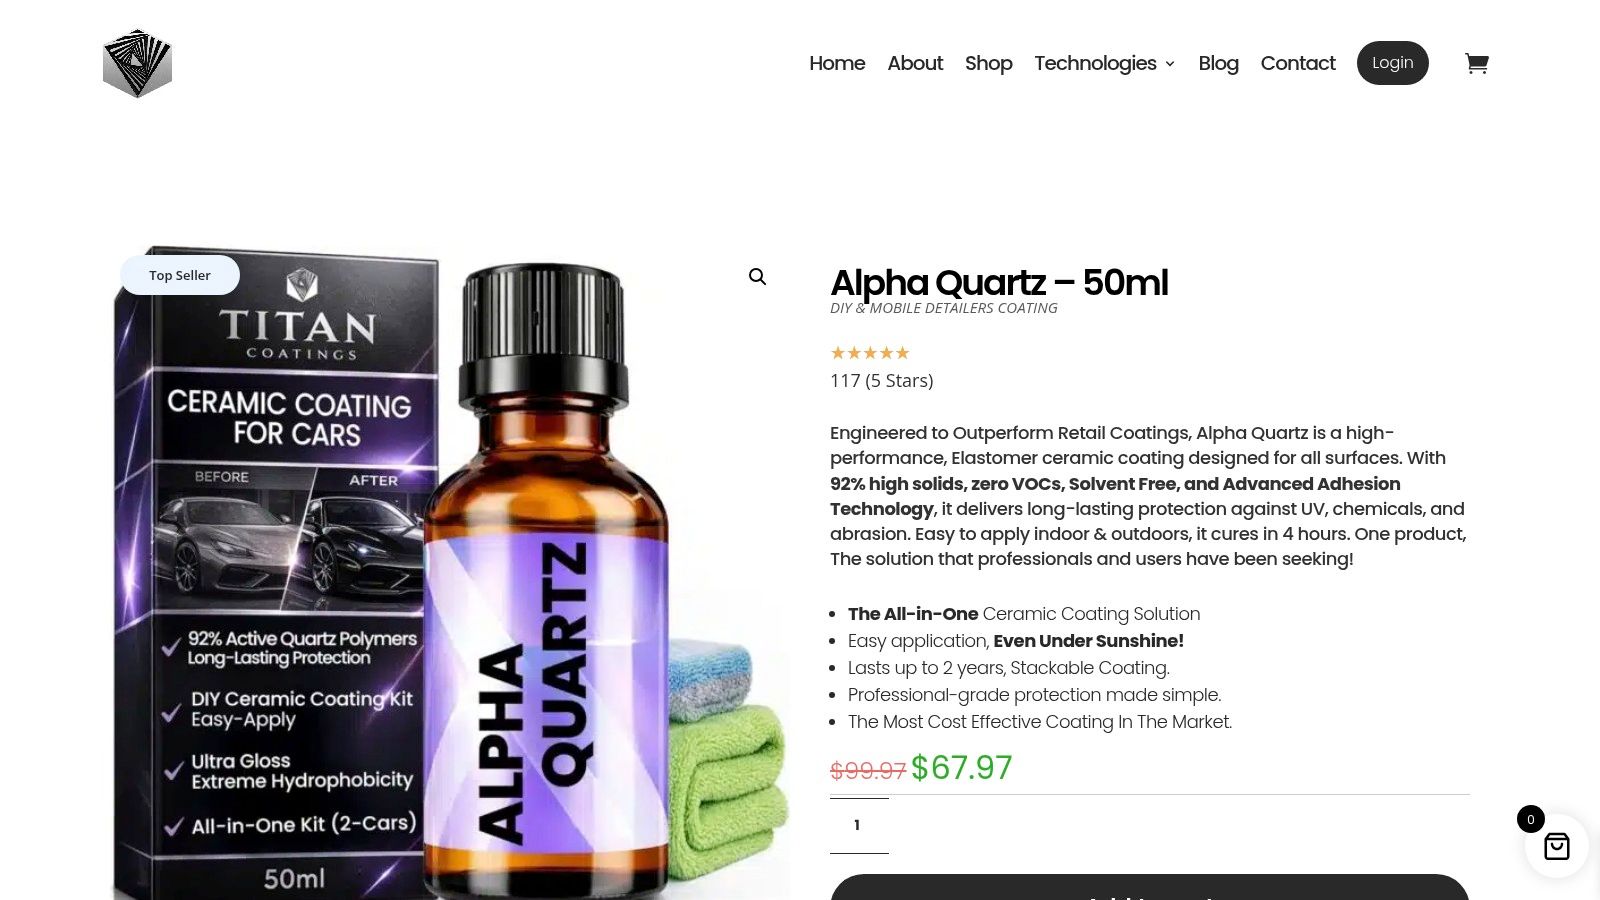
For detailers and serious DIY users, Alpha Quartz stands out because it's easy to install and fits neatly into a post-repair protection workflow. After the chip is fully corrected, leveled, and polished, applying a flexible coating over the area helps seal the finish in a way that aligns with how real panels live. They expand, contract, flex slightly, and deal with constant temperature swings.
A rigid coating can leave you wondering whether the repaired spot will become the first place to show stress. An elastomer approach makes more sense for this specific use case.
Then there's Ultra Ceramic Spray. It's the fast, easy option when you want a clean layer of slickness and water behavior without a complicated install. I wouldn't use it as a substitute for doing the repair properly, but I do see it as a strong maintenance and top-layer choice when you want fast protection with low hassle. If you want to compare where coatings fit into a full protection strategy, take a look at paint protection coating options for cars.
The best chip repair isn't just hidden. It's sealed in a way that respects how the surface moves in the real world.
That's the missing step most paint chip articles never talk about.
Beyond the Chip A Strategy for Total Protection
Fixing one chip changes how you look at the whole vehicle. You start noticing where the next impact is most likely to land. Hood edge. Front bumper. Mirror caps. Lower doors. That's when smart detailers stop thinking defect by defect and start protecting systems, not spots.
Protect more than paint
A flexible coating strategy makes sense across the whole exterior, especially on the panels that take repeated abuse. Titan's coating platform is built around the idea that a protective layer shouldn't turn brittle when the car sees real environmental movement. As described in Titan's explanation of coating performance, unlike standard ceramic coatings that act as rigid shells prone to micro-cracking, Titan's elastomer technology combines ceramic hardness with elastomer flexibility so the coating remains stable and crack-resistant even when substrates and environments move significantly.
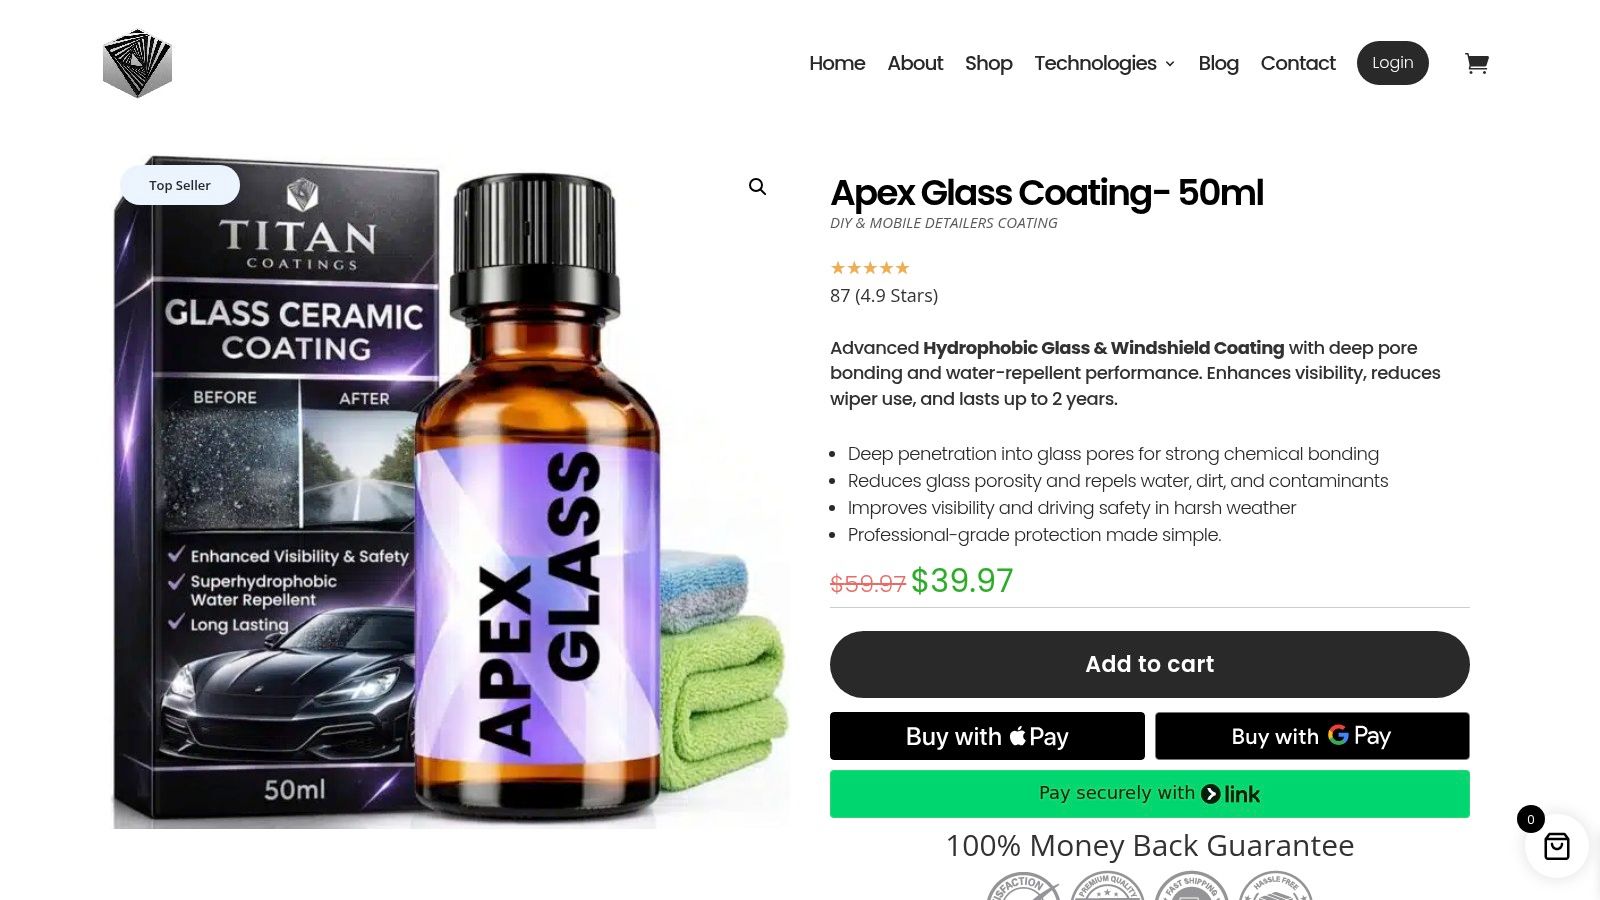
That same logic applies to glass. Apex Glass & Windshield Coating deserves more attention than it gets because visibility is part of detailing too. When rain starts stacking up on the windshield, a quality glass coating changes the driving experience. Water clears more cleanly, the windshield stays easier to maintain, and the application process is straightforward enough for both mobile detailers and hands-on owners.
The better long-term mindset
If you've already put in the work to perform precise car detailing paint chip repair, don't go back to reactive maintenance.
- Protect the front end: That's where repeat impacts usually show up first.
- Use flexible technology where movement matters: Heat, cold, washing, and road debris don't stop.
- Don't neglect glass: Better visibility in rain is a practical upgrade, not a cosmetic extra.
- Keep products simple enough to use consistently: Easy application is a feature, especially for mobile work.
For anyone wanting to build out a full exterior protection setup, the product range is easy to browse through the Titan Coatings shop.
APEX NANO – Titan Coatings brings that next step into reach. If you want coatings that are hard like glass, flexible under real temperature swings, and practical for both pros and hands-on owners, explore APEX NANO – Titan Coatings for solutions like Alpha Quartz, Ultra Ceramic Spray, and Apex Glass & Windshield Coating.
0 Comments