
The SUV was black enough to mirror the bay lights, but a faint hazy arc near the A-pillar told me the coating hadn't bonded cleanly. The culprit wasn't the bottle. It was the prep wipe that never happened.
The Saturday Detail That Nearly Cost a Client
The owner arrived late on a Saturday afternoon, expecting the deep gloss he'd seen before leaving the SUV with us. He walked around the vehicle, pressed a finger across the hood, and stopped beneath the overhead lights. The mark looked like a harmless smudge, but I knew what I was seeing: a high spot where the coating had met leftover polishing oil instead of bare clear coat.
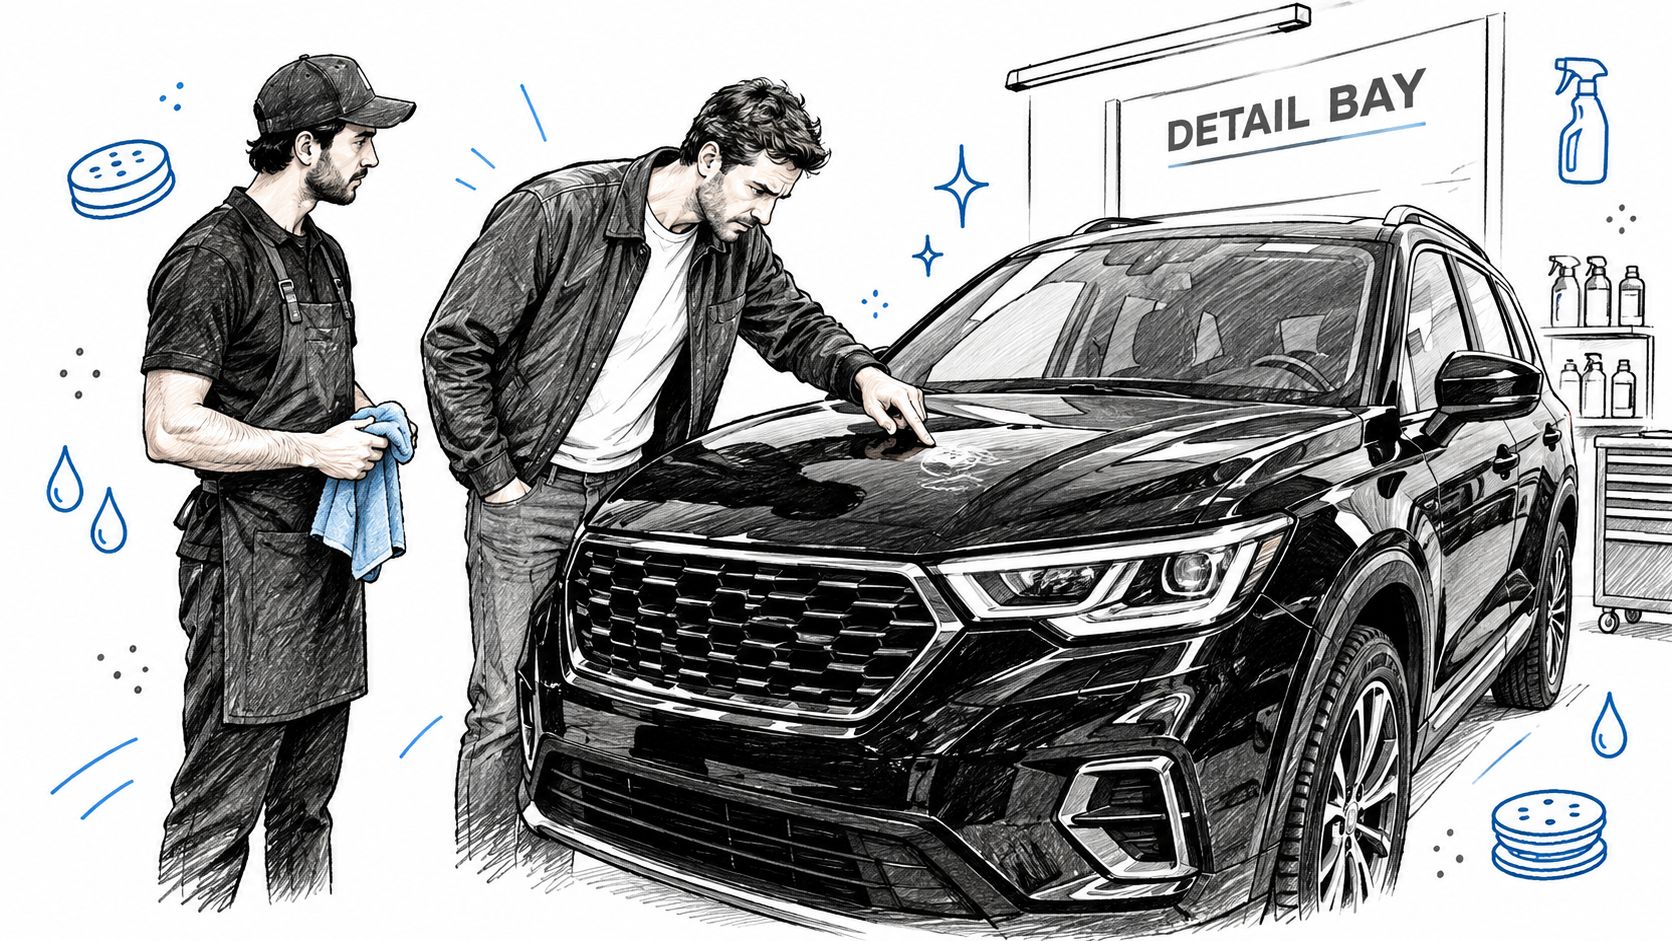
The repair meant partial stripping, another polish, another wipe-down, and an uncomfortable explanation. One missed pass with ceramic coating prep spray had turned the final inspection into a correction job.
The hidden failure point
Polishing oils can leave a thin film that makes paint look richer and smoother. That shine can fool even an experienced owner because gloss isn't proof of cleanliness. A coating bonds to the surface presented to it, so residue beneath the coating can weaken the result long before the owner understands why water behavior or clarity has changed.
The history of ceramic protection helps explain why this final wipe now matters so much. Ceramic and quartz sealants were used by detailers in the late 2000s, while broader consumer popularity emerged in the 2010s as brands and application systems multiplied (the history of car detailing and ceramic coatings).
Shop rule: The coating bottle stays closed until the panel has passed the final wipe and inspection.
Prep spray isn't glamorous. It doesn't create the first dramatic reflection, and customers rarely ask to see it. Yet this quiet degreasing stage often determines whether the finish remains convincing after the garage lights are gone.
What Ceramic Coating Prep Spray Actually Does
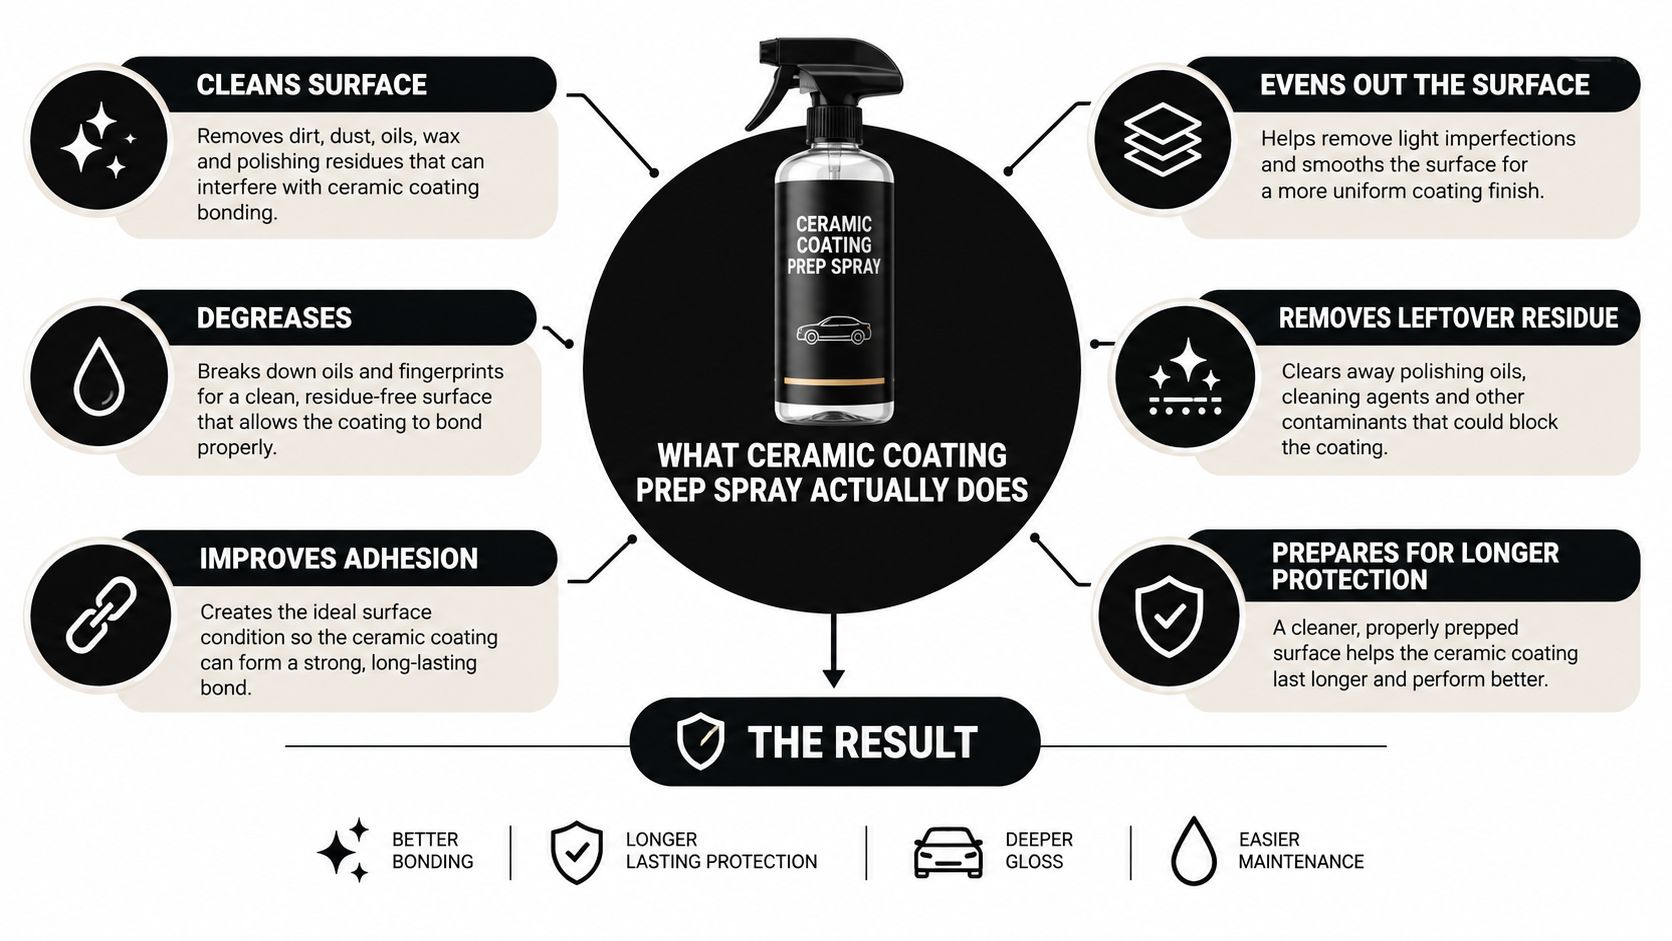
A dedicated prep spray is the final cleaning agent before coating. It commonly uses alcohol and solvents that dissolve thin films of polishing oils, wax residue, fingerprints, silicones, and handling contamination, then evaporate or wipe away without leaving a protective layer behind. For example, Adam's Surface Prep identifies a 30% IPA formula and directs users to spray the product on a towel or surface before wiping thoroughly.
Think of it as cleaning a window before applying tint. The glass may look clear already, but a nearly invisible film can interfere with the adhesive. Paint correction works similarly. Polishing refines the finish, while prep spray removes the oils that can remain after the machine and pad have done their work.
What it removes, and what it cannot
Prep spray isn't an iron remover, tar remover, clay lubricant, or paint correction compound. It won't pull embedded rail dust from the clear coat, dissolve bonded tar, remove mineral scale, or level oxidized paint. Those problems belong earlier in the workflow, where chemical decontamination, mechanical decontamination, and polishing can address them safely (Magic Auto Care's prep-spray FAQ).
A useful distinction is simple:
- Surface film: Prep spray can address polishing oils, wax residue, fingerprints, and final wipe contamination.
- Bonded contamination: Iron fallout, tar, and mineral deposits need dedicated decontamination methods.
- Paint defects: Swirls, scratches, and haze require correction before coating.
Treating prep spray like a quick detailer is a common DIY mistake. A quick detailer adds slickness or gloss. A prep spray is meant to remove the very films that interfere with bonding. If you need a compatible maintenance product after the coating has cured, keep that separate from the final pre-coating wipe. Titan's ceramic coating maintenance spray belongs to that maintenance conversation, not as a replacement for surface preparation.
The Prep Work That Has to Happen First
Prep spray can't rescue a dirty, contaminated, or poorly corrected panel. Before the bottle comes out, start with a foam pre-wash or careful two-bucket wash that lifts loose grit away from the paint. Rinse thoroughly, dry the vehicle completely, and inspect in shade or controlled lighting.
Chemical decontamination comes next. An iron fallout remover addresses ferrous particles, while a tar remover handles asphalt and adhesive-like residue. After rinsing, a clay bar or clay mitt can remove bonded contamination that chemicals leave behind. The paint should feel smooth under a clean plastic bag, not merely look shiny.

Correction determines the finish
A coating preserves the surface beneath it. It doesn't erase swirls, holograms, scratches, or etching. Take paint-thickness gauge readings where appropriate, choose a conservative correction plan, and run a test spot before polishing the entire vehicle. The test spot tells you whether a finishing polish is enough or whether the paint needs a more involved correction.
Polishing creates the finish you want to preserve, but it also introduces the residue that must later be stripped. That residue is why Titan's coating surface preparation guidance belongs in the same conversation as correction, decontamination, and the final panel wipe.
Practical rule: Every stage carries the next one. If you ask prep spray to remove bonded fallout or fix correction marks, the coating is being asked to compensate for a process failure.
Once the final polish is complete, blow dust from panel gaps, emblems, and trim edges. Wipe away loose residue before applying prep spray. The goal isn't a clean-looking vehicle. The goal is a chemically bare, visually refined surface that won't transfer contamination into the coating.
Applying Prep Spray Panel by Panel
Large panels tempt people into rushing. A full hood looks efficient, but solvent can flash before you make your way back across it, especially in warm air or direct sunlight. Work on a manageable zone, such as half a hood, one door, or one fender.
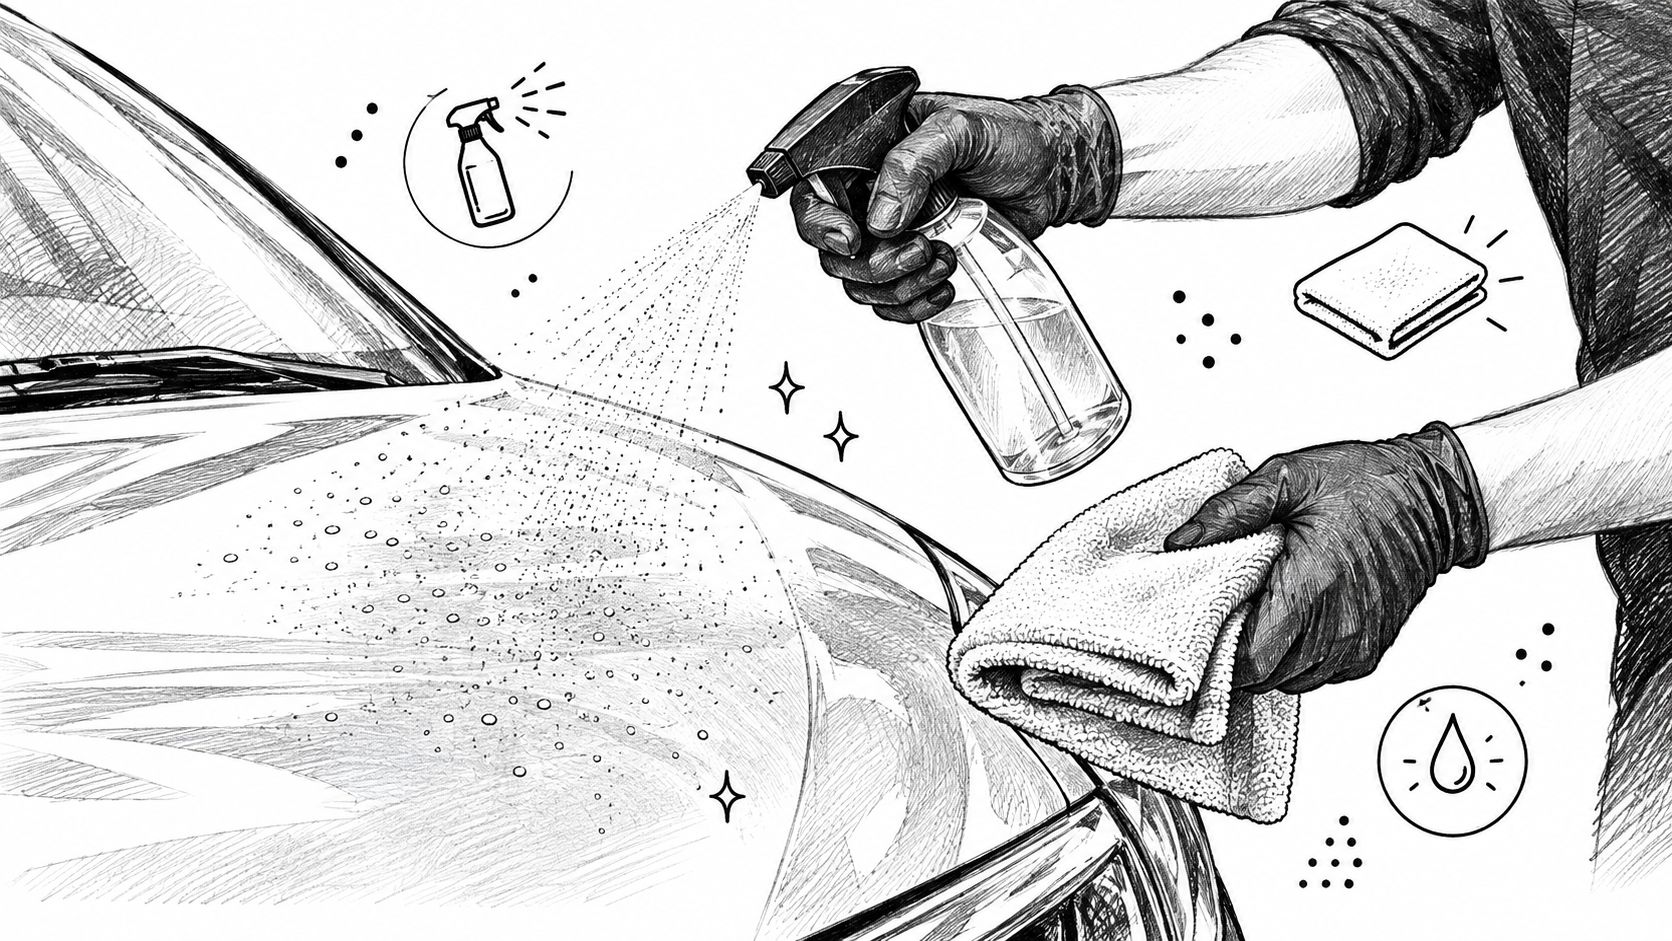
Mist a light, even amount across the chosen area or onto the microfiber, depending on the product directions. Use a clean, lint-free towel folded to expose a fresh face. Make straight, overlapping passes with light pressure, then flip to another clean face as dissolved oils collect in the fabric.
The wet pass and the dry pass
Circular wiping can increase the chance of dragging contamination across a soft clear coat. Straight lines make coverage easier to track, particularly along the edges of a door or around a body crease. Wear gloves throughout the process, because bare fingers can put skin oils straight back onto the panel.
Follow the wet cleaning pass immediately with a second, dry microfiber. The dry towel lifts the remaining film before the carrier evaporates and leaves streaks. Manufacturer guidance commonly calls for small working areas and a second dry towel, with Poorboy's Surface Prep Spray instructions recommending a 3 ft by 3 ft working area.
Keep these habits consistent:
- Fresh towel faces: Refold often, and replace towels before they become saturated.
- Clean separation: Never reuse a towel that touched cured coating, wheel cleaner, or silicone dressing.
- Controlled environment: Work out of direct sunlight and away from blowing dust.
- No wet dwell: Don't let the product sit wet while you search for another tool.
- Dedicated equipment: Keep a clean applicator and towel supply reserved for paint preparation.
A proper panel often develops slight towel drag once the surface is bare. That feel isn't a substitute for inspection, but it can tell you the panel no longer has the slick, oily glide that polishing residue creates. Store the spray in a clean, labeled bottle if the manufacturer permits it, such as a dedicated trigger spray bottle, and never mix products in an unmarked container.
Pairing Prep Spray With Titan APEX NANO Elastomer Coatings
Traditional quartz coatings and elastomer-modified systems both need a clean surface, but they don't respond to movement in the same way. Rigid coating structures can be less tolerant of thermal expansion and contraction, while elastomeric coatings are designed to retain flexibility as the underlying surface moves.
Titan's APEX NANO Elastomer approach connects that flexibility with disciplined preparation. The coating may remain hard like glass while retaining flexibility, a combination intended to help it accommodate temperature changes rather than crack as readily during thermal cycling. Technical guidance on coating flexibility explains how elastomeric materials can bridge cracks and absorb expansion and contraction through freeze-thaw cycles, while Titan's flexibility reference notes that flexibility is commonly assessed with ASTM D522 bend testing.
That flexibility doesn't make contamination harmless. A flexible film still needs a clean, uniformly prepared surface so it can establish a sound bond. The final wipe should remove oil thoroughly, followed by a careful inspection wipe if the product system calls for it. Apply the coating panel by panel, spread in a cross-hatch pattern where directed, level with a short-nap suede, and follow the product's specified flash and curing conditions rather than guessing.
| Prep Step | Traditional Quartz Coating | Titan APEX NANO Elastomer |
|---|---|---|
| Final degreasing | Remove polishing oils and residue before application. | Use the same strict oil-stripping standard before application. |
| Surface inspection | Look for streaks, high spots, and remaining film. | Check for the same contamination, because flexibility doesn't replace adhesion. |
| Application rhythm | Work in controlled sections and level within the product's flash window. | Work panel by panel and follow the specified leveling and flash guidance. |
| Temperature movement | Rigid films may be less forgiving of repeated expansion and contraction. | Elastomeric flexibility is intended to accommodate movement through changing temperatures. |
| Suitable audience | Often chosen by professional detailers and experienced installers. | APEX NANO is presented for coating workflows that may include DIY and mobile detailers. |
The central comparison is not “rigid versus flexible means prep versus no prep.” It's rigid or flexible film, both dependent on the substrate beneath them. Titan's Elastomer coating technology describes the material approach, but the installer still controls whether the paint is ready to receive it.
How to Tell the Surface Is Truly Ready
A glossy hood can still carry oils. Freshly polished paint often looks excellent before the final wipe, so judging readiness by reflection alone is unreliable.
Run a clean, dry microfiber across the panel with light pressure. Bare paint often gives a faint, slightly tacky squeak or controlled drag, while an oily surface can feel unusually slick and silent. Shine can remain in both cases, which is why touch and lighting need to work together.
Use light, touch, and controlled checks
Hold a bright, daylight-balanced work light low and flat across the panel. Rainbow sheeting, smudge clouds, or halo-like residue can reveal a film that disappears under broad overhead lighting. Inspect the panel from several angles, including around body lines and near trim where polishing residue tends to collect.
A small hidden-area check with plain isopropyl alcohol can show whether streaking remains, but use a compatible product and follow the coating manufacturer's safety and application guidance. The plastic-bag test serves a different purpose. Glide a thin sandwich bag over the paint to detect bonded roughness that your eyes miss. If it feels gritty, return to decontamination rather than adding more prep spray.
For a final sensory check, notice lingering solvent or silicone odor. A strong smell suggests that product residue or an unflashed cleaner may still be present. These observations support the technical reason for the final wipe: independent technical literature on ceramic surfaces reports that contamination can reduce adhesion, while aggressive cleaning can improve bond strength compared with untreated contaminated controls (technical literature on ceramic surface adhesion).
Before opening the coating, verify the correction under light, confirm smoothness with the bag test, inspect for streaks, and make a final clean-towel pass. Paint correction before ceramic coating isn't cosmetic preparation. It determines what the coating will preserve.
Turning Prep Spray Habits Into a Lasting Coating
The most economical protection in a coating job is a repeatable wipe routine. A missed pass can leave polishing oils beneath the film, and no later maintenance wash can reach through a cured coating to correct that interface. The result may look acceptable at first, then show uneven water behavior, hazing, or premature loss of slickness in the affected area.
Create a dedicated preparation station. Keep prep spray away from polish bottles, label a separate bin for paint-prep towels, and remove any towel that has contacted dressing, wheel chemicals, or cured coating. A clean system prevents accidental cross-contamination when the bay gets busy.
Build a routine the bay can repeat
A practical checklist can be short:
- Wash and dry: Remove loose dirt before touching the finish.
- Decontaminate: Address iron, tar, and bonded roughness with the correct tools.
- Correct: Refine the clear coat and inspect the test spot.
- Strip: Wipe each panel with ceramic coating prep spray, then complete a dry pass.
- Inspect twice: Check the surface under controlled light and with a clean towel before opening the coating.
- Apply carefully: Follow the coating's own flash, leveling, and curing directions.
The market reflects how closely this product category is tied to modern coating workflows. Independent market research estimates the global ceramic coating prep spray market at $0.4 billion in 2025, with a projection of $0.8 billion by 2034 at a 7.2% CAGR (ceramic coating prep sprays market analysis). The same analysis reports solvent-based formulations at 38.5% of product share and automotive applications at 52.3% of revenue, or about $0.209 billion in 2025. Those figures suggest a growing category, but the garage lesson remains basic: demand doesn't make a shortcut safe.
Elastic coatings add another reason to respect the substrate. Titan's APEX NANO is positioned as a coating system that combines a glass-like hard surface with flexibility, allowing the film to respond to temperature movement rather than treating every expansion cycle as a brittle shock. The advantage only matters when the coating bonds to clean paint.
Audit your last coating problem today. Look at the panel that failed, ask what remained after correction, and trace the workflow back to the towel, solvent, and inspection stage. For the next job, schedule a prep wash, prepare a dedicated towel bin, and don't open the coating until every panel passes the wipe test twice.
If you want a coating system built around careful surface preparation and flexible protection, explore what APEX NANO by Titan Coatings offers for your next vehicle. Review the APEX NANO – Titan Coatings range, including options for detailers, DIY installers, and mobile workflows, then match the application process to the clean surface you've prepared.
0 Comments