The black paint was flawless. The wheels were perfect. Then I stepped in front of the windshield and saw the job that would decide whether the car looked detailed or merely cleaned.
A luxury car with marked-up glass will humble any detailer fast. Fine wiper trails, mineral staining, and a few tight scratches near the edge can undo hours of otherwise excellent work.
The Unseen Flaws That Ruin a Perfect Detail
I remember a high-end job where the owner kept saying the car still looked “off” from the driver's seat. The paint had already been corrected. The trim was dressed properly. The interior was sorted. The problem was the glass, especially the windshield, which had stubborn water marks and a web of fine scratches that only showed under the right light.
That's the part many people miss. Glass defects don't shout the way paint defects do. They sit there until sunlight, streetlights, or rain expose them. Then the whole vehicle feels unfinished.
Why glass correction changes the whole result
A clean windshield and a corrected windshield are not the same thing. Cleaner removes film. It won't level etched minerals or reduce scratch visibility. That's where the right glass buffing pad and the right compound start to matter.
If you regularly deal with mineral buildup on exterior glass, this guide on professional window stain removal is worth reading because it helps separate contamination issues from defects that need true polishing. That distinction saves time and keeps you from attacking every spot the same way.
The demand for better finishing tools isn't guesswork. The global market for polishing pads, including specialized glass buffing pads, was valued at USD 1.2 billion in 2024 and is projected to hit USD 1.8 billion by 2033 according to this glass polishing pads market outlook. More detailers and shops are treating glass correction as part of premium work, not an afterthought.
A perfect detail can still look incomplete if the windshield throws glare back in your face.
Standard methods often fail for a reason
A lot of failed glass jobs come from using paint-polishing habits on a harder surface. People grab a random foam pad, run too much product, make a few loose passes, and expect clarity. Glass doesn't reward that approach.
It responds to pressure control, pad choice, heat management, and coverage discipline. You also need to know when the problem is a polishable defect and when it's damage that needs a different repair path.
For basic prep before correction, I always point detailers toward a proper windshield cleaning process first, because polishing over embedded grime is asking for trouble. Titan's article on the best way to clean an auto windshield is a useful starting point before machine work begins.
Choosing Your Glass Buffing Pad and Compound
Pad choice is where most glass polishing jobs are won or lost. Not because every pad is wildly different, but because the wrong material forces you to fight the surface instead of cut it cleanly.
Start with the pairing that actually works
For serious correction, a rayon pad paired with cerium oxide is the standard combination. Industry consensus confirms that this is the most effective pairing for eliminating glass scratches, and it has become the go-to setup for high-end automotive and optical restoration work, as noted in this discussion of glass polishing pad recommendations.
That matters because glass is harder than paint. A soft, generic pad that feels safe on a clear coat often doesn't have the bite or consistency needed on glass.
Rayon versus felt
Here's the practical way I look at it:
| Pad type | Best use | What it does well | Where it can go wrong |
|---|---|---|---|
| Rayon pad | Defect removal, water spot correction, scratch reduction | Cuts better on hard glass surfaces, works well with cerium oxide | Can haze if technique is sloppy or the slurry is wrong |
| Felt pad | Refinement, certain restoration workflows, controlled finishing | Stable contact, good for systematic polishing | Can run hot if overloaded or used carelessly |
Rayon is usually the first pad I reach for when the glass has real issues. Felt still has a place, especially when a workflow calls for a more deliberate finishing step, but rayon with cerium oxide is the combination that consistently shows up in professional conversations for a reason.
Practical rule: If the defect is on the glass and not just sitting on it, stop treating it like a cleaning problem.
Pad size and machine control
Smaller pads give you better control around edges, pillars, and tight lower windshield corners. Larger pads cover broad, open glass faster, but they can make edge work clumsy. On windshields with complex curves or trim sitting close to the glass, I'd rather give up a little speed and keep control.
A clean, balanced setup also matters. If your backing plate overhangs awkwardly near moldings, you'll hesitate, lighten pressure at the wrong moment, and leave uneven correction.
If you're comparing sizes and construction styles, a dedicated look at 6 inch polishing pads helps frame what works better for broad sections versus more technical areas.
Powder or premixed cerium oxide
Cerium oxide comes as powder or premixed polish. Both can work. The bigger issue is consistency.
Powder gives you flexibility, but it also gives you more chances to mix it badly. Premixed product removes some guesswork, which is helpful for mobile detailers or anyone trying to keep results repeatable across different jobs.
What doesn't work is chasing a magical recipe and assuming more compound means more cut. The pad and slurry need to stay workable, not overloaded. If the product cakes, dries too fast, or turns into a muddy mess, correction slows down and heat rises.
A good glass polishing setup should feel controlled on the glass. The pad should stay engaged, the slurry should stay active, and your section should tell you quickly whether you're correcting or just smearing product around.
The Professional Glass Buffing Technique
Technique is where pros separate themselves from people who possess the tools. Glass polishing rewards discipline. Random movement, uneven pressure, and oversized work areas lead to poor clarity and wasted time.
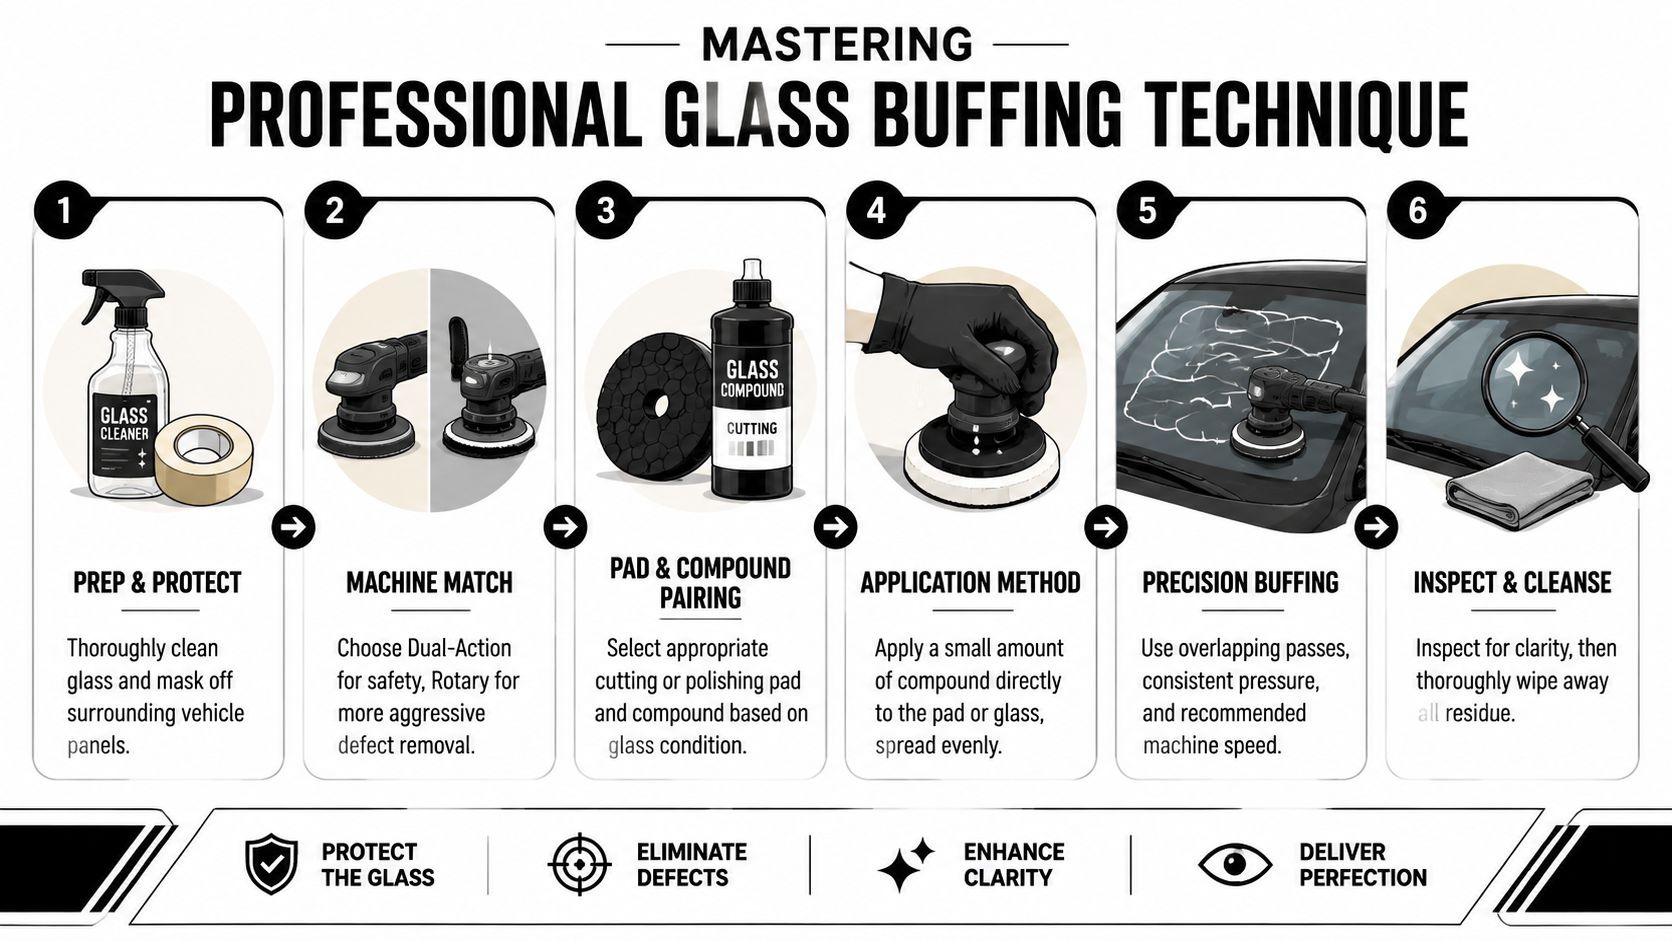
Set up the glass before the machine touches it
Start with a thoroughly cleaned surface. Then mask nearby trim, rubber, painted edges, and any area that can catch sling. Glass polishing residue loves to hide in textured surfaces and around windshield moldings.
Work under lighting that lets you read the defect pattern. Overhead shop light alone often isn't enough. You need to see whether you're chasing water spot etching, wiper abrasion, isolated scratch lines, or a mix of all three.
Machine choice matters too. A rotary gives stronger correction and more direct transfer of force. A dual-action machine is often easier to control, especially for lighter work or for people still building confidence. If you need a dedicated machine for this type of correction, Titan's guide to a rotary car polisher is worth reviewing because glass often benefits from the directness a rotary provides.
Use a cross-hatch pattern, not random circles
Professional glass buffing needs structure. A systematic cross-hatch pattern, where each pass overlaps the previous one by half the pad's width, is essential for uniform clarity. This method ensures complete coverage and has a success rate over 90% for removing common scratch damage when used properly, according to the GlassRenu reference handbook.
That overlap is not optional. It keeps the correction even and reduces the patchy look that happens when one section gets more mechanical action than the next.
Use this rhythm:
- Spread first with light contact so the compound doesn't sling.
- Work horizontally across a controlled section.
- Then work vertically over the same area.
- Move outward gradually instead of chasing defects all over the windshield.
- Inspect before repeating so you know whether you need more passes or a different approach.
What proper polishing feels like
A good glass polishing pass feels planted. The pad stays flat. The machine tone stays steady. The slurry remains active rather than flashing dry or clumping into stubborn residue.
The section size should stay small enough that you can control heat and pressure. If you enlarge the area too early, correction drops and frustration climbs.
Keep the pad engaged with the glass, not dancing on top of it.
There's also a business side to learning this skill well. Shops that can handle hard water spots and scratch reduction properly offer a service many customers can see immediately from the driver's seat. If you're building a mobile or studio operation, this guide on how to start a detailing company is a helpful read because specialized services like glass correction can sharpen your positioning.
Small habits that improve the finish
A few habits separate clean results from rework:
- Prime the pad lightly: Don't start with a dry face dragging on dry glass.
- Stay consistent with arm speed: Fast movement skips correction.
- Watch the edges carefully: Curved sections and lower corners are where uneven pressure shows up first.
- Wipe and inspect often: Don't do long blind polishing cycles.
- Adjust based on the defect: Wiper trails may respond quickly. Tight, isolated scratches near edges often need more patience.
The best operators don't just move the machine. They read the surface every pass and correct with intention.
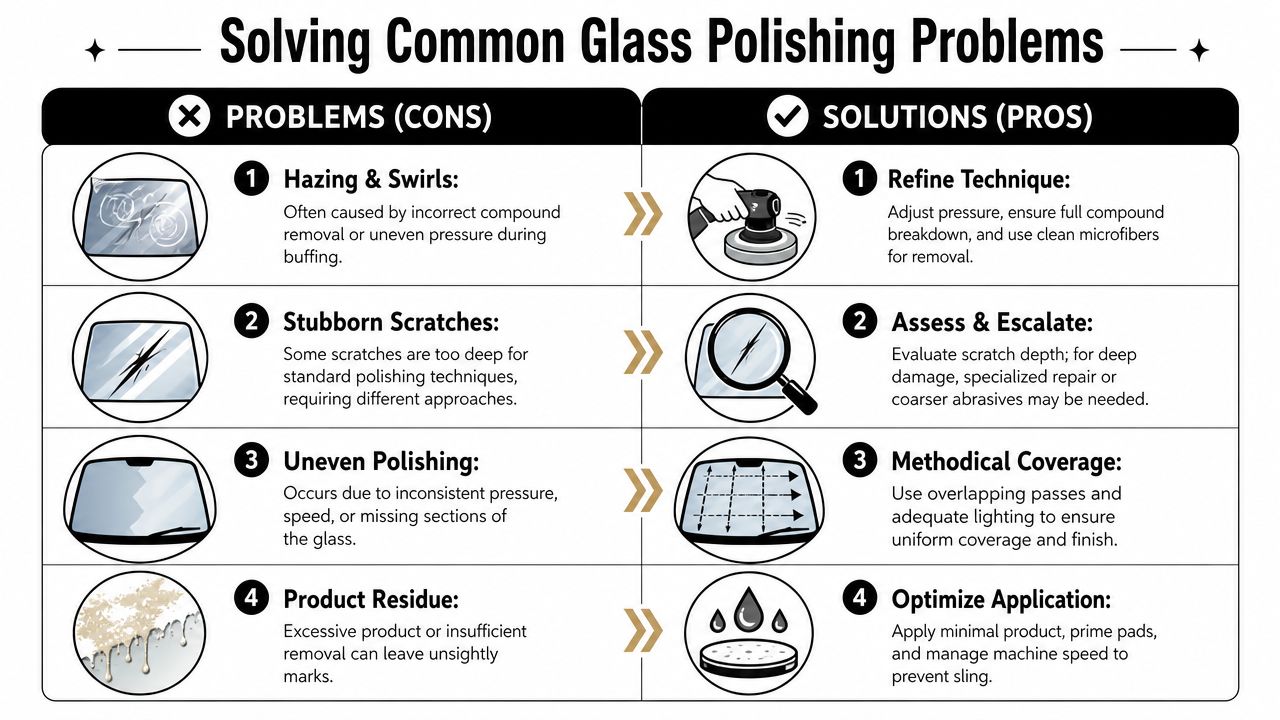
Solving Common Glass Polishing Problems
Most bad outcomes in glass polishing come from doing too much, too fast, with the wrong mixture. More pressure doesn't always mean more correction. More compound doesn't always mean more cutting. On glass, excess usually creates a new problem before it solves the old one.
The slurry problem nobody respects enough
A common failure point is the cerium-oxide-to-water ratio. Too watery, and it won't polish. Too thick, and it won't work effectively. Improper heat control is another major risk, which is why the work area should be misted with water at regular intervals to help prevent glass cracking, as explained in Lake Country's article on the most important thing to polish.
That's why I don't tell people to memorize a magic mix and forget about it. I tell them to watch behavior.
If the pad glides with almost no bite and the defect barely changes, the slurry may be too thin. If the product cakes, dusts, or feels grabby and sticky, it may be too heavy. In both cases, the operator often blames the pad when the actual issue is the mixture.
Fixing the four failures that show up most
| Problem | What usually caused it | Better move |
|---|---|---|
| Haze after polishing | Uneven pressure, poor wipe-off, wrong slurry consistency | Rework the section with steadier pressure and a cleaner process |
| Defects that won't move | Damage is deeper than expected, or the pad isn't cutting efficiently | Reassess the defect before spending more time |
| Hot glass | Oversized sections, too much pressure, not enough moisture control | Shorten your section and manage heat earlier |
| Caked residue | Too much product or dried compound | Use less product and clean the pad sooner |
If the glass starts getting hotter than your comfort level, you're already late in backing off.
Heat, edges, and false expectations
Glass polishing gets dangerous when people assume the windshield can absorb endless abuse. It can't. Tight edge work, prolonged polishing in one area, or trying to force a deep defect out by leaning harder into the machine can create bigger issues than the scratch you started with.
Edge areas deserve special caution because they don't dissipate heat the same way broad central areas do. Lower corners and zones near trim are where people tend to tilt the pad, concentrate pressure, and create uneven results.
Another common mistake is trying to correct contamination with polishing alone. If hard water spotting is the actual issue, your diagnosis needs to be right before you attack it mechanically. Titan's guide on how to remove water spots from a windshield is a good resource for distinguishing stain removal from true surface correction.
Know when to stop
Some scratches will improve. Some will remain visible. If you can chase a defect only by increasing risk, the professional move is to stop and explain the limitation forthrightly.
That's not weakness. That's judgment.
A polished windshield should be clearer, more uniform, and easier to see through in harsh light. It does not need to become a science experiment because one isolated mark refuses to disappear completely.
From Polished to Protected with Elastomer Coatings
Once the glass is corrected, the job isn't finished. Freshly polished glass is clean, leveled, and exposed. That's the ideal moment to protect it, not hand it back bare and hope the clarity lasts.
Why protection belongs in the same conversation
I've seen corrected glass look excellent at delivery, then lose that premium feel too quickly because nothing was added to defend the surface afterward. Polishing repairs the problem. Protection helps preserve the result.
That's especially noticeable on windshields that face constant wiper use, road film, mineral exposure, and changing weather. A proper glass coating helps maintain cleaner behavior on the surface and makes bad-weather driving feel less stressful because water movement and visibility improve.
For homeowners who appreciate the same idea on fixed glass, this article on maintaining your shower doors shows how much easier life gets when glass is protected instead of repeatedly restored.
The case for elastomer technology
Titan has created its own coating technology and introduced Elastomer coatings to the market using nanotube technology and Dark Matter Technology. According to Titan's technical overview of Elastomer coating technology, the company's proprietary system integrates vertically aligned carbon nanotubes, giving the coating a combination of glass-like hardness and flexible, self-healing properties that help resist cracks and damage.
That combination matters. Hard coatings sound good until temperature changes expose brittleness. A coating that has hardness but also flexibility is better positioned to handle practical conditions.
Titan also states that its Dark Matter Technology uses carbon nanotubes with silicon carbide and aluminum additives to support thermal stability across freezing and high-heat conditions, and third-party testing cited by Titan says its coatings use zirconium additives for wear resistance in harsh UV, chemical, and abrasion-heavy environments. Those material choices support the broader point detailers care about most: a coating has to survive daily use, not just look good on day one.
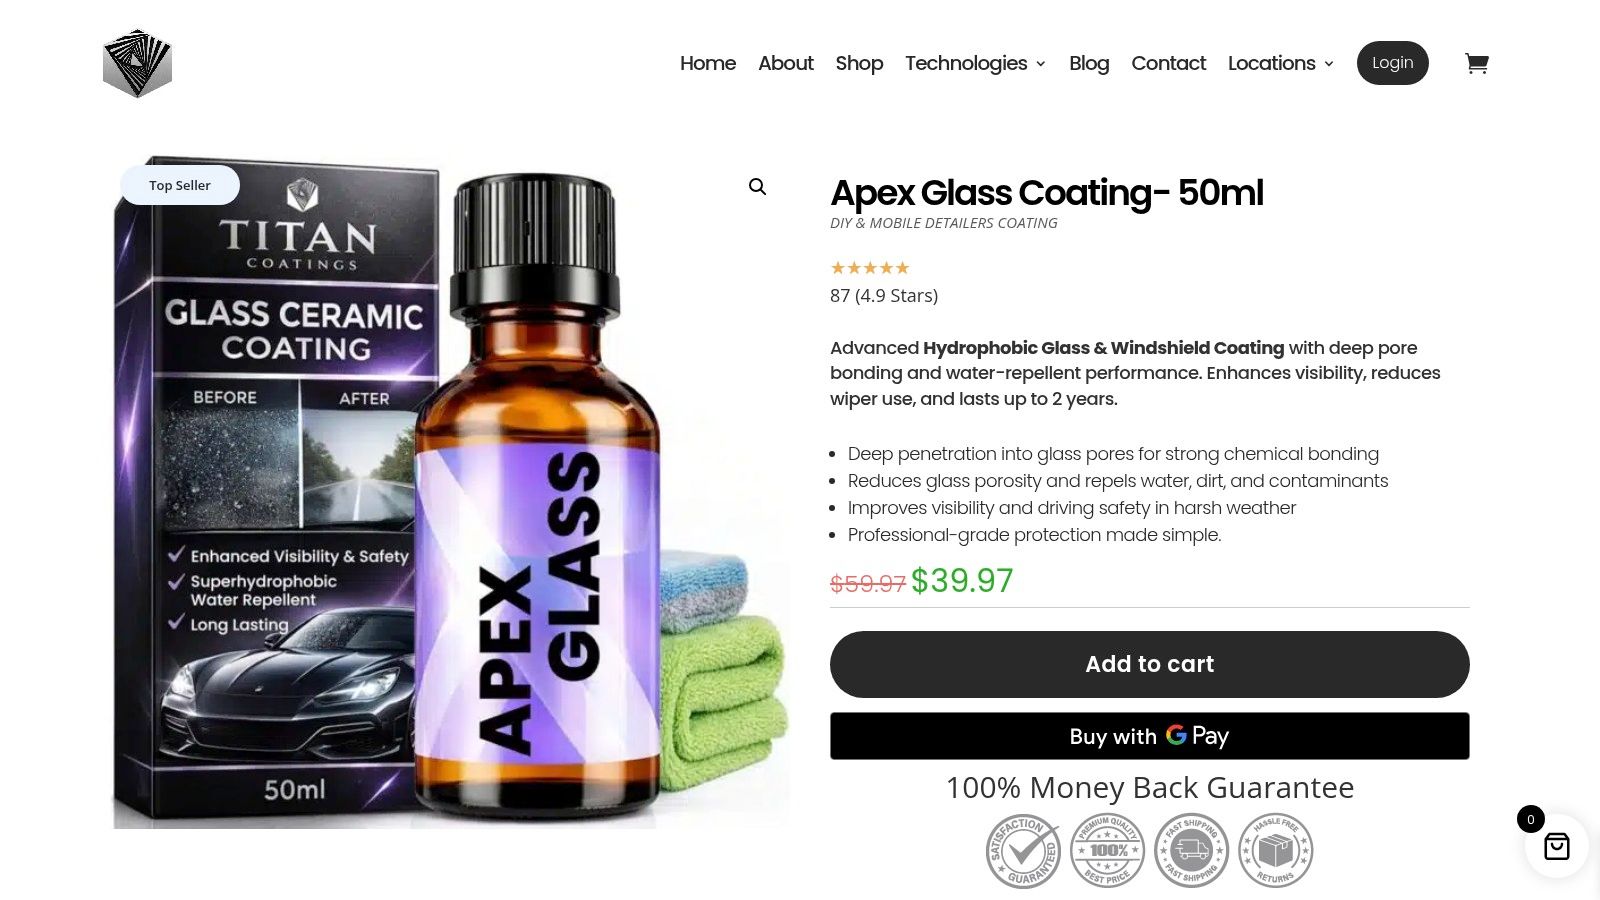
Which products fit after glass polishing
If the goal is windshield performance, Apex Glass Ceramic Coating is the obvious fit. It's presented as easy to use and focused on enhancing glass behavior in the rain, which makes it relevant right after correction work.
For paint protection on the rest of the vehicle, Alpha Quartz is positioned as an easy-to-install elastomer coating with strong usability for DIYers and mobile detailers. The elasticity angle is especially interesting because it speaks to durability when the vehicle sees temperature swings and regular road abuse.
If someone wants a simpler application format, Ultra Ceramic Spray fills that role. Easy-install products matter because not every client, enthusiast, or mobile operator wants a complicated coating workflow on every job.
Anyone who wants to understand the category better can look at Titan's overview of Titan Coatings Elastomer systems. And if you want the full lineup, the shop and product pages are easy to browse from there.
Correct first. Protect second. That order is what gives glass a finish that looks deliberate instead of temporary.
Pad Maintenance and Storing Your Gear
A neglected glass pad will punish you on the next job. Cerium oxide residue hardens, fibers mat down, and contamination gets trapped deep in the face. Then you wonder why the pad skips, hazes, or cuts unevenly.
Clean the pad before the residue sets
As soon as the job is done, rinse out compound thoroughly. Don't let slurry dry in the pad if you can avoid it. Hand washing works fine if you're careful, and a pad washer can speed things up in a busier shop.
Use enough water to break down the remaining product, then work the face gently until the residue releases. The goal is to clean the pad without tearing up the material or crushing the working surface.
Dry and store with intent
A few simple habits keep pads usable longer:
- Air dry fully: Don't store a damp pad in a sealed container.
- Keep pads separated: A glass pad shouldn't mingle with greasy polishing or compound pads from paint work.
- Store clean-side up: Protect the face from dirt and floor contamination.
- Retire damaged pads early: If the face is deformed or contaminated, it's no longer a precision tool.
Glass correction is exacting work. Your gear needs to reflect that. The detailer who finishes the job, cleans the tools, and stores them properly is usually the same one who gets consistent results when the next difficult windshield rolls in.
If you want to lock in the clarity you worked so hard to create, explore APEX NANO – Titan Coatings for advanced protection solutions, including Apex Glass Ceramic Coating for windshields, Alpha Quartz for easy-to-install elastomer protection, and Ultra Ceramic Spray for fast, effective results. Their coating technology centers on durability, flexibility, and real-world usability, which makes it a strong next step after proper glass correction.
0 Comments