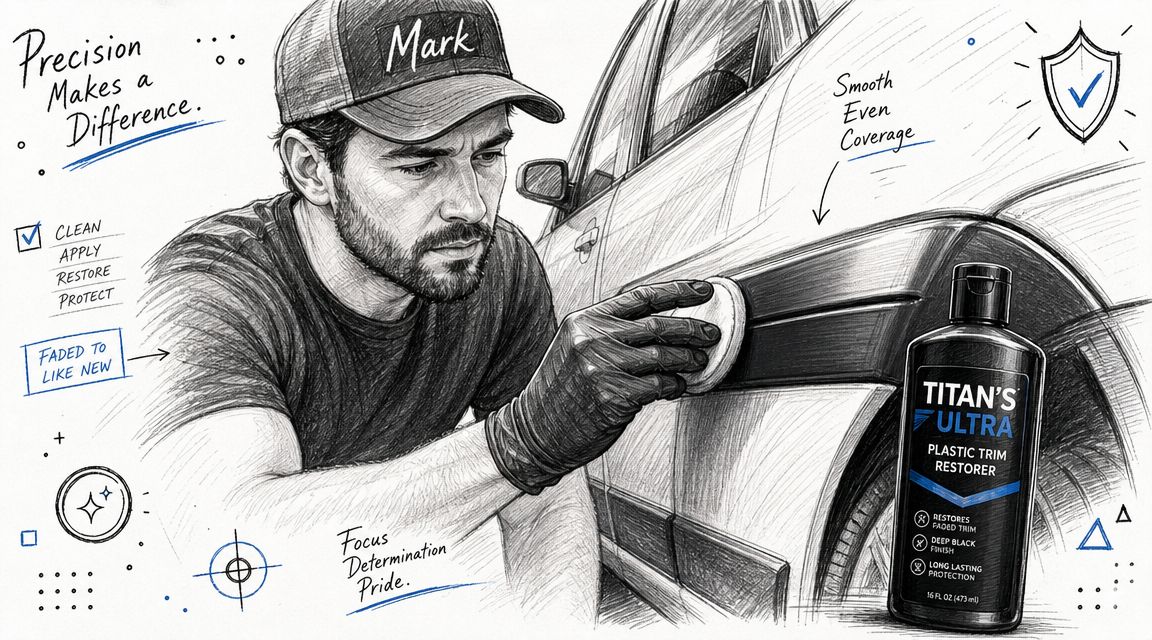
Mark rolled into the shop with a sharp-looking car and one glaring problem. The paint was clean, the wheels were right, but the trim looked tired, gray, and blotchy from a parade of store-bought dressings that washed away the minute the weather turned.
The Never-Ending Battle Against Faded Plastic Trim
I've seen Mark's problem a thousand times. A driver spends good money keeping the paint glossy, then the black trim fades to chalky gray and makes the whole vehicle look older than it is. So they grab a bottle that promises instant black, wipe it on, stand back for ten minutes, and think they won. Then it rains, the trim streaks, and the cycle starts all over again.
That frustration isn't small-time. The global plastic trim restorer market reached USD 1.14 billion in 2024, which tells you this isn't some niche detailing obsession. Faded trim is a widespread problem with real demand for fixes, as noted by Growth Market Reports on the plastic trim restorer market.
Why trim failure is so obvious
Paint can carry a lot of sins. Plastic trim can't. Once it oxidizes, every mirror base, cowl, bumper insert, rocker accent, and grille surround starts shouting for attention.
A few common triggers show up again and again:
- Sun exposure: UV beats up exposed plastic faster than most owners expect.
- Old dressings: Cheap shine products stack residue on top of oxidation instead of fixing it.
- Harsh washing: Aggressive chemicals and automatic wash habits dry trim out even faster.
- Neglected prep: Old silicone is often not stripped before applying the next product.
Faded trim doesn't just look dull. It makes the whole vehicle look neglected, even when the paint is spotless.
The old fix isn't good enough anymore
Most owners don't need another shiny dressing. They need a better plan. If the trim is lightly faded, proper restoration and protection can bring it back. If it's heavily cooked, you need to know whether a coating can still bond or whether the surface has degraded too far for a cosmetic wipe-on fix to last.
That same pattern shows up on other neglected exterior plastics too. If you've dealt with cloudy front-end plastics before, the same oxidation mindset applies to understanding oxidation on headlights. Surface failure always looks cosmetic at first. It usually isn't.
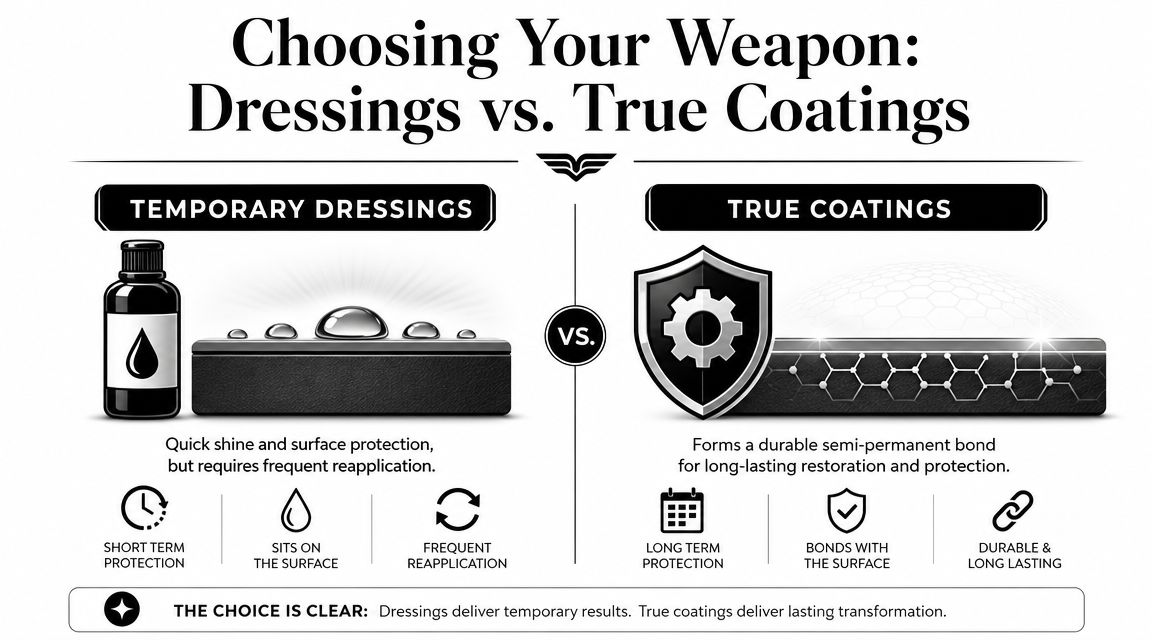
Choosing Your Weapon Dressings vs True Coatings
Here's the blunt truth. Most trim products sold to casual drivers are dressings, not restorers. They darken the surface, give you a quick visual win, and leave you doing the same job again later.
A real coating is different. It's meant to sit tighter, bond better, and survive real-world use without turning every wash into a reset.
What independent testing already tells you
This isn't a category where every bottle performs the same. Consumer Reports tested five exterior car trim cleaners and found “big differences” in claims, performance, and price. That matters because buyers often assume black trim is black trim and product choice doesn't matter. It does, according to Consumer Reports coverage of exterior car trim cleaners.
If you're choosing a plastic trim restorer, stop buying based on label drama. Buy based on what kind of result you want.
The practical difference on the car
Dressings sit on top. Coatings aim to create a more durable layer. That difference shows up fast once the car sees sun, water, and weekly washing.
| Feature | Silicone Dressings | Elastomer/Ceramic Coatings (e.g., Titan) |
|---|---|---|
| Primary effect | Darkens and adds gloss fast | Restores appearance with a more durable protective layer |
| Surface behavior | Mostly sits on top of trim | Designed to bond more tightly to the surface |
| Look after rain | More likely to streak if overapplied | Usually cleaner-looking when applied correctly |
| Maintenance cycle | Frequent reapplication | Longer service interval in practice |
| Prep sensitivity | Still needs cleaning, but often hides bad prep at first | Punishes bad prep with blotching and premature failure |
| Best use case | Quick cosmetic touch-up | Semi-permanent restoration approach |
My recommendation
If you care about durability, stop dressing your trim and start coating it. Dressings have their place on a quick flip, auction prep, or a customer who only wants a temporary darkening. For your own car or a client who hates repeat failure, they're the wrong tool.
Elastomer-style coating concepts are logical. A hard but flexible film is smarter than a brittle one, especially on exterior trim that sees heat, cold, expansion, contraction, wash chemicals, and constant sun. That's why I prefer coating systems that focus on flexibility instead of a stiff shell that can struggle through temperature swings.
One trim-safe option in that lane is Titan's ceramic coating for plastic trim. I'm not recommending it because of label hype. I'm recommending the category: a real coating approach beats a temporary dressing approach every time when the goal is longevity.
Practical rule: If a product sells you mostly on shine, be skeptical. If it sells you on prep, bond, cure, and maintenance, you're looking at a more serious solution.
The Critical Preparation Phase for a Flawless Finish
Bad prep ruins good products. That's the sentence a lot of people need taped to their toolbox.
Professional detailer guidance is consistent on this point. Deep-cleaning the trim and following with alcohol-based prep to strip oily residue is essential, and over-saturation plus poor prep are common reasons for uneven finish and early failure, as explained by Detail King's trim detailing guidance.
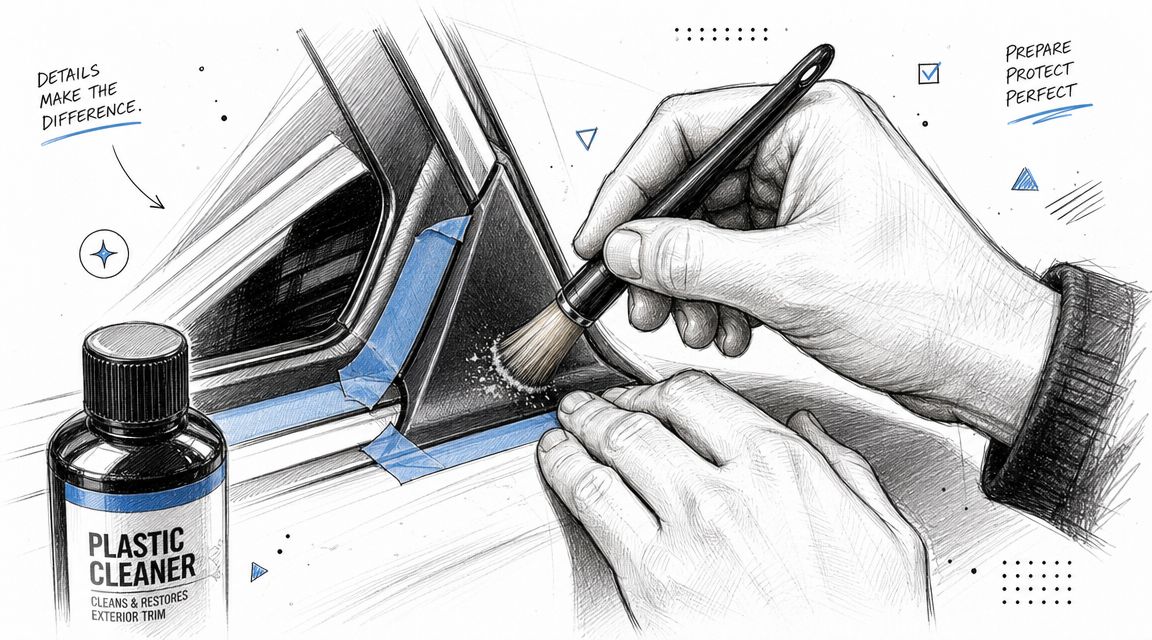
What clean actually means
A lot of people think trim is clean because it looks clean. That's not enough. Old dressings, wax residue, traffic film, soap residue, and skin oils all interfere with bonding.
My prep standard is simple:
- Wash the area first: Remove loose dirt and road film.
- Use a trim-safe cleaner: Work it into the texture with a soft detailing brush.
- Rinse or wipe thoroughly: Don't leave cleaner in the grain.
- Dry the trim fully: Water trapped in texture will sabotage application.
- Do an alcohol-based wipe-down: Strip the oily residue you can't always see.
- Mask nearby paint if needed: Especially around textured trim and tight edges.
Where most DIY jobs go wrong
They rush. They clean flat surfaces and ignore the pores, edges, and recessed texture where old product lives. Then they blame the coating when the result turns patchy.
Focus on the problem spots:
- Textured grain: Product residue hides there.
- Panel edges: Missed oxidation shows up after curing.
- Adjacent paint: Sloppy application makes cleanup harder.
- Rubber-plastic transitions: Residue collects at material changes.
If your applicator pulls brown or gray residue after the first cleaning pass, the trim isn't ready yet.
Prep is where pros separate themselves
A good detailer doesn't just wipe product on black plastic and hope. A good detailer strips the surface back to the point where the coating has a chance to hold.
That's why serious installers pay attention to coating surface preparation steps. The coating doesn't create discipline. Your prep does. If the trim still feels oily, looks glossy before product, or has chalk buried in the texture, keep cleaning.
The Art of Application Techniques for a Perfect Result
Application is where people get greedy. They think more product means more restoration. It usually means more streaking, more patchiness, and more cleanup.
Thin wins. Controlled wins. Small sections win.
How I apply a coating on trim
I don't flood a bumper insert and pray. I use a microfiber or foam applicator, load it lightly, and work one small section at a time.
The technique matters more than the brand sticker:
- Start small: Mirror bases, cowl corners, or one trim section at a time.
- Spread in thin passes: Horizontal, then vertical, so you don't miss texture.
- Watch the edges: Heavy buildup hides there first.
- Let it flash: Don't wipe instantly unless the product specifically calls for that.
- Level the surface: Buff excess only after the product has settled enough to show you the high spots.
Why less product gives a better finish
Trim has texture. Texture tricks people into overapplying because the surface drinks product unevenly at first. Then the excess sits on top, cures ugly, and creates dark-heavy spots next to lighter ones.
I tell DIYers to treat the first pass like a primer coat. Get coverage. Don't chase saturation.
Thin, even, repeatable passes beat one heavy pass every single time.
Use the right towel after application
Once the coating flashes, use a clean towel to level any excess. Not the filthy towel you used on door jambs. Not the old shop rag that still has compound dust in it.
Good towels matter because trim catches lint and residue fast. If you want fewer headaches, learn how to wash microfiber cloths the right way. Dirty or clogged microfiber can drag product, leave fibers in texture, or create false high spots that only show up later in sunlight.
One more thing. Check the panel from different angles before you walk away. Uniform coverage on textured trim never looks uniform from just one viewing position. Move your body, catch different light, and find the missed spots before cure locks them in.
Protecting Your Work Maintenance and Troubleshooting
Freshly coated trim isn't ready for abuse the minute you finish buffing. Let it settle.
Detailing guidance for restoration coatings advises waiting at least 30 minutes before moisture exposure, and it also points out that trapped contamination and uneven dwell time are common reasons trim turns patchy after the first wash, as covered by Next Level Tint's faded plastic trim restoration guidance.
What to do right after application
Your first job is restraint. Keep the vehicle dry as long as the product instructions require, and don't rush straight into a wash.
For maintenance, keep it simple:
- Use gentle wash methods: Harsh cleaners shorten the life of any finish.
- Inspect after the first wash: That's when weak prep usually reveals itself.
- Top up only when needed: Don't pile fresh product on unresolved residue.
- Store the car smart when possible: Less UV and less chemical exposure always help.
How to fix common problems
Most trim issues are fixable if you catch them early.
- High spots: Re-level them while the product is still workable. If fully cured, you may need to clean and reapply that section.
- Streaking: Usually too much product or uneven wipe-off. Strip the area and start over clean.
- Patchiness after washing: That points back to contamination or uneven application.
- Product on paint: Clean it off before it sets hard. Masking would've saved you time.
Maintenance doesn't mean constantly reapplying. It means washing in a way that doesn't undo your work.
If you want the finish to stay consistent, use a sensible care routine like the one outlined in ceramic coating maintenance basics. Good maintenance won't rescue a bad install, but it will preserve a good one.
Frequently Asked Questions About Plastic Trim Restoration
Can a plastic trim restorer permanently fix severely faded trim
Usually, no. It can improve the appearance a lot, and the right coating can hold up far better than a dressing, but severely oxidized plastic may be beyond simple cosmetic recovery. That's the part too many trim demos skip. Darker doesn't always mean restored.
If the trim is chalky deep into the surface, uneven after proper cleaning, or keeps rejecting product, you may be dealing with material breakdown rather than just surface fading. In those cases, a coating can still help appearance, but you should be realistic. Some trim is too far gone for a wipe-on solution to act like new molded plastic again.
Are all trim restorers basically the same
Not even close. Independent testing already showed meaningful differences, and any pro who's used enough products knows the category is split. Some products clean and darken. Some give a glossy dressing effect. Some behave more like semi-permanent coatings.
That's why I tell people to choose the category before the brand. If you want a short-term visual bump, use a dressing. If you want a more durable finish, choose a coating-oriented plastic trim restorer and prep for it correctly.
Can I use these products on interior plastic too
Sometimes, but don't assume exterior and interior trim should be treated the same way. Exterior textured trim deals with UV, water, and contamination. Interior surfaces often include soft-touch coatings, satin finishes, and plastics that react differently.
For interiors, spot test first. I also avoid turning cabin trim into a shiny mess. The goal is clean, dark, factory-looking interior surfaces, not a greasy dashboard reflection.
What about heat guns on faded trim
Heat can temporarily improve the look of some oxidized plastics, but it's easy to overdo and easy to regret. Heat doesn't clean the surface, it doesn't remove embedded contamination, and it doesn't replace proper protection afterward.
I see heat as a cautious specialty move, not a default recommendation. If someone reaches for a heat gun before they've done a proper clean, they're gambling.
How often should trim be redone
That depends on exposure, washing habits, and what type of product was used. Dressings need more frequent attention. Coatings usually stretch the maintenance cycle much better.
The smarter question isn't “How long should the label last?” It's “How does the trim look after weather, washing, and normal use?” That's the true durability test.
Does humidity make application harder
Yes. High humidity can affect flash behavior, wipe-off feel, and cure consistency. It doesn't automatically ruin the job, but it shortens your margin for error.
In humid conditions:
- Work smaller sections: Don't try to coat a whole bumper trim strip in one shot.
- Use less product: Heavy application gets messy fast.
- Watch the surface closely: Let the trim tell you when it's ready to level.
- Keep towels fresh: Damp air plus overloaded towels creates smearing.
What's the best finish for trim, glossy or factory-look satin
Factory-look satin. That's my answer almost every time.
Trim should frame the vehicle, not scream at you. A soaked, oily gloss on black plastic usually looks cheap and attracts dust. Good restoration should make the trim look healthy, even, and intentional.
Are elastomer coatings worth considering for trim and surrounding surfaces
Yes, especially if you care about real-world movement and temperature swings. A rigid protective layer can look good at first and still struggle over time on surfaces that expand, contract, flex, or take regular impact from weather and road use.
That's why elastomer coating technology is worth understanding. The idea is straightforward: you want a protective layer that's hard enough to defend the surface but flexible enough not to become fragile when temperatures swing from cold to hot. That flexibility matters on exterior surfaces. It also makes sense for drivers who want durability without turning the coating into a brittle shell.
If you're looking beyond trim alone, Titan also offers products aimed at adjacent problem areas. Their Apex Glass Ceramic Coating is designed for glass and windshield use, which matters because visibility in rain is part of the same protection mindset. Easier water behavior on glass can make bad-weather driving less stressful when the product is applied properly. Their Ultra Ceramic Spray is the kind of product DIY users and mobile detailers usually appreciate because spray-format coatings are easier to work into a fast service workflow. And if you want a tougher coating discussion, Alpha Quartz fits the conversation around elastomer-style protection because the selling idea is simple: hard surface behavior with flexibility, so temperature changes and day-to-day impact are less likely to punish the coating the way brittle systems can.
What if I need to reapply later
Reapplication is normal. The key is not stacking fresh product over failure.
Do this instead:
- Wash the trim thoroughly.
- Strip any leftover residue.
- Inspect for patchy oxidation or old high spots.
- Reapply lightly and evenly.
If you skip the cleaning and just keep adding product, the trim starts looking muddy instead of restored.
How do I know when trim is too far gone
Look for these signs:
- Permanent chalkiness after deep cleaning
- Uneven color that won't level out
- Surface that feels dry and degraded even after restoration
- Repeated early failure in the same spots
At that point, you're not choosing between two bottles. You're deciding whether the material still has enough integrity for a coating to hold.
Is a windshield or paint coating relevant to trim care
Yes, because most owners don't maintain trim in isolation. A neglected vehicle usually has multiple weak points at once. If you're restoring trim, it's smart to think about the whole exterior system: plastics, paint, glass, rubber, and wash routine.
That doesn't mean coating everything blindly. It means using the right product for the right substrate and respecting the prep each surface requires.
If you're ready to stop chasing short-lived shine and move toward a more durable surface protection strategy, take a look at APEX NANO – Titan Coatings. Their lineup covers trim, paint, and glass-focused protection, which makes them relevant for DIYers, mobile detailers, and shops that want a more coating-centered approach instead of another temporary dressing routine.
0 Comments