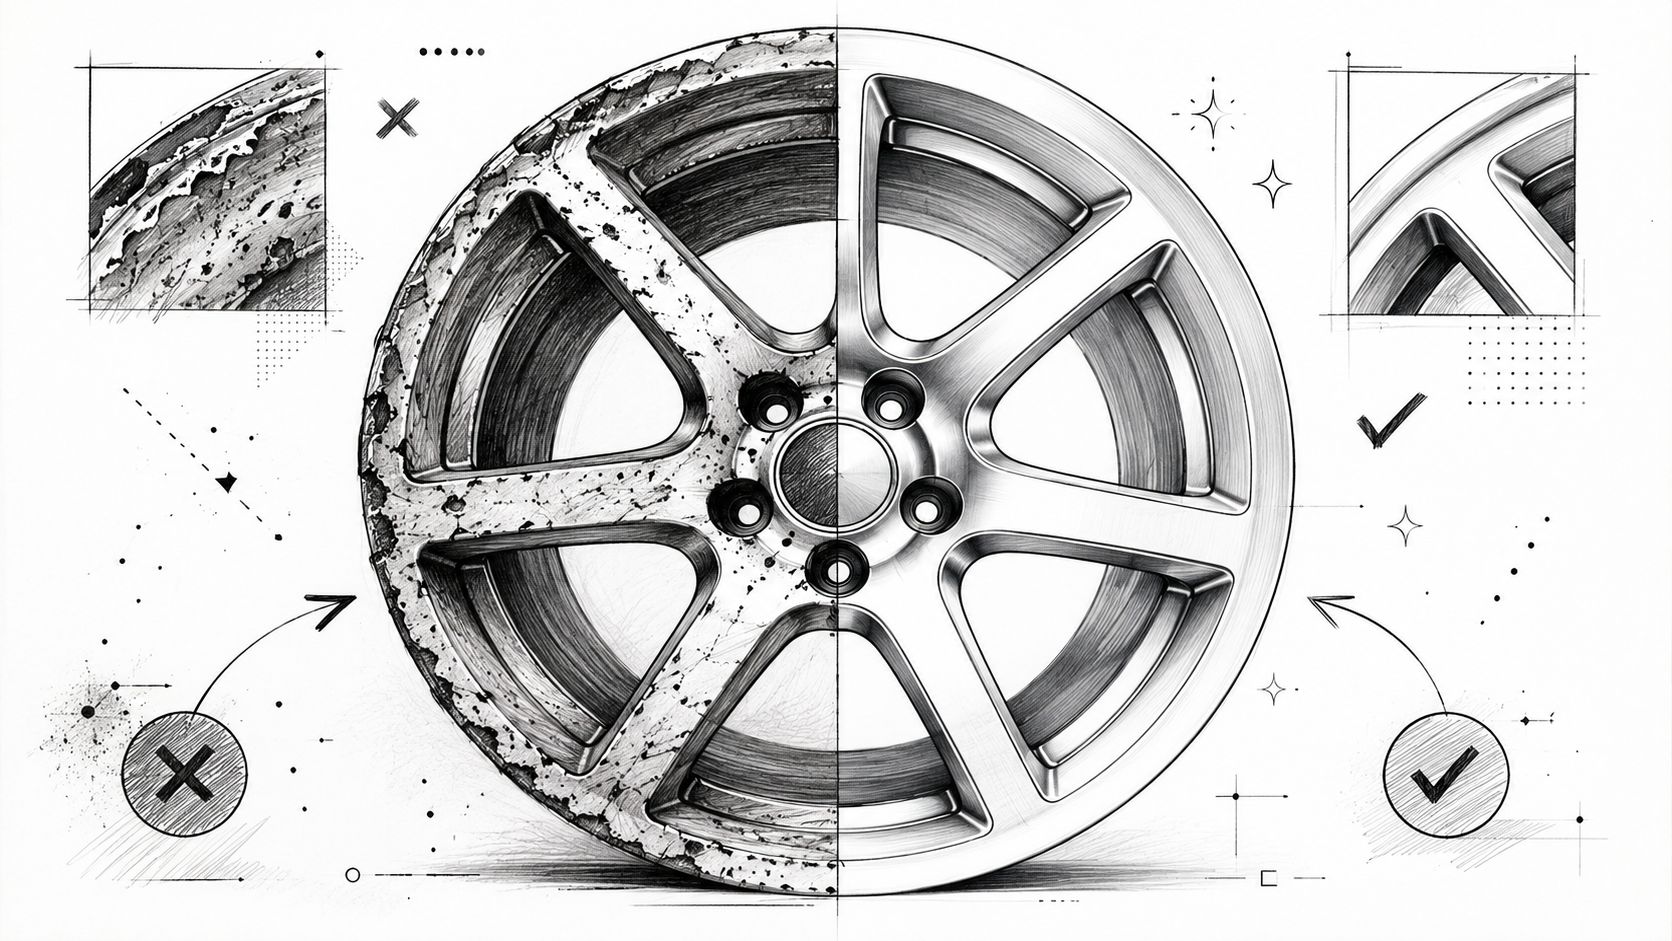
The first time I pulled a neglected set of alloy wheels out from the back of a garage, they looked finished. Oxidized lips, curb rash on two spokes, brake dust baked into every corner. Under the grime, though, the metal still had that sharp, cold look that tells you a mirror finish is possible if you're willing to earn it.
The Dream of a Perfect Shine
A polished wheel always starts as a gamble. You're staring at dull aluminum and trying to see past the stains, the scratches, and the bad decisions made by the last owner. Some wheels clean up fast. Others fight for every inch of gloss.
That effort is part of why polished alloys still matter. They carry a long automotive lineage. Alloy wheels moved from niche equipment in 1924 to mainstream factory-fit hardware over roughly 60 years, then became widely popular in the 1980s as production improved and costs came down, according to this concise history of the alloy wheel. When you polish alloy wheels today, you're not just brightening metal. You're restoring one of the parts that helped define modern car styling.
Why polished wheels still stop people
Fresh paint gets attention. A clean engine bay gets respect. But polished wheels do something different. They catch light from every angle and make the whole car look more deliberate.
I've seen average daily drivers look finished the moment the wheels were corrected properly. I've also seen people waste hours trying to chase that same result with a one-step metal polish on a wheel that needed real sanding first. The dream is simple. The path to it usually isn't.
A show-car wheel doesn't come from one magic product. It comes from disciplined surface correction.
The payoff is bigger than the wheel itself
The reason this job is so satisfying is that the result is obvious. You can watch the surface change in stages. Gray and lifeless turns smooth. Smooth turns reflective. Reflective turns sharp enough to mirror the shop lights.
If you care about durability as much as appearance, it also helps to understand the broader benefits of ceramic coating before you stop at bare polish. Too many people put in the labor, get the shine, and then leave the metal exposed. That's where a lot of wheel projects go wrong. The restoration succeeds, but the protection plan is missing.
First Assess and Prepare Your Wheels
Before you touch sandpaper, identify the finish. Most avoidable damage occurs at this stage.
A lot of guides treat all alloy wheels the same. That's a mistake. Some wheels are raw aluminum and respond well to sanding and multi-stage polishing. Others are painted, clear-coated, or powder-coated and need a gentler approach. Mobil's wheel care guidance highlights this exact content gap and notes that a simple test can help determine whether the wheel is raw aluminum or coated, because using aggressive methods on coated wheels can damage them in its wheel polishing advice.
Start with a real cleaning phase
If the wheel is still carrying brake dust, road film, or old dressings, you can't inspect it properly. Clean first, inspect second.
Use this order:
- Rinse thoroughly to knock off loose grit.
- Apply a wheel-safe cleaner and work the face, barrel, and around lug holes.
- Agitate with dedicated brushes so you're not dragging contamination over the surface.
- Rinse again and dry so defects are visible.
A proper set of wheel cleaning brushes makes this step much easier, especially inside barrels and around spoke junctions where grime packs in.
Use a simple decision test
Put a small amount of metal polish on a soft cloth and test an inconspicuous spot.
- If the cloth turns black, you're likely dealing with bare aluminum.
- If the cloth stays clean, you're likely working on a coated surface.
That test changes everything.
Choose the right path by finish
Raw aluminum or previously polished alloy
This is the ideal candidate for true correction. If the wheel is oxidized, pitted, or scratched, sanding and compound work can restore it. This finish rewards patience.
Clear-coated alloy
Treat this like painted trim unless you intend to remove the coating and refinish the wheel properly. Aggressive polishing can cut through the clear unevenly and leave you with patchy gloss.
Painted wheels
Don't attack painted surfaces with metal polishing logic. Clean them, decontaminate them gently, and use paint-safe finishing products only.
Powder-coated wheels
These are durable, but they're still a coating. If the goal is shine, think in terms of cleaning and surface enhancement, not heavy abrasive correction.
Forged and cast wheels
Both can be polished, but damage depth matters. Forged wheels often tolerate more precise refinement. Cast wheels can have porosity and texture that make perfection harder to chase.
Practical rule: If you're not certain what finish is on the wheel, start with the least aggressive method and inspect often.
Prep the work area too
Good wheel polishing is messy. Set up proper lighting, plenty of clean microfiber towels, water for wet-sanding, and separate pads for cutting and finishing. One dirty towel or one contaminated buffing pad can put fresh scratches right back into the surface.
Repairing Curb Rash and Pitting
You can't polish damage that sits below the surface. You have to level it first.
That's the stage people rush because it's the least glamorous part of the job. It's also the stage that decides whether the final result looks crisp or compromised.
How to approach curb rash
Curb rash usually leaves raised edges around the scrape. Those high spots have to come down before finer sanding begins.
Use this sequence:
- Knock down the raised metal with a file if the rash is severe.
- Switch to coarse abrasive paper on a sanding block to level the repair area.
- Feather outward into the surrounding metal so you don't create a visible flat patch.
- Stop and inspect often from multiple angles.
The goal at this stage isn't final shine. It's shape. If the wheel lip or spoke line is still distorted, polishing will only make that distortion more obvious.
How to handle pitting and corrosion
Pitting is trickier than rash because it's scattered and often deeper than it looks. Light corrosion can sand out. Deep pitting may only improve, not disappear.
A few working rules help:
- Remove oxidation first so you can see the true depth of the pits.
- Use a gentle hand around edges and spoke transitions because those areas thin faster.
- Don't chase perfection blindly if the pits are deep enough to alter the wheel's contour.
If the damage includes peeling finish instead of exposed metal, this guide on fixing clear coat peeling on rims is the more relevant path than raw-metal polishing.
When to stop and reconsider
Some wheels are too far gone for a cosmetic-only correction. If you find cracks, bends, or damage that affects structure, polishing isn't the answer. That wheel needs professional repair or replacement.
If the metal is compromised, more shine won't make it safer.
The hard truth is that good repair work is slow. You'll sand. Wipe down. Inspect. Sand again. But if you leave a gouge in place and hope compound will hide it, the wheel will still look damaged, only shinier.
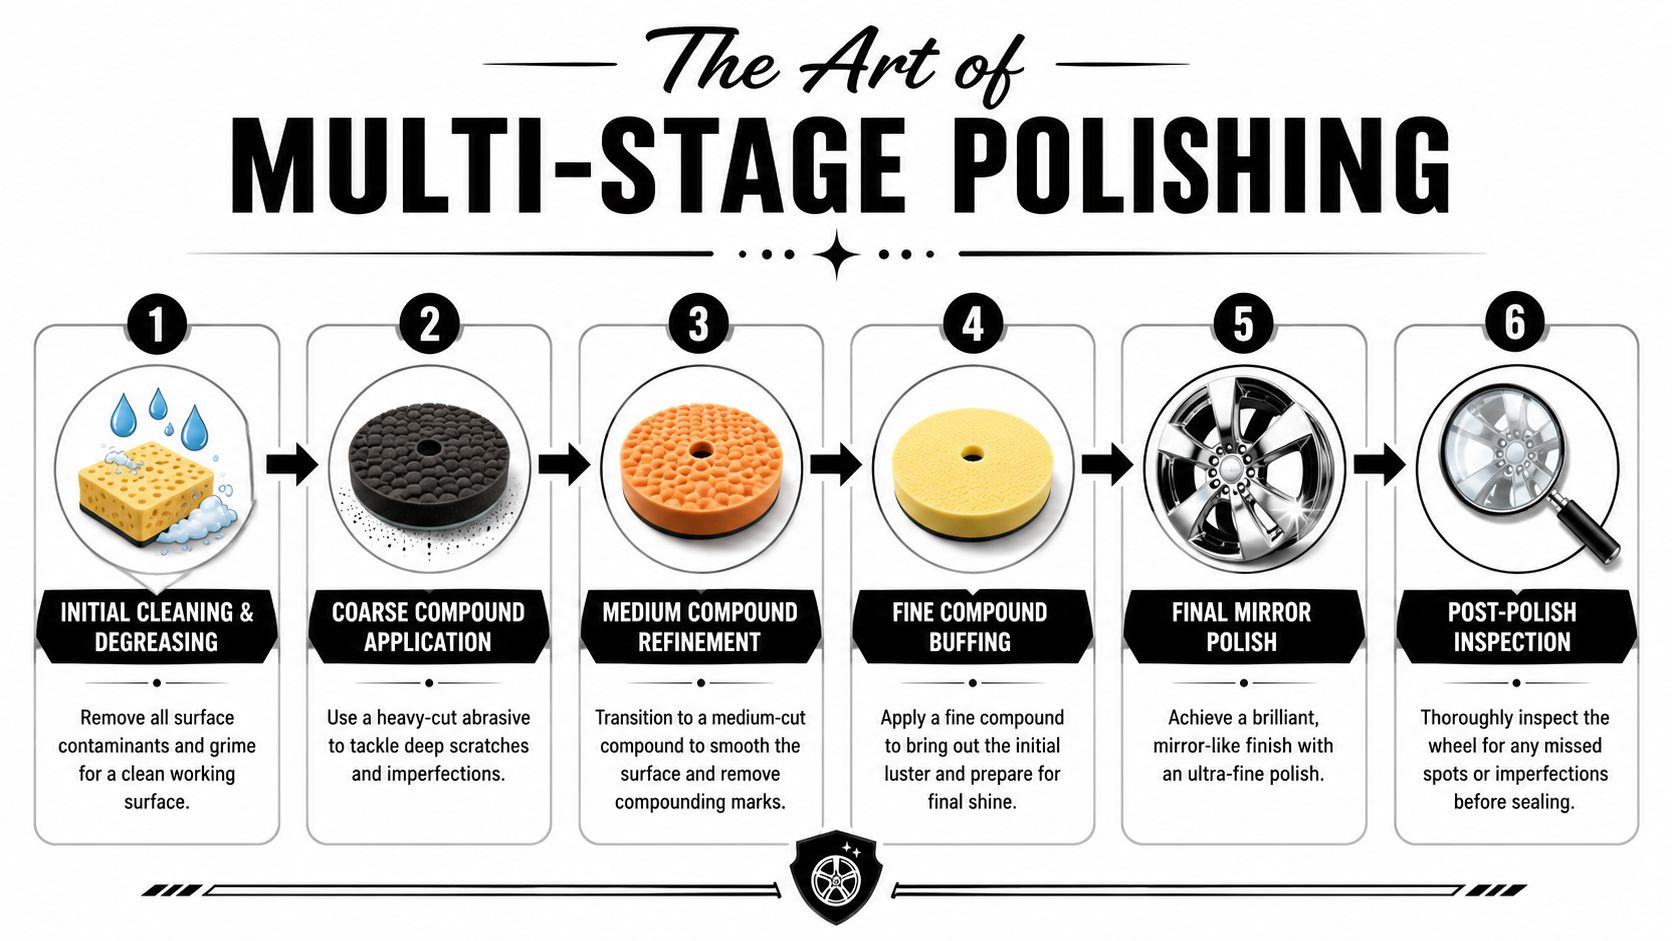
The Art of Multi-Stage Polishing
The finish is made. Not by force, but by sequence.
The professional method follows a strict order: cleaning, abrasive sanding, compound cutting, and final buffing. The sanding stage usually starts around 200 to 400 grit for deeper imperfections, then moves to 600 and 800 grit for wet-sanding. Skip the intermediate grits and you risk visible grit haze that won't disappear without going backward and re-sanding.
Sanding is where shine begins
If you want a mirror finish, the sanding marks from one stage must be fully removed by the next. That's the entire game.
A disciplined progression looks like this:
- Coarse correction with the grit needed to remove the repair marks left from curb rash or oxidation.
- Mid-stage refinement to replace heavy scratches with finer, more uniform ones.
- Wet-sanding from the finer stages onward to keep the paper cutting cleanly and reduce clogging.
If I'm correcting a wheel that needed repair, I look for a completely uniform scratch pattern before moving up. Mixed scratch patterns are a warning sign. They almost always show up later under compound.
The common mistake that ruins the finish
People get impatient and jump ahead. They think one pass with a stronger polish will replace time spent sanding.
It won't.
Shop note: Compound can remove fine sanding haze. It cannot erase deep scratches that should've been removed two stages earlier.
That's why a proper grit progression matters more than brand names on the bottle.
Cutting compound and finishing polish do different jobs
After sanding is complete, move to machine or hand polishing with separate products and separate pads.
Cutting compound
This is the bridge between sanding and gloss. Use it to remove the finer sanding marks and flatten the dull haze left behind. Work small sections and keep the pad moving so you don't build too much heat.
Finishing polish
This is the stage that gives polished aluminum that liquid-metal look. A finishing product on a clean, softer pad refines the surface and sharpens the reflection.
A lot of people use one pad for both steps. Don't. Cross-contamination drags cutting abrasives into the finishing stage and leaves faint trails in the metal.
If you need dedicated polishing and buffing pads, use separate ones for each stage and keep them clean.
Hand polishing versus machine polishing
Both methods work. They just serve different goals.
| Method | Where it works best | Trade-off |
|---|---|---|
| Hand polishing | Tight spokes, lips, delicate areas, final touch-up | More labor, slower defect removal |
| Drill or machine polishing | Larger flat areas, repeated corrections, heavier compounding | Easier to create heat or uneven pressure if rushed |
Hand work gives control. Machine work gives speed. The best results often use both.
A reliable workflow
When I want polished wheels to come out right, the order stays simple:
- Clean until the metal is thoroughly exposed
- Repair the damage before chasing gloss
- Sand in a linear progression without skipping
- Cut with compound to remove sanding haze
- Finish with a dedicated polish and clean buffing media
- Inspect under hard lighting before calling it done
That last step matters. Shop lights reveal defects daylight can hide, and daylight reveals haze some shop lights won't catch. Check both if you can.
Locking In the Shine with Elastomer Coatings
Bare polished aluminum looks outstanding right after correction. It also starts losing that edge the moment it meets air, water, brake dust, and road salt.
That's the gap most wheel polishing guides leave open. They teach the restoration and stop before the preservation. If you've spent hours sanding, cutting, and refining, leaving the wheel unprotected makes no sense.
Why old protection methods fall short
Traditional sealants can add short-term gloss, but wheels live in a harsher environment than paint. They see repeated heat cycles, contamination from brake dust, road salt, and aggressive wash routines. That constant exposure is exactly why stronger protection makes sense after polishing.
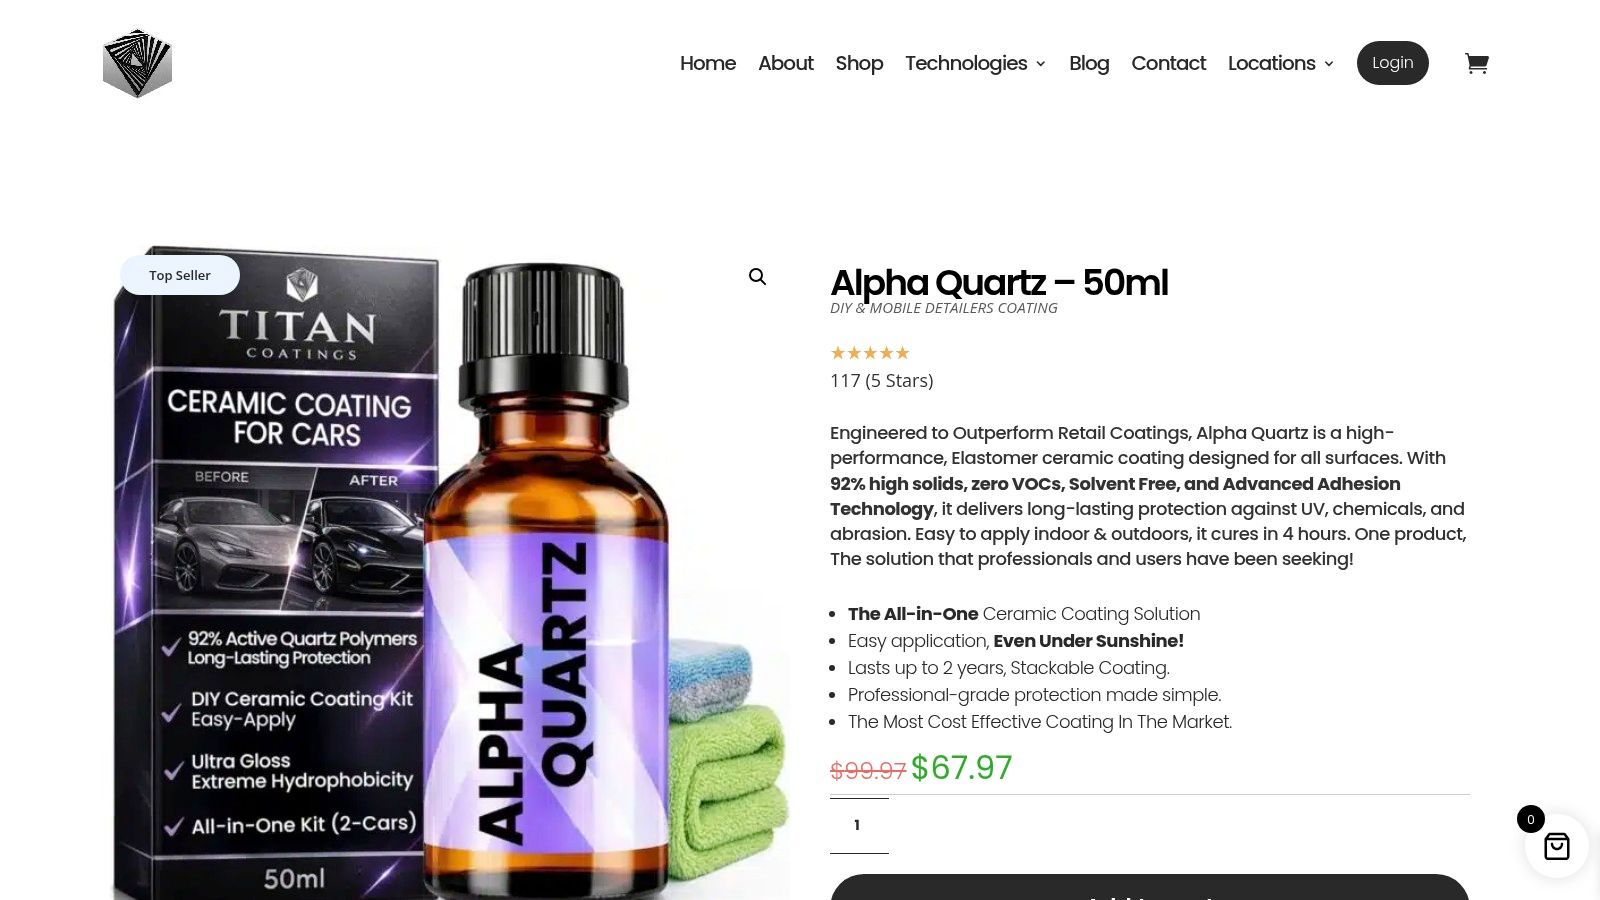
Titan states that wheels protected with Alpha Quartz maintained over 90% of their initial gloss and hydrophobicity after 24 months of exposure to road salt and brake dust, while traditional polymer sealants degraded by up to 80% within 3 to 6 months on its Alpha Quartz coating page. That difference matters more on wheels than almost anywhere else on the car.
What an elastomer coating changes
The appeal of an elastomer-based wheel coating is practical. You want a layer that behaves like a hard barrier but doesn't become fragile when the wheel cycles through cold mornings, hot brakes, and repeated washing.
That flexibility is the part many detailers overlook. A coating that's rigid in theory can still become the weak link on a wheel if temperature swings and impact exposure are part of daily use. A flexible, glass-hard protective layer is a better fit for a part that lives in constant abuse.
One good reference point is Titan's ceramic wheel coating guidance, which focuses on this exact use case.
What to do after polishing
Once the wheel is fully corrected, keep the protection stage controlled and clean.
- Remove residue completely so no polish oils interfere with bonding.
- Work on cool wheels only because hot metal complicates wipe behavior.
- Apply the coating evenly and avoid overloading the surface.
- Level high spots carefully before they set.
This is also where product choice matters. Some coatings are unforgiving on polished metal. Some are easy enough for a careful DIYer or mobile detailer to manage without turning the last stage into a panic.
A polished wheel without protection is a short-lived victory.
There's also a useful side benefit if you're already in protection mode. Glass often gets ignored during a detailing project, but a dedicated treatment like Titan's Apex Glass is meant to improve visibility in rain and make routine cleaning easier. It's separate from wheel care, but it follows the same logic. Correct the surface, then protect it so the result lasts.
Easy Maintenance and Troubleshooting
Once the wheels are polished and coated, maintenance gets much simpler. The mistake now is over-cleaning.
Harsh acidic wheel cleaners and random degreasers can shorten the life of your protection. A pH-neutral wash routine is the safer play. Light, frequent cleaning beats aggressive rescue cleaning every time.
The easiest maintenance habit
Use a coating-friendly maintenance spray after normal washes or between deeper cleanings. Titan states that Ultra Ceramic Spray can extend the life of the base coating by up to 50%, and its Dark Matter Technology® creates an anti-static layer that reduces brake dust adhesion by 70%, according to the Ultra Ceramic Spray product page.
That matters because wheel maintenance usually fails at the same point: brake dust gets ahead of the owner, then strong cleaners come out, then the finish slowly loses ground.
A simple upkeep rhythm
After washes
Dry the wheel fully, especially around lug recesses and spoke joints. Standing water leaves marks and carries contamination into seams.
Between full details
Mist a maintenance spray onto a microfiber towel, wipe the wheel face, then buff lightly with a second towel. This keeps the surface slick and makes the next wash easier.
If the wheel starts looking dull
Don't assume the polish has failed. Often it's just contamination sitting on top of the protection layer.
Clean the surface first. Diagnose second. Re-polish last.
Polishing Troubleshooting Guide
| Problem | Likely Cause | Solution |
|---|---|---|
| Haze under direct light | A grit was skipped, or sanding marks weren't fully removed before compounding | Go back to the last abrasive stage that fully levels the defect, then work forward again |
| Fine swirl marks after buffing | Dirty pad, mixed compounds, or too much pressure in the finishing stage | Switch to a clean finishing pad or towel and re-polish lightly |
| Uneven shine across the wheel | Different sections were corrected to different levels | Reinspect each spoke, lip, and pocket under strong light and even out the process |
| Black residue keeps transferring during polishing | Raw aluminum is still oxidizing during correction | Continue refining, wipe often, and protect the surface once the finish is complete |
| Water spots on polished metal | Hard water dried on the wheel | Use a gentle cleaner, dry more carefully, and avoid letting rinse water air-dry |
| Brake dust sticks faster than expected | Protection layer is depleted or maintenance has been inconsistent | Clean thoroughly, refresh with a compatible maintenance product, and reassess the base protection if needed |
A polished wheel can stay sharp for a long time, but only if the finish and the maintenance plan match. The polishing gets the attention. The upkeep preserves the investment.
If you want products built around long-term surface protection, explore APEX NANO – Titan Coatings for wheel, paint, and glass solutions that fit both studio work and careful DIY maintenance.
0 Comments