
I once had a hood come in so crusted with pine sap that the customer swore it had been “just a few dots” for a week. Under diffused light, those dots told the story: hardened specks, dragged by dry towels, and a finish that now needed patience instead of panic.
The Morning a Sticky Parking Lot Taught Me Everything
The car sat under a pine tree long enough for the sap to bake into the clear coat, and that’s the mistake that changes the job. Fresh sap is annoying, hardened sap is a decision tree, because the wrong first move can turn a cleanup into a correction.
The first inspection decides the outcome
I always start by asking one question, is the panel still just contaminated, or has the residue already been worked into the finish. If the paint has been wiped dry, the risk jumps. If the panel is coated, the answer changes again, because a protection layer can buy you easier cleanup or hide damage if you rush.
The order matters more than the bottle on the shelf. A practical workflow starts with assess, soften, dissolve, lift, neutralize, and that sequence matches consumer guidance that says to remove excess sap before heat, because heat can set the stain if the sap is still there. Tide’s guidance for fabric follows the same logic, scrape first, test carefully, pre-treat, let detergent sit for 5 minutes, then wash at the hottest safe temperature on the care label, with alcohol or hand sanitizer tested for 1 to 3 minutes before treatment if needed. Tide’s tree sap removal guidance
Practical rule: if you can feel grit under the sap, stop rubbing. You’re no longer cleaning, you’re grinding.
The hidden cost of waiting
When sap sits, it hardens and the resin grips the surface more stubbornly. Housekeeping guidance reflects the same physics, harden it, scrape off the bulk, then use rubbing alcohol and detergent before laundering, or freeze the item for a few hours so the sap lets go more cleanly. On a vehicle, that translates to less friction, less towel drag, and less chance of chasing a dull trail across the panel.
That’s why the same car can be a quick wipe-down one week and a polish job the next. A coated panel often releases contamination with less effort, while an uncoated one can hold onto residue and show every bad wipe. By the time the sun has baked sap into the finish, the job is no longer about speed, it’s about not making the panel worse while you remove what’s on top. A lingering spot becomes a lesson in surface awareness, not just cleanliness.
The Soften Dissolve Lift Neutralize Sequence
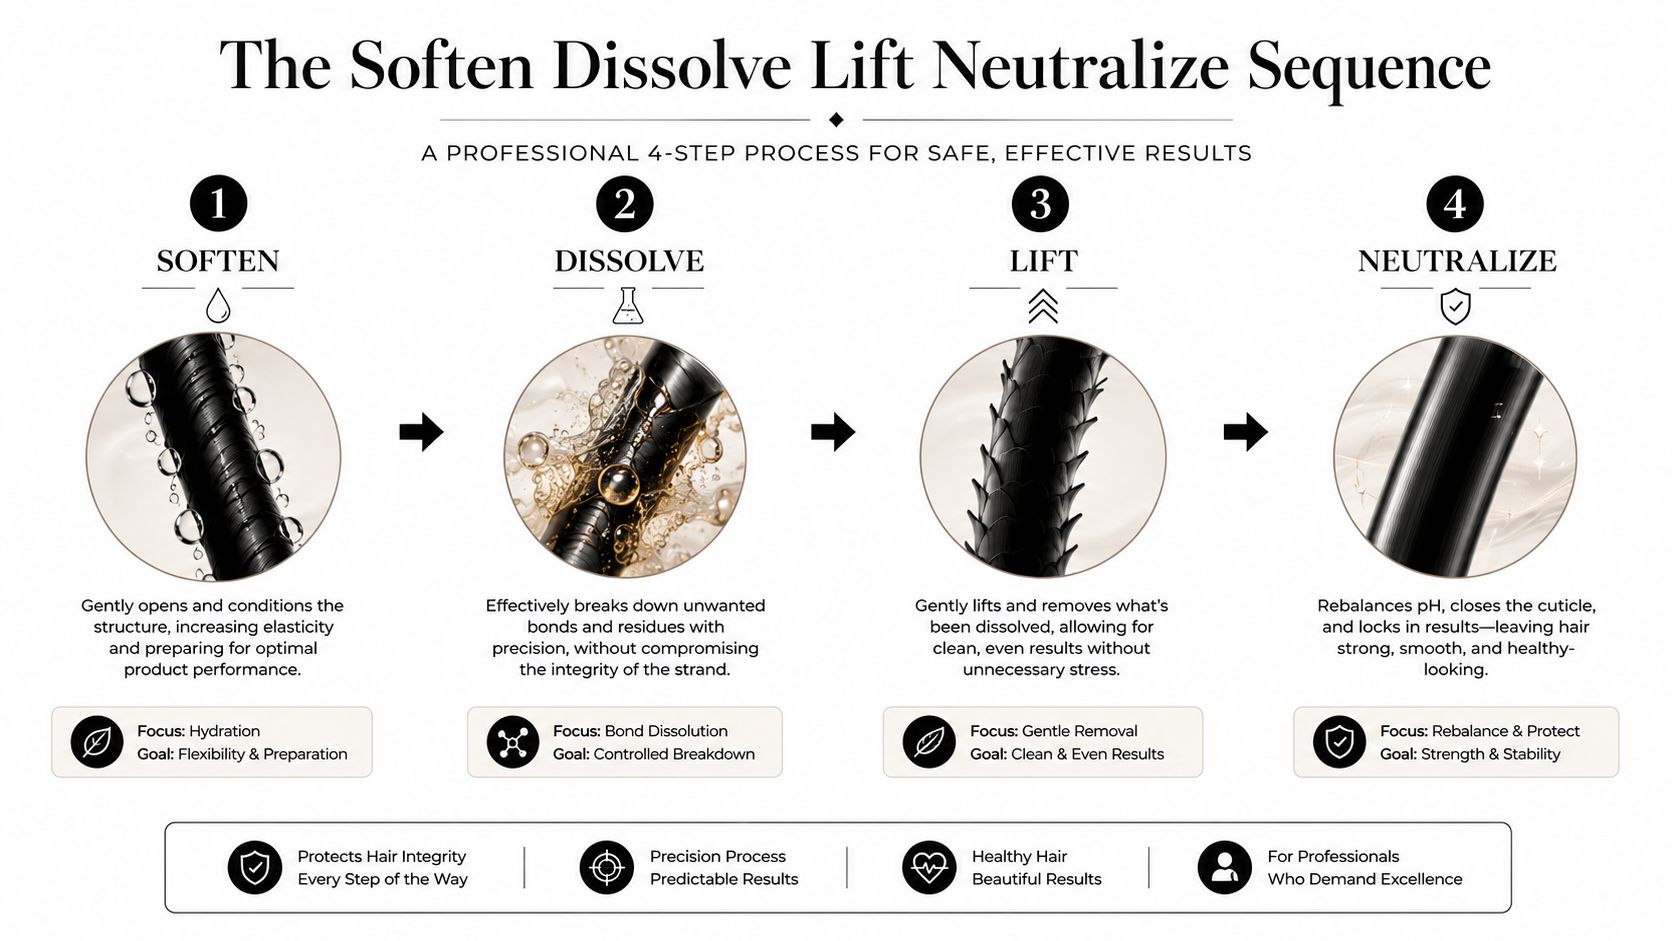
The safest way to handle sap is to treat it like a bonded contaminant, not a stain you can just wipe away. Every good method follows the same four moves, even if the product changes.
Soften before you touch
Softening is where most shortcuts fail. On fabric, freezing for a few hours hardens the sap so it can be scraped, while Tide advises alcohol or hand sanitizer testing for 1 to 3 minutes before pre-treatment. On hard surfaces, short dwell times matter too, because a solvent only needs long enough to weaken the bond before you lift it.
On paint, I prefer a lubricated cleaner or a small amount of isopropyl alcohol on a microfiber towel, then a brief pause before wiping. On glass or trim, the dwell time can stay short, because the goal is to loosen the resin without leaving a film that attracts dust. The moment the residue starts to smear, stop and re-evaluate.
Practical rule: if the sap is still glossy and sticky, it needs softening. If it’s chalky and brittle, it needs careful lifting.
Dissolve, lift, then neutralize
Dissolving is where the chemistry does the work. A microfiber towel, a plastic scraper, or a dull knife takes care of the lifted edge, but only after the solvent has had time to break the bond. On the fabric side, Tide’s sequence makes the point clearly, pre-treat, wait 5 minutes, then wash. On the vehicle side, the last step is just as important, because any oily film left behind can smear or reattach dirt.
The neutralize step is what keeps the panel clean after the sap is gone. That can mean a wash, a quick detailer wipe, or a full contact wash depending on the surface. If you skip it, you often trade a sap spot for a residue problem, and that residue is what makes the next wipe feel grabby. For a dedicated chemical option, the Titan bug and tar remover fits the same staged logic, let chemistry work before you touch the finish.
Choosing the Right Solvent for the Job
I start with the surface, not the strongest bottle on the shelf. Sap comes off faster when the solvent matches the finish, the substrate, and how long the resin has had to bond.
The solvent that fits the surface
Isopropyl alcohol is still a dependable first pass for paint and glass, but only with a test patch and a light hand. On clear coat, the risk is marring if you scrub before the sap softens, and on glass the risk is streaking if you leave a film behind. Mineral spirits can help on wood and other hard surfaces, though I would not reach for it on delicate trim until I knew how that finish would react.
Vegetable oil or olive oil can do real work on fresh sap because they loosen the bond without the same bite as hotter solvents. The trade-off is residue, so you have to wash the area after the sap is gone or you trade one problem for another. Acetone gets the most caution in my shop. If it comes out at all, it is for very limited glass use after every safer option has been ruled out, because it can haze paint, disturb plastic, and leave matte surfaces looking tired fast.
For thicker contamination, a dedicated tar or sap remover is often the better call. It lets dwell time do the work, which lowers the chance of scrubbing a soft finish into haze.
| Solvent | Safe On | Avoid On | Typical Dwell |
|---|---|---|---|
| Isopropyl alcohol | Paint, glass, spot-tested trim | Unknown finishes, sensitive plastics without testing | Brief, a few minutes at most |
| Mineral spirits | Finished wood, some hard surfaces | Delicate trim, untested coatings | Short, controlled contact |
| Vegetable or olive oil | Fresh sap on paint, skin, hair, fur | Surfaces that need a residue-free finish unless washed after | A few minutes |
| Dedicated tar and sap remover | Clear coat, many hard surfaces | Matte or delicate finishes without a test patch | Follow product guidance |
| Acetone | Limited glass use only | Paint, PPF, matte finishes, plastics | Very short, if used at all |
The same thinking shows up in the Rubber Ducky Rug Cleaning Birmingham guide, because tar removal on carpet runs into the same basic rule, match the chemistry to the material or the fix creates a new mess. I use that reminder in the bay all the time.
Strength is not the goal. Control is. If a mild solvent and a clean towel will do the job, start there. If you reach for the harshest option first, you are usually solving impatience, not contamination.
Surface-Specific Playbooks That Actually Work
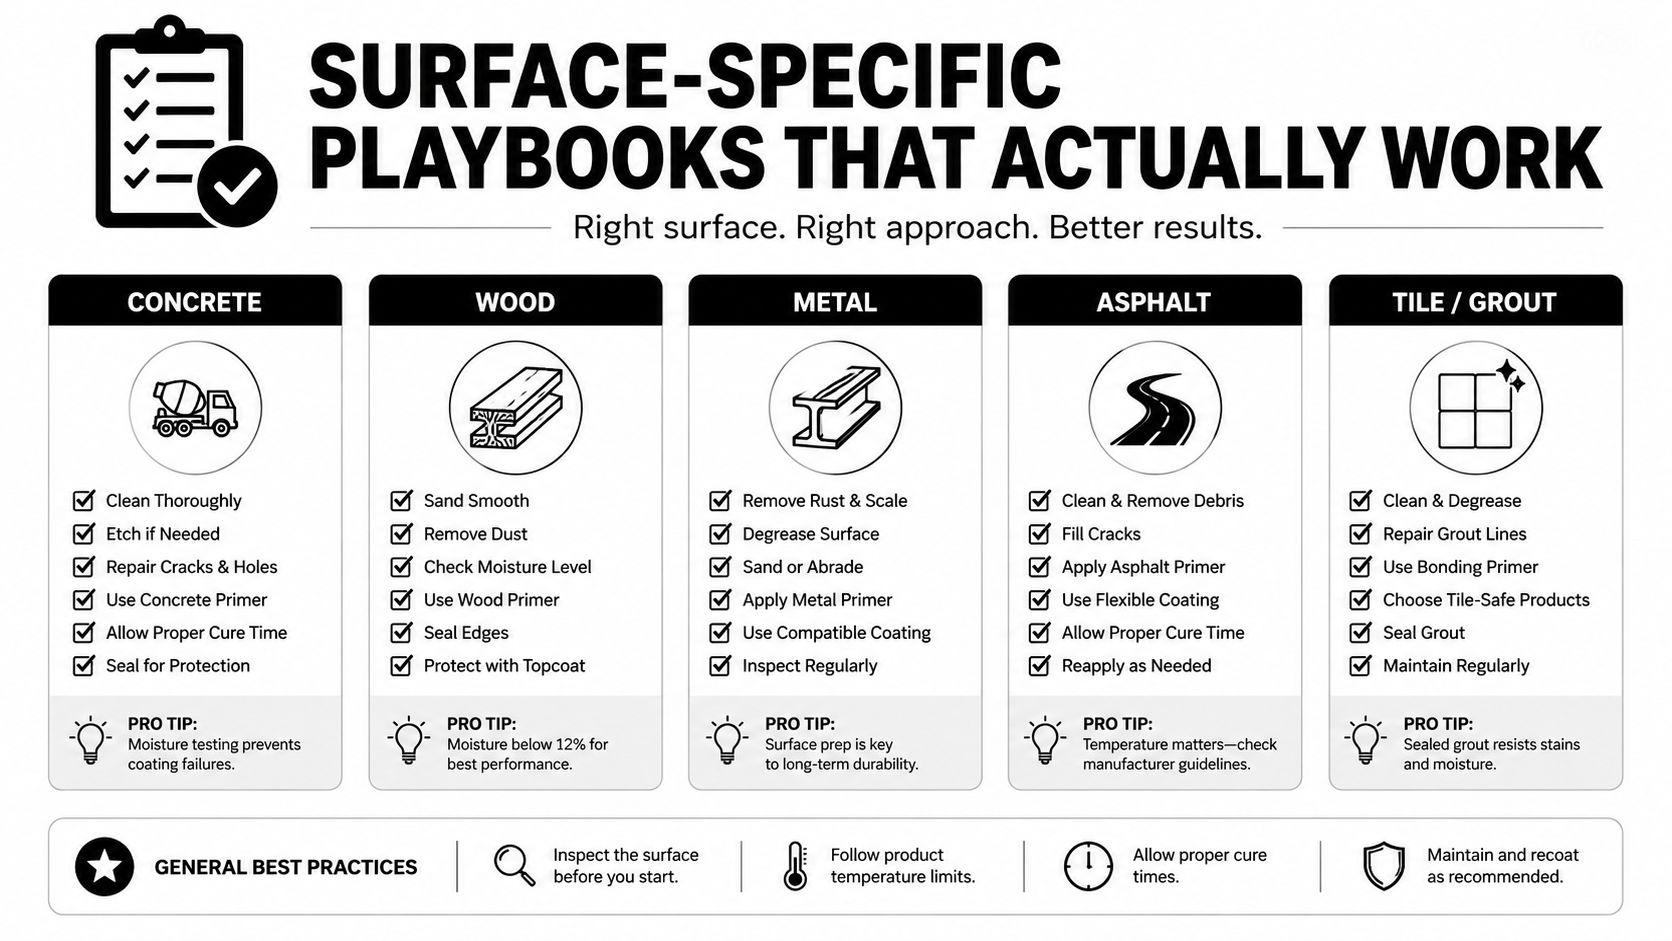
Different surfaces punish different mistakes. Paint shows haze, glass shows streaking, trim shows dye transfer, and fabric rewards speed more than force.
Paint, glass, trim, and fabric each need their own rhythm
On paint, start with a hidden test patch and a microfiber towel dampened with isopropyl alcohol or a sap remover. Let it sit briefly, then lift instead of scrubbing, because dry friction is what creates marring. If the panel is matte or has PPF, go lighter, because gloss loss and haze are the failure signs you can’t undo with a quick wipe.
Glass gives you the cleanest win if you respect the sequence. One guide recommends hot water for 5 to 10 minutes, then rubbing alcohol or acetone with circular motions, and finishing with glass cleaner and a lint-free cloth for a streak-free result. That same finish step is what keeps the windshield from catching smears the next time the sun hits it. For a broader house-glass process, professional bird dropping cleanup advice follows the same logic, soften first, then finish cleanly.
Plastic trim is where I see rushed detailers get humbled. Alcohol can discolor some plastics, and oil-based approaches often beat brute-force scrubbing because they loosen the sap without digging into the color. A test patch isn’t optional here, because a small stain on black trim can look like a permanent shadow once it dries.
Fabric is a different animal. Freeze the spot, scrape the bulk, then pre-treat before washing, and keep the wash hot only if the care label allows it. Tide’s guidance is clear that the stain has to be addressed before drying, because heat sets what’s left behind. For upholstery and cabin material, the same softening and neutralizing principle applies to Titan’s leather seat stain guidance, even though the material is different.
A residue-free finish matters as much as sap removal itself. If the cleaner stays behind, dust sticks to it and the panel looks dirty again by lunch.
Troubleshooting the Mistakes That Wreck Panels
Most bad sap jobs start with someone moving too fast. The mess isn’t usually the sap itself, it’s the cleanup method.
Four mistakes that show up later
The first mistake is scrubbing dry sap like it’s mud. That turns a sticky contaminant into a dragged abrasive, and the symptom is usually fine haze or a dull trail on darker paint. The fix is to soften first, then lift with a clean microfiber towel or a plastic scraper.
The second mistake is skipping dwell time. If the solvent hasn’t had time to work, the technician keeps pressing harder, and pressure creates more damage than chemistry would have. On thick sap, the dwell can be the difference between a clean release and a scuffed patch that needs correction.
The third mistake is leaving solvent residue behind on trim or glass. That often shows up as smearing, streaking, or a panel that attracts dust faster than the rest of the car. A follow-up wash or a proper neutralizing wipe removes the leftover film and prevents a second round of cleanup.
The fourth mistake is reaching for acetone too early, especially on coated or matte panels. If the finish suddenly looks flat, ghosted, or uneven, stop immediately and inspect the area under diffused light. A hidden-area test would have told you the risk before the damage happened.
What the panel is telling you
A dull trail usually means the towel was too dry or the sap was too hard. Haze on black trim usually means the solvent was too aggressive or the finish wasn’t tested first. Etching on glass is rarer, but if it appears, the glass likely needed a gentler sequence and a cleaner finish step.
That’s why I keep a simple triage habit. If the residue is still there, go back to soften and dwell. If the residue is gone but the surface looks disturbed, stop adding pressure and assess whether you’ve made a correction job instead of a removal job. For deeper finish issues, Titan’s clear coat peeling guidance is a useful reminder that once the surface is damaged, the repair path changes fast.
Why Elastomer Coatings Change the Sap Equation
The reason that pine-sap car came in so ugly is simple, the panel had nothing helping it. Once a surface has a coating that resists bonding, sap stops acting like a permanent guest and starts acting like contamination you can lift off cleanly.
A flexible layer changes the whole cleanup
Titan’s Alpha Quartz Elastomer ceramic coating uses Advanced Adhesion Technology and high solids to deliver up to two years of protection, and it’s designed to absorb pressure and temperature change without cracking, with an outdoor-friendly, easy three-step application. That flexibility matters because paint and trim move with heat and cold, but a brittle layer can fail when the surface shifts. Titan also positions its elastomer technology around Dark Matter Technology and nano tube reinforcement, which is the kind of construction detail that explains why a finish can stay hard like glass while still flexing.
On a coated vehicle, sap often comes off with a quick detailer or a light wipe instead of a solvent-heavy rescue. That doesn’t mean the surface never needs attention, it means the cleanup time shrinks because the resin has less to bite into. The same logic applies when bugs hit the front end or temperature swings between frozen mornings and hot afternoons, the coating moves with the panel instead of cracking on it.
The practical upside is easy to see in the bay. A DIY owner can handle the aftermath faster, and a mobile detailer can move from contamination removal to final inspection without dragging out the job. For application context, Professional Window Cleaning’s coating methods are a useful reminder that even protective chemistry depends on prep and clean finish work.
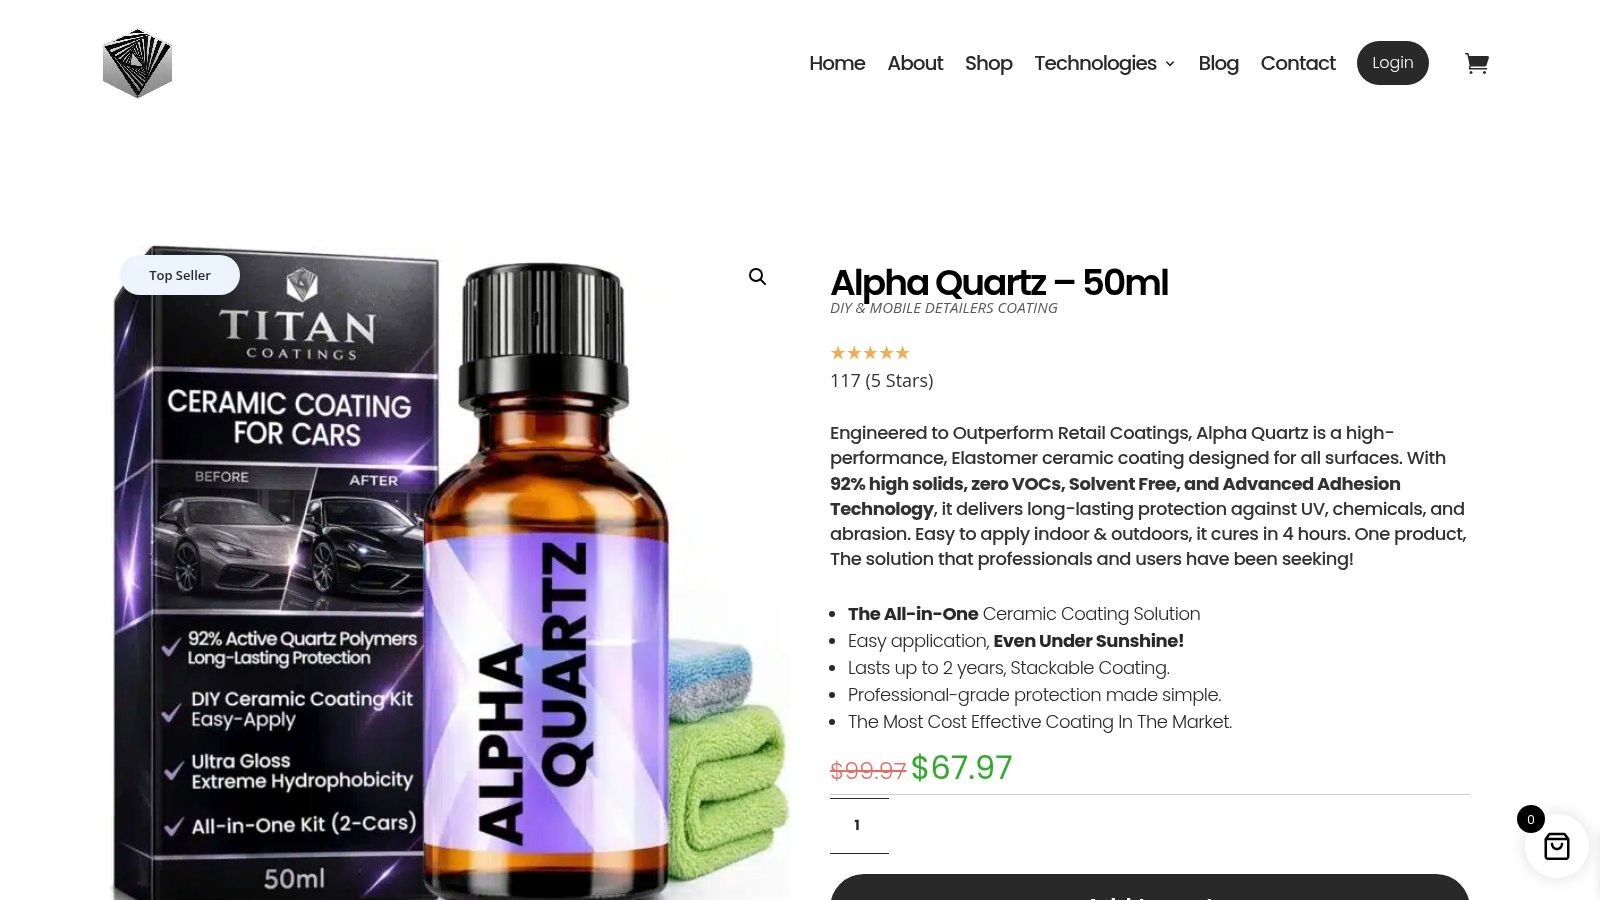
For detailers who want a coating option that fits this kind of work, Alpha Quartz is the product to look at, and the Titan car paint coat page shows where it sits in the lineup. The point isn’t hype, it’s less friction when sap shows up and less risk when the weather swings.
A Simple Maintenance Rhythm That Stops Sap Before It Sticks
A good maintenance routine beats a dramatic rescue every time. If sap season is part of your parking reality, set the car up so contamination never gets a long head start.
A rhythm you can actually keep
A weekly quick detailer wipe during sap-heavy weeks keeps fresh contamination from hardening into a repair. A monthly contact wash with neutral pH soap clears the residue that a quick wipe won’t touch. A quarterly inspection under diffused light catches the spots that hide in plain sight until the sun turns them glossy again.
I also like to pair paint protection with glass protection, because the windshield takes a beating long before the hood does. Apex Glass ceramic windshield coating is engineered for deep pore bonding on glass, activating superhydrophobic water sheeting at roughly 30 MPH and reducing glare and wiper use in heavy rain for clearer, safer driving. That makes the front of the car easier to live with when weather and tree cover hit at the same time.
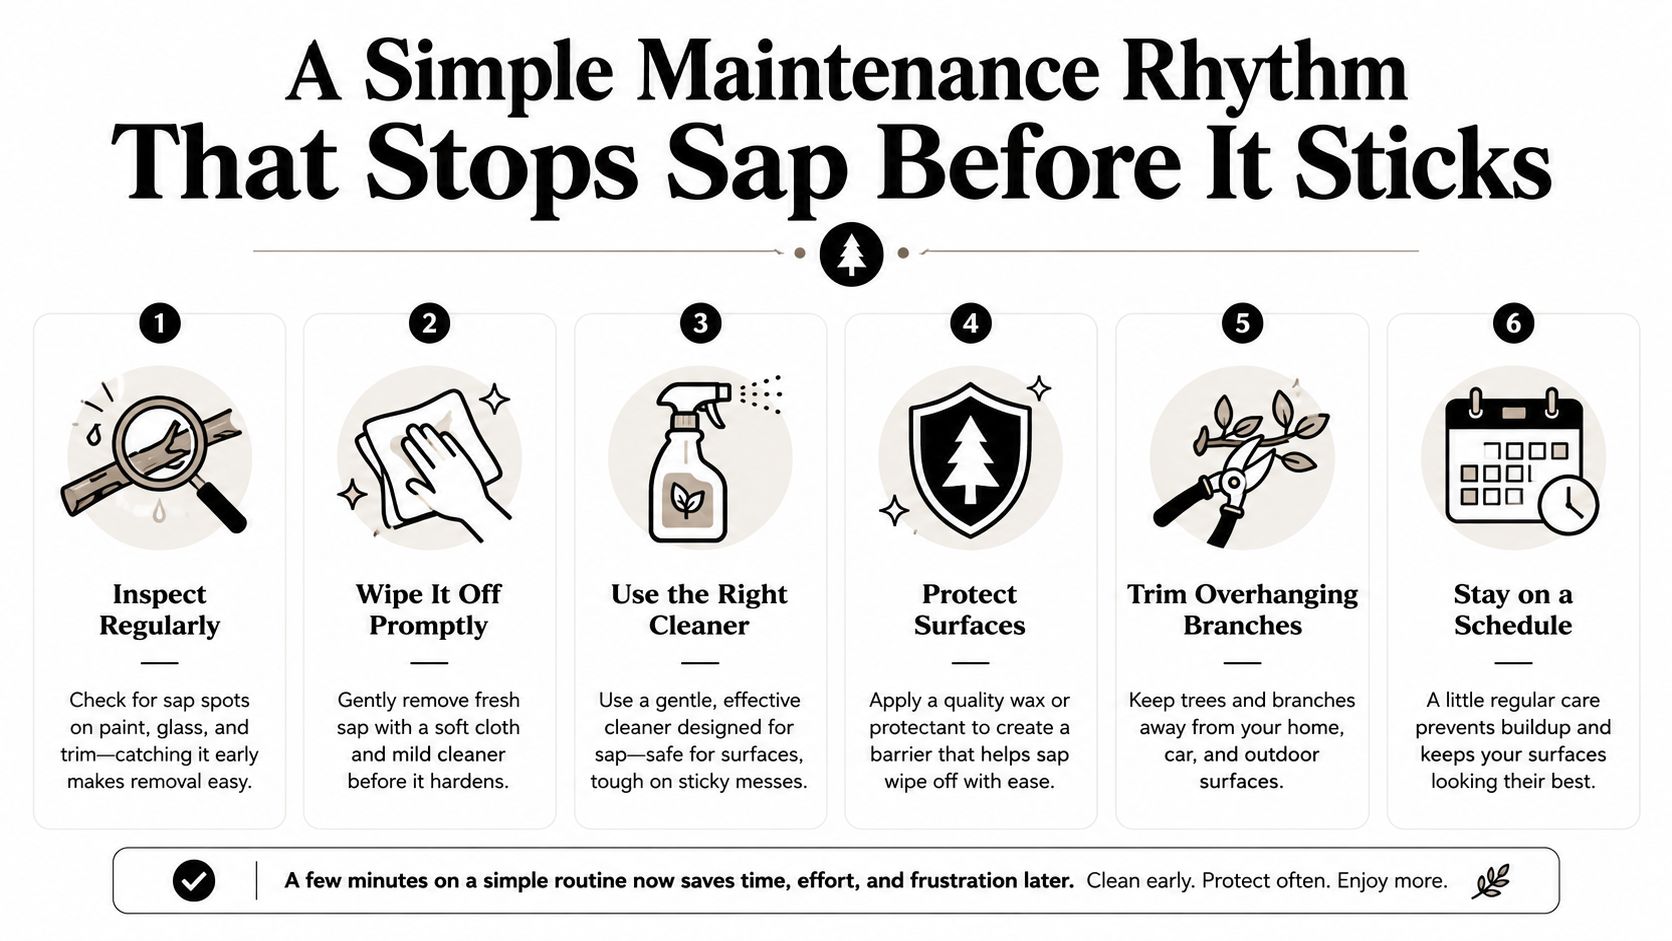
The most useful habit is the one you repeat without thinking. Start with a weekly wipe, add the monthly wash, and make the diffused-light check part of your normal inspection so sap never gets the chance to bake in.
If you want a finish that fights sap before it bonds, Titan Coatings builds protection for the kind of real-world use detailers deal with every day. Visit APEX NANO – Titan Coatings to compare coatings, match the right product to your setup, and put a stronger layer between your paint and the next sticky parking spot.
0 Comments