
You've got the car in the driveway, the coating bottle unopened, and a fresh stack of microfiber towels waiting on the workbench. The job looks simple until you notice the water spots under the garage light, the roughness in the paint, and the weather forecast shifting by the hour. That's the challenge of nano coating DIY. The bottle matters, but preparation, timing, and temperature control decide whether the finish looks even or leaves behind high spots that need polishing.
I've seen home installers spend more time comparing coating hardness than checking whether the panel is free of polishing oils. That priority is backwards. A flexible elastomer coating can be a smart choice for a daily-driven car because it combines a glass-like cured surface with a rubber-like ability to move with the substrate. The finish still depends on disciplined installation, though. Treat the process like a small detailing job, not like wiping on a spray wax.
Why DIY Nano Coating Has Become a Weekend Ritual
On Saturday morning, a hobbyist pulls a coupe onto the driveway and opens a small kit bag on the tailgate. Inside are an applicator block, several suede cloths, gloves, and a compact bottle that looks nothing like the commercial spray equipment used in industrial coating work. A few years ago, that setup would have felt reserved for a professional studio. Now, consumer kits have made the process approachable for careful car owners.
The broader nanocoatings industry has moved well beyond laboratory use. One 2026 industry forecast projects the global market from USD 15.3 billion in 2025 to USD 33.2 billion by 2030, at a 16.8% CAGR, with applications across automotive, aerospace, construction, healthcare, energy, and marine markets, as reported in this global nanocoatings market forecast. Automotive is one of the main consumer-facing entry points, which explains why small-bottle coatings now appear in detailing shops, online stores, and mobile-detailing vans.
Why the process feels accessible now
Three changes pushed DIY adoption forward:
- Detailing video culture: YouTube channels have made paint correction, panel wiping, and coating removal visible to ordinary car owners. The viewer can watch the hand movement before opening a bottle.
- Consumer-grade chemistry: SiO₂ coatings and elastomer formulations are packaged for wipe-on application rather than commercial spray equipment.
- A practical ownership goal: Drivers want easier washing, water behavior, and a finish that needs less frequent reapplication.
The automotive segment itself has become a substantial part of the category. A separate 2026 forecast estimates automotive nanocoatings will grow from USD 3.2 billion in 2026 to USD 9.1 billion by 2031, representing a 23.2% CAGR, according to this automotive nanocoatings market forecast. That growth doesn't mean every home installation will succeed. It means the technology and the buying audience have matured.
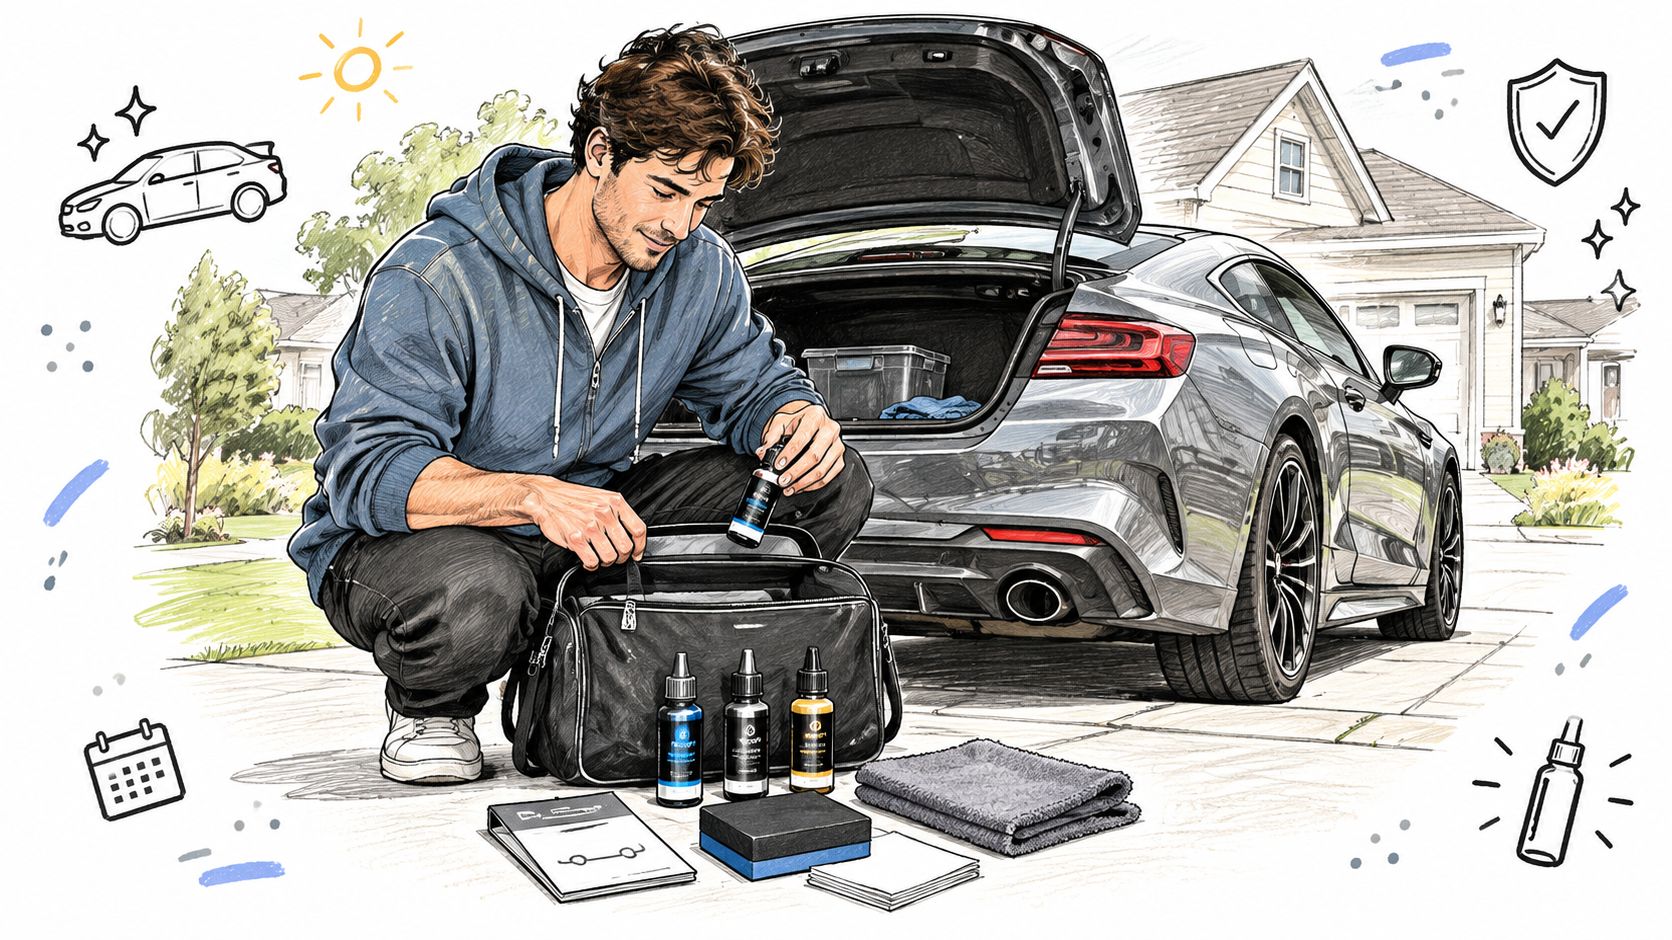
A weekend coating isn't a cheaper substitute for a professional appointment. It's a hands-on skill that rewards restraint. You'll need to wash carefully, inspect the paint, and accept that a panel may need correction before protection. The payoff is control over the process and a better understanding of what the coating can, and can't, do.
Tools and Materials You Actually Need Before You Start
Stage everything before the bottle leaves its packaging. Once the coating is on the panel, stopping to search for a towel or flashlight creates avoidable pressure, and pressure causes rushed wipe-offs.
Start with a pH-neutral wash soap, a dedicated microfiber wash mitt, and a grit guard. Road film and loose grit have to leave the surface before you begin contact work. Use a two-bucket setup, with a separate rinse bucket, and keep the mitt moving in a controlled top-down pattern.
Build the kit around contamination control
A clay bar or synthetic clay mitt, together with proper clay lubricant, removes bonded particles that washing can't touch. You'll also want a tar remover and iron fallout remover for specialized contamination. Follow each product's label dwell time. Rubbing too soon can spread softened contamination rather than remove it.
For the final cleaning stage, use an isopropyl alcohol panel wipe prepared according to the coating maker's directions. A diluted solution is commonly used for this purpose, but the exact mixture should come from the product instructions rather than a guess.
Your application and inspection tools should include:
- Applicator blocks and suede cloths: Use a fresh surface for each coating task and replace it when it becomes saturated.
- Low-pile edgeless microfiber towels: Keep separate towels for initial leveling and final buffing.
- Nitrile gloves: They keep skin oils away from the paint and protect your hands from the product.
- Painter's tape: Mask textured trim, badges, rubber seals, and porous plastics before application.
- Detailing light: A small foam-tipped flashlight or bright inspection lamp reveals haze that disappears under weak garage lighting.
- Hygrometer and infrared thermometer: These help you understand the environment instead of relying on how the air feels.
The temperature and humidity range printed by the coating manufacturer outranks any generic rule. Your staging checklist can also be compared with this mobile detailing equipment list, especially if you're building a kit that has to travel between customers.
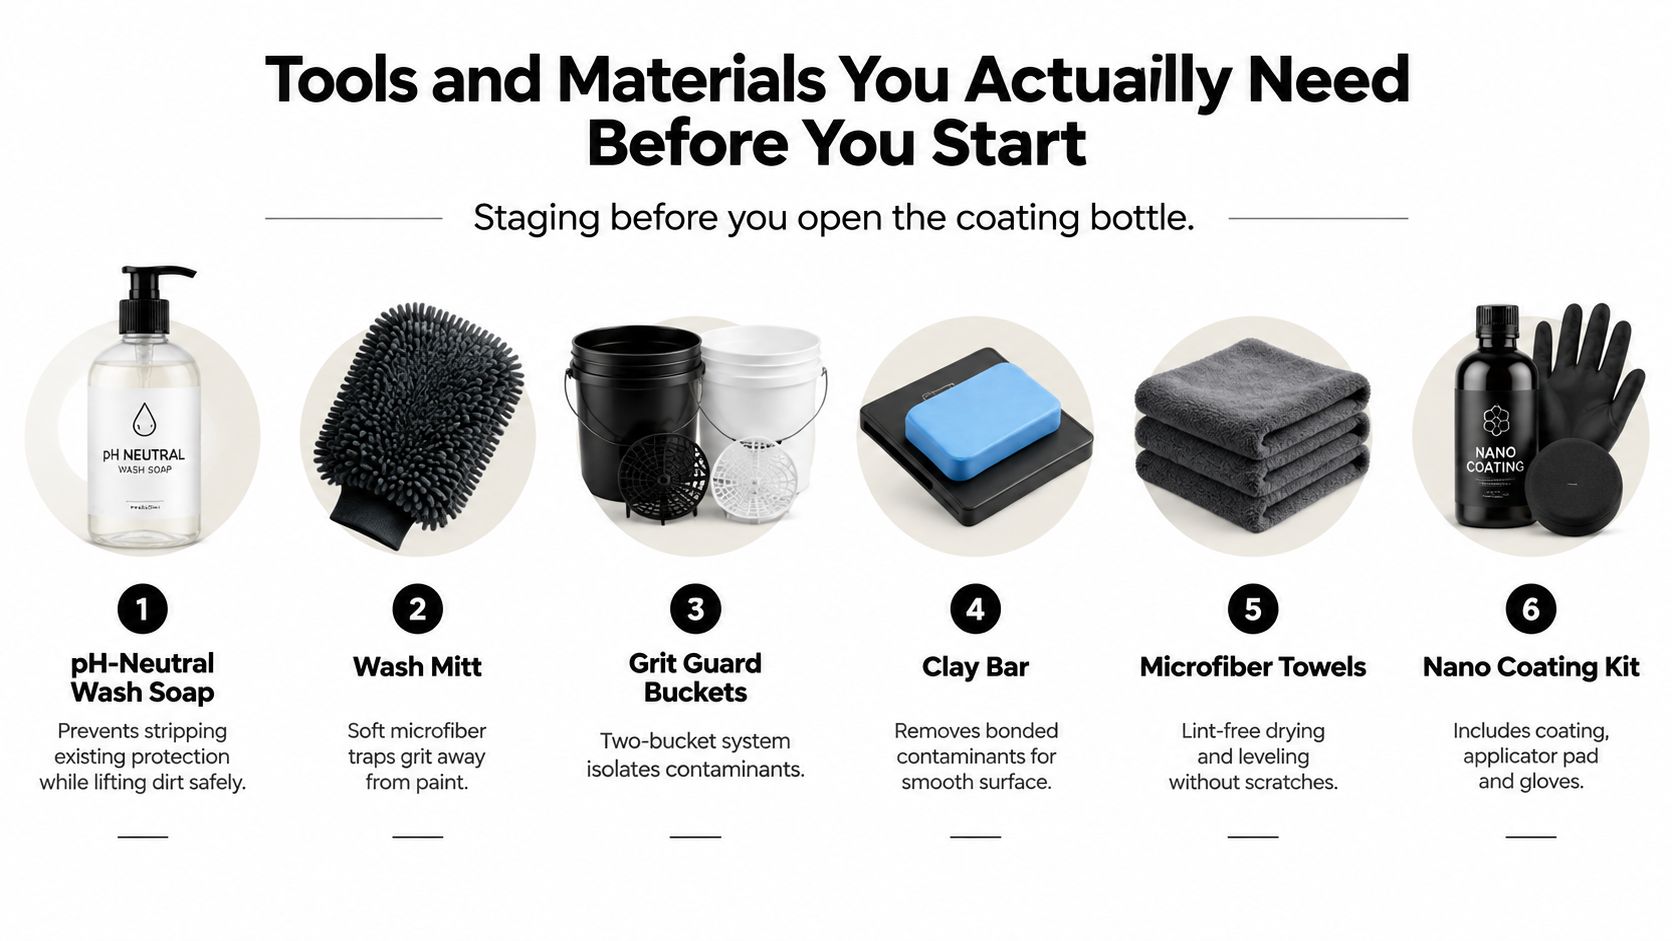
Don't open the coating until you have enough towels, enough light, and a clean place to put the applicator. Those small decisions make the application calmer and reduce the temptation to stretch one towel across contaminated panels.
Surface Prep That Decides Whether Your Coating Survives
The coating won't hide poor preparation. It seals the surface you give it, including light oxidation, polishing residue, traffic film, and missed spots.
Begin with a two-bucket contact wash and a third bucket for rinsing. Work from the roof downward, washing cleaner panels before lower sections that hold heavier grime. Rinse the mitt often, and don't press hard when a contaminant resists. Pressure can drag grit across the clear coat.
Decontaminate before you correct
After the wash, use an iron remover and tar remover where appropriate. Give each chemical the full dwell period specified by its manufacturer, then rinse thoroughly. Move to the clay stage with generous lubricant and straight, overlapping passes. The paint should move from grabby to smooth under the mitt or bar. That change in feel is more useful than guessing from appearance alone.
Once the surface is clean, inspect the paint under a bright, angled light. If swirls, oxidation, or dull areas bother you now, they'll still bother you after coating. Machine polishing is the efficient correction route, while careful hand polishing can address limited areas. Either way, remove polishing oils afterward.
Practical rule: If you can see the defect before coating, assume the coating will make it easier to notice afterward.
The final panel wipe strips oils and residue from the corrected surface. Apply it to a towel or as directed by the product instructions, wipe a manageable area, and turn the towel frequently. Don't flood trim or allow solvent residue to sit on sensitive materials.
This coating surface preparation guide is useful as a reference for organizing the sequence. Independent detailing guidance estimates that complete-vehicle preparation can take 4 to 8 hours, and warns that skipping a stage can leave defects that later require machine polishing to remove the coating, as explained in this complete ceramic coating preparation guide.
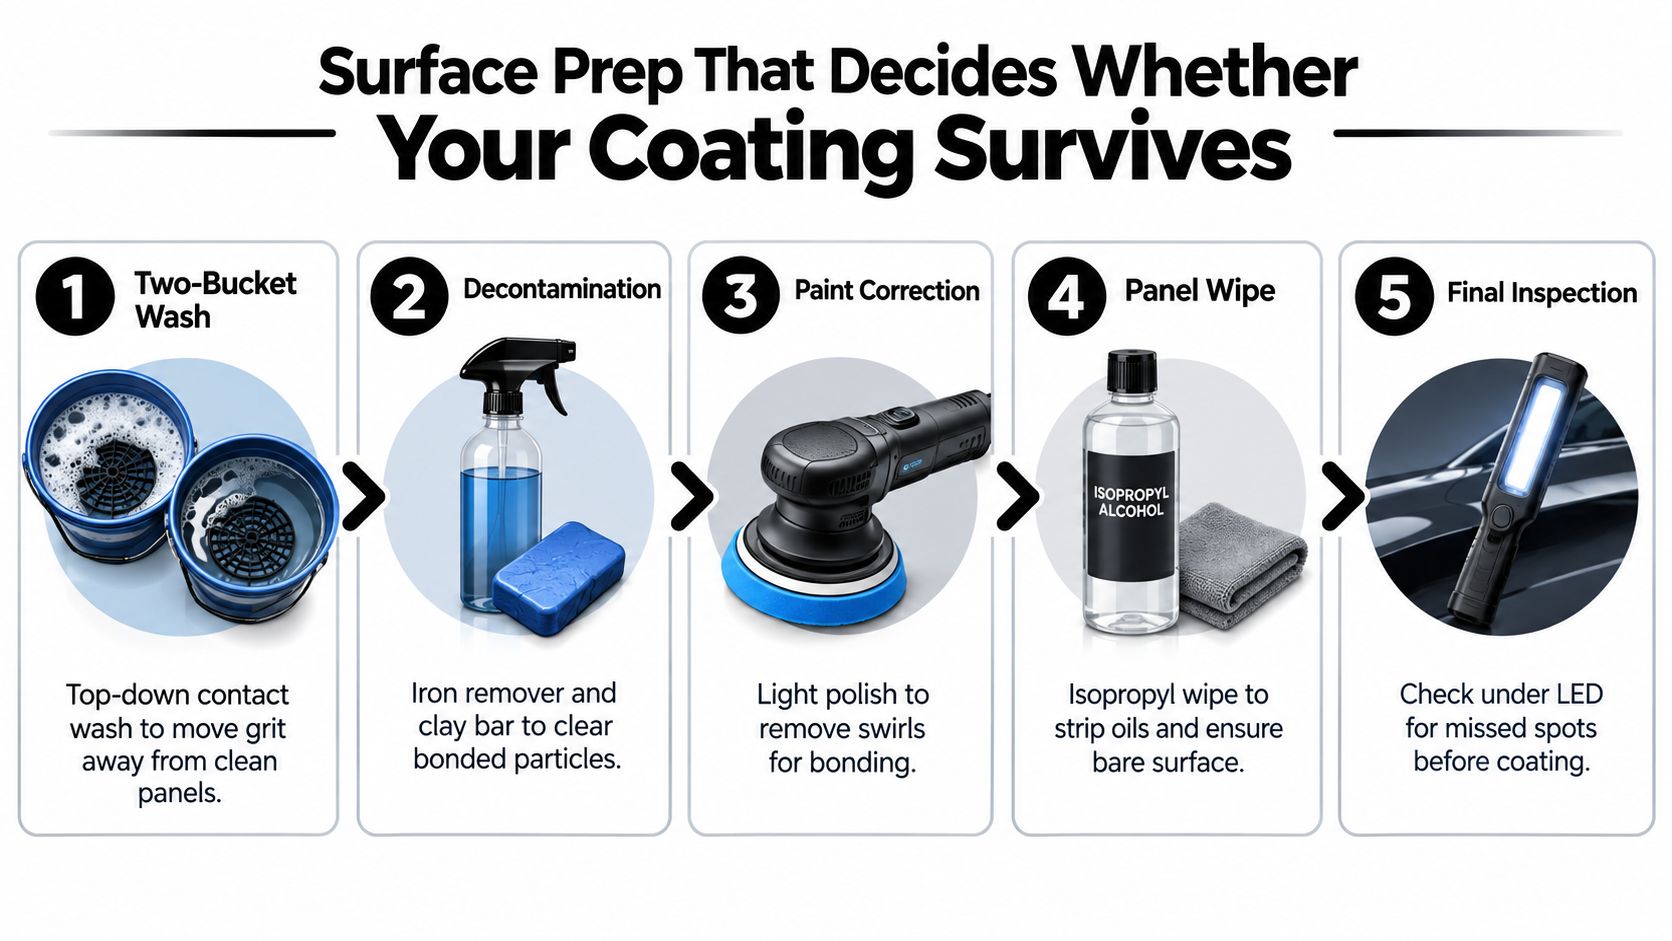
Finish by running the light across every panel from several angles. If you see a smear, polish trace, dust nib, or oily rainbow that doesn't belong, correct it before opening the coating.
Applying the Nano Layer With a Crosshatch and a Timer
Application becomes manageable when you reduce the working area. Load the applicator according to the product directions, then coat one panel or a small section at a time. Don't spread product across the entire car because the flash window changes with temperature, humidity, airflow, and panel size.
Use a strict crosshatch pattern. Move vertically across the section with overlapping passes, then repeat horizontally. The overlapping strokes help you identify missed coverage and distribute a thin film instead of leaving heavy lines at the edges.
Read the flash instead of guessing
The coating often changes from a wet, slick appearance to an oily rainbow or haze as it flashes. The exact interval is product and environment dependent. Some workflows place the wipe-off window around 30 to 90 seconds, while other products may specify a longer period. Follow the bottle directions, and use the visual change as a confirmation rather than a replacement for the instructions.
Keep two clean towels available. Use the first to level the film, then follow with a second towel to clear the remaining haze. Sweep a headlamp or inspection light across the panel from a low angle. High spots show as darker smears, cloudy lines, or small areas that reflect light differently from the surrounding finish.
If the coating is still moving easily, level it gently. If it has grabbed and left a visible high spot, don't keep scrubbing aggressively. Add a small amount of fresh product only if the manufacturer's instructions allow reactivation, then level carefully. Otherwise, stop and follow the product's correction procedure.
Elastomer-friendly coatings may tolerate a slightly longer working window than a rigid ceramic film, but they still punish an installer who lets sections cure unevenly. Flexibility helps the cured layer handle movement. It doesn't excuse missed wipe-off.
For more application detail, use this coating application methods guide.
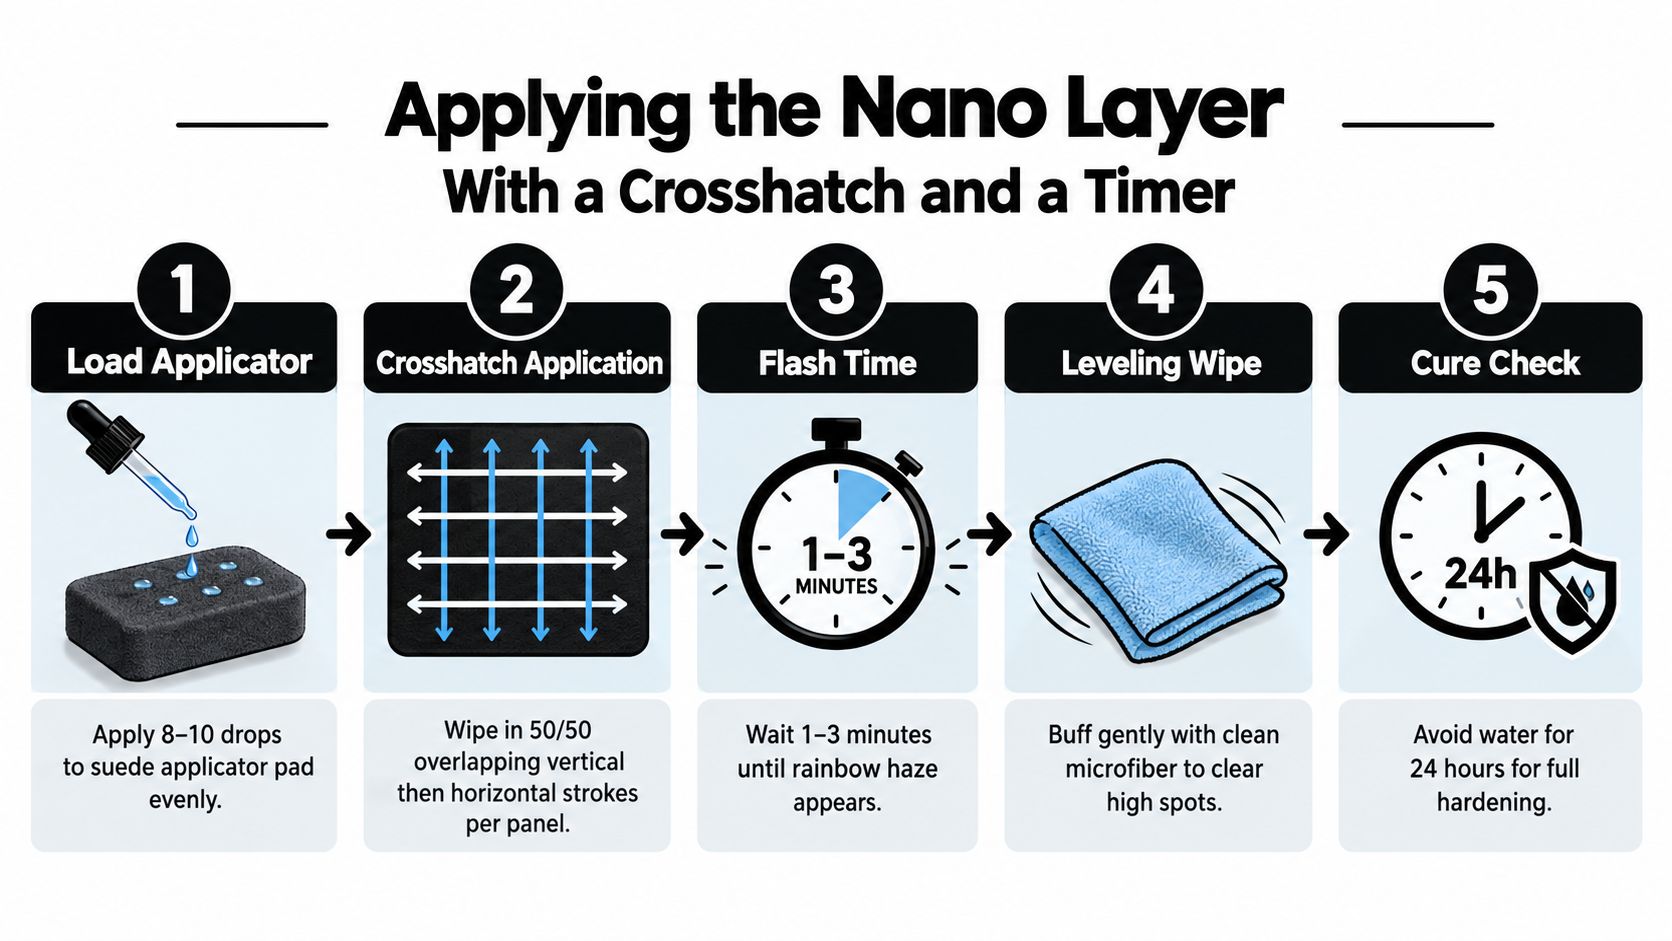
Write down the start time for each panel if you're working alone. A simple timer prevents the common mistake of treating the whole vehicle as one continuous section.
Curing, Weather, and Why Elastomer Coatings Flex With Your Car
A coating can look perfect at the end of the install and still fail during its first night. Park the vehicle somewhere dry and stable, away from direct sun, windblown dust, rain, sprinklers, overnight dew, and accidental contact. A clean garage gives you more control than a driveway, although high humidity or unsuitable temperatures can still slow or disrupt the cure.
Follow the product maker's specified temperature and humidity range. Many coatings work comfortably around 60 to 80°F with moderate humidity, but the label takes priority. Temperature changes affect flash behavior while you work, and moisture can interfere with a film that has not finished setting. Record the forecast and check the panel temperature before starting, rather than relying only on the surrounding air.
Flexibility is a durability strategy
Hardness is only one part of coating durability. Body panels expand and contract, and the cured film must stay bonded while the substrate moves. Elastomeric coatings use rubber-like flexibility, with reported elongation ranges from 100% to 600% of original length, according to this elastomeric coating guide. That flexibility is the practical reason to examine how elastomer coatings flex before choosing a product for a vehicle that sees changing temperatures.
Industry guidance places typical elastomeric wall-coating glass-transition temperatures around -40°C to -10°C, compared with 0°C to 25°C for conventional architectural paints, as described by IIBEC's elastomeric wall-coverings guidance. A lower glass-transition temperature helps a coating stay flexible in colder conditions instead of becoming brittle.
A manufacturer example describes a smooth acrylic elastomeric coating with over 300% elongation, marketed for flexibility and weatherability, as shown on this Sika elastomeric coating product page. That example does not mean every automotive coating performs the same way. It does show why flexibility can matter more than chasing the hardest film on the shelf.
| Stage | Time After Application | Condition or Action |
|---|---|---|
| Initial set | Immediately after application | Keep the vehicle indoors, dry, and protected from dust and contact. |
| Early cure | During the first day | Avoid rain, washing, sprinklers, dew, and touching the coated panels. |
| Return to light use | After the product's stated wait period | Drive only when the coating maker permits it, and avoid contaminated roads where practical. |
| First wash | According to the product directions | Use a gentle, pH-neutral wash and soft microfiber equipment. |
| Full service routine | After the stated cure period | Resume normal maintenance without abrasive polishing unless correction is required. |
ASTM D6944-15(2020) provides a repeatable method for evaluating cured coatings through thermal cycling, including adhesion loss, checking, cracking, and blistering, as documented in this ASTM D6944-15(2020) standard reference. For a DIY installer, the takeaway is direct. Temperature-change durability can be tested, but it still depends on correct preparation, suitable weather, and an uninterrupted cure.
Common DIY Mistakes and How to Diagnose Them
Most coating failures become visible after the installer has already packed away the towels. A dark high spot may appear under morning light, a hazy patch may show after the first wash, or the water behavior may feel inconsistent from one panel to the next. Diagnose the symptom before reaching for more product.
Match the defect to the likely cause
- High spots or dark smears: The installer missed the wipe-off window, used inadequate lighting, or tried to level too large an area at once. Recheck the panel from multiple angles rather than judging it under one overhead light.
- Streaks and uneven gloss: Flash time, airflow, panel temperature, or towel saturation may have changed during application. A coating can look perfect from one direction and uneven from another.
- Hazy patches: Contaminated panel wipe towels, polishing oils, or incomplete decontamination can leave a film beneath the coating.
- Water-spot etching: Early water exposure can leave minerals or create marks before the film has finished curing. The fix depends on severity and product instructions.
- Weak or inconsistent beading: The film may be under-cured, thin in places, contaminated, or affected by an incompatible maintenance product.
The process matters more than the price tag. An academic defect-analysis study found that 87.5% of recurring coating defects occurred during execution, while 47.6% were linked to improper preparation or faulty application, according to this coating defect-analysis studyCO.1943-7862.0001075). Those figures point directly toward towel discipline, surface cleanliness, and application control.
A practical inspection sequence
Start with the original application notes. Check the temperature, humidity, panel order, flash observations, and wipe-off timing. Then inspect the paint under a raking LED, perform a gentle water-beading check only when the coating has reached the maker's permitted stage, and notice whether a clean towel glides or grabs.
Don't polish immediately just because a panel looks different. If a high spot is fresh, the manufacturer may provide a short correction window. Once the film has hardened, a light machine polish may be necessary. Severe or widespread defects can require full decontamination and reapplication.
This coating failure analysis resource can help organize the diagnosis. The best correction is usually the smallest one that removes the defect without disturbing sound coating around it.
Realistic Expectations, Maintenance, and DIY Versus Pro Results
A successful weekend install gives you a protected, easier-to-maintain surface, not an invulnerable force field. Bugs, road grit, mineral deposits, poor washing, and neglected panels can still create problems. Elastomer chemistry adds flexibility, which can help a cured coating move with the surface through temperature changes, but it doesn't replace maintenance.
A useful service expectation for elastomer nano coatings is six to eighteen months, with shorter performance possible for vehicles kept outdoors or exposed to harsh winters. That benchmark comes from the assigned product-planning guidance, not a universal promise. Professional ceramic packages may be positioned around two to five years, but those claims depend on the system, correction work, environment, and maintenance program.
Keep the maintenance simple
Wash with a pH-neutral shampoo on a regular rhythm, dry with clean microfiber, and avoid abrasive polishing unless you're intentionally correcting the coating. A silica-based topper can refresh water behavior when the product maker confirms compatibility. Don't stack unknown spray products just because the surface feels less slick than it did on installation day.
| Factor | DIY Nano Coating | Professional Application |
|---|---|---|
| Panel correction | You control the work, but results depend on your tools and technique. | A trained installer usually has stronger correction capability and inspection lighting. |
| Environment | A garage can work if you control dust, temperature, humidity, and moisture. | A studio is designed around repeatable application conditions. |
| Cost | Lower direct labor cost, with tools and learning time as part of the investment. | Higher service cost, with preparation and application handled for you. |
| Learning value | Builds a repeatable detailing skill and makes future maintenance more informed. | Reduces your installation workload and limits hands-on risk. |
| Flexibility choice | You can select an elastomer formulation for a vehicle that sees changing conditions. | The installer can match the coating system to the paint, use, and correction needs. |
DIY makes sense when you enjoy preparation and can protect the car during curing. Professional application makes more sense when the paint needs extensive correction, the vehicle can't stay sheltered, or an uneven finish would be costly to repair.
Titan Coatings' APEX NANO range includes options aimed at different surfaces and workflows, including Alpha Quartz for painted surfaces and the Apex Glass Ceramic Coating for windshields and glass. The glass product is designed to improve water behavior and visibility during rain, which can make wet-weather driving less stressful when the glass has been properly cleaned and coated. Titan also offers Ultra Ceramic Spray, a spray-applied option intended for a simpler installation path, while Alpha Quartz is positioned as an elastomer coating for DIY users and mobile detailers. Review the manufacturer's directions before selecting a system, because the correct prep and cure process matters more than the label.
Treat the project as a skill you can repeat. The first install teaches you how your garage flashes, how quickly your towels saturate, and which panels demand smaller working sections. That knowledge is more valuable than chasing the hardest coating on the shelf.
APEX NANO by Titan Coatings gives DIY installers and mobile detailers options such as Alpha Quartz, Apex Glass Ceramic Coating, and Ultra Ceramic Spray for different surfaces and application preferences. Visit APEX NANO – Titan Coatings to review the product range and choose a coating that matches your preparation ability, working environment, and maintenance plan.
0 Comments