
The hood looked perfect on Friday, then the customer came back two weeks later with water spotting and a dull patch that wouldn’t wash off. That’s the kind of comeback that makes a detailer stop guessing and start tracing the job backward, one layer at a time.
A failed finish is usually not a single mistake, it’s a trail. The fastest way to waste a warranty claim is to blame the last coat first.
When a Fresh Coating Starts Failing Before Your Eyes
A black daily driver came in for a two-step correction and a fresh coating. The owner loved it, drove it home, then noticed water spotting and weak beading after the first real rain. By the time the vehicle rolled back in, the hood had gone from “glass-like” to visibly tired, and the shop owner had to decide whether the issue was product, prep, or something the client did after pickup.
That kind of call is exactly why coating failure analysis matters. The visible defect is only the symptom, and the reflex to blame the applicator misses how many hands shape the result. A foundational review that pulled together 42 industry articles and 41 consultant case studies found that 75% of coating failures are not solely the fault of the contractor. The same review treated failure as a systems problem, with owners, engineers, specifiers, and applicators all affecting the outcome, and it pointed to training as the strongest control because many failures start before application, in specification, substrate prep, or coordination (OSTI review).
A fresh coating can look fine and still fail fast if the surface was contaminated, the environment shifted during cure, or the product choice never fit the service conditions. Good diagnosis means tracing the defect through the full chain of custody, from prep to maintenance history.
Practical rule: If the failure shows up early, don’t ask, “Who sprayed it?” Ask, “What was on the surface, what was the air doing, and what was the film asked to survive?”
That systems view also explains why early failure is treated as uncommon, but still worth taking seriously when it does happen. In large installed markets, even a small failure rate affects a huge number of vehicles, so the habit of diagnosing correctly matters as much as the coating chemistry. For a detailer, that means fewer guess-and-recoat jobs, fewer arguments at handoff, and a cleaner warranty conversation when the hood comes back with a problem. It also explains why a well-matched elastomer-based system like Titan’s 5-year ceramic coating can reduce some of the common defect modes before they start, because the chemistry is built to tolerate more of the typical abuse that defeats weaker films.
The Four Root-Cause Families Behind Most Defects
The cleanest way to sort a bad coating is to stop thinking in one defect and start thinking in four families. Technical sources consistently point to surface-preparation errors, application and process deviations, formulation or product mismatch, and service-environment stress as the main buckets, and each one leaves a different fingerprint on the finish (Lucideon). Titan’s adhesion guidance fits that same logic, because adhesion problems rarely start at the topcoat.
What each family looks like on a real vehicle
Surface-prep failures usually show up as blistering, cratering, crawling, detaching, poor wetting, orange peel, or uneven gloss. Those symptoms often come from contamination, the wrong profile, or a substrate that was never completely clean.
Application and process deviations are the next layer. Wrong humidity, out-of-range temperature, cure mismatch, bad film build, or an incorrect two-component mix can all leave a finish that looks acceptable for a day or two, then turns soft, hazy, or inconsistent.
Formulation mismatch is the quiet one. A coating can be chemically fine and still be wrong for the substrate or the climate, which is why the same product can look solid on one job and fail quickly on another.
Service-environment stress is where the vehicle fights back. UV, heat cycling, salt, road grime, and chemical exposure punish a finish that was already marginal, and the damage often shows first at edges, high-wear zones, and exposed horizontal surfaces.
Bottom line: If the coating failed, the defect may be telling you where the process broke, not just what broke.
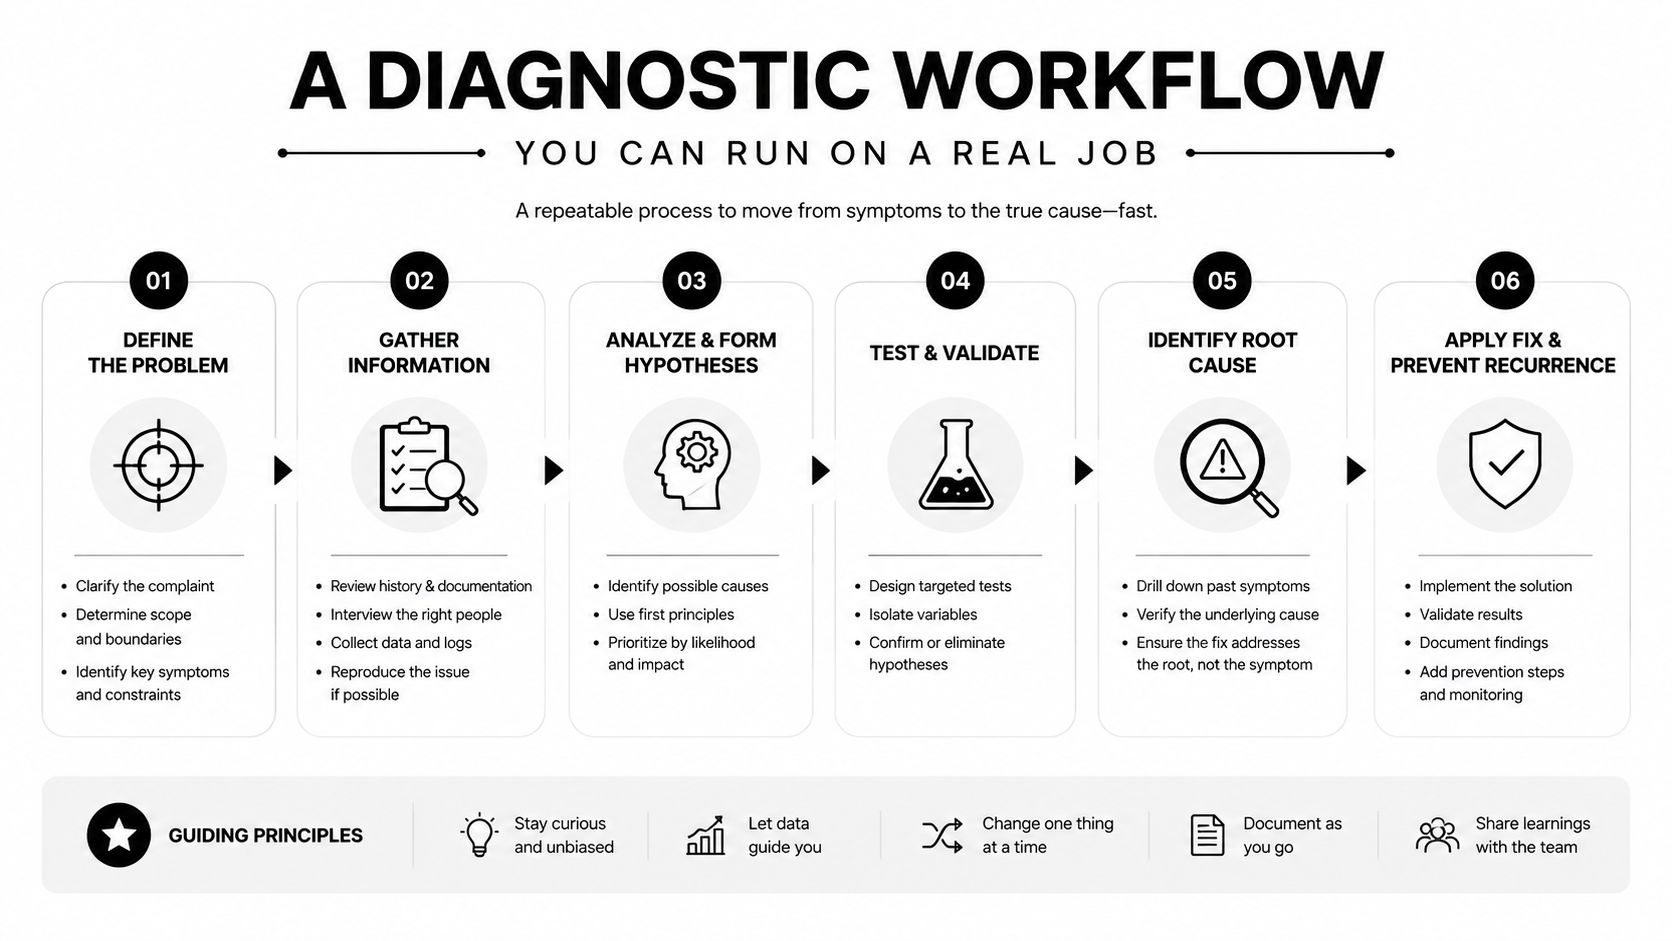
The useful move is to sort the failure into one of those families before you touch a polisher, a solvent, or a warranty form. That’s what keeps a comeback from turning into a repeat failure.
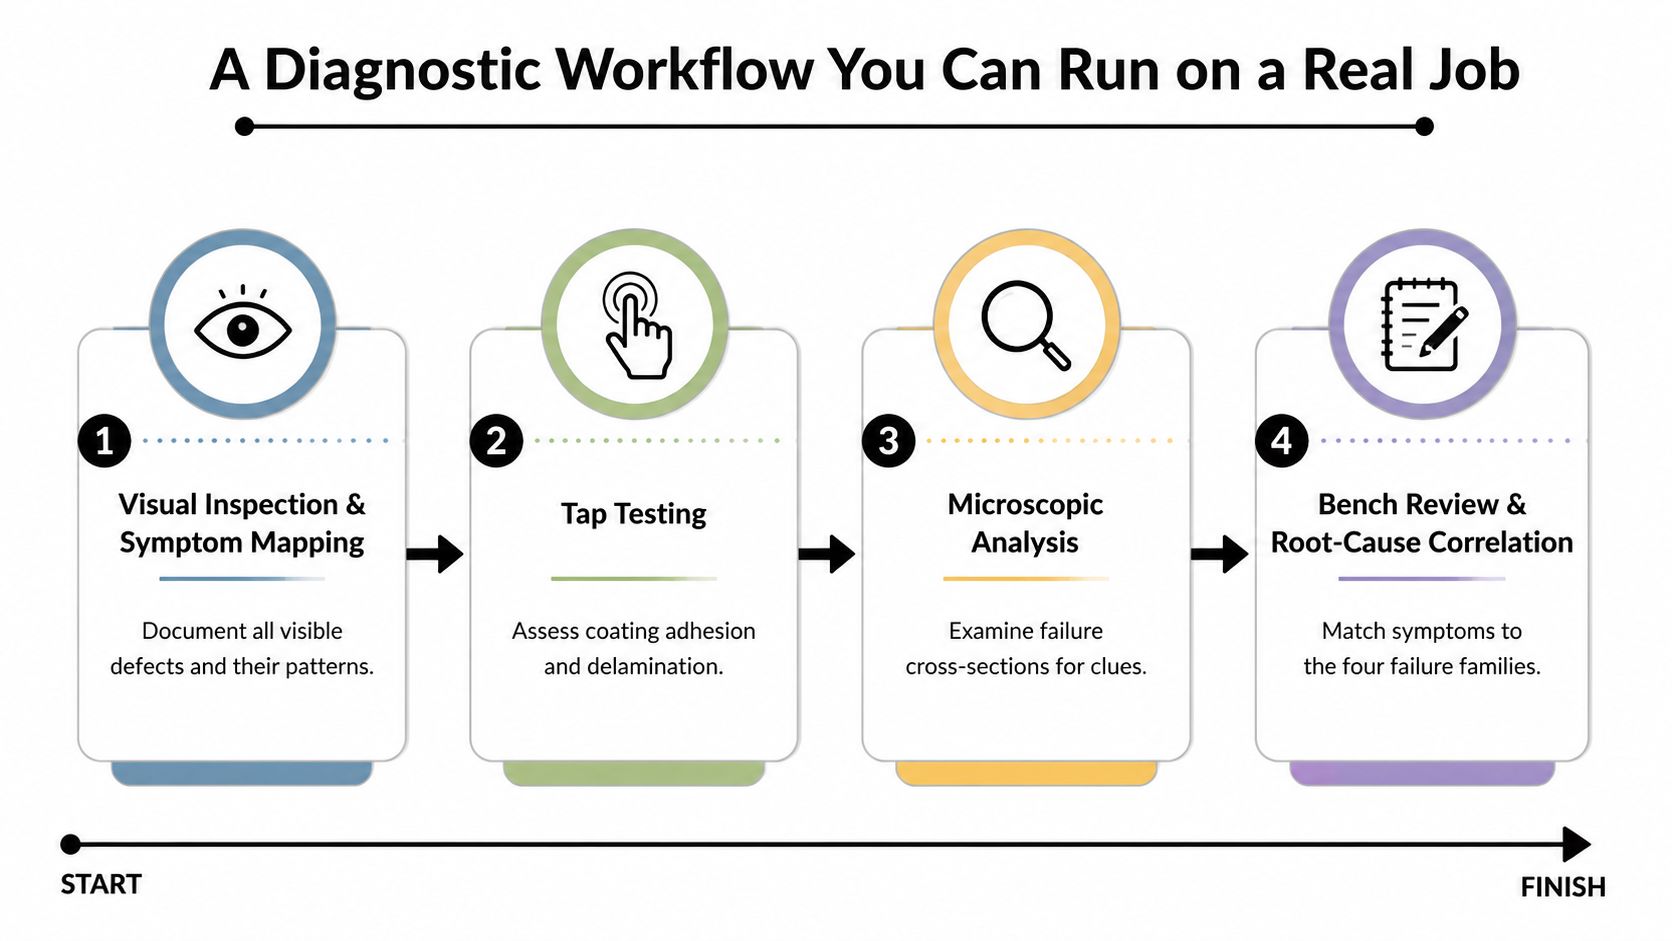
A Diagnostic Workflow You Can Run on a Real Job
A comeback inspection should start with the car, not the bench. Walk the panel, mark the defect zones, and map the pattern, because a failure that shows at the edge of a hood, under a mirror cap, or around a repair line tells a different story than a uniform loss of gloss.
Start with what you can prove in the field
Visual inspection gives you the first clues, but tap testing and adhesion testing tell you whether the coating is still bonded or already lifting. A hollow sound, edge lifting, or isolated delamination means the problem may be under the visible surface, not in the visible film.
For concrete or floor-style failures, field teams often use substrate checks and profile comparison against reference comparators, because you can’t diagnose adhesion with a glance alone. The same is true on painted metal or glass. If the finish is behaving oddly, you need evidence of what’s underneath it.
Escalate only when the field data isn’t enough
When the defect doesn’t make sense in the bay, the bench comes next. That’s where contamination testing, cure evaluation, and lab work enter the picture. A practical resource that breaks down the logic well is browse Forge Reliability’s RCFA guide, especially if you already know the pattern but need a tighter root-cause method.
Practical rule: Don’t send every failure to a lab. Use field tests to rule out the obvious, then escalate only when the evidence still points to more than one likely cause.
Lab methods matter most when the defect looks like simple adhesion loss but behaves like contamination or incomplete cure. FTIR helps identify coating chemistry and contaminants, while ion chromatography is useful when hidden salts are suspected at the interface (KTA failure investigations). That’s the point where you stop asking whether the coating “looked good” and start asking what was on the surface before the failure started.
Reading the Numbers Without Reading the Manual
Numbers only matter if you read them against the failure mode in front of you. A pull-off test, a humidity reading, or a moisture-vapor result narrows the suspect list, it does not hand you a clean verdict.
Common test outputs and what they mean
| Test | Threshold or Output | What It Tells You |
|---|---|---|
| Pull-off adhesion | At least five representative test locations, with recorded psi and whether the failure was adhesive or cohesive | Shows whether the coating is bonded to the substrate or failing within the coating stack |
| Calcium-chloride vapor emission | 3 pounds per 1,000 square feet per 24 hours if the coating manufacturer gives no other limit | Flags moisture conditions that can undermine floor coating adhesion |
| Relative humidity | 75% maximum if no other manufacturer limit is given | Indicates whether the slab or environment is suitable for application |
| RH probe equilibration | 72-hour in-sleeve equilibration before probe insertion in the described method | Reduces bad readings from rushed testing |
| Cure and chemistry check | FTIR spectrum | Shows whether the coating is fully cured or carrying contamination |
| Hidden contamination check | Ion chromatography | Detects salts and other interfacial contamination that visual inspection misses |
The psi number is only part of the story. The failure plane matters just as much, because cohesive failure points toward a different problem than adhesive failure at the substrate.
Read the result, not just the reading
A respectable psi value can still hide a prep mistake if the bond breaks at the substrate. A weak number with cohesive failure can point you toward coating integrity, cure, or product mismatch instead.
For concrete failures, the workflow still calls for at least five representative pull-off locations, tap testing across the full surface, and profile comparison to ICRI CSP 1–9 references where coating has been removed (National Concrete Coating Authority). That is not padding the report. It keeps you from repairing the wrong layer.
Titan’s coating testing page fits the same approach. If a reading sits near the edge, run the test again, document the result, and do not let one number stand in for a full diagnosis.
Three Case Studies From Real Detailing Jobs
The first car was a windshield that looked fine at handoff, then started hazing and wicking water after a few weeks of real driving. The problem wasn’t the product label, it was the surface. The glass needed a deeper clean of the pores before the coating could bond properly, and the fix was a full rework with a glass coating designed to settle into that kind of surface instead of riding on top of it.
The second car was a black daily driver parked outside all day, every day. The hood started showing etching after heat, UV, and contamination had time to work together, and the rigid layer on top didn’t give enough when the panel moved. That’s where a more elastic top layer makes sense, because the finish needs to survive thermal cycling instead of cracking under it.
What the wheel told us
The third case was a set of winter wheels with corrosion bloom around the spokes and lip. Brake dust and road salt crept under a thin film, then tap testing showed hollow zones and adhesion loss where the coating had already started to lift. The correction was stripping the failed sections, verifying the substrate, and rebuilding with a sacrificial layer that could take abuse before the base system did.
The defect changed from job to job, but the diagnosis didn’t. Inspect, test, prove the failure plane, then choose the repair based on the substrate and the stress.
That’s why how to fix clear coat peeling is useful reading alongside coating failure work. Clear coat, glass, and wheel finishes all fail differently on the surface, but the core decision is always the same: whether the substrate is sound enough to keep or too compromised to trust.
Prevention Strategies That Change the Failure Curve
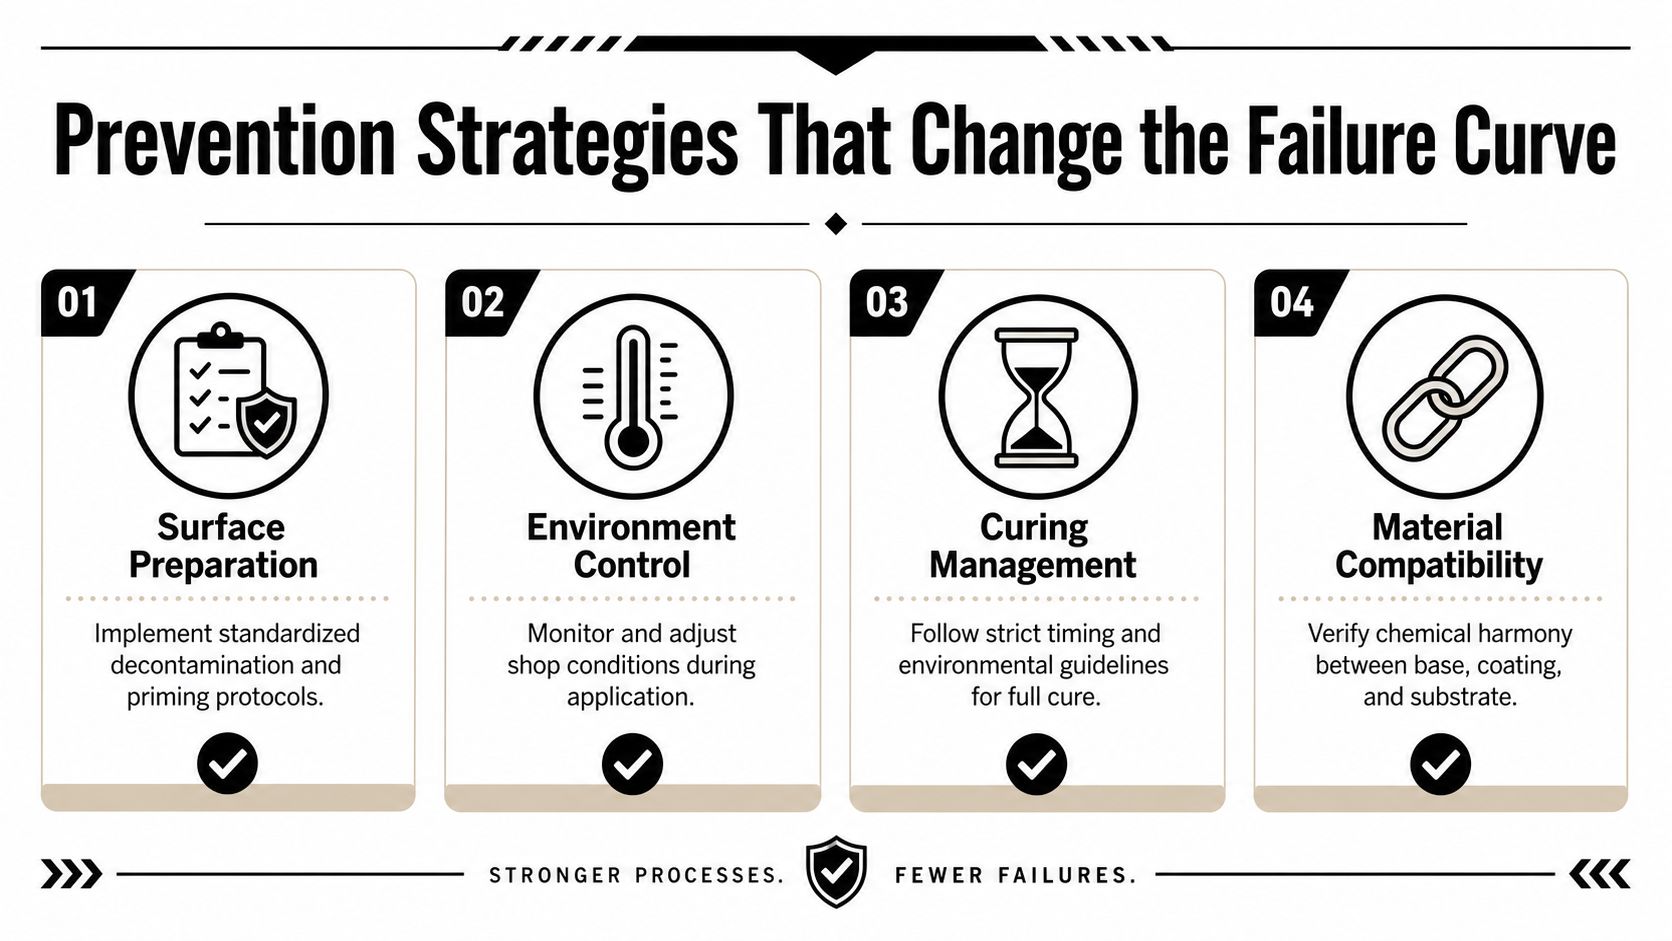
Prevention starts with process, not luck. A detailer who controls prep, environment, cure, and chemistry has far fewer surprises than one who leans on appearance at delivery and hopes the coating behaves later.
Match the preventive step to the failure family
Surface-preparation failures are the easiest to reduce. Standardized decontamination, verified profile, and documented cleanliness checks remove most of the avoidable risk before a bottle ever opens. Titan’s surface preparation guidance belongs in that checklist because prep is where the bond is won or lost.
Process deviations need timing and conditions logged in real time. Humidity, temperature, flash windows, and cure discipline matter more than a glossy look at the end of the bay.
Formulation mismatch is a selection problem. The chemistry has to fit the substrate and the climate, or the finish will fight the environment instead of surviving it.
Service-environment stress is where flexible systems help. Titan’s elastomer coatings are relevant here because the practical benefit of an elastic film is simple, it can take movement, thermal swing, and impacts better than a brittle layer when the job calls for that kind of forgiveness.
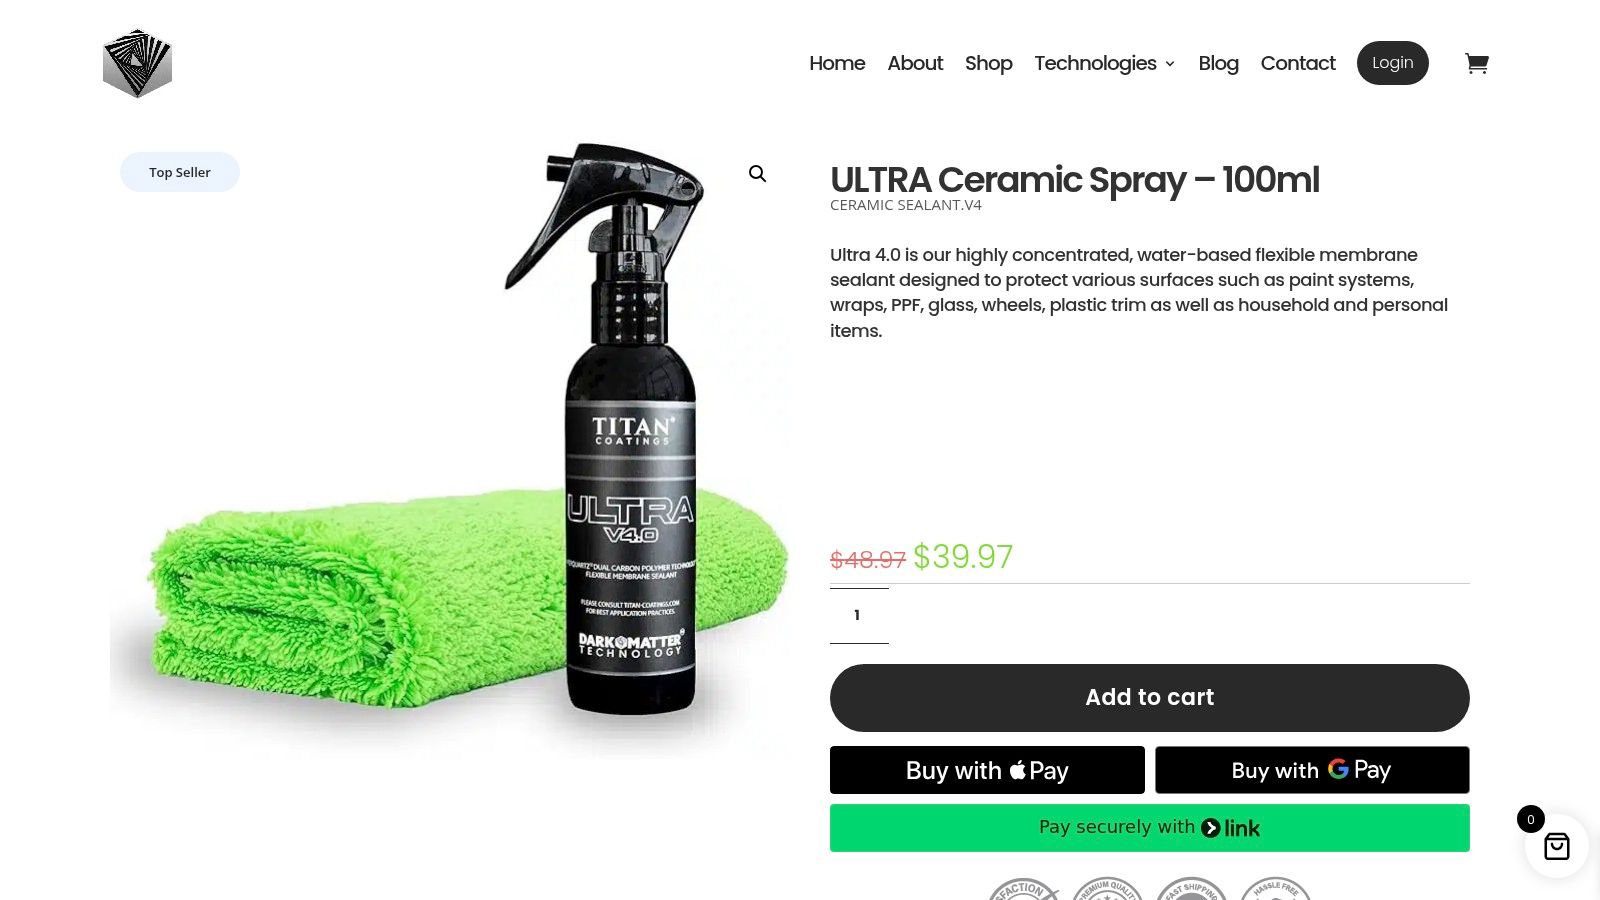
For windshield work, Apex Glass makes sense when the issue is bonded glass protection and weather behavior. For maintenance layers, Ultra Ceramic Spray is the kind of sacrificial top layer that helps absorb the abuse before the main system takes the hit. For high-stress paint protection, Alpha Quartz fits the conversation when you want an elastomer base that supports the whole stack instead of fighting every movement in the panel.
Choosing the Right Titan Product for the Job at Hand
The best product choice follows the failure, not the hype. If the substrate is stable but the surface keeps seeing movement, heat, or abuse, the job needs a system that can flex and shed stress instead of becoming brittle on contact.
A simple decision path
If the work is on glass, especially a windshield that keeps getting hammered by rain and wiper use, Apex Glass is the product that belongs in the conversation. Its purpose is glass-specific bonding and water behavior, not paint-style protection.
If the goal is a base layer that needs to tolerate real-world movement, Alpha Quartz is the stronger fit. Titan positions it as a high-solids elastomer system, and that kind of chemistry matters when temperature swings and road impacts are part of the job.
If you want a maintenance layer that can be reapplied as a sacrificial top film, Ultra Ceramic Spray is the practical choice. It’s the sort of product that makes sense over an existing system when the goal is easier upkeep and a flexible top barrier.
That decision tree is simple on purpose. Match the substrate, match the stress, and pick the chemistry that gives you the most forgiveness for the way the vehicle lives.
Turning Failure Analysis Into a Repeatable Shop Process
The shops that avoid repeat comebacks don’t just coat better, they document better. Photos, environmental readings, prep notes, and batch records turn a bad outcome into something you can learn from instead of just arguing about.
Training is still the biggest lever. The old review on coating failures was right to point out that a lot of the damage happens before application, and a technician who knows how to read a failure can spot the weak link sooner than the one who only knows how to lay down a finish.
A failed coating is rarely a single-cause problem. The detailer who follows the chain of custody, checks the substrate, respects the environment, and chooses chemistry that forgives real shop conditions will build a reputation for work that lasts.
If you want a coating system built for the kinds of failures detailers fight, visit APEX NANO – Titan Coatings and look at the finishes designed for glass, maintenance layers, and elastomer-based protection. If you’re trying to cut comebacks and choose a system that handles real-world stress better, that’s the right place to start.
0 Comments