
You've got a repair that looks right in the booth, but the owner sees a shade shift outside, a rough edge near the blend, or clearcoat that starts lifting. It's tempting to blame the color or the product. In practice, the finish reflects the whole job: the surface you prepared, the material you mixed, the way you sprayed it, and how you let it dry and cure.
A reliable color coating process isn't a magic formula or a single perfect pass. It's a connected workflow, and the durable result comes from getting each stage to support the next.
Why Your Color Coating Process Is a Chain, Not a Checklist
The panel is under bright bay lights. The color seems close, the clear looks even, and the repair is ready to leave. Then daylight reveals a mismatch, the edge begins to peel, or the surface shows defects that weren't obvious during application. The owner points to the coating. Before replacing a product, walk back through the process.
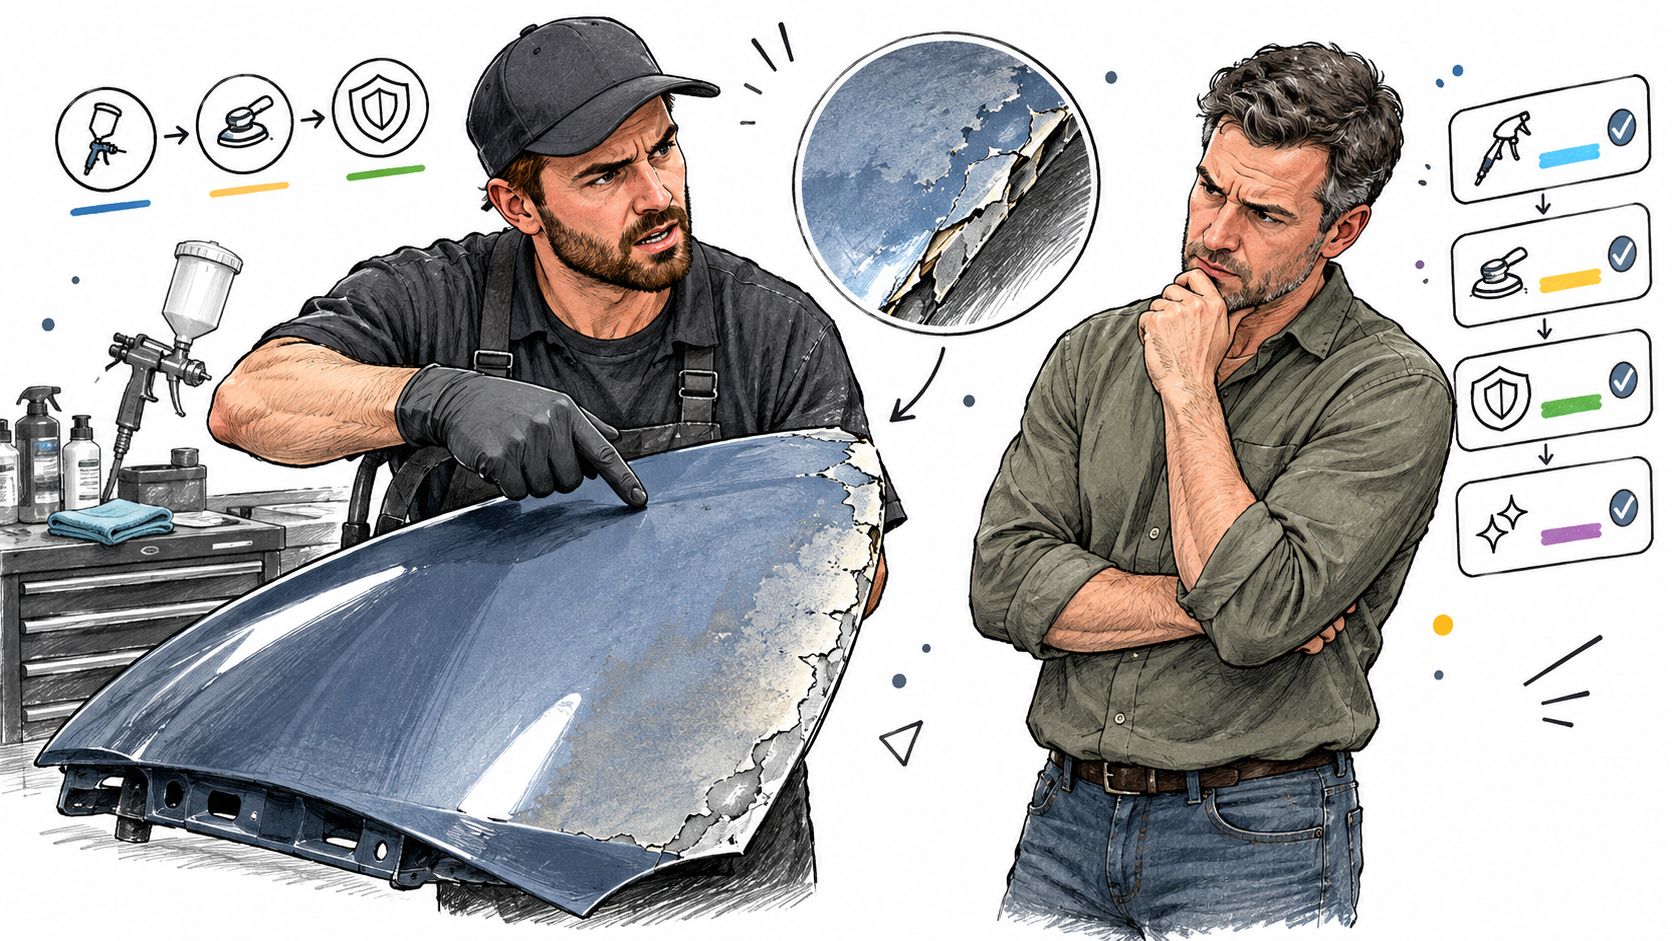
A color match can fail even when the pigment choice is sound. A panel that wasn't fully cleaned can repel the coating; poor abrasion can leave weak adhesion; rushed flash-off can trap solvent; and an incomplete cure can leave a soft film. Those problems don't stay isolated. Each one changes the conditions the next layer has to work with.
That's why I treat refinishing as a chain of decisions, not a checklist of unrelated tasks. Color is only one part of the result. Preparation establishes whether the coating can grip. Mixing and gun setup affect film build and appearance. Drying and curing determine whether the applied layers settle into a stable finish.
Shop-floor rule: When a repair fails, inspect the process before blaming the product.
The same principle applies to larger vehicle work, where panel size, access, and repair scope make preparation and application discipline even more important. A body shop for motorhomes can be a useful reference when evaluating repair capabilities for larger vehicles and their distinct body panels.
A repeatable result starts with a repeatable method. Record what you did, inspect the surface before coating, and test the complete system on a spray-out panel rather than making a last-minute adjustment on the vehicle. That's how you learn whether the problem is color, application, or a weak link earlier in the chain.
Preparing the Surface So Color Actually Sticks
The cleanest-looking panel isn't necessarily ready for coating. Silicone, polishing oils, road film, dust, and moisture can remain even when the surface appears spotless. If they're still there when you spray, the finish may show fisheyes, craters, pinholes, or poor adhesion.
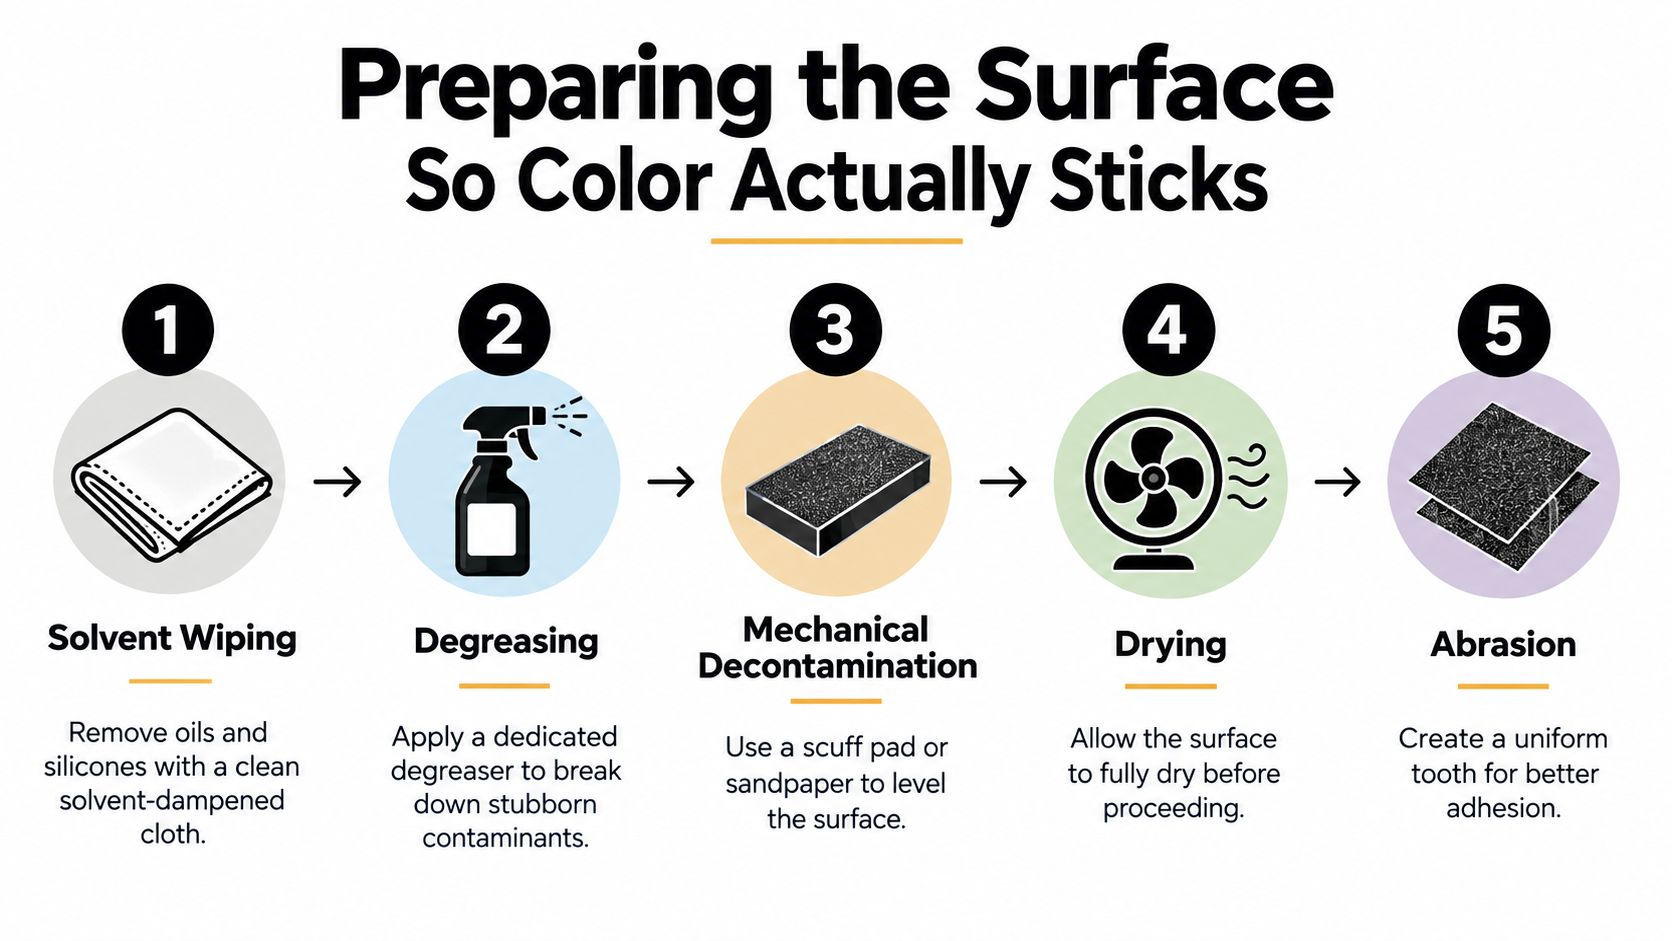
Factory pretreatment offers a useful model. Bare metal is cleaned and rinsed, often through a multistage process that includes zinc-phosphate treatment, before the coating layers go on. That sequence creates a receptive surface, helps primer adhere, and delays corrosion. A repair job doesn't always reproduce a factory line, but it should respect the same logic: remove contamination, establish a suitable surface, and keep it clean until coating begins. Titan's surface preparation guidance is a relevant reference for planning that work.
A practical pre-coat routine
Start by solvent-wiping the panel with a clean cloth and the appropriate product for the coating system. Follow with degreasing when needed, then mechanically decontaminate and abrade only as the product instructions allow. Remove sanding residue, let the panel dry fully, and avoid touching the prepared area with bare hands.
Mobile detailers and DIYers often rush the drying and inspection steps. Moisture can interfere with adhesion, while leftover polishing oil can create a crater that appears only after the coating is laid down. A clean panel also needs a uniform surface profile. Uneven sanding marks can telegraph through the finish or affect how metallic color reads.
Before you pick up the gun, inspect the entire panel under high-intensity angled lighting. Look for dust, fisheyes, damp areas, silicone contamination, and uneven abrasion. If you find any, stop and correct it. Spraying over a known defect doesn't save time; it makes the defect harder to remove later.
The preparation sequence should suit the substrate and coating system, not a generic recipe. Don't use an incompatible primer or improvise abrasion on a surface where the manufacturer specifies another method. Clean, dry, uniformly prepared panels give the next stages a fair chance to succeed.
Mixing Pigments, Reducer, and Hardener the Right Way
Mixing is where a good formula can become a poor application. Pigment determines the color, but the ground-coat shade, metallic particle orientation, viscosity, and film build influence how that color looks on the vehicle. A formula that seems right in the cup still needs a spray-out panel to confirm its appearance under the intended conditions.
A controlled study reported its best tested balance at a 100:130 paint-to-thinner ratio, with cross-cut adhesion rated 5B and hardness of 88.77 HD. At 100:140, adhesion fell to 3B and hardness to 83.3 HD. A thicker 100:110 mixture produced 4B adhesion with approximately 3–5% minor defects, attributed to restricted penetration. These results describe that study's test conditions, not a universal shop setting; the coating maker's specifications and the actual gun, substrate, and environment still govern the mix. The study and its testing context are useful reminders that changing reducer can change more than flow.
Make the mix repeatable
Measure rather than estimate. Stir or shake according to the product directions, track pot life, and record the mix ratio so you can reproduce a successful batch. Don't adjust reducer just because the paint “feels thick” without checking the specified range and how the material atomizes on a test card.
A small spray-out panel lets you evaluate coverage and color without gambling on the vehicle. Match the intended substrate and ground coat as closely as practical, then let the test dry and clear it if the repair will receive clearcoat. For product-system selection, Titan's automotive refinishing products provide a starting point.
| Symptom | Likely Cause | Fix |
|---|---|---|
| Weak hiding or thin-looking film | Excessive reducer or insufficient film build | Check the specified mix, apply controlled coats, and verify coverage on a test panel |
| Orange peel or dry spray | Mix too thick, poor atomization, or unsuitable gun setup | Confirm viscosity guidance and adjust setup within the product specifications |
| Sagging or soft finish | Excessive reducer or excessive wet film | Recheck the ratio and apply a more controlled coat |
| Inconsistent color | Uneven mixing, ground-coat variation, or metallic orientation | Remix thoroughly and reproduce the intended spray technique on a test panel |
The right ratio is the one validated for the material and job, not the one remembered from a different product. Treat the mix as a documented process variable, not a matter of habit.
Spray Techniques That Produce a Consistent Film
A spray gun lays down material; the operator determines whether that material becomes an even film. Keep the gun perpendicular to the panel, move at a steady pace, and trigger while moving so the pass doesn't leave a heavy deposit at the start or end. Rehearse the stroke before spraying the vehicle, especially around curves, edges, and repair boundaries.
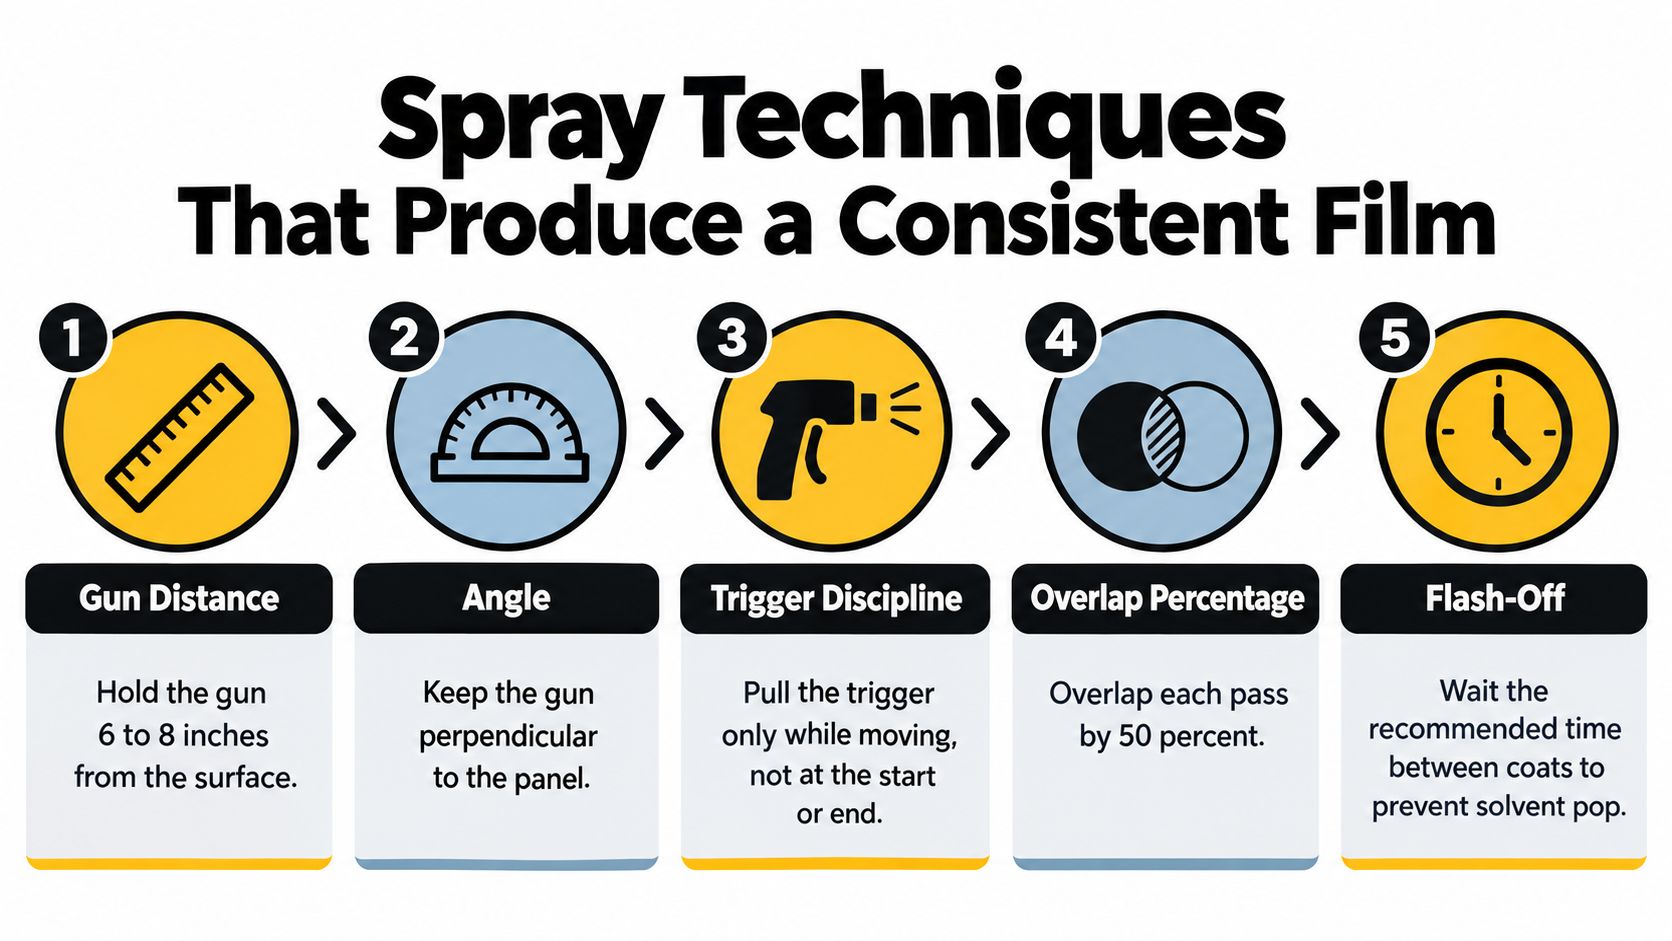
Gun distance, angle, overlap, and pace work together. Follow the coating maker's setup guidance for distance and pressure rather than forcing one setting onto every material. Maintain consistent overlap so one pass blends into the next without stripes or thin gaps, and use a test card to check the fan pattern before approaching the panel. Titan's coating application methods can help you compare application approaches for the task at hand.
Read the pattern before the panel
A clean, even pattern gives you a baseline. Spits or drops point toward contamination or a problem in the fluid path; dry spray can indicate poor atomization or an unsuitable gun path; orange peel can stem from multiple interacting factors, including viscosity, setup, and application conditions. Don't assume the pigment is at fault when a defect follows the direction of a pass.
HVLP, RP, and compliant guns can suit different equipment and shop conditions, but transfer efficiency depends on correct setup and operator control. Overspray wastes material and creates more cleanup. The practical goal isn't to chase a named gun type; it's to achieve the required atomization and film build with the equipment and coating system you're using.
Respect flash-off between coats. A wet layer needs the specified time to release solvent before the next coat goes down. Rushing it can contribute to solvent pop and other finish defects, while waiting too long can also affect intercoat performance if the system specifies a window.
Practical rule: Set up the gun on a test card, then repeat the same distance, angle, pace, and overlap on the panel.
A steady pass is easier to repeat than a last-second correction. If the first coat looks uneven, stop and diagnose the cause before piling on another layer.
When the Color Formula Is Right but the Repair Still Looks Wrong
A correct color code doesn't guarantee a visual match. The ground coat can shift the final appearance, film build changes how light moves through the finish, and metallic flakes can lie differently depending on the spray technique. A panel can also look close while wet, then read differently after drying and clearcoating.
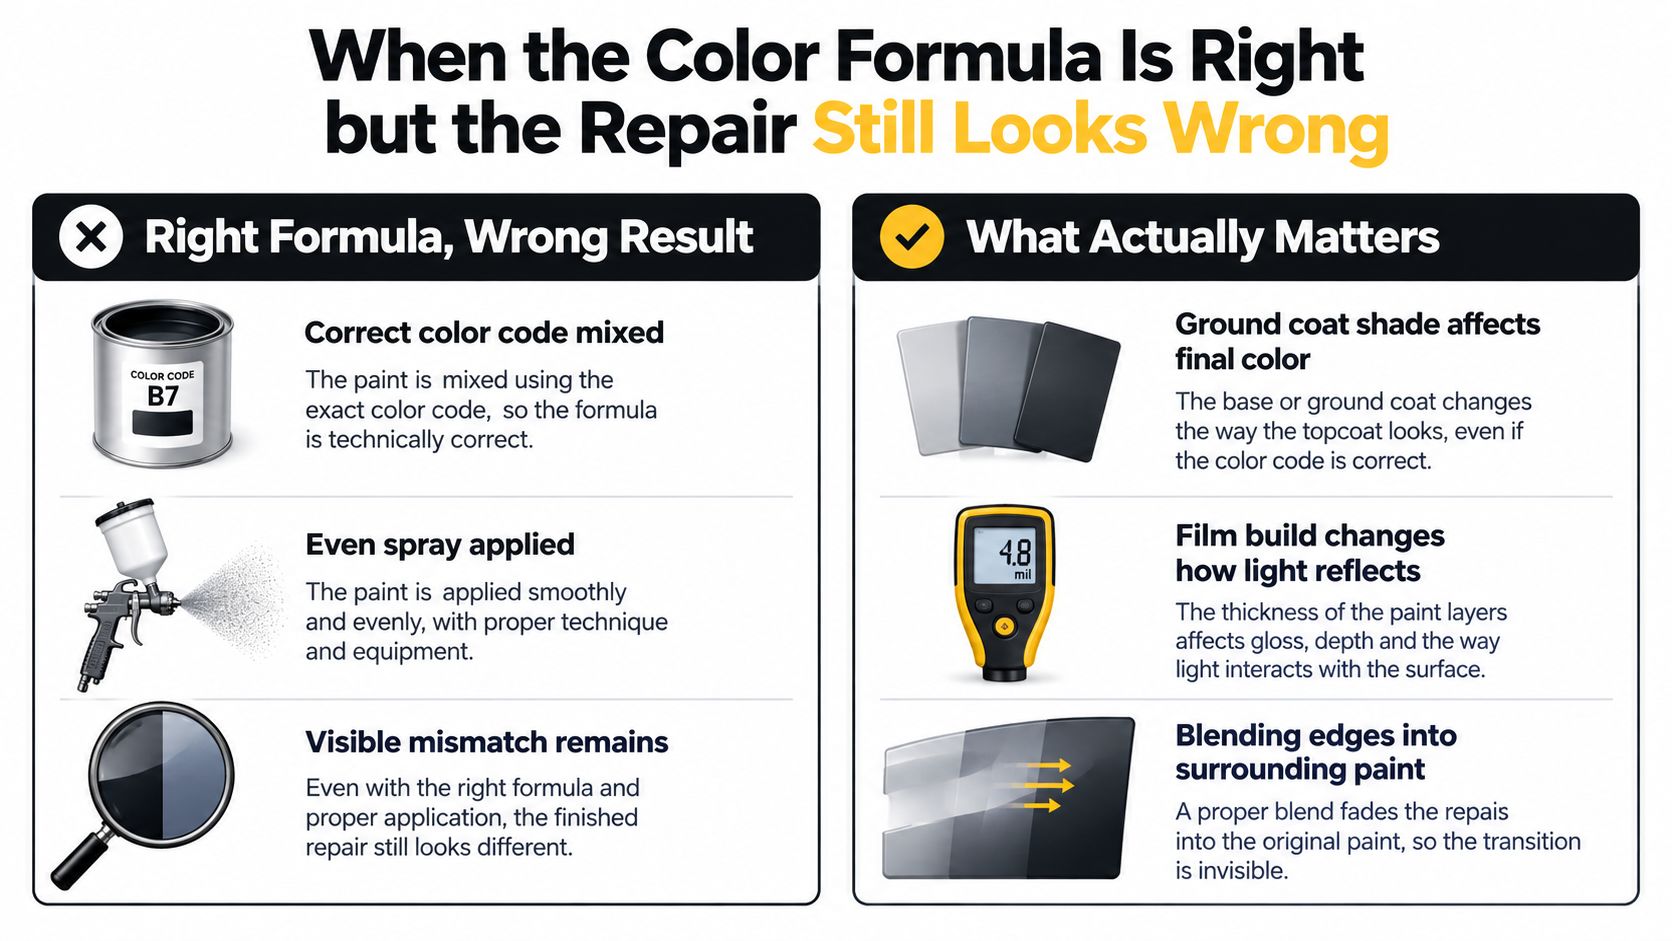
BASF's refinishing guidance emphasizes that the ground coat should simulate the production primer for a proper match. Repair guidance also stresses reproducing the coat count and spray technique, then checking a dried and clear-coated test panel in daylight. PPG notes that some finishes may call for a different aftermarket layer sequence or ground coat, and that metallic appearance can be affected when the surface isn't prepared finely enough. BASF's refinish concepts provide useful background on why the substrate and layer sequence matter alongside pigment choice.
Diagnose the symptom, not the color code
| What you see | Check first | What to compare |
|---|---|---|
| Overall hue looks wrong | Ground-coat shade and coat sequence | Spray-out against the intended substrate |
| Color changes sharply with viewing angle | Metallic orientation and spray technique | Test panel at different angles |
| Original color shows through | Hiding and film build | Coverage across the repaired area |
| Spots or craters appear | Contamination and air or material path | Panel cleanliness and gun condition |
| Color seems right but finish looks uneven | Clearcoat texture and surface profile | Reflection under diffused light |
One light source can mislead you. Check the spray-out in daylight and under diffused inspection lighting, and look from more than one angle. If a blend is required, evaluate the transition into adjacent paint rather than judging only the center of the repaired area.
For complex repairs, it helps to consult a specialist who handles collision work across different vehicle types. Motor Sportsland collision repair is a relevant resource when the repair involves larger panels or collision-related refinishing. If the result still looks wrong, Titan's coating failure analysis can support a systematic review of possible process causes.
Drying, Curing, and Why Elasticity Changes the Math
Drying, flash-off, and curing aren't interchangeable. Flash-off gives volatile components time to leave between coats; drying describes the film becoming touch-ready or ready for the next operation; curing develops the coating's final properties according to its chemistry and specified conditions. Treating one as a substitute for another is a common path to solvent entrapment, dieback, or a film that stays soft.
Temperature changes create another stress for a coating. When a film and its substrate expand or contract at different rates, the substrate restrains the coating and stress develops at the interface. Research on high-build epoxy coatings found that thicker films developed substantially higher stress during thermal cycling and were more often associated with cracking or delamination. A Purdue dissertation on ceramic coatings likewise found that increasing elastic modulus and thermal-expansion coefficient increased the probability of crack initiation under high heat flux. The thermal-cycling research helps explain why a rigid finish can struggle when conditions shift from cold to hot.
Hardness without treating flexibility as a flaw
Titan describes ElastoTek® as a membrane-forming approach based on polymers known for elasticity and flexibility. Its design premise is to combine a hard, glass-like surface with flexibility that can accommodate movement. Titan also describes Dark Matter Technology® as incorporating carbon nanotubes into its elastomer coating platform. The material principle is credible, but no coating should be treated as immune to cracking: preparation, film thickness, substrate, cure, and service conditions still matter.
For a mobile detailer or DIYer choosing an elastomeric product, Alpha Quartz 50ml Ceramic coatig is described as an elastomer ceramic coating for all surfaces, with 92% high solids, zero VOCs, a solvent-free formulation, and advanced adhesion technology. Its product information says it cures in 4 hours and is designed for application indoors or outdoors. Those are product claims, not a replacement for following the application directions or validating the substrate and conditions.
Flexibility isn't a shortcut around good process. It's a material property that may help a coating accommodate movement, while careful preparation and correct curing remain essential to the result.
The Hidden Environmental Trade-Off in Process Choices
Lower curing temperatures can reduce energy demand, but that alone doesn't establish the lowest overall environmental impact. The full process includes coating materials, cleaning chemistry, overspray, waste, rework, rejected parts, and how long the finish performs in service. A change that saves oven energy but increases defects or discarded components may trade one burden for another.
Magna reported in February 2025 that lowering process temperatures reduces overall energy demand and supports decarbonization. It also noted that plastic components can rarely be repaired when a defect becomes visible during coating, which makes defect prevention and process control especially important. Magna's discussion of low-temperature automotive painting illustrates why cure temperature is only one part of the decision. A 2025 life-cycle assessment also identifies paint, sealants, pretreatment agents, and cleaning agents as materials needing tighter control or greener alternatives because of ecotoxicity impacts.
A better shop-floor question
Does a lower-temperature or lower-VOC process automatically have the lowest total environmental impact? No. Compare the whole workflow before making that claim. Titan's overview of low-VOC coating considerations can sit alongside practical tracking, but the shop still needs to evaluate its own materials, waste, and outcomes.
Track material use per vehicle, defect and rework rates, cure energy, cleaning waste, and coating longevity. A disciplined process can prevent avoidable waste: contamination caught before spraying is easier to address than a defect discovered after coating, and a repeatable application reduces the chance of rejected work.
For glass, Apex Glass Coating- 50ml is described as a hydrophobic glass and windshield coating with deep pore bonding and water-repellent performance. Its product information says it enhances visibility, reduces wiper use, and lasts up to 2 years. For maintenance work, Ultra Ceramic Spray is described as a concentrated, water-based flexible membrane sealant for paint systems, wraps, PPF, glass, wheels, plastic trim, and household or personal items.
Before the next job, use this quality-control sequence:
- Inspect: Confirm the panel is clean, dry, and uniformly prepared.
- Document: Record the mix, pot life, and relevant application conditions.
- Test: Validate the color and film on a spray-out panel.
- Set up: Check the gun pattern and repeat a controlled pass.
- Respect the stages: Allow flash-off, drying, and curing as specified.
- Review: Inspect the finished panel under daylight and diffused lighting.
The color coating process stops being guesswork when each stage has a clear purpose, from surface preparation to final inspection. For a practical next step, compare coatings by the job they're meant to do and review the application guidance before you start; the Titan Coatings shop is one place to explore the available options.
APEX NANO – Titan Coatings develops coating products for automotive and other applications, including elastomeric options designed to pair surface hardness with flexibility. If you're refining your color coating workflow or choosing protection for glass and paint, visit APEX NANO – Titan Coatings to review the product and application information before your next job.
0 Comments